It is difficult to do without updating the ceiling surface when it comes to a complete renovation. And although worthy alternatives are a dime a dozen in the niche market, installing PVC panels on the ceiling is still one of the most popular options. Largely due to the ease and accessibility of the work itself, as well as the absence of serious requirements for the selection of available tools. How to install PVC panels on the ceiling with your own hands will be discussed in our detailed instruction article. All the necessary photo and video materials will help you.
- Selection of material
- What you will need for installation
- Tool preparation
- Preparing the base
- Marking
- Frame preparation
- Installation of plastic panels
- Conclusion
Selection of material
Direct installation of PVC panels on the ceiling surface is still like the moon, until you have decided on the color, texture and size of the material. Every hardware store will immediately offer you a wide range of plastic panels, so finding the right option for you requires effort. Nevertheless, here are some tips to help you avoid making mistakes with your purchase:
- for small rooms, select panels with a width of no more than 25 centimeters, for large ones - respectively, more than 25 centimeters;
- pay attention to the product specification: ceiling panels, despite their visual similarity, differ from wall panels in their lighter weight;
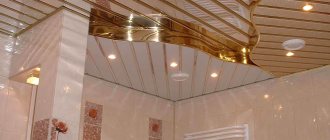
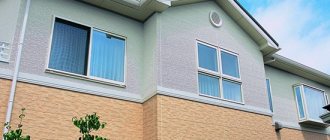
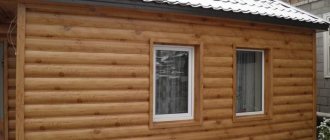
- ordinary white panels are most often used to decorate public and home bathrooms; for other options, it is best to choose colored or textured options - visually they can support even the most interesting and non-trivial interior;
- if the task is to visually enlarge a room that cannot boast of a decent area, the ideal choice would be panels with a glossy surface, which significantly work to create volume and depth;
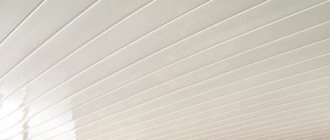
- choose panels with a hidden seam - this way your ceiling will look more monolithic, but if you are going to use a whole cascade of built-in lamps, then it is quite possible to buy material with a visible seam, the main thing is to fit it correctly into the interior composition.
Calculation
In order for wall surfaces to be finished properly, you need to carefully and scrupulously calculate the need for the blocks used and the components for them.
Standard dimensions of wall panels are:
- thickness 0.6-1 cm;
- width 25-30 cm;
- length 250-600 cm.
The key importance, according to professionals, is the width. If you choose the largest possible products, you can reduce the number of seams, and the appearance of the installation will be closer to a continuous surface. But during the work itself, narrow structures are more practical because they are easier to bend. And the relative lightness of each block makes itself felt.
The calculation itself begins with determining the perimeter of the sheathed base. From this figure the perimeter of each door, each window or other part that for some reason cannot be sheathed is subtracted. The result obtained is divided by the perimeter of a single block (only remembering that part of the block material will go into segments). Rounding in calculations is always carried out upward, and a margin for cuts is provided in the amount of 10%. If you have no experience, you can even leave 12-14%.
You can calculate the need for plastic sheathing if you take into account the following points:
- slats will have to be placed not only on the edges of the walls, they need to surround the openings of doors and windows;
- the standard profile gap is 0.3 m;
- the very first profile is always turned at right angles to the future installation plane;
- the slats themselves are fastened to the walls using self-tapping screws or dowels with a gap of 400 mm;
- The guides are attached to the slats at a distance of 500 mm.
What will be needed for installation?
Everything you need for installation is listed below in an easy-to-view list:
- self-tapping screws;
- anchor bolts;
- dowels;
- bars (for wooden frame);
- ceiling plinth;
- CD and UD profiles;
- "crab" type pendants.
Expert advice
To make the ceiling made of PVC panels smooth and neat, you should take note of the recommendations of the masters:
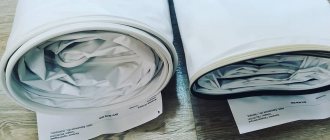
- The slabs must be left in a warm room without a load for at least 1 day. The material acquires evenness and the desired temperature.
- When laying out the last elements, it becomes necessary to trim the dies. This must be done in such a way as not to spoil the pattern, if there is one. The cut side always lies at the junction with the wall, then is covered with a plinth.
- The compensation gap at the wall can be minimal, up to 2-3 mm. Such a small width is explained by the small expansion of the material during climate changes.
- When laying out dimensional strips, installation starts from the wall. The installation is parallel to the long walls, with trimming only being done at the opposite wall panel. Here it is important to calculate the dimensions of the width of the decor so that the last lamellas do not turn out to be too narrow. Preliminary marking of the diagram on the ceiling will help - mark with a marker the initial distance from the wall (the gap will be closed with a plinth).
When laying out decor on the ceiling, you should not forget about the wires for lighting fixtures and air conditioners. It is better to pass communications through the ceiling plinths - this way all the wires will be hidden.
Tool preparation
Check if you have all the necessary tools at hand. So, you will need:
- roulette;
- pencil, marker;
- level;
- painting cord;
- corner;
- metal scissors;
- jigsaw;
- hammer drill (drill);
- screwdriver
Marking
- use a level to determine the lowest point of the ceiling base;
- step back 5 cm and mark a point that will serve as the level of your future ceiling;
- use a paint cord or hydraulic level to draw a line along the entire perimeter of the premises;
- Your markings for making a frame for PVC panels are ready.
Frame preparation
The frame for subsequent installation of PVC panels can be made of wooden blocks, plastic or metal profiles. The decision on this issue is made only by you, but one cannot help but cancel the generally accepted fact: in rooms with high humidity it is best to use metal profiles (read more about the technology for installing ceilings from PVC panels in the bathroom), which are not as afraid of the influence of moisture as ordinary bars .
Frame made of wooden blocks
It will cost you about half the price of a metal one, and it will be assembled a little faster. True, you need to select beams with a cross-section of at least 3 by 3 cm.
A nuance that you need to pay attention to: the price of perfectly smooth bars is equal to the price of finished metal profiles.
How much do you estimate your time spent perfecting crooked beams?
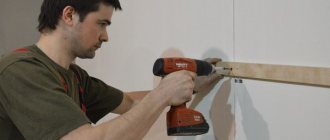
However, if you have successfully dealt with the uneven bars, then your next step is to fix them on the ceiling using self-tapping screws. Maintain a step of 60 cm
, and if you want to bring the plane perfectly level, then prudently drive in the outer planks and pull nylon cords from them to the center and along the edges.
Already in accordance with the stretched cords, drive in the remaining beams in a similar way, observing the minimum required step of 50 cm
.
Lathing made of plastic U-shaped profiles
will cost you about the same amount as a metal one, but it is far from universal: if later you want to change the PVC panels to some other material, you will have to prepare the frame again.
This is what it looks like in the picture.
But this is how it is in reality.
The principle of fastening to the base is the same as that of a frame on wooden beams, with the only difference being that the fixation should be done using fastening screws through pre-mounted wedges. The advantage of this option is the amazing convenience of direct installation of PVC panels, which are easily driven into the groove. Well, we have already mentioned the disadvantages above.
The most common option for making a frame is from metal profiles
.
We won't reveal anything new to you here:
- the longitudinal CD profile is inserted into opposite grooves of the UD guide profile;
- using crab-type hangers, the longitudinal CD profile is additionally secured to the ceiling with anchor bolts;
- step for installing hangers - from 60 to 80 centimeters;
- the step for fixing the profiles is 50-60 centimeters.
Let's sum it up
The peculiarity of a PVC ceiling is that it is simple, but at the same time very practical, beautiful, cheap and functional. If you make your ceiling exactly like this, you won’t regret it. If installed correctly, the ceiling will last more than 10 years. And thanks to the instructions for creating it, you can further save money. These jobs are not difficult, so even a beginner can cope with this task. Therefore, you can move from theory to practice.
Recommended Posts
Plasterboard ceiling in the kitchen
How to properly glue ceiling tiles
Brown stretch ceiling
Frame for plasterboard on the ceiling
Ceiling tile Lily (Rockfon)
Tiled ceiling Copy
Installation of plastic panels
- We attach the ceiling plinth with a mounting groove to the frame around the entire perimeter using self-tapping screws;
- we insert the first panel with a tenon inside the starting profile and fix it on the guide bar with a self-tapping screw, bracket or clamp - depending on what type of structure you have chosen;
- the installation of the next panel does not bring anything new: it is inserted with a tenon into the groove of the previous one, pressed against the guides and fixed at the back;
- the last panel is the most difficult, and in order to install it accurately, you need to cut it to length and then cut it to width in accordance with your measurements, and then carry out direct installation;
- in the case when the last panel is not included, it is always easy to get rid of excess material using a stationery knife.
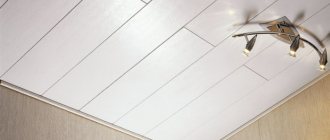
If you follow all the steps scrupulously, the installation of PVC panels on the ceiling surface will be easy and flawless. Here's what it all looks like in the video:
But this is what may well happen to you during installation.
Useful tips
If you follow the advice of professionals when performing installation work, then there will be no problems with decorating the ceiling surface using plastic boards:
- You need to cut the panels and drill them with the front side up, for which you use a hacksaw, a handsaw or a construction knife.
- It is advisable to immediately apply the glue to the wall, for which liquid nails are ideal.
- When working with a hammer, driving nails, you should avoid hitting the plastic, as the panel will immediately become unusable.
If you follow the installation technology, you will get a beautiful and even ceiling that will delight property owners with its appearance for a long time.