Volumetric wall panels have come into use since the beginning of 2000 and are actively used in interior decoration. This finishing method allows you to install gypsum 3D panels as a finishing coating in a short period of time without much hassle. With the help of volumetric slabs, it becomes possible not only to create a cozy atmosphere, but also to convey the whole range of emotions and mood. In addition to properly selected furniture, lighting and 3D panel decor for walls, the interior decoration of the room will be perceived differently.
Panel installation
What are 3D panels?
Three-dimensional gypsum panels are square or rectangular slabs on which a certain pattern is repeated. The front side of the panel can repeat absolutely any pattern or imitate various materials. The back side of the slab is usually flat. But some manufacturers produce 3D panels in which the front and back sides follow each other’s contours. This significantly reduces the weight of the slab and subsequently facilitates independent installation. On average, a slab with a flat back measuring 50x50 cm weighs about 4.5 kg.
The first 3D panels were created and developed in the USA in 2008. Very quickly, Europe became interested in this innovation, and then Russia picked it up, and already in 2011, the first own production appeared in the country. Environmentally friendly , non-flammable gypsum 3D panels of factory quality, on average, cost about 4,000 rubles per square meter. 3D panels are perfect for those people who not only want to quickly change the internal appearance of their apartment, but also give it more depth and originality.
Types of gypsum panels
You can find round and oval gypsum panels on sale. But more often rectangular and square products are produced. Their dimensions can be different: length with width - from 0.2 to 0.6 - 0.9 m, thickness - 18-36 mm.
The panels are divided by type of pattern and texture. They can:
Imitate natural materials: wood, stone;
Create three-dimensional artistic paintings;
Be a mosaic, bas-relief or a combination;
Consist of large modules that have a geometric shape with a repeating pattern.
Production technology
The process is actually nothing supernatural . The gypsum solution is mixed using special equipment. It is recommended to use G-16 gypsum , which is very plastic and non-flammable. To give the finished product strength and resistance to impact, some manufacturers add special plasticizers or fiber fibers to the gypsum mixture, thereby worsening the environmental friendliness of this type of decor. The finished mixture is poured into special plastic molds that repeat the required pattern.
The molds for the panels are made very carefully, first creating a 3D model using a special computer program. Artists and designers with extensive experience work on creating forms. Then the computer model of the form is cut out on a special machine and modified until it fully matches the artist’s idea. Only after this the finished matrix can be used in mass production.
While pouring the mixture the matrix vibrates a little ; this is used to ensure that the material is evenly distributed throughout the mold and does not form internal voids. Next comes the drying process. The forms are allowed to sit for 20-30 minutes, after which the panels are removed and sent for further drying in rooms with controlled temperature and humidity. After complete drying, the product is considered ready. Naturally, the entire process is fully automated, all proportions are strictly observed, and the quality of the surface and edges of factory panels is always at the highest level.
Of course, the use of modern equipment and labor costs slightly increase the cost of the finished product. If you are not limited in funds and can afford to spend a decent amount of money on this type of finishing material, then, of course, it is better to buy 3D panels from trusted manufacturers. But if you are used to doing everything with your own hands and want to make sure that this is a truly environmentally friendly product without unnecessary impurities, we suggest trying to make the panels yourself .
Installation video
If you have come to the conclusion of making an original, stylish design in your own home, then you need to pay attention to today’s decorative materials, for example 3D wall panels.
Installation diagram of panels for walls.
Thanks to the abundance of structures and textures, different optical effects and a variety of colors, these decorative components are gaining more and more space in modern design style. In the end, your living space will become more voluminous and stylish, it will seem that a group of highly experienced builders and decorators worked on its decoration. At the same time, you can install the 3D panels yourself.
DIY decorative 3D panels
Everything is much simpler than you might imagine. Moreover, by making 3D panels yourself, you don’t have to spend money on delivery and worry about the integrity of the product, and things made by yourself are always more valuable than purchased ones. The only thing you should be prepared for is a more painstaking and time-consuming process of installing panels made by yourself.
From the previous paragraph it is clear that 3D panels are made by casting into a mold . You can purchase a form with the required design over the counter or order it online. Molds are not only plastic, but also silicone. It is more convenient to extract finished slabs from them, but they are more expensive , so for one-time production, a plastic one will be enough for you. Next you will need materials for the potting mix . They are inexpensive and are sold in every hardware store. You will need plaster, fiberglass, lime and a drill attachment to mix the mixture. Fiber fiber is a reinforcing material, the use of which is not necessary, but preferable.
Let's move on to making the panel. Prepare a flat surface on which to place your mold and a container with clean water for mixing the mixture. You won’t be able to mix a homogeneous mixture without lumps by hand, and besides, everything needs to be done quickly, so use a drill with a mixer attachment. To prepare the solution , mix 300 grams of lime and 2.7 kg of gypsum and add fiberglass, the weight of which should be no more than 1% of the weight of the gypsum. Pour the mixture into clean cold water (2 liters) and mix thoroughly. Make sure there are no lumps or air bubbles, otherwise they will certainly ruin the appearance of your panel. When the finished mixture begins to resemble thick sour cream and becomes homogeneous, you can begin pouring it into the mold.
In production, molds are placed on special vibrating tables, which prevents the formation of bubbles and provides the necessary shrinkage; you can also lightly tap the mold as it is filled. evenly throughout the pan and leave it to stand still for about 30 minutes. The gypsum mixture hardens very quickly, so you can easily make 6-8 m² in a day .
The main thing is to be very careful and consistent.
Once dry, carefully remove the panel from the mold, starting from the corners. Inspect the surface, if its appearance suits you, transfer the product to a flat wooden surface for further drying. It would be good if it was a wooden lattice . This will promote rapid evaporation of excess moisture and faster drying. Maintain normal temperature and humidity levels in the room.
It is impossible to make panels in a damp, unheated room. The subsequent fate of your panels depends only on your imagination. You can paint them or open them with clear varnish. This will not only give them a beautiful glossy shine, but will also make wet cleaning easier. 3D panels made at home, provided the technology is followed, are not much different from purchased ones, except for the straightness of the edges. This is exactly what we meant when we talked about more difficult installation. But since plaster is easy to work with, you can trim the edges using sandpaper or a utility knife. But how nice it will be to boast to your guests that it was your doing.
Advantages of 3D panels
Gypsum panels have gained mass popularity not only because of their unusual and attractive appearance, but also because of a number of other advantages :
- Versatility . All kinds of three-dimensional drawings that manufacturers offer will be appropriate in absolutely any room. They will perfectly complement the interior of the living room, bedroom or even kitchen. 3D panels are suitable for all interior styles, giving it unique features. You can paint the panels, varnish them, or cover them with wallpaper. You can perform either seamless installation or specifically highlight each slab. Whatever you choose, it will be unique in any case.
- Practicality. Properly installed high-quality 3D panels can serve you well more than 50 years and not lose your external attractiveness. Gypsum promotes normalization level humidity indoors, so practically no dust settles on it. He has a high warm- And soundproof properties, so using this method of decorating walls, you will not only decorate them, but also insulate them and get rid of extraneous noise from neighbors. Gypsum does not burn, does not conduct electric current, protects from radioactive radiation, does not emit harmful substances and is very simple V care.
- Environmental friendliness . Recently, it has become very fashionable to give preference to natural materials in interior design. It is not only beautiful, but will also have a positive effect on your health. Gypsum is an environmentally friendly, hypoallergenic material that is absolutely safe for health. Therefore, you can safely use the panels even when decorating a children's room . It is very easy to check the panel for compliance with the declared environmental friendliness, without even requiring special certificates. If the panel breaks when dropped, it means that it is indeed made of gypsum without unnecessary additives.
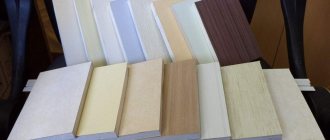
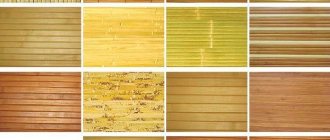
- Price . In addition to gypsum wall panels, there are also panels made from MDF, metal, bamboo, glass, plastic and other materials. Apart from plastic panels, which look quite cheap, gypsum panels are the most affordable. In addition, the pricing policy depends on the complexity of the design, so everyone can choose the option that suits them.
Scope of use
There are only three areas of use of finishing. The most common is the use of gypsum panels for finishing walls in rooms. Regardless of the purpose of the premises, you can select suitable 3D slabs or gypsum panels.
One of the newfangled options was the use of material for finishing the ceiling. The transition from one ornament to another looks unusual in the design. You can finish only the ceiling, making the walls neutral in color. So the ceiling becomes the main highlight of the space, increasing the room in size.
Some slabs are so massive that they can be used for zoning. It will not be possible to build a full-fledged partition in this way, but you can zone the room.
Any use of 3D gypsum boards adds a sense of depth to the interior space, visually expanding it.
5. Disadvantages
There is probably not a single type of finishing material that, despite all its undeniable advantages, does not have at least one drawback . The main disadvantage of gypsum 3D panels is their weight . One slab can weigh up to 5 kg, depending on its size. And if you decide to decorate the entire surface of a wall with panels, for example, 10 m², this will create an additional load on the floors, which is not always allowed by building codes. And a plasterboard partition may not withstand such a load at all. Therefore, it is recommended to fill not the entire space of the wall, but only a fragment of it . It is also worth mentioning that branded designer 3D panels with a unique pattern will cost you a lot , but they will truly be exclusive.
Apartment renovation
Recently, 3D panels made from various materials and representing elements of volumetric decoration of premises have become increasingly popular among consumers. This circumstance is due to the fact that for a relatively low cost you can get a surprisingly realistic texture, which will help in a short period of time to recreate an exquisite and unique style in the premises. However, given the novelty of this finishing material, many users would like to find out how to install 3D gypsum panels and what are the features of implementing this technology.
Variety of shapes
The most popular manufacturers offer 3D panels with truly unimaginable patterns . But they can be combined into several main groups .
- Lines and waves . This is the simplest and most common form of 3D panels. They have very soft smooth shapes , and the width and intensity of the lines are quite varied. They can have a horizontal, vertical or diagonal direction and imitate the slight bends that sea waves or large stripes of varying widths leave on the sand. They can also have different protrusion heights above the main surface of the panel and be barely noticeable or characteristically pronounced. This motif is very suitable for a recreation area . This calm, unobtrusive ornament sets the mood for relaxation and gives a feeling of comfort.
- Honeycombs . This version of the 3D panel looks very interesting in the hallway or hall . Honeycombs can have both large and small cells. The panels can be smooth and only follow the contours of a honeycomb, or they can be voluminous and protrude or sink in relation to each other to different depths. The latter option looks more impressive and realistic . The honeycombs can have either the usual hexagonal shape or be slightly elongated. This effect adds more volume to the surface on which it is used.
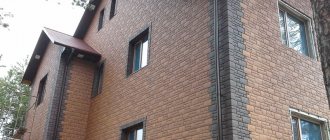
- Stone . the much-loved brickwork using 3D panels. Bricks can have a smooth or textured surface, which makes them even more similar to the real material. They can repeat the laying in a checkerboard pattern with the same seam, or they can be located on the panel perpendicular to each other with a large distance, or simply repeat horizontal lines. Also, 3D panels can imitate cracked plaster , rough surface of granite , spongy shell and other types of natural stone, both in shape and texture. Such panels look very discreet and natural . Suitable for decorating a fireplace area in the living room and for the hallway.
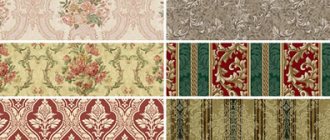
- Imitation of fabric and other materials. This is a very interesting type of panels that can very well imitate upholstery fabric, and even have buttons, like on leather sofas. They can imitate the structure of wood fiber , genuine leather or luxurious tapestries . This design looks very chic and expensive, especially in spacious offices or libraries, and a skillfully selected color will help achieve maximum naturalness.
- Abstraction . Abstract panels will fit well into an interior in a loft, hi-tech or minimalist style. used are very diverse . These are rhombuses, small labyrinths, and rectangles of different sizes, located at angles to each other and protruding above neighboring elements. These can be braids, the effect of crumpled paper, large or small circles, lines resembling a snake, all kinds of bends and fractures, triangles, puzzles and other geometric shapes. Such an ornament is not obligatory to anything, but at the same time, it is very original and “ alive ”. There is an immediate desire to touch such a surface. Such 3D panels will look great, perhaps, in any room .
- Bubbles and spheres . Imagine a soap bubble show! And on your wall? There are panels that really look like big bubbles of different sizes. It looks very unusual and immediately resembles a spaceship. There are panels that resemble raindrops on glass, or circles on water, or just small ovals, arranged in random order and intersecting with each other in different places. Such panels would be appropriate in the bathroom , especially since there are moisture-resistant 3D panels.
- Floral ornament. The variety of shapes of this type of panel is probably the richest. This all kinds flowers large and small sizes, trunks of plants intricately intertwined with each other, leaves of various plants, bamboo, huge asters, orchids, ivy, daisies and roses, or just individual petals. These panels look very rich, so we would recommend using this type for decorating a wall panel, otherwise it might be too messy. Although, this is also a matter of taste.
As you can see, choosing a 3D gypsum panel will be very difficult, so imagine in advance what this or that form of panel will look like in your interior. Focus on the furniture and decoration of adjacent walls. If your interior is dominated by calm, strict colors and shapes, then you should choose similar panels. This tandem will successfully emphasize the depth and elegance of your room and will look appropriate.
How to avoid counterfeiting
If you decide to purchase 3D panels from a manufacturer , then be sure to choose a company that has all the sanitary and epidemiological, as well as fireproof certificates , which can confirm the quality of their product. Always give preference to manufacturers who have their own production site. Never buy products online unless you have had the opportunity to personally touch and inspect the quality of the panels from the chosen manufacturer, for example, from friends. If, nevertheless, you decide to take a risk, then the packaging in which the goods will arrive will tell you a lot. A self-respecting manufacturer always treats his products with care, therefore, the packaging will be appropriate. Ideally, the panels should be packed each in a separate cardboard box and wrapped with a special shockproof film with air bubbles.
The edges of the panels will also tell you a lot . From a high-quality manufacturer, they are perfectly even and perpendicular to each other, which allows you to easily perform seamless installation and not waste effort on grouting uneven joints. The pattern of will match perfectly on each tile and you won’t have to worry about matching.
Surface quality is one of the most important indicators of panels. Manufacturers who strive for market leadership are very sensitive to this parameter. They invent new and improve existing production technologies that would allow them to achieve a perfectly flat surface. You just need to run your hand over the panel and it will immediately become clear to you whether this is a quality product or the brainchild of an unknown production. The surface should not have roughness, unevenness, and especially particles of small debris or abrasive. Having a smooth surface will allow you to save significantly on finishing . If the product you received does not meet these requirements, be sure to return it to the seller, otherwise you will suffer more during installation than you will receive aesthetic pleasure.
Choosing adhesive for 3D boards
Soft wall panels
The use of glue implies the absence of any other elements of adhesion between the slab and the wall. Panels glued to Moment glue will adhere well to a flat surface previously treated with putty. For a glue gun with liquid nails, it is necessary to prepare an absolutely flat and smooth surface.
If the walls have some minor errors, glue them with baseboard glue. When choosing such an adhesive base, it is recommended to pay attention to options that are resistant to temperature changes and high humidity.
Once all manipulations with the wall panels are completed, you can begin decoration.
It is not recommended to apply the topcoat to the slab without a primer - the composition will not adhere well and the coating will peel off in the near future. When choosing a topcoat, you should give preference to those colors and textures that predominate in the interior of the room.
Tips for use in the interior
Gypsum 3D panels are very often used in interior design. After all, a skillfully selected pattern can visually make a room much larger than it actually is and expand it. By the way, they successfully decorate not only walls, but also ceilings . This extraordinary solution will appeal to people who love experiments. This ceiling will definitely become the center of attention in your home. If we are talking about wall decoration, then remember that it is not customary to decorate all the walls in one room with panels, much less different shapes. It will be too much and the note of originality will be lost. Choose one wall and make your fantasies come true. Using paneling, you can perform not only a decorative function, but also several tasks at the same time. Let's take a closer look:
- Decor. This function is the most obvious. 3D panels will transform in an instant even the most mediocre interior and make it rich and interesting. Panel panels made at the head of the bed or above the seating area in the living room look very advantageous. An interior that has such a wall looks very original and complete, and does not require additional decorations. For accent wall decoration 3D panels are great, especially if you prefer to give them your favorite color. Choose a central wall or part of it to decorate with this decorative element, and also do not forget that it is very impressive looks like this TV zone and the area around the fireplace.
- Zoning . This is what the use of panels means not only for decoration, but also as a practical solution. very relevant in one-room apartments or studio apartments. Instead of decorating a wall with wallpaper of different colors or textures, it is much more interesting to decorate the wall of a bedroom combined with a work area using unusual 3D panels. This way you can separate any zone, the main thing is to show your imagination.
- Partitions. You can’t imagine how beautiful a partition made from 3D panels looks compared to plasterboard. The undoubted advantage of such partitions is ease of installation and the opportunity to do it translucent. Thus, the room will not seem limited, and the partition itself will look airy and weightless. And light, refracting and falling into the gaps of the ornament, can create a unique play of shadows. Partitions can have either practical, and aesthetic function.
Do not forget that it is important to choose not only the appropriate shape, but also the color . Light colors are good for a classic style, while dark colors will add mystery to your room. emphasized by the correct lighting , looks very advantageous . Do not neglect this rule; be sure to use at least a couple of spotlights directed at such a wall. Shadows that create curves on the surface of the panels will add depth and comfort to the room. Usually the light is directed along the picture , this arrangement will most advantageously emphasize its texture, so the light source can be located either above, below or on the side of the wall. The most optimal angle of incidence of the light flux is 13-20 degrees. More recently, 3D panels with built-in LED backlighting . You can change the color and even the intensity of the lighting depending on your mood using a small control panel. Such panels, of course, cost more, but the effect is stunning.
How to perform installation correctly
If you are not going to resort to the help of a specialist, and intend to lay 3D panels with your own hands , you need to carefully approach this issue. the service life and appearance of a wall designed in this way directly depends on the quality of installation Before starting installation, leave the panels for 48 hours in the room in which the work will be carried out. This will protect against fragility and make installation easier. There are two ways to attach panels - on a metal sheathing and directly on the surface using adhesive mixtures.
- Mounting to metal frame implies the use of additional room space and the cost of its construction. Gypsum panels are attached to metal profiles using self-tapping screws. Holes are drilled in the panels themselves, and after fastening, they are sealed with putty. Not the most gentle way.
- Installation directly to the surface possible only if there are smooth walls. If your walls are not perfect, then you need to carry out additional work on their leveling, or give preference to the first option. The wall surface must be carefully treat with soil deep penetration, then it is recommended to treat the back side of the panels themselves. After this you need to apply marking. Using a level, draw an even vertical and horizontal line - this will be your guide for the first panel. It is necessary to apply an adhesive mixture to the fastening site. Give preference to mixtures that contain gypsum, for example, “ Pearlfix» from Knauf. If you neglected to properly prepare the wall before pasting and hope to level it with a thicker layer of adhesive mixture, then be prepared for the fact that its consumption will be many times more than necessary, and its cost is not the cheapest. So, apply a layer of glue to the marked area and evenly spread with a notched spatula, lean the panel and align it according to the marked lines. The Pearlfix mixture sets fairly quickly, so you don't have to hold the panel for very long. Lay subsequent tiles in a horizontal line, focusing on the first one. If you have chosen seamless way installation, then experts still recommend leaving small gaps, about 2-3 mm wide, so that they can be filled with putty later. This way you will achieve greater uniformity. There are two ways to fill the seams – after complete drying, fill them with putty using a small rubber spatula, or apply putty directly to the joint. Once you have glued the first panel, apply a thin layer of putty to the end that will be in contact with the next panel. Press it not only against the wall, but also against the end on which you applied the putty. The excess will immediately come to the surface. They must be carefully removed with a barely damp cloth. This way you will achieve complete filling of seams without wasting time. If the last panel does not lie completely on the wall, do not be alarmed; using a small hacksaw you can easily cut off a piece required size. It is recommended to sand the sawn edge with sandpaper. If after installation you notice any unevenness or gaps in the joints, correct these nuances with finishing putty.
It doesn’t matter how you attached the panels to the wall, the main thing is that if you next need to paint 3D panels, they must be treated with primer. Painting can be done using a roller or spray. It is recommended to choose water-based, latex or acrylic matte paint .
Tools and materials
The first step to getting started is measuring the walls and purchasing the required number of panels.
In addition to them you will need:
primer for walls
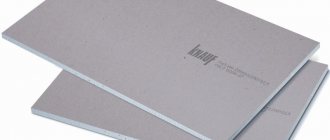
gypsum assembly adhesive
building level or laser level for marking
sandpaper
fine-tooth hacksaw
rubber spatula
dye
brush or roller for painting panels
Tips for choosing
Before purchasing panels, you must know the quantity required , because buying more is not a problem, but it will be a shame to overpay for the extra. It’s easy to make a calculation if you know the dimensions of one panel, even at the place of purchase. The choice of shape depends only on your personal preferences. Remember that it is better to choose quality manufacturers and make a purchase directly in the store, having previously assessed the quality of workmanship, and not on the Internet. Don't be tempted by the low price. If the price of the panel differs significantly from the average pricing policy, this means that manufacturers use low-quality materials and do not have quality certificates, which you must ask the seller before purchasing.
Place the two panels next to each other, if
the pattern matches perfectly and the gaps at the junction are insignificant , then you have a quality product. Try to touch the front surface of the selected panel - it should be perfectly smooth and even. If the product you have chosen meets all these requirements, feel free to make a purchase and hurry to make your interior magical!
The article was written for the site.
Tags: Apartment design, Wall panels