Choosing wall coverings for the perfect design and gluing them is only half the battle. The special beauty in each room of your apartment or house is made up of small “accents”. Without them, the effect will be incomplete. A border for wallpaper can become such a “touch”. It can become a center of attraction regardless of where it is placed on the wall - near the ceiling, near the floor or in the central part of the room.
How to glue wallpaper with a border in the middle?
The border, pre-impregnated with glue, is glued end-to-end to the edge of the wallpaper, while its lower edge of 1.5-2 cm is left not pressed against the wall. The wallpaper sheets of the lower panel are placed under the border and cut along the lower edge. The section is removed, and the border is finally glued to the wall.
Interesting materials:
Who retires first? Who signs the bill of lading? Who reviews cases of administrative offenses committed by legal entities and individual entrepreneurs? Who develops the staffing schedule? Who registers the issue of securities by credit institutions? Who registers at the place of residence? Who is considered an affiliate for an organization? Who is considered busy? Who will take the ESF in 2022? Who submits Form 2 TP Waste 2022?
Choosing a border strip taking into account its main characteristics
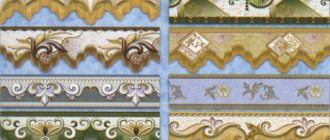
Border tape, or frieze, or edging, or edging are the names of the same universal finishing material, with the help of which you can very quickly and economically complement the interior and give it expressiveness and a characteristic shade. Those who claim that this is the last century, and borders have already gone out of fashion, since interiors with their use are very reminiscent of the furnishings of the times of the USSR, simply do not know how to use them correctly. Especially considering that the modern type of frieze is distinguished by high aesthetic qualities and is impressive in its diversity.
This decorative element is a strip ranging from a few centimeters to a whole meter wide and is sold in rolls ranging from 5 to 10 meters in length. Choosing a border strip shouldn't bring many problems. Most stores selling finishing materials offer a large number of ready-made wallpaper collections, which already contain one or more frieze options. If you first hung wallpaper and then realized that you need to complement the interior to complete the picture, then you need to pay special attention to the material used to make the edging.
The most common of them:
- Paper ones are the thinnest and most delicate type, which are glued and removed very easily. However, due to their delicate texture, they can tear or get wet if the gluing process is not done carefully. They do not have a particularly long service life and quickly fade under the influence of ultraviolet radiation. But this is the most budget option.
- Vinyl - differ from the previous ones in an increased level of strength to mechanical stress, have a more dense structure, are not subject to fading, and therefore have a decent service life. Various contaminants are easily removed from their surface using ordinary detergents, which do not damage the surface, unless, of course, you rub with the hard side of a sponge. Due to this practicality, they are often used in rooms with specific environmental parameters, such as the kitchen or bathroom.
- Acrylic – have also proven themselves to be a very practical decor, resistant to external factors. The cost of acrylic borders is slightly cheaper than vinyl ones with almost equal performance characteristics.
- Textile - this interesting type of frieze consists of two layers. The first layer is the base, made of paper. A fabric layer is glued onto it, which performs a decorative function. Velor is often used for such purposes. The disadvantages of this chic element are poor resistance to moisture and mechanical stress. If handled carelessly or placed near pieces of furniture, such as a sofa or armchairs, where there may be constant contact with pets or hair clips, it may become scratched, come apart or lose its luster. In addition, dust will quickly settle on it, especially if the tape is not small in width. Allergy sufferers should definitely avoid this idea. Caring for a textile frieze is complicated due to the inability to remove dust or dirt simply with a damp cloth.
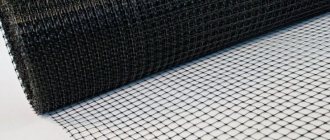
- Made from fiberglass - the most practical of the options, which is resistant to both mechanical and other types of influences. This frieze will have an attractive appearance for many years. Its stability allows this decor to be used in any room. Due to this, it has the highest cost.
To prevent borders from creating obvious contrast, it is necessary to select a material identical to the material of the main wallpaper. For example, silk-screened acrylic wallpaper decorated with paper borders will instantly lose its chic and rich look and instead become awkward and vulgar. The same happens in reverse situations. Borders are designed to hide the junctions of two types of wallpaper, eliminate the consequences of sloppy pasting or smooth out transitions between two or more colors, and perform the function of zoning. At the same time, they should remain an interior decoration. As for the choice of pattern and color, border tape comes in:
- Plain;
- With ornament;
The surface of the tape can be:
- Smooth;
- Embossed;
- With gold, bronze or silver plating;
- Lace.
Depending on the scope of application, curbs for:
- Children's room - you will not confuse them with any others. Elephants, giraffes, dolls, butterflies and other heroes always “live” on them;
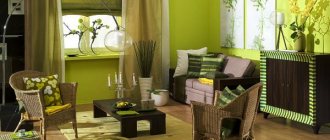
- Living room - such a border looks quite noble and rich. It can depict various stripes, monograms, floral patterns, elements of ancient Roman frescoes, calligraphic inscriptions and much more. Sometimes such a small element, with an appropriate design, is enough to demonstrate a particular design style;
- The dining room is the most “delicious” variety, on which fruits and vegetables, tempting sweets, various drinks or simply words corresponding to the kitchen theme can be drawn. In this room, borders are often used to accent a window or doorway, a beautifully lit wall cabinet or pencil case, or on the wall opposite the dining area.
What can be replaced?
To save money, you can avoid purchasing ready-made border strips and make your own garden fences from scrap materials. For example, to fence beds or paths, old slate is often used, provided it is in good condition, or the remains of this building material after laying the roof. To create a fence, slate sheets need to be cut into pieces of the required sizes and dug into the soil. The advantages of such borders include low cost and ease of installation, while the disadvantages are the fragility of the material and the release of harmful substances into the soil.
Plastic fences are also being replaced with wooden fences. Wood products are easy to use and functional - they can be used to lay several tiers of different heights. The material is easily sawn into pieces of the required length. Wooden fences will look aesthetically pleasing on any site.
Such products are environmentally friendly, but they are short-lived. When in contact with wet soil, the tree swells and rots, and cracks from sunlight. To extend its durability, the wood must be treated with protective agents and then varnished.
Some gardeners use glass or plastic bottles to fence flower beds. In this case, it is recommended to take containers of the same size and design. To install them, you need to dig recesses into which you place the containers one by one, neck down. You can use leftover corrugated sheets to make garden fences. The material is resistant to corrosion, it can last for many years while maintaining its external presentability.
Examples of decorating a children's room with different wallpapers
Wallpaper marking scheme.
How to wallpaper a baby's room using a combination of wallpapers?
- You can use the technique of wallpaper inserts: all surfaces of the walls are covered with the same wallpaper, and bright characters from animated films are pasted on top of the background, forming entire plots.
- If you are gluing wallpaper with a border in a child’s room, it is best to glue the border with drawings at the baby’s eye level, then he will be able to look at the funny pictures with pleasure.
- Another interesting option for a child’s room: the top part is made plain (painted or pasted over), and strips of special washable wallpaper with carved edges are glued to the bottom at a distance of 45 cm from the floor. Such decorative wide rolls of wallpaper are expensive. But you can find a way out of the situation - to glue them only to the parts of the walls that are visible to the eye, where there is no furniture.
Today you can find a suitable border for almost all wallpapers.
Drying
In order to speed up this process, care must be taken to create special climatic conditions: there should be no drafts in the room, and direct exposure to the sun's rays on the glued strips must be excluded.
If you used non-woven wallpaper, be patient - it takes much longer to dry than paper wallpaper. However, you now know how to glue wallpaper on the ceiling, and a long wait is a mere trifle for you!
Wallpapering
Wallpaper gluing begins after installing polystyrene foam cornices on the ceiling and painting the ceiling or painting the ceiling and cornice strips, if the wallpaper will not be glued to the ceiling, but indented from it.
The quality of wall decoration with wallpaper directly depends on the quality of wall preparation. The walls are either completely leveled, or the evenness of only “indicative” places is emphasized: ceiling cornice, wall corners and slopes of windows and doors, places where skirting boards are attached. The closing angles of the walls do not have to be strictly vertical, but they must be even; it is advisable to bring the slope angles closer to the vertical. The attachment points for the door trims also need to be brought closer to the vertical so that after attaching the trims there is no large gap between it and the wall. The ceiling cornice does not need to be pressed into each hole. Let it go, if not in a straight line, then in smooth arcs. In this case, there will be gaps between the cornice and the wall, the cornice and the ceiling; they need to be puttied together with the joints of the cornice along the length and painted over with acrylic paint (together with the ceiling) in one tone. When puttingtying cracks between the cornice and the wall, it is advisable not to just fill the crack with putty, but to stretch it 500 millimeters down onto the wall, stretching the putty from the thickness of the crack under the ceiling “to zero” on the wall. It is advisable to install skirting boards after wallpapering, but if the walls are crooked, then they are installed before the wallpaper, just like ceiling cornices, smoothly bending around the bumps. The gap between the wall and the baseboard is filled with putty. Of course, if the wall is leveled entirely, then all these tricks with “indicative” places will not be required.
To install or not to install a ceiling cornice? It gives the finish a finished look, but if you categorically do not allow polystyrene foam into the interior, then you can replace it with gypsum cornices (the walls must be level - this cornice does not bend) or glue wallpaper with a distance of 50–100 mm from the ceiling corner. Pasting walls with wallpaper “to match the ceiling” leaves a feeling of incompleteness, especially if the ceiling is not pre-leveled. Wallpapering with an indentation from the ceiling is done with or without installing a border tape. The border adds completeness to the finish. When sticking it, you don’t need to strive for an ideal horizontal line; it’s better to make the same distance from the ceiling. If you make a horizontal border under a leveled but not horizontal ceiling, you will get a visually falling ceiling. When gluing two types of wallpaper separated by a border, for example, at a level of one meter from the floor, the border tape should be placed at the same distance from the floor, but again not horizontally. The furniture is on the floor, and if the floor is flat, but not horizontal, then a horizontally applied border tape will emphasize the slope. Conversely, curb tape glued parallel to the floor will visually remove the slope of the floor. If the tape separates the wallpaper closer to the ceiling, then it is glued parallel to the ceiling. When sticking wallpaper “with flowers” on the walls in a room with crooked ceilings, you should beware of cutting the wallpaper along the “flowers” that go under the cornice or border, this emphasizes the curvature of the ceiling; it is better, if the wallpaper pattern allows, to lower the “flower” by 80–100 mm down and cut the wallpaper along the background - the curvature of the ceiling will be less noticeable.
Plasterboard walls must be completely puttied, otherwise during the next repair the cardboard can be removed along with the wallpaper.
Before gluing the wallpaper, the entire surface of the walls is primed with wallpaper glue diluted with clean water by 20–30%. Do not prime the walls with deep penetration primers; wallpaper glue does not adhere well to such walls. If the base is loose, it is better to use cheap universal domestic primers, and then prime with wallpaper glue. As a last resort, use imported PVA (Turkish) instead of a primer. Dilute the water with 10% PVA, then add 20–30% wallpaper glue to it. However, you need to remember that the use of PVA in the primer can make the wallpaper gluing irreversible - subsequently it will be difficult to remove it from the walls. Do not use domestic PVA; it was not intended for such use and leaves yellow stains on the wallpaper.
Wallpaper is cut into pieces with an allowance of 50–100 mm in length. In the process of performing this operation, it is necessary to take into account the repeat (frequency of repetition) of the pattern, the presence of which requires careful selection of adjacent panels in height to match the pattern. Some types of wallpaper (plain color, paintable wallpaper without an ordered texture, etc.) do not have a pattern repeat, which almost completely eliminates the generation of waste and significantly speeds up working with it. After cutting the wallpaper, pencil marks are applied to each piece on the back side, indicating the panels are facing up. Feel free to draw large “crosses” on the back or write the word “top” in capital letters. Don't waste time looking for the top when wallpapering.
Preparing glue (according to the instructions) usually does not cause difficulties. To prevent the formation of lumps, the water in the container (bucket) must be “spinned” with a stick until a stable funnel is formed, into which the contents of the package are poured in a thin stream. The liquid in the bucket must be continuously stirred until the glue is completely dissolved.
In the vast majority of cases, the glue is applied to the back side of the wallpaper, but some types of wallpaper, for example, non-woven wallpaper, require applying the glue directly to the wall, which must be indicated in the instructions for use. The glue is applied to the wallpaper and wall using rollers and brushes.
Before starting work, a vertical line is struck on the wall using a plumb line, which serves as a guide when gluing the first panel. Modern wallpaper is glued only end-to-end, so the sequence of installation of the panels (from window to door or from door to window) does not matter. However, if you use wallpaper with a matching pattern, it is better to start from the window, making an overlap of 20–40 mm on the slope (then trim it along the slope) and glue it “in a circle”. If you glue from the window in both directions, then the pattern will not converge; in this case, it is better to join the wallpaper above the doorway, where the discrepancy of the pattern is less noticeable. You can start gluing wallpaper without matching the pattern from any place, for example, from a corner, but not immediately, but from the second panel. To do this, apply a rolled piece of wallpaper to the corner and make an overlap to wrap it at an angle of 20–40 mm, and from there they find a place to stick the second panel, which is marked vertically.
The photographs (Fig. 107) show the sequence of wallpapering two types of patterns. Wallpaper was purchased with and without a pattern, so when gluing, the panels alternate. In order for the wallpaper to look symmetrical on the wall, markings were made and gluing was carried out from the center of the wall in both directions to the corners. The illustration shows the pasting of walls with paper wallpaper, in which glue is applied both to the wall and to the back side of the wallpaper. To apply non-woven wallpaper, apply glue only to the wall. The illustration also shows an apartment with well-prepared, aligned walls and corners, with wallpaper joining in the corners of the walls. Using this technology, wallpaper is overlapped in the corner of the wall, and the top sheet is trimmed without touching the bottom sheet. This type of work requires experience.
Apply glue to the wallpaper, fold it with the adhesive side inward and leave it to soak.
Place a plumb line on the wall and mark it. Check the vertical level
Apply adhesives to the wall, under the cornice and where the baseboard is attached (work with a roller and a flat brush).
Place a piece of wallpaper against the wall, aligning it with one edge along the line. Check verticality again with a plumb line.
Press the aligned edge and roll it to the wall. Roll the middle of the canvas. Roll the wallpaper up from the middle and edge.
Roll the wallpaper down from the middle and edge. Use a ruler or spatula to press the top of the wallpaper against the ceiling cornice and trim it with a utility knife.
Cut a “cross” for the sockets. Spread the wall under the next panel and stick the second panel next to the first...
...moving it close and making the joint even. Roll the joint of the two canvases. Glue the entire fabric, trim the top...
...and the bottom of the wallpaper. Glue the third sheet
Bend back the unglued joints, coat them with glue and glue them. Glue the fabric into the corner so that it wraps 20-40 mm.
Here it is more convenient to cut the wallpaper with scissors. Press the canvas into the corner with a spatula or ruler...
...and running a utility knife along a ruler or spatula, we cut the wallpaper folded at a corner. We trim the top with scissors and press the trimmed wallpaper into the corner.
We continue wallpapering to the right side of the center of the wall. We insert the canvas into the corner with an overlap of 20-40 mm onto the other wall.
Experienced craftsmen can afford to glue a whole panel into a corner and cut it to width directly on the wall. Pruning is done “in the corner”.
Rice. 107. Wallpapering
The reverse side of the wallpaper is covered with glue (using a paint roller or a special brush), the pieces are folded in half (with the glue inside) and kept in this state for the time indicated on the packaging (usually 5–10 minutes). It is not necessary to maintain this time exactly to the second, but it is also not advisable to “overexpose” it too much. This primarily applies to cheap paper wallpaper, which can swell to such an extent that it begins to fall apart in your hands. You need to spread glue on as many pieces as you can glue while the wallpaper is soaked in glue; if you lack experience, no more than two.
Wallpaper soaked in glue is applied to the wall, wrinkles and bubbles are smoothed out with a stiff brush (for embossed, crumpled designs) or a special rubber roller, the joints are rolled with a narrow roller or special rollers, which allows you to fix the joints and prevent them from coming apart when drying. It is not recommended to use a rag for this purpose, since on some types of wallpaper - most often paper - the paint may smudge. When gluing paper wallpaper, you need to carefully ensure that the glue is not squeezed out too much from the joints. The squeezed out glue should be blotted with a sponge or a clean white rag. Branded adhesives (not counterfeit ones) leave virtually no traces and become invisible after drying, but it’s better to play it safe and immediately blot up any exposed glue.
The wallpaper is smoothed out in the following sequence: first, the edge of the wallpaper is pressed along its entire height, aligning it with the line on the wall, then the center of the piece is pressed across the entire width across the piece (Fig. 108), the wallpaper is leveled from the center and pressed up and down to the wall.
Rice. 108. Wallpaper smoothing direction
When marking a vertical line, you should not draw it along the entire height of the wall, a few strokes are enough, otherwise the pencil mark may be noticeable - visible through the joint, and it will seem that the wallpaper is not closed.
When joining panels on uneven walls, slight divergences of joints or overlapping edges are possible. Wallpaper coated with glue and kept for the required time is elastic, that is, it can be slightly stretched or compressed. Always keep an eye on the joints, looking at them from top to bottom, bottom to top and from the side along the wall. If you notice overlaps or divergences in the joints, try to return them to the required position; if the glue or the edges of the wallpaper have dried, bend the edges and spray them and the wall with water from a spray bottle and apply a fresh layer of glue; if the edges are not coated with glue, apply it with a thin brush (flute) and return the wallpaper to its previous position, closing the joints. To prevent the joints from coming apart, it is sometimes useful to paste a strip of paper tape under the folded wallpaper joint, coat it with glue on top and close the joint. When the wallpaper dries and stretches, at the joint it will be glued not just to the wall, but through the paper. Sometimes this helps prevent the joint from coming apart. However, we repeat once again that high-quality wallpapering, when the joints are practically invisible either under direct or oblique rays of light, is only possible on a flat, well-prepared wall. In other cases, the joints are still noticeable, however, with conscientious gluing, only if you look for them specifically.
Since the wallpaper pieces are cut to excess length, after gluing, excess material is formed under the ceiling and near the floor. This excess is cut off with a chopping knife. A dull knife crumples and tears paper, so the blade should be broken every 500–600 mm of cut. The breaking is done using a magnet, so that you don’t have to look for broken blades all over the room later. Cutting wallpaper on the wall is done using a spatula or ruler. The crooked the walls, the narrower the spatula should be; on flat walls you can use a wide (up to 400 mm) spatula or ruler. Do not cut wallpaper starting from the factory edge, it often wrinkles. It is better to start cutting along the wallpaper, moving towards the edges, first in one direction, then in the other. Do not cut to the corner of the spatula - it is bent. Do not pull the knife out of the wallpaper when moving the spatula, otherwise you will end up with a step. You need to move either a knife or a spatula (ruler), the other tool must be motionless at this moment.
When gluing “in a circle”, having reached the inner corner of the walls with wallpaper, measure the distance to the corner and increase it by 20–40 mm or less, it is important that the overlap covers the corner, its size is not important. Cut the panel to the required length and width and glue it into the corner. Level and rub the wallpaper into the corner, paying attention to the side from which the wallpaper was glued. The turn on the adjacent side of the corner is not very important to us; it will be cut off. The short side of the wallpaper, folded onto the adjacent wall of the corner, should be straightened as far as possible, but not pressed too hard against the wall, so as not to create tension that pulls the wallpaper out of the corner. The same side that is adjacent to the already pasted wallpaper, on the contrary, should be well connected to the previous panel, ground to the wall and to the corner. After gluing this panel, it is cut “into the corner”, cutting off the entire overlap. On the other side of the corner we will use the second half of a piece of wallpaper, cut to length - do not throw it away. To do this, apply this trim to the unpasted side of the corner, measure the distance that this trim will occupy on the wall, and subtract 20–40 mm from it for the overlap into the corner. Let's put a pencil mark on the wall. And use a plumb line to mark the vertical line. Let's glue the whole piece, aligning it along the line, and then join the half of the piece that we planned in the corner to it. Let's glue it with a fold into the corner and trim this overlap “into the corner.”
In other words, to make it clearer, having reached the inner corner of the walls with pasting, we glue into the corner not a whole piece of wallpaper, but two pieces obtained from the whole by cutting it longitudinally. At the same time, we paste both the first piece and the second onto the wall with a turn into a corner. First we glue the first piece, wrap it in a corner, then cut off the overlap. We end up with a wall completely covered with wallpaper, and the wallpaper fits very tightly into the corner, repeating its entire curvature. Then we take the scrap remaining from the whole panel and paste it onto the second wall, but so that the cut edge of the wallpaper again goes into the corner and wraps around the pasted wall. You can leave it like that if the corner is not visible and is hidden somewhere behind the curtains, but if the corner is visible, then we cut off this overlap, but do not touch the wallpaper underneath it. Without experience this is quite difficult to do. It is recommended to place a wooden student's ruler under the edge of the wallpaper to be cut or to cut with scissors. The second piece cut in this way, just like the first, completely repeats the curvature of the corner, but at the same time, the thickness of the wallpaper covers the place of the first cut and the joint becomes invisible.
In this kind of corner pasting there are completely no internal stresses; here, in fact, there is no traditional corner pasting, but there are, as it were, two independent walls covered with wallpaper. With such pasting, the wallpaper will never wrinkle or move away from the corner, and air bubbles will not appear under it, which so often make themselves felt during traditional pasting of corners. In addition, when using two sides of one piece, the design, of course, gets lost, but no more than with a traditional sticker. In this type of corner pasting, in general, there is no joining of the wallpaper, but there is a slight overlap of the wallpaper on each other. A spatula or ruler has a certain thickness, inserting it into the corner and making a trim, part of the wallpaper remains on the adjacent wall. When trimming the second piece, again, part of the wallpaper remains in the corner, overlapping the bottom layer.
Why is the second corner panel not glued on right away? On the adjacent wall, the first wallpaper again needs to be aligned vertically. Finishers unanimously claim that it is more convenient for them to first glue a solid piece and align it vertically, and then glue the corner piece to it, they say, otherwise the design may go astray - they know better. Although on wallpaper without selecting a pattern, of course, you can immediately glue in the second corner piece and align its factory edge vertically, and then join subsequent pieces to it.
External corners, if they are not planned to be further covered with plastic corners, are covered slightly differently (Fig. 109). What was included in wallpapering with cutting “in the corner”? Essentially, this is self-pasting of each wall as independent elements. If you glue the outer corners in the same way, then the joint of the wallpaper, even with a slight overlap, will end up right on the edge of the corner. The invisible joint in the inner corners “bulges out” on the outer corners. Therefore, we also cut the wallpaper panel along its length, dividing it into two pieces. A turn is also made at an angle, but a little more, for example, 50–100 mm. After this, a whole panel is glued vertically to the adjacent wall at the required distance. A second corner piece is joined to it, overlapping the first. Using a ruler, both wallpaper sheets are cut to overlap. The wallpaper is folded back, trimmings are removed from under it, the edges are coated with glue a second time and closed on the wall.
Rice. 109. Pasting external corners
Quite often problems arise with gluing borders to the surface of vinyl wallpaper. Even the use of specialized border adhesives does not provide an acceptable result: after a short period of time, the border begins to peel off, and sometimes simply falls off. Only gluing the border tape directly to the wall surface guarantees long-term service of wallpaper with this decorative element.
The technology for gluing the border is as follows. A line is drawn along the entire perimeter of the room at the required height. After this, the upper (above the border) part of the wallpaper is glued, the lower edge of which is cut along the drawn line with a sharp knife along a ruler. The border, pre-impregnated with glue, is glued end-to-end to the edge of the wallpaper, and its lower edge (15–20 mm) is not pressed against the wall. The wallpaper panels of the bottom row are placed under the border and cut along its lower edge. The cut strip is removed, after which the border is finally glued to the wall (Fig. 110). This job requires a lot of care and precision, but ensures a perfect (and long-lasting) connection between the border strip and the wallpaper. A good result is obtained when gluing a border along the top of the wallpaper. However, this is only possible for wallpaper with a flat pattern; for vinyl wallpaper, special border adhesive is used.
Rice. 110. Pasting the border
When gluing a border around a door or window, glue the strips so that they overlap the previous ones, ensuring that the pattern matches. Use a knife to cut two layers of wallpaper and remove the scraps. Erase traces of glue and roll the joint with a roller (Fig. 111).
Rice. 111. Gluing borders around openings
Sometimes the wallpaper cannot be firmly glued along the window slopes. Window slopes often have a lower external surface temperature and higher humidity than the rest of the wall. Differences in temperature and humidity lead to uneven drying of the wallpaper, and as a result, compressive stresses tear off the edge of the wallpaper. If the slopes will not be covered with an angle or F-shaped plastic profile, then when gluing wallpaper, it is recommended to use border glue to coat the edges or add 10–20% imported PVA to the wallpaper glue.
Wallpapering around doors is usually not difficult. The humidity and temperature of these surfaces are the same as that of the rest of the wall, and the edge of the wallpaper goes under the trim. Here you can hide even carelessly cut wallpaper.
When covering hard-to-reach areas of the wall behind the radiator, cut the wallpaper in the places where the pipes and radiator mounts are supplied. To evenly apply glue to the wall, use a roller or brush tied to a stick (Fig. 112). To level the wallpaper, you can use a clean mop or wrap it with a clean cloth. Lowering the mop behind the radiator, smooth the wallpaper so that it sticks tightly to the wall. Wipe away traces of glue on the wallpaper and on the radiator. To cut holes for switches or sockets, remove the covers from them after turning off the electricity. When gluing wallpaper panels, cut the wallpaper in a cross opposite the center of the box and trim the edges with scissors. Replace the covers.
Rice. 112. Pasting the walls behind the radiator
During the process of gluing the wallpaper and until it dries completely, it is necessary to exclude any possibility of drafts. Drafts cause uneven drying of the wallpaper and, as a result, their uneven shrinkage, which can lead to unraveling of joints, poor-quality gluing of panels, and in severe cases, damage to the integrity of the wallpaper.
If the next day there was complete or partial peeling of the wallpaper along the top of the walls and at the joints, then it is likely that the wallpaper was pasted on surfaces previously painted with lime or adhesive paints that were not cleaned off. It is also possible that the surfaces were not glued, or liquid glue was used, or the wallpaper was poorly coated, or the room was hot during work. The defect is corrected as follows. The wallpaper is folded back and cleaned of adhered paint (whitewash). Remove the plaster from the walls so that no trace remains. Wet the wallpaper well from a spray bottle and glue the surface with thick glue and spread it on the wallpaper, giving it the opportunity to soften well. Then they are glued and carefully smoothed. If ordinary glue does not help, use border glue or add imported PVA to wallpaper glue. And let us remind you once again that domestic PVA leaves yellow stains. Adhesive stains at the joints are soaked with water from a spray bottle and blotted with a clean sponge.
Preparing the base
What to dissemble is the most tedious and unbearable process, on which, nevertheless, too much depends to be neglected. It’s sad, but it’s the old wallpaper that holds up best, which you need to get rid of as quickly as possible, and the worst thing is the wallpaper that has just been pasted. All this, of course, is a joke, but it does not at all negate the truth: in order to remove old wallpaper, you will have to soak it in warm water, and then carefully remove it, actively helping yourself with a spatula.
In the case where you are dealing with a bare concrete base, it is necessary to remove the applied plaster and prime the ceiling.
acrylic -based primer
, capable of penetrating into the deepest crevices. This will help you complete this part of the job as efficiently as possible.
First, tape the place where the chandelier invoice will come out from. You can even turn off the electricity completely to ensure the complete safety of those involved in the repair.
What to look for when choosing edging?
- The style of the interior and the selected wallpaper (combination of color and picture). Any ornamental border that fits into the overall background will suit plain wallpaper. If combined wallpaper is used in the room, then the edging can be selected to match any of the dominant colors (or pattern). Keep in mind that in specialized stores wallpaper is sold complete with accompanying frames.
- Size. Gosstandart provides for different lengths (5-10 meters) and widths (from a couple of centimeters to meter-long specimens).
- Do not forget to compare the material of the edging and the wallpaper sheets (vinyl wallpaper - vinyl edging; non-woven wallpaper - textile framing, etc.).
- Wallpaper strips in the bathroom and children's room should have different parameters of water resistance and strength. The same applies to the rest of the premises.
- The texture of the border can be embossed or smooth, and can also be made of lace, gold or other coverings. It all depends on the individual preferences of the user.
Have you recently completed a renovation and think you don’t need wallpaper borders? In vain. You may need them ahead of schedule. After all, almost no manufacturer can guarantee that its wallpaper sheets will last in their original form for the desired number of years. Also remember what kind of canvas children like to create their masterpieces on. Right. This is all wallpaper.
Do your renovations wisely and let your interior be filled with a warm, abundant atmosphere.
Good luck! How can you remove bubbles from wallpaper after gluing?
How to decoupage furniture with wallpaper yourself?
How to properly apply wallpaper over paint?
Useful tips
Recommendations from the experts will help you quickly cope with the task:
- If you do not have pasting skills, you should select a border pattern that fits easily at the seams.
- You should not stick the border onto wallpaper that has not yet dried.
- When using glue, it is important to remember the polymerization period.
- The middle of the wall height is not the best place for decorative tape; the room will appear lower than it actually is.
- The edging located at the bottom of the wall will protect the wall from dirt.
Special harmony in the interior can be achieved by using a simple decorative wall element - a wallpaper border.
Required Tools
To apply vinyl wallpaper you will need:
- A sharp utility knife for cutting strips.
- Measuring tool (ruler/tape for marking, plumb line/level to obtain an even vertical line), pencil.
- Special glue for vinyl wallpaper (for example, universal, if necessary - for heavy wallpaper) and containers for it.
- Stirring device.
- A wide brush, brush or roller for applying glue to walls and canvases.
- A narrow small brush for greasing seams and individual areas.
- A wide rubber roller or spatula for smoothing the glued strips.
- Narrow roller for pressing seams.
- Sponge, cotton cloth to remove escaping glue.
The knife blade must be sharp at all times, otherwise there is a risk of damaging the coating. For high-quality gluing, you will need two people - while one from above applies the strip to the wall, the second from below supports it and corrects the evenness of the application.
Secrets of successful application and placement of borders
When you have precisely decided on the type of wallpaper and, based on our recommendations, selected the most suitable border, you will certainly be faced with the question of how to correctly arrange the elements on the wall. Let's consider the most successful options:
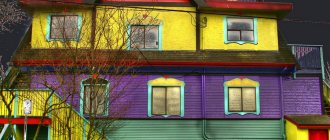
- Horizontal location is the most familiar for many. The most common option is when the border is located exactly in the middle of the wall. This is acceptable for rooms with normal ceiling heights. More interesting would be the location of the curb somewhere at 1/3 of the wall height. This will help raise low ceilings a little. To hide a bad wallpaper trim or encourage guests to notice your chic stretch ceiling or exquisite lamp, place a border strip directly under the ceiling. A wide ribbon will be more noticeable.
There are a lot of options for such borders, sometimes they can be made in the form of large flowers, unusual birds or inscriptions. With the help of such an element, the interior will seem more thoughtful and complete. Another option for horizontal placement is directly above the floor level. In this case, the border can have a width of 20-30 cm and be made in the form of young grass with primroses or simply have an interesting pattern. - Vertical orientation is especially relevant when you want to highlight the wall on which the emphasis is placed. This can be a wall of a distinctive color, edged around the perimeter with a border with an ornament in the same color as the main walls. Or, conversely, a wall with patterns and a clear monochromatic border. In any case, such a solution will have a more expressive and neat appearance. After all, you will not only clearly mark the boundaries, but also hide the joints or trimming in the corners, where it is quite difficult to do this beautifully. Especially without proper surface preparation beforehand. A vertical border can also be wonderfully placed on the plane of a long wall in a place where wallpaper of different types meets.
- Diagonal separation is extremely rare. But this option also has a right to life. The rooms, one of the walls of which is divided by a diagonal line, look very extravagant and creative. Besides this there is one more plus Using this direction - diagonals help to expand the space and slightly dissolve its boundaries, thereby making the room more spacious. Please note that the latest design decision in the design of a backsplash in small kitchens was the diagonal arrangement of tiles. Which also manifests itself in the way the flooring is laid. So why not? They will look especially impressive wide stripes with a beautiful pattern against the background of plain walls. But you shouldn’t be zealous either. The width of the curb should not exceed ¼ of the height of the wall. In the case of two parallel stripes, even less.
- We highlight window or door openings. This is another not-so-standard way to use a border for wallpaper. However, if you have such a desire or need, then you should not talk yourself out of it. To highlight the window opening, you can stick tapes around its perimeter. This is acceptable if the curtains do not interfere with further viewing of such a solution. If you already have your favorite curtains, place a wide border with a beautiful pattern directly above the curtain rod and across the entire width of the wall. Of course, it must match the color or texture of the other finishing materials. Doorways are designed in a similar way. In the case of gluing a border around a door frame, for example, instead of platbands, you can match its color to the door leaf, and the pattern to match the color of the walls. It can also be the other way around. Main, so that the color of the walls and doors is reflected in the appearance of the edging.
It is also worth noting that in addition to their excellent aesthetic qualities, borders can help visually highlight a particular area. Thus, you can quickly and easily perform space zoning without much expense. This can be done especially successfully when the border is placed vertically at the junction of canvases that are identical in texture but different in color. This technique is often used to separate a small area of the bedroom for a work area. Or when combining a living room and a kitchen.
Pasting interior doors or windows
Pasting windows or doors with stripes will add more decorativeness to the overall appearance of the room. There is one difficulty here when connecting the strips: they need to be cut very precisely and connected in a miter (maintain an angle of 45°).
Try to choose stripes so that there are no patterns, large designs or colors at the joints. Overlap the strips at the junction and use a diagonal ruler and a sharp knife to cut through both strips. Remove the section from the horizontal border. Fold the edge of the same border and remove the section of vertical border. Place the horizontal edge back, press and press the seam.
The use of borders is optional, but recommended. Especially in the case when there are 2 border zones in the finishing of the wall surface. The selection and use of borders must be approached wisely and carefully, since decorative framing can both narrow and visually expand the room.