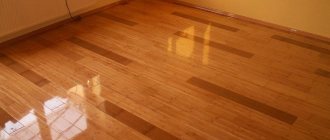
Laminate is a popular floor covering. At a relatively low price, it looks great, is quite durable and requires little maintenance. It is quite easy to install a heated floor system under the laminate, which significantly increases the level of comfort. A wide range of colors and textures allows you to choose the right coating for any interior.
Laying laminate flooring on uneven floors
That is why more and more people, when choosing flooring, choose to use laminate. However, despite the apparent ease of installation, laminate flooring is very demanding on the base on which it will be laid.
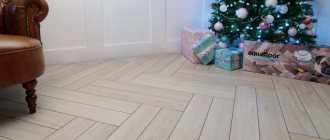
Laminate in the bedroom interior
Individual laminate boards are fastened together using special locks, and a dense monolithic structure is obtained. All types of locks can be divided into two groups: click type and lock type.
Click and Lock laminate locks
With a lock type connection, the edges of the laminate boards are made in the form of a tenon on one side, and in the form of a groove on the opposite side. This laminate is installed by driving a tenon into a groove using a wooden mallet. The result is a fairly reliable connection, however, the installation process is very labor-intensive. In addition, it is very difficult to disassemble such a connection.
A more modern type of connection is click locks. In this case, the edges of the boards are made in the form of flat hooks and depressions. The board being laid is inserted at an angle of 45 degrees into the previous board, after which it is lowered onto the substrate and securely fixed with a characteristic click. It was for this sound that the castle got its name. This type of connection is much easier to install than a lock-lock, and if necessary, the floor can be easily disassembled.
Castles Click
Both types of connection require a very level base for installation. If the base has height differences, unevenness, paint runs or protruding nail heads, then the service life of the laminate will be significantly reduced.
If you lay the laminate on an uneven surface, then when you walk on it, the panels will experience increased bending load. This will lead to loosening of the connections between the boards and the appearance of cracks. Debris will get stuck in the cracks and moisture will get in. The floor will begin to creak, individual laminate boards may swell and the coating will have to be replaced.
Permissible floor unevenness for laying laminate
That is why it is important to think in advance about leveling the base under the laminate. This can be done in several ways.
Basic methods for leveling the base under a laminate
A note about installing laminate flooring
If you have to lay the laminate on a concrete base, then it can be leveled using a liquid self-leveling screed or a dry screed made of expanded clay and gypsum fiber board. In any case, the result should be a strong, flat surface with a height difference of no more than 3 mm. The slope of the surface is checked using a long building level.
Checking the levelness of the floor
These methods are suitable for leveling floors in houses with reinforced concrete floors. The base is cleaned, waterproofed with polyethylene, after which a liquid screed is poured. You can start laying the laminate only when the screed has completely hardened.
self-leveling floor
Leveling floors under laminate
When installing a dry screed, a layer of fine-grained expanded clay is poured over the waterproofing. Expanded clay is leveled using a level and gypsum fiber board sheets are laid on top of the backfill, having locks that are securely fastened together with screws and glue. The result is a durable and even coating.
Knauf floor screed diagram
Do-it-yourself Knauf bulk floor
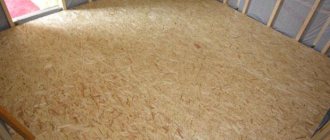
When you have to lay laminate flooring in a private house whose floors are made of wood, the floor can be leveled using chipboard or plywood. This is a very quick and easy method, however, it is important to carefully monitor that all wooden parts are securely fastened. It would be a good idea to treat the wood with a composition that prevents rotting.
Video - Leveling the floor with plywood
Between the floor joists, a rough flooring made of boards is installed, on which thermal insulation made of foam plastic, penoplex or mineral wool is laid. After that, sheets of plywood or chipboard are laid on the level, which are attached to the joists using screws or nails.
penoplex
Leveling the floor with laying insulation
When there is a need to lay laminate over a finished floor made of boards, you need to first make sure that the boards are securely fastened and that there are no creaks or other extraneous sounds when walking on the floor. If the condition of the floor is satisfactory, then all that remains is to check its evenness using a level. If there are protrusions on the floor at the joints of the boards, paint runs and protruding nail heads, then all these irregularities must be removed before laying the laminate.
Advantages and disadvantages of the main floor leveling methods
| Method | Advantages | Flaws |
| Liquid self-leveling screed | Relatively low labor costs. It is enough just to dilute the screed with water and evenly pour it over the entire floor in the room. High strength of the base. Non-flammability. Moisture resistance. | Large final weight of the screed, increased load on the floors of the house. Work can be continued only after the screed has completely dried; this process can take up to a week. |
| Dry screed using gypsum fiber boards | Light screed weight thanks to the use of expanded clay. Good thermal insulation characteristics. Non-flammability of the material. | Relatively high labor costs for leveling expanded clay and GVL flooring. Quite a high price. The strength of the base is lower than when using a traditional screed. |
| Leveling with chipboard or plywood | The method is suitable for private houses with wooden floors. Low labor costs for installation. Low price. | Flammability of materials. When heated, chipboard releases substances harmful to health. The base is extremely sensitive to moisture and temperature changes. |
Creating a new screed
The work uses a classic composition for cement mortar, for which formwork is previously created. Wooden slats are placed on the thick mixture a meter apart from each other. After this, the solution should harden.
It is necessary to pour the mixture from the far corner, leveling it in parallel with the rule. As the mixture moves, it shifts to the right and left, which makes it possible to exclude voids with air from the mass. A day after pouring, the resulting screed must be moistened with a roller, moistened again and the solution checked for strength.
If the coating has acquired sufficient hardness, then the screed must be covered with plastic wrap and left in this condition for several weeks until completely dry. Then you lay the laminate with your own hands on the uneven floor using a new screed. Presumably, the ceiling height with this method of compensating for height differences will be reduced by 3 cm.
Preparing to lay laminate flooring
Leave the laminate in the room for several days to adapt
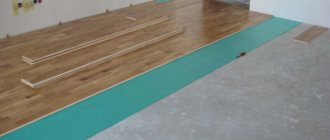
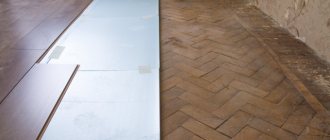
A layer of so-called underlay is placed between the laminate and the base. It is usually made from polyethylene foam or cork. The underlay compensates for minor unevenness in the floor and also provides sound insulation. It is important to remember that the underlay is not a way to level the floor; the maximum height difference that a thick underlay can compensate for is 3 mm.
Polystyrene backing and wedges to maintain the gap between the wall and the panels
The polyethylene foam backing is cheap and easy to install. Cork substrate has increased strength and better thermal insulation properties, but it is noticeably more expensive.
The underlay is spread over the entire floor area. There should be no gaps between the sheets, and they should not overlap. The sheets are attached to the base using double-sided tape.
laminate backing
Cork backing
We identify surface irregularities, bumps and holes
Let's look at the main types of irregularities:
Cracks and crevices. They are most often found on wood floors. We easily seal it with putty and lay down the laminate.- Lumps or pits. These are satellites of concrete bases that greatly affect the laminate.
- Elevation changes. They can appear between wooden boards or between concrete floors.
Using a hydraulic level (a laser or regular level will also work), you can identify unevenness on each wall.
We mark control points with self-tapping screws to guide us. We tie the threads along the caps.
Choosing a laminate
Today on the market there are thousands of laminate products of various textures and colors. It’s easy to get confused in this variety, so it’s advisable to first decide on the basic characteristics of the laminate, and then move on to choosing the appearance.
The thickness of the slab primarily affects how tightly the laminate panels fit together and how reliably they behave during operation.
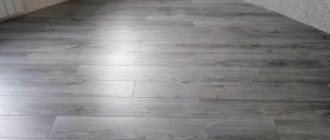
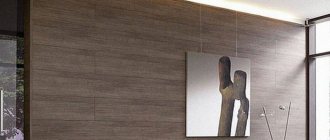
Laminate
The strength class of the laminate shows how resistant the coating is against external influences; the higher the strength class, the longer the service life of the laminate and the greater the loads it can withstand.
| Properties of isolon | Description |
| Reflective effect | One of the main advantages of isolon is its high reflective effect, which contributes to an additional and very noticeable reduction in heat loss. |
| Compatibility with other materials | The properties of isolon allow it to be used both in combination with wooden structures and for insulating concrete floors. |
| Thickness | Compared to many other thermal insulation materials, isolon stands out favorably with its modest thickness, averaging 2-10 mm (sometimes up to 15 mm). Despite this, the material copes with the tasks assigned to it without any complaints. |
| Moisture permeability | The insulation does not absorb moisture, which makes it possible to count on its maximum long-term operation without reducing its thermal insulation characteristics. |
| Environmental friendliness | Isolon is not harmful to human health or the environment, which allows it to be used in premises for any purpose. |
| Other properties | Izolon is characterized by a long service life. The material is not subject to rotting. If necessary, izolon can be used in combination with other insulation materials. In addition to excellent thermal insulation characteristics, izolon has good noise absorption properties, which is an additional advantage. |
Of course, these recommendations are very conditional; in fact, it is better to completely abandon the use of laminate of classes 21 and 22, their service life is very short. The best option would be to use class 31 coatings for bedrooms, and class 32 is sufficient for all other rooms.
Laminate classification
The thickness of the laminate does not play as important a role as its class and, other things being equal, it is better to choose a thinner laminate, but of a higher class. However, you should not use a coating thinner than 7 mm, since it does not have a sufficient margin of strength when exposed to bending.
Which laminate to choose
The type of laminate lock affects the ease of installation; the most convenient and reliable method is a click lock, it allows you to quickly fasten the panels together and minimizes the risk of damage to the panel. The second most popular is the lock-lock; such panels are a little cheaper, but their installation is much more labor-intensive.
The moisture resistance of laminate flooring is an important criterion when you are going to install it in the kitchen or hallway. In other rooms, it is not practical to install moisture-resistant laminate due to the high price.
Diagram of one of the HDF-based laminate models
laminate
How to level an uneven floor and eliminate slope
The method for eliminating irregularities depends on their size, the scale of the problem, as well as the base material.
Elimination of height differences
- Minor, up to 5 mm, irregularities are smoothed out using a laminate backing.
- Small local depressions are filled with putty corresponding to the type of base (for wooden floors you can use a mixture of PVA glue with sawdust, for concrete floors - a self-leveling mixture).
- Lumps (noises) on concrete floors are knocked down with a hammer drill, and the protrusions of the wooden covering are removed with a plane. Finish leveling is carried out using a grinding or scraping machine.
- Minor but numerous irregularities can be eliminated using a self-leveling screed. This method is best suited for leveling a concrete base, but it can also be used on wooden floors, after laying a plastic film.
- More significant unevenness in the concrete base is leveled using a cement-sand screed.
- The problem of an uneven wooden floor can be solved by placing a dry screed on top from sheet materials - fiberboard, plywood, OSB. The more unevenness, the thicker the sheet material should be. First you need to eliminate other defects, cut off large protrusions with a plane, and fill the depressions with pieces of plywood or fiberboard of the required size in order to increase the area of support of the screed on the base. The plywood sheets laid and attached with self-tapping screws to the base are sanded on top.
Removing Slope
The slope of the concrete base is eliminated using a self-leveling, cement-sand or dry screed.
For wooden floors, there are methods that involve dismantling the floor covering or allowing you to do without it.
- A slight slope can be eliminated using a self-leveling mixture, but with a large slope this is unprofitable, the material consumption will be too high.
- When leveling the base with a cement-sand screed, you need to carefully check its horizontal level.
- If the ceiling height and floor level in adjacent rooms allow, you can install a raised floor on adjustable joists. The logs are mounted on racks with bolts, and sheets of plywood, CBPB, and OSB boards are laid on top. The floor level can be adjusted by changing the height of the bolts in the racks.
- A layer of plywood is rigidly attached to the base, and a second one is attached on top of it, so that the joints of the two layers do not coincide. Threaded bushings are installed between them, allowing you to adjust the height of the top layer.
- The wooden covering is dismantled and the height of the joists is leveled; instead of using adjustable stands, you can cut off the excess with a plane or stuff slats on top.
- On top of the base, at the point of maximum slope, a beam is attached to it, which will act as a log. If necessary, it is possible to install several more rows of logs of different thicknesses on top of the old base. The space between them is filled with mineral wool, and sheets of plywood or cement-bonded particle boards are attached on top.
Do-it-yourself elimination of floor unevenness video:
You may also find the following articles useful:
- Which laminate is better, with or without chamfer?
- How to lay laminate flooring on a wooden floor
- Tips for choosing laminate flooring for an apartment
- How to make sound insulation under laminate
- Pros and cons of cork backing
Laying laminate
Prepare everything you need
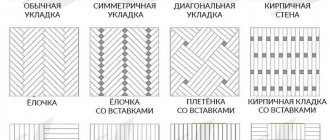
Before starting work, you need to decide on the layout of the laminate. You can lay the laminate parallel or perpendicular to the long side of the room based on the texture of the board and your personal preference. Recently, laying laminate flooring at an angle to the walls has become increasingly popular. This method of installation allows you to visually increase the space of the room, but at the same time 5-10% more waste is generated.
Recommendations for laying laminate flooring
If you are laying laminate flooring in the traditional way, then to calculate the required number of panels you need to add 10% to the area of the room; this value will take into account losses when cutting the panels on site. If laying will be done diagonally, then 20% should be added to the area of the room.
Important information
Try laying out several rows of laminate flooring without the locks getting caught, try different installation options and choose the one that suits your space best.
Remember that there should always be a gap of at least 10 mm between the laminate panels and the wall; it is necessary to compensate for the thermal expansion of the coating.
Before laying the first board, measure the length of the room with a tape measure, subtract 20 mm from it (the gap size) and divide by the width of the laminate panel. If you see that the planks in the last row should already be 50 mm, then you need to saw the panels of the first row lengthwise in order to reduce their width and thereby increase the width of the planks in the final row.
Important Note
Most often, laminate flooring begins to be laid from the far left corner of the room. Install 10 mm wide expansion wedges between the first row of planks and the walls and begin laying.
Lay the first row with the groove against the wall
Step 1
Place the first laminate panel in the far left corner of the room and install expansion wedges to keep the panel from pressing against the walls.
Laying the first row
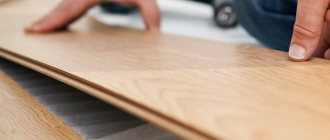
Step 2
Take the other panel and fit it to the first narrow side, making sure the panel locks snap securely into place. Continue fastening the panels with the narrow sides until the end of the row.
Maintain clearance
Step 3
The last plank in the row will most likely need to be sawed in place. Place it next to the second to last panel and mark the cut location. Saw off the excess panel using a jigsaw and finish the row.
The principle of trimming the outermost panel of a row
Laminate cutting
The length of the cut board should be less than 30 cm
Step 4
The joints of laminate planks in adjacent rows should be staggered with an offset of at least 40 cm. When you have laid a whole row and you have a part of the panel left of sufficient length, this remainder can be used as the first plank in a new row.
We start the second row with half a board. And there should be a lock on the right side
If there is a whole number of panels in a row or the segment of the last plank is shorter than 40 cm, then the next row must be started with a panel sawn in half.
Repeat steps 1-3 and assemble the second row of panels.
Sometimes a special paste is used for sealing
Step 5
The assembled new row is joined to the previous one simultaneously along its entire length. It is necessary to check whether all locks are tightly closed. Make sure there are no cracks or gaps anywhere.
Laying rows of laminate
Laying panels
When the entire area of the room is covered with laminate, you can remove the bursting wedges from the walls and begin installing skirting boards and thresholds.
If necessary, the boards of the last row are cut to width
Sawing the boards lengthwise. Don't cut the lock
The device necessary for inserting the comb of the last row into the lock of the penultimate one. Just insert the bracket and tap it with a hammer
But it’s better not to use a staple and a hammer, but to snap the last panel in place by hand
If the height difference is small
To compensate for differences in floor heights within 5 mm, it is permissible to take a simple route. A special laminate underlay is used. Can be used:
With an extreme difference of 5 mm, a special polyurethane substrate will help, specifically designed to compensate for such a difference in floor level.
The underlay is laid under the laminate, is not attached to the installation elements, and improves the overall quality of the flooring. However, one should not perceive such a remedy as a panacea. When the heights of the base differ, individual zones of the substrate will be subject to increased load, accelerating the destruction of the material. It is recommended to use more effective surface leveling techniques.
Preparatory work
Warming and leveling the floor at the same time
Installation of laminate does not begin immediately after its purchase, but after careful preparation of the work site.
- Taking measurements, determining the geometry of the base.
- Comparison of the obtained data with the permissible floor difference for laying laminate purchased for renovation.
- Identification of defective areas. Removing fragile fragments, areas affected by mold, sealing cracks and holes. Treatment of load-bearing structures and surfaces with an antiseptic.
- Perform alignment in accordance with the selected technology.
Further actions are carried out after checking the quality of the work performed and the complete drying of all solutions and liquids used.
Required tools for installation
In order to correctly lay the laminate you will need the following tools:
- Hacksaw with fine teeth. Sometimes a hacksaw is preferred, which can also be useful for sawing metal locks.
- Jigsaw, power saw.
- Electric drill with a set of regular and feather drills.
- A sharp knife for cutting the substrate.
- Ruler, tape measure, square, pencil.
- A regular hammer or one with a rubberized head.
- Tamping block.
- Set of wedges.
There are special sets of tools for laying the covering, which include all the most necessary devices. For example, clamps for laminate flooring are unlikely to be found by a home craftsman who has not previously dealt with laying the material.
The same can be said about the laminate bracket, with which it is convenient to seal the seams of panels located close to the walls. There are also special tools for cross-cutting panels, allowing you to quickly and very cleanly cut them at right angles, which is constantly required during installation.
It's nice to have a hand-held power saw, and even better, to be able to mount it on a base that turns it into a circular saw. There are also special tamping bars that do not crush the locking parts of the laminate when tamping panels for greater joint density.
NOTE!
The listed tools are the basic and most necessary set; each master can use additional tools or devices if they are able to somehow facilitate the work and improve the results.
Using a Leveling Underlay
Let’s make a reservation right away: a suitable base for a laminate is considered to be a surface whose height differences do not exceed 2 mm/l.m. These are acceptable curvature standards at which the internal stresses of the coating are insignificant and do not lead to breakage of the locks. Exceeding these figures requires adjustment.
Permissible floor unevenness for laying laminate
The easiest way to eliminate unevenness of the base is to use special substrates from:
- polyethylene foam;
- foamed polystyrene;
- extruded polystyrene foam;
- polyurethane;
- natural cork (option - from a mixture of cork and bitumen or rubber);
- wood fiber boards.
Any substrates existing on the market can compensate for some unevenness of the base. The quality of the result depends on their density and thickness. For example, a regular polyethylene foam backing with a thickness of 2 mm levels the surface of the base to 1 mm/m.p. Wood fiber substrates "ISOPLAAT" or "Quiet running" are more effective. “ISOPLAAT” slabs with a thickness of 4 mm are able to compensate for differences of up to 3 mm/l.m., and with a thickness of 12 mm – as much as 5 mm/l.m.! Wood-fiber substrates “Quiet Run” have approximately the same abilities.
Cork underlay perfectly compensates for uneven floors
How to properly prepare a concrete surface with your own hands?
Grinding
- if it is not possible to do this with a self-leveling mixture or by installing self-leveling floors;
- with differences and irregularities not exceeding 4 mm.
For small areas, you can use improvised tools; for large areas, you need to use a grinding machine. Coarse sandpaper is a great assistant in sanding surfaces. It is better to choose its grain size in the parameters 40, 60 or 80. For convenience, attach it to a plastic or wooden block.
Attention: After completing the work, it is important to thoroughly clean the floor from accumulated dust and construction debris. The clean base floor is covered with several layers of primer for strength and better adhesion to the cladding boards
Application of self-leveling mixtures
The use of mixtures is justified if the rough surface has a number of irregularities, large differences or bumps. In this case, no tools can correct the curvature of the surface better than a self-leveling mixture. The method is effective, but far from cheap.
The name of the mixture indicates that after it is poured, the solution is distributed independently. It will cover all the unevenness and make the surface smooth. There are three types of such mixtures on the shelves of construction stores:
- For rough leveling. Complex deformations and floor distortions (from 1 to 6 cm) are eliminated.
- For eliminating large cracks and potholes. Fill only in particularly difficult areas (for example, to compact a large hole and compare it with the base).
- Finishing mixture. Levels floors with differences of up to 5 mm. The layer is suitable for the final layer, on which finishing material can be applied.
Depending on the composition, self-leveling mixtures also come in several types:
- With polyurethane or epoxy resin. This is a binding material that gives strength to the surface and prevents the formation of dust on it. Suitable for filling surfaces with constant, uninterrupted loads.
- Cement based. Can be poured in a layer up to 5 cm.
- Gypsum mixtures. They fit perfectly, hold tightly, but are not suitable for work in rooms with high humidity.
Before pouring the mixture, you need to clean the floor, cover all the cracks and uneven spots with putty, and prime it. In a clean bucket, mix a bag of mixture and water in the amount specified in the instructions. Stir to the consistency of liquid sour cream, leave to set for 5 minutes. Then mix well again and start pouring.
Using tile adhesive
You can prepare the adhesive solution yourself, but it is easier to purchase it at a hardware store. The surface is thoroughly cleaned of accumulated dirt, not forgetting to clean all gaps and cracks, then primed and allowed to dry. All visible defects are filled with glue.
Tip For small defects, it is convenient to use an ordinary trowel to pour glue, but if the unevenness is significant, then the glue is poured directly from the bucket.
The rule is to stretch the glue along the surface so that the tool is at a slight angle. Properly prepared glue lays evenly, fills all unevenness, grabs roughness and makes the surface perfectly smooth. If the solution is poured correctly, then after 2-3 days after it has completely dried, no traces will be noticeable.
New screed
- It may be necessary to lay a new covering if the previous one has become unusable. To do this, it is completely dismantled and prepared for finishing. First, the entire surface is cleaned of dust and dirt, and then the level of the new floor is marked. The markings will help you measure the thickness of the screed.
- The line of the new floor level must be transferred to the walls around the perimeter of the room.
- A damper tape is attached along the intended line and a gap is created between the wall and the concrete layer.
- Then waterproofing work is carried out: polyethylene film is laid over the entire area. This is done with an overlap of 30 cm in width. And the joints are taped with tape.
- A reinforcing mesh is placed on the floor surface so that it is embedded in the thickness of the screed.
- After this, take the spacers and lift it from the floor surface by 1–2 mm.
- The prepared cement mortar is laid out along the length of the room in strips, with a step distance of about 1 meter. There should be a distance of 1.5 meters from the wall. This is necessary to secure the pendulum slats.
- The screed is performed after the beacons are laid out and hardened. Pour the cement mixture over the entire surface and level it. Allow it to dry for 5-7 days, or better yet, 24 hours, and you can begin laying down the final laminate finish.