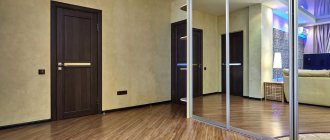
Recently, laminated coatings have been used not only as floor finishing, but also as wall cladding. At the same time, its main advantages are preserved: aesthetics, practicality, durability. Let's look at all the ways in which laminate flooring is installed on a wall, as well as some of the nuances of choosing it.
Features of laminate wall finishing
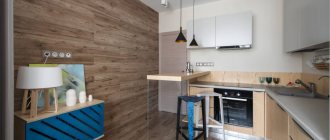
Laminate, being a floor covering, has higher performance characteristics than conventional wall finishing materials. This finishing can be used in living quarters, in the hallway, in the kitchen and on the glazed loggia.
The advantages of the material include the following:
- Strength, hardness, wear resistance.
- Moisture resistance.
- Unpretentious care.
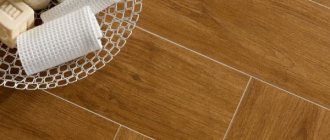
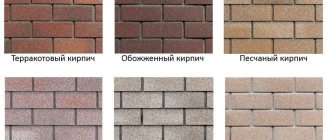
- A huge range of colors and textures, from familiar natural shades to rare woods, imitations of stone, metal, leather and other materials.
- Simple and quick installation.
- Affordable price.
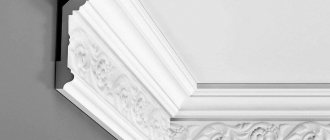
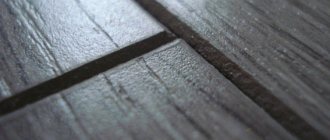
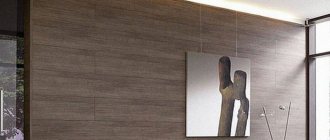
One of the main features of laminate is the expressiveness of its texture. Some varieties are easy to confuse with natural wood, not only visually, but also to the touch.
Important: even before purchasing the material, you need to decide on the method of fixing it on the wall. The direction of the lamellas determines the perception of the area, height and configuration of the room.
Methods for attaching laminate to the wall
Wall finishing with laminate is carried out using a slightly different technology, unlike that used when laying laminate on the floor, this is due to the fact that traditional installation involves the use of a locking system provided by the design of each lamella. Provided the plane is horizontal, the locks securely interlock with each other and the lamellas form a monolithic, durable coating.
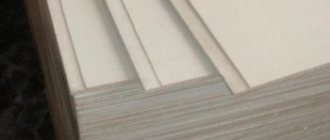
Dimensions of laminate for installation on a wall However, when installed on a wall in this way, the locking system cannot hold the coating in a vertical plane, since it was not originally designed for this. Some lock designs even create inconvenience when attaching panels to the wall. The lamellas are fixed using clamps, which are used when installing lining, staples, screws or nails, as well as glue.
When choosing how the laminate will be fixed to the wall, you should take into account the material of the vertical structure and the lamellas themselves.
Method 1: fastening with clamps
A clamp is a small metal bracket, which with a curved protrusion fits into the lamella lock, and on the flat part has holes for fasteners (screws, nails). Fastening occurs along the lathing or directly to the wall.
Using clamps, installing laminate flooring on a wall is quick. The only condition is that the wall material must allow the use of fasteners. The size of the clamp is selected based on the thickness of the locking part of the laminate. To fix the clamp, you can also use a construction stapler - special holes for staples are provided by the design of the product.
Method 2: fastening with screws, nails, staples
This method of fixation involves fixing the lamellas without the use of auxiliary parts. When screwed in, the self-tapping screw passes directly through the ridge of the lamella lock. The fastening pitch is 300 – 400 mm.
Fastening the laminate with a bracket
Important: this method is “traumatic” for the laminate and can cause the detachment of part of the locking system.
Therefore, you should do this: first, in the place of fastening to the self-tapping screw, use a thin drill (with a diameter smaller than the self-tapping screw) to prepare a hole. Double work makes this method labor-intensive and time-consuming.
Also, the lamellas are fixed through the ridge with nails or staples, having previously coated the back side of the panels with adhesive.
Method 3: wet fastening
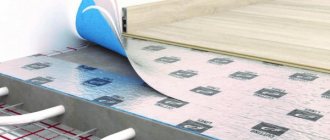
Laying laminate flooring on a wall using glue is the easiest and fastest way. But there is one condition: the wall must be perfectly flat and smooth. The difference per 1 linear meter should not exceed 0.3 cm. Therefore, if the wall does not meet the specified requirements, first perform its leveling and, if necessary, local repairs.
When using glue, it is important to carefully study the instructions. Some types of compounds must be weathered before the panel is finally glued to the wall. If gluing is carried out immediately after applying the composition, then after attaching three rows, the work is stopped so that the glue dries and the higher laid rows do not provoke displacement of the lower ones.
liquid nails for laminate
Requirements for the surface to be finished
Using laminate as a finishing element for walls is accompanied by some difficulties. You need to know how to properly prepare the rough surface that is being coated.
What to do with concrete walls
In most cases, concrete walls are quite smooth, so they only need to be cleaned of dust and small dirt with a rag or dry brush. Next, apply a deep penetration primer to improve the adhesion of the adhesive and the base. A roller or wide brush is suitable for spreading the mixture. Once the primer has dried (this takes several days), you can attach the facing material with liquid nails or glue.
It is enough to clean concrete walls from dust and small contaminants.
How to level walls before work
If defects in a horizontal coating can be eliminated using a substrate, then in the case of walls there is no such possibility. It is customary to spread the adhesive mixture in a thin layer, since it is expensive, and it will not be possible to mask unevenness in this way.
To level the walls, it is better to use starting putty. You will need to buy a high-quality mixture with a high degree of adhesion.
After puttying, you should wait some time (1-2 days) for the composition to dry completely. Next, you can coat the walls with a primer to improve adhesion to the glue. This stage cannot be ignored, since laminate is a heavy material and without quality preparation of the base it will not be able to stay on a vertical base for a long time.
Leveling walls under laminate using lathing
If the wall is smooth or has minor, permissible errors, then leveling is done with putty or a thin layer of plaster. When the wall is curved, this method is not suitable due to labor intensity and high consumption of mortar. It is easier to build a sheathing from timber, metal profiles or slats, and cover the frame with plywood, OSB or gypsum board.
The lathing manufacturing process is as follows:
- The work begins with marking. The distance between the guides should be 400 - 450 mm.
- Holes for fasteners are pre-drilled in the guides.
- The planks are applied to the marking lines and the attachment points are marked. At these points, drill a hole for the dowels.
- It is important to ensure that the guides form a flat plane. Under some of them, scraps of cardboard or plywood are placed.
- Finally, check the position of the planks in the same plane with a level and a rule horizontally at the bottom, in the center and at the top, as well as diagonally. After this, the guides are finally fixed.
Installation methods - horizontal and vertical
There are several ways to attach laminate flooring to the wall:
- horizontally;
- vertically;
- diagonally;
- herringbone
Laying methods can be combined. When laying vertically, the slats are placed from wall to wall.
With the horizontal method - from floor to ceiling, it is important to leave a gap between the canvas, ceiling and floor, which will be covered with a plinth. Also, horizontal laying is carried out sequentially from bottom to top, and to prevent the panels from sliding (using the glue method), a support is formed from below.
Important: when choosing how to attach laminate to the wall, you should take into account the visual effect that is created. Horizontally or diagonally laid lamellas visually expand the space, vertical ones increase the height of the ceiling. The desired result can be obtained with the correct selection of the shade and texture of the laminate - its pattern and direction of the “fibers” also affect the visual perception of the coating
One more nuance. With the frame installation method, it is initially necessary to take into account the direction of fixation of the lamellas: the grille should be positioned horizontally with a vertical installation method, and vertically with a horizontal method.
Recommendations for purchasing
You can buy beautiful and not very expensive material, but you should not forget about many circumstances. For example, a child will paint a wall and it will be quite difficult to clean it. There may be many other options that are worth thinking about initially.
What to consider when purchasing:
- When there are animals in the house that can scratch the wall, you should give preference to not very expensive models.
- Externally, the color should match other interior items. For a small room, it is better to choose light panels; very bright designs will not go into such a room.
- When choosing an adhesive laminate, you need to remember that the walls must be very smooth, otherwise the panels simply will not stay on it. When the differences are very large, you can make lathing rather than level the surfaces.
Return to content
Horizontal installation of laminate on a wall with clamps: step-by-step process
The principle of laying on clamps shown below demonstrates the simplicity and speed of the process. This method can be used for both vertical and horizontal layouts.
- Markings for guides are applied to the wall. You can use a metal profile. The distance between the marking lines should be 50 cm.
- A hole is made in the wall and in the guide. A plastic dowel is driven into the wall. Apply the guide and check the level for its clear vertical position.
- The guides are attached to the wall with self-tapping screws.
- When laying laminate on a wall, the same requirements are observed as for floor installation. It is imperative to leave a gap between the floor and the first plank, as well as between the ceiling and the last plank. This will provide free space for thermal expansion of the material.
- By attaching the lamella to the guide, mark the center.
- A latch clamp is fixed on the first panel
- By pressing lightly, the panel is snapped to the guide.
- A clamp is placed on top of the panel ridge. It has fixing holes through which it can be secured when using wooden sheathing.
- The next panel is inserted into the lock. In this way the covering is laid up to the ceiling. The clamps are fixed using self-tapping screws or staples.
Tool for work
To cover walls with laminate, you will need some tools used for laying floors. There is no point in using them on the ceiling, because... everything is done there by weight. Click laminate strips can be precisely adjusted when laying using just a tool. It will not be possible to move them with your hands - the comb sits very tightly in the groove.
- Boss. Using a hammer, the strips are tapped through the boss as they are laid.
- Rule (emphasis on “and”), or hook. It is sometimes incorrectly called a clamp. The rule is to tighten the last strips, either by hand or by hitting the “flag” with a hammer.
- Spacer wedges maintain the indentation along the perimeter. You need at least two sets of wedges to work. Wedges are mainly used for flooring.
Glue mounting
When attaching with glue, it is important to have a perfectly flat wall. To do this, you can mount a frame and cover it with plywood sheets or plasterboard. This option can be used when finishing an entire wall. You can lay insulation inside or install electrical wiring to make the decorative wall also functional. If a large TV is supposed to be placed on such a wall, then the mounting for the bracket is mounted at the stage of assembling the frame. The following instructions show how to mount the covering, securing the panels with glue. Work begins by fixing the corner into which the first row will be inserted on the floor.
- The lamella of the first row is trimmed. It will be located at the bottom, so its size is adjusted so that the upper slats form a correct, symmetrical layout and do not require trimming from above.
- Glue is applied to the corner into which the panels of the first row will be inserted.
- Glue is also applied to the panel itself.
- The planks of the first row are inserted into the corner and pressed. Check the joints. Fixed with staples through the ridge
- Gently tap so that the lock latches completely.
- The panels of the next row are also greased with glue, pressed and fixed to the brackets through the ridge. The edge of the top strip is masked with a plinth.