There is an opinion that laying laminate can only be done horizontally or vertically. This is a fundamentally wrong approach - there are other installation methods that allow you to add variety to the design of the room and achieve interesting visual effects. One of these methods is diagonal laying of laminate flooring.
Diagonal laying of laminate
Despite the fact that installing a laminate floor is a technology that requires compliance with technical recommendations, it is quite possible to do it yourself. Let's take a closer look at how laminate flooring can be laid diagonally, what are the advantages and disadvantages of this process, and also compare different methods of laying flooring.
It's no secret that today laminate flooring is at the peak of popularity, so for most people there is a question of installation - and some prefer to do the work themselves, customizing the finished result to their needs and requests, as well as making quite significant savings.
Most often, those who do not have experience in laying floors do it in the usual direct way and lay out the panels in a straight line, along the walls in the room.
Installing laminate flooring is easy to do manually, following the recommendations
This solution is good only for those rooms that have the correct shape - if there are features such as an unconventional shape or rounded walls, the diagonal laying method will help.
While the standard technique places laminate panels so that they are parallel to one wall and perpendicular to the other, otherwise they are laid diagonally at an angle of about 45 degrees. As a rule, it is this angle that allows you to achieve optimal results.
Interior use
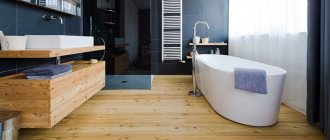
Every year, chamfered laminate flooring becomes more popular, which encourages manufacturers to create various collections. There is a gray beveled laminate; wenge laminate, which has already become traditional; Laminate can also be vinyl or glossy. The domestic building materials market offers a large selection of lamellas with a surface that imitates manual scraping. This laminate is used in medieval style interiors.
The choice of laminate flooring depends on the characteristics of the place where the flooring is intended to be used. Wenge laminate is ideal for a bright room. In a darker room, bleached oak laminate, which has reflective properties, will look great. It is undesirable to use a glossy surface in the hallway, because frequent contact with sand and dirt can ruin it.
Before purchasing, you should think about the installation method, as it affects how many panels are needed. For example, for complex figured layouts you should not use single-strip collections.
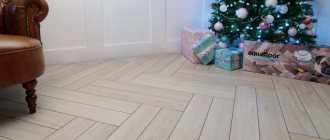
If the room is long and narrow, then its proportions can be easily corrected by using straight laying of the product with a chamfer, laid perpendicular to the long wall. You can lay laminate flooring diagonally in rooms with a non-standard shape, and this method also emphasizes zoning. Laminate flooring is laid in a herringbone pattern or in squares to create the illusion of parquet, but here you need to use special panels with small strips and special locks for adhesion at right angles.
Laminate is one of the most popular floor coverings today. Manufacturers produce many varieties of these products, among which are chamfered lamellas. Technically, this is a small cut from the top end of the board, allowing the formation of a depression after installation. To obtain a high-quality surface, the installation of these products must be carried out according to certain rules.
Advantages and disadvantages of the method
One of the main advantages that I would like to highlight is the interesting and original appearance of the room, a good design solution that visually adds volume to the space while maintaining the usual length and width. Coverings laid out in this way look neat in narrow rooms that are very elongated in length. If the room has a hexagon shape, has niches or curves, then with the direct installation method most of the flaws will be noticeable immediately.
The diagonal method of laying laminate allows you to give an unusual look to the room
List of advantages:
- hiding wall imperfections - with a large number of corners or the absence of parallel walls, any imperfections will be much less noticeable;
- expanding the space visually in small rooms (especially if there is not a lot of furniture in the room);
- the coating looks much more natural;
- if the windows are located asymmetrically, the light enters the room more effectively;
- for standard-shaped rooms, diagonal laying will give an additional external effect if you choose several coating options that match each other in color;
Diagonal laying allows you to hide flaws such as uneven walls, asymmetry of windows
- the effect of the floor transition between two adjacent rooms is also much less noticeable;
- Particular effectiveness can be achieved with a skillful combination of direct and diagonal methods.
Unfortunately, there are also disadvantages:
- first of all, the amount of unspent material and scraps is much higher than with the standard method - overconsumption is approximately ¼ of the total amount of materials;
- the process of drawing up a plan is quite labor-intensive and requires much more time for counting and drawing up drawings;
If you lay the laminate diagonally, you will have to purchase more material than would be needed with the “standard” method
- can cause difficulties, especially when installed in a room where the walls are completely unsymmetrical;
- you need to carefully monitor the humidity of the room where the work is being carried out - not all types of laminate flooring can withstand serious changes in humidity.
In general, with a competent approach, this method has many more advantages than disadvantages.
laminate
Advantages of the method
It is customary to lay flooring material parallel to the rays emanating from the main light source. But in the modern arrangement of houses, due to the lack of territory, people are often deprived of a constant source of outdoor lighting.
Diagonal laying of laminate transforms the room, adding zest to the interior.
Laying laminate diagonally
Advantages:
- Laying diagonally will help to comply with the generally accepted principle that the sun's rays should be parallel to the seams.
- Geometric errors in the room will become almost invisible.
- Any apartment becomes visually wider.
Laying laminate flooring diagonally has pros and cons. There are a number of disadvantages of this technique:
- It is absolutely impossible to cope with the work alone; an assistant is needed;
- high material consumption due to incompletely used pieces of panels;
- The technique of laying laminate flooring at an angle is not known to all craftsmen.
This forming method consumes a large amount of material, so masonry is rarely used in budget repairs.
How to prepare
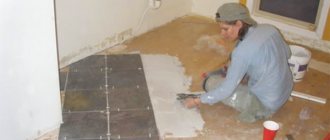
Every careful and careful owner should know that the foundation is extremely important when performing preparatory work. Having analyzed what material the base is made of, it will be possible to choose the right type of preparatory work. Usually we are talking about two different types of lower base.
Concrete
Usually we are talking about a concrete base if repairs are carried out in an apartment building with a large number of floors. In this case, preparation will begin with pouring a screed of cement and concrete - this is simple and accessible to everyone. There will be no need to attract external forces and employees.
It is necessary to properly prepare the base and, if necessary, fill the screed
Here's what you should pay attention to if you have a concrete base:
- the screed will dry for at least 3 weeks;
- to cope with drying faster, add plasticizers to the prepared solution;
- be sure to make sure that the screed is neat, without cracks or depressions - such parts can cause significant damage and cause problems in the future. To avoid this, it’s easier to simply replace the screed with a new one.
Remember that the screed dries completely only after 3 weeks, so it will not be possible to lay the laminate right away
If you take into account all these nuances, the result will be of higher quality and faster.
floor screed
Wood base
Of course, wood is a much less durable and stable material, despite the abundance of all kinds of impregnations and compositions. That is why, before laying the laminate, try to perform a few simple steps that will allow the floors to last longer:
- first of all, get rid of all floor elements that are affected by rot or mold - this kind of bacteria tends to multiply;
- if there are elements that do not hold well, be sure to additionally strengthen them with nails or self-tapping screws - this will allow the floors to last longer and prevent unsightly creaking;
- if you notice any major deformation, then it is best to re-lay the wooden covering of the base completely, rather than waste energy on a tedious and lengthy restoration;
If you are laying laminate flooring on a wooden base, you need to carefully inspect the subfloor for deformations and weak fixation of floor elements
- If the working surface becomes uneven, you can use sheets of chipboard or plywood.
Correct implementation of all prescribed recommendations will help extend the life of wooden flooring by almost a quarter of a century!
Cons and pros
Advantages of diagonal laying of laminate
The classic and frequently encountered option for installing slats on a wooden floor covering is to place the joints along parallel lines relative to the main source of daylight - the window opening.
Of course, each flooring has pros and cons. What are the advantages of diagonal laminate?
- It is better to lay the laminate diagonally when the window is located slightly to the left or right, and not in the center of the wall. Thus, the principle of parallel lighting will fully correspond to the diagonal placement of the lamellas.
- It is appropriate to use a diagonal option for laying laminate flooring if the walls of the room have noticeable defects.
- Designers use diagonal placement of laminate flooring, because it creates a visual effect of expanding the room, thereby increasing the square footage of a cramped living space.
Main disadvantages
There are also disadvantages of diagonal laminate. The most important thing is that when laying diagonally, the consumption of laminate is greater, so the material must be purchased in larger quantities than usual. Large expenses are due to the fact that where the ends of the panels are connected to the wall structures, they need to be cut at the appropriate angle and adjusted to different values each time. There is a lot of excess and scraps that remain after cutting and installing the lamellas, but, unfortunately, they are completely useless and cannot be used.
Experienced specialists have learned to determine the required amount of wood coating in such a way that only 5% of the total purchased material is leftover. If you are a beginner and for the first time you are faced with the need to lay laminate flooring diagonally, you should put a large number of lamellas in reserve. Finishers recommend focusing on a percentage value of 7% or, in extreme cases, a margin of 0.1 share of the entire perimeter of the room.
Consider the higher consumption of laminate
So, for convenience, we suggest using a formula that will help make an accurate calculation: C*1.1, where C is the area of the floor structure that is planned to be treated with laminate. If you then divide the resulting value by the perimeter of the lamellas packed in one package, you will get the number of sets, the contents of which are enough to cover the room with wooden material.
Once you have decided on the required quantity, go shopping to the store and purchase the entire set of panels at one time. Beginners often make an unforgivable mistake - they select only part of the lamellas with the hope of later purchasing the rest of the product, but then they are faced with the problem of the lack of an identical type of wood, painted in the required shade, especially if it concerns a rare manufacturer.
List of tools
First of all, we will need a saw with fine teeth; a special machine, jigsaw or circular saw will also work well. However, remember that hacksaws for working with metal and hand saws will not work.
Additionally, purchase a hammer, measuring tape, bars and wedges, as well as pencils and rulers for taking measurements.
You need to prepare the necessary materials in advance
How much laminate will it take?
It is very simple to accurately calculate the number of boards required for work using the classical method - just find out the ratio of the total area of the entire room and the area of a single board.
In this case, large panels are first laid out and finally trimmed to the desired size, then, in the second row, you will need to lay out whole panels, in addition to the last one - it is carefully trimmed until the desired size is achieved. The same is done with the third and any subsequent step.
In general, the installation principle will practically not differ from that of direct installation - the only difference is that the trimmings will be triangular, and initially the amount of material must be prepared in greater quantities. So, the amount is calculated from the area of the room, but it will be necessary to add approximately 15 percent of the amount of material for additional waste. For particularly experienced installers, this number can be reduced to 5 percent; average values will be around 10 percent.
Interesting! This amount of reserve will be required when laying at an angle of 45 degrees; if the angle increases, then there will be more waste. It is better not to deviate from gold standards.
How much laminate is needed for laying diagonally
Preparation of material and tools, work planning
List of tools
The main tool when laying laminate flooring is a cutting tool. It is recommended to use a jigsaw or a circular saw: with their help you can make the work easier and faster. In addition to the main tool, you also need:
- hammer or mallet;
- roulette;
- square;
- block for padding lamellas;
- wedges for setting gaps;
- pencil and ruler for measuring short pieces of material.
It is not recommended to cut lamellas with a hacksaw - your hand gets tired quickly, and installation turns into torture.
Large volumes of work require the use of power tools
Which laying angle to choose
So that the scraps can be placed in other places, and their quantity is minimal, it is better to lay the laminate in the room at an angle of 45 degrees (a bisector of a right angle). An angle of 30-40 degrees is also acceptable, but not less than 30 - the coating will not look natural and beautiful.
How to determine the amount of laminate when laying diagonally
The calculation is simple. You just need to look at the layout of the panels.
Diagonal arrangement of lamellas
The picture shows that you need to cut two triangular pieces on each side. Therefore, laminate must be purchased taking into account the increase in footage by the total area of these scraps - there are two of them in each row on both sides.
If you place the lamellas at 45 degrees, moving diagonally from point A to point C, you get trims, the sum of the lengths of which is equal to the width of the panels. From corner C, the slats are cut at the same angle and direction required for the leftmost panels. That is, during such an assembly nothing is thrown away, all the pieces are needed. This will continue until point B. After reaching it, trimmings appear again, a pair of which forms a square with a side equal to the width of the lamella.
Thus, the total area of the panels is equal to the area of the room added to the total area of the remaining squares, and it is defined as the product of the square of the width of one board and the number of rows with trimmings.
Now you need to determine the number of rows as the sum of X1 and X2.
Scheme for calculating the number of floorboards
To determine the desired value, you need to remember long-forgotten geometry. Consider equilateral right triangles BDF and CAE:
- the sum of X1 and X2 is equal to the diagonal of the square with side AC;
- or X1+X2=AC*1.42 (1.42 here is the square root of the number 2);
- the number of rows is equal to the sum of X1 and X2 divided by the width of the lamella;
- or the number of rows is equal to AC times 1.42 divided by the width of the slats.
Remember that the total area of all the squares is equal to twice the width of the panel multiplied by the number of rows. That is, the total area of our squares will be equal to the product of the width of the lamella multiplied by AC and 1.42.
Let's make a calculation for a room 4x6 meters in which it is planned to lay panels 0.1 m wide and 1.0 m long.
Number of slats: (4*6)+(0.1*4*1.42)/(1*0.1)=245.68, that is, 246 floorboards.
By analogy, a formula can be entered to determine the amount of laminate laid not at 45 degrees, but at any other angle.
What rules should you follow?
It is better to learn these recommendations before you begin the actual installation - this way you will achieve the best result.
- First of all, let the laminate sit at room temperature - it should adjust to the microclimate of the room for about two days.
- Then carry out an inspection after unpacking the material - it must be intact and not damaged. All boards with facial defects must be discarded; only those with minor defects on the rear will be suitable.
- The air temperature in the room where installation takes place should be about 20-25 degrees, the maximum range can be from 13 to 30 degrees, but these conditions will already be quite extreme.
Laying laminate flooring should be done in a room where the temperature is at least 13 degrees (optimally 20)
- The main thing is humidity! It should not be too high (more than 70%) or low (less than 45%). Also keep an eye on the surface roughness indicator; it can be no more than 3 millimeters per square meter.
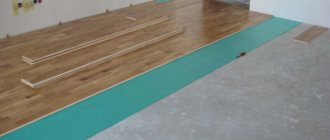
- The backing is required.
Its material depends entirely on your desire and possibility. The most budget option is a regular polyethylene film; for a high-quality coating, you should not skimp and purchase a good cork backing. underlay for laminate - Be sure to factor in the 10-15 percent laminate waste difference.
- Take care in advance of a diagram that will help you lay out the laminate correctly and avoid additional consumption of materials.
Be sure to lay a backing under the laminate - it will help extend its “life” and soundproof the floor
A little trick from the owner: the pieces of laminate that remain from the first laid row can be an excellent start to the next one.
It is best to stick to an angle of up to 45 degrees (about 30 is acceptable). This installation method is good for rooms with a width of up to 6 and a length of up to 8 meters.
We recommend that you first familiarize yourself with interesting design projects in order to develop your own beautiful and neat option. Show your imagination and rely on other people’s experience.
It is better to lay the laminate diagonally at an angle of about 45 degrees
How to lay parquet in opposite directions | Home Guides
Hardwood floors can be installed in a variety of patterns and plank sizes, but the general idea is that they use a tongue and groove system to hold the entire floor together. Whether the floor is nailed or installed in a floating format, slotted installation occurs in some form. This applies to floors with straight laying, as well as floors laid diagonally and floors with opposite directions.
L-shaped rooms
In traditional square/rectangular rooms, the wood is installed along the length of the longest wall, but in L-shaped rooms this installation will have a 45 degree rotation. Bringing the edges of the pieces together at a 45-degree angle with a power miter saw as they turn at the L corner allows the installation to continue around the other leg of the room. To help guide you, draw a chalk line from the inside corner of the L corner on one side of the room to the outside corner of the opposite L corner. Continue with the mortise-and-mortise installation. you simply bend the rig around a corner to move in the opposite direction. Some installers also choose to use biscuits and splines (custom cut tongue pieces) to further strengthen this miter joint.
Transitions from corridor to door
Transitions from room to hallway or room to room are not always saved behind the door. Most people choose a wood threshold that is installed independently of the floor so that each individual pattern can move on its own. This allows the hardwood to be laid in different directions that contrast with each other while maintaining the integrity of each individual room. The transition threshold can be any size piece of hardwood cut to size, or you can even use faux tile and natural stone thresholds. Just be sure to leave at least 1/8 inch between the edge of the installation and the threshold separating the patterns to allow for expansion and oscillating movement.
Centered installations
Most hardwood flooring installations start along the length of a given wall and work row by row from this starting point, with the tongue and groove cut at the first row and running towards the wall. A full row is installed before moving on to the next row, cutting the tongues and tongues together as you go. grooves, gluing them together and nailing them when necessary for non-buoyant installations. However, some installations need to be placed in the center of the room, such as a diagonal installation, in which case the installation must begin from the middle of the floor. Half the floor is set up, and then you return to the center. However, there is an exposed tongue that needs to be dealt with. A special transition strip that mirrors the grooved section of the wood floor is installed along the length of that center row, essentially reversing the tongue and groove alignment so that you can walk across the other half of the floor.
Sample Borders and Insets
Border patterns and insets are easier to establish if you block them in advance. This will require some initial markings using chalk lines and a framing square/laser square so that a few scraps of wood can then be attached to "block" the patterns and insets. The main rig is then installed with the edges fitting snugly against the scrap which is installed lengthwise chalk lines representing the border. After this, border patterns and inserts can be installed along the edge of the installation. Alternatively, you can install the border patterns/inserts first and then work from there, but border patterns and inserts usually require detailed work and additional cuts, so it's best to leave them for last.
In what cases is laminate not installed?
Laminate will not always be a good option for flooring. There are conditions that make this type of coverage impossible or impose certain restrictions on use.
First of all, you should not lay a laminate flooring with glue (or any similar method) - not only does it look terrible, it also reduces the durability of use. Shrinkage of the building or temperature changes will cause the coating to simply move.
Interesting! Laminate is not a suitable option for those rooms where the natural air humidity is higher (this applies to saunas or baths, showers, open spaces, balconies and terraces).
If the humidity in the room is high, it is better to avoid using laminate flooring.
If the room requires high traffic or the constant presence of a large number of people, then it is better to give preference to another material that is more resistant to wear.
Laying technology: making the right choice
Remember that choosing the technology by which installation will be performed is a very important task that cannot be neglected. Here are the basic techniques.
| Method | Description |
| Adhesive installation | With it, laminate boards are secured using adhesive mixtures specially selected at the end. This method is good because it allows for good sealing of the joint areas, good waterproofing, lack of deformation and resistance to changes in temperature conditions. This installation is quite easy and simple. However, the disadvantages include the impossibility of replacing individual elements if they are damaged - only through complete dismantling. |
| Castle Click | This method is considered one of the most popular - the laminate is installed quite easily, the method is accessible even to beginners, and the boards using this system are attached at an angle, which allows you to quickly and conveniently dismantle the coating partially if damage or other deformation of the board occurs. |
| Castle Lock | The Lock method is similar to the “Click” method, however, the parts will be attached precisely in the horizontal plane - for example, when installing boards between walls or making a second row along the length, if the distance between the rows of boards is small. The boards are knocked down using a block and a hammer between two rows. All rows will subsequently be mounted in the same way, without changes. |
There are several ways to install laminate flooring
Installation features
It would be a good idea to pay special attention to how best to design the places where the panels come into contact with the heating pipes.
The first method is to drill a hole in the panel that will be about one and a half centimeters larger than the diameter of the pipe. This gap can be made on two joint boards by drilling a separate semicircle on each. Or, if you want, drill a hole in the board, and after that, divide the laminate sheet into two halves.
You need to drill a hole in the laminate board for the heating pipe
To seal the area where the panel meets cutouts and central heating pipes (or other elements that cannot be removed), use sealants.
As you can see, everything is very simple - laying a laminate flooring in a diagonal manner does not present much difficulty; it only requires accuracy and precision in drawing up estimates and counting the material. It is better not to start this method without planning. As a result, you will have a neat and beautiful floor with an unusual coating effect that you were able to create with your own hands.
The room looks more spacious, there is more visually defined space - this will be a huge advantage for apartments with small living space.
Laying laminate diagonally allows you to visually expand the room
During installation, please note that difficulties may arise when purchasing products from brands such as Cronotex, Berry Flour, Tarkett, Vitex and Pergo. The fact is that each of these companies has a number of developments that can affect how the panels move, what type of lock and its size. If you find that you have difficulty connecting blocks, then create rows with alternating short and long locks.
Interesting! The most accurate way to cut the material is with an electric jigsaw from the reverse side - this way you will protect the surface from chipping.
Laying laminate over a cement screed is usually done no earlier than a week after application. In winter, it is better to wait three weeks or even a month. To level wooden floors, use OSB boards, isolon or underlay.
It is better to cut laminate using a jigsaw
jigsaw
Bypassing internal communications
Scheme of bypassing internal communications
In places adjacent to internal communications pipelines, the floor is laid with preliminary drilling of holes in the board.
The diameter of one hole is taken equal to the diameter of the pipe plus a gap of 5–10 mm. Then the board is divided into two parts with a cut in the center of the drilled holes. Before laying, the resulting parts are glued together with wood glue. The resulting gap, for aesthetics, is sealed with special rubber or plastic liners.
At the junction with the door frame, the platbands are cut with a hacksaw to the thickness of the panel being laid. To ensure the required structural rigidity, the floor is laid with preliminary gluing of the joints of adjacent lamellas with wood glue.
The last row is laid using special levers, with the help of which the chamfered panels fit tightly to the previous row and to the wall.
After laying the covering, install the wall mountings of the skirting boards along the perimeter of the room with a distance of 40–50 cm relative to each other. Upon completion of installation of the baseboards and preliminary wet cleaning, the laminate flooring is ready for use.
General Tips
Under no circumstances should you lay laminate flooring all over the entire apartment, especially if the flooring is installed in several rooms at once, in the hallway and in the kitchen. Try to ensure that each room has its own individual direction for laying the panels.
If parquet is used as a base, be sure to repair it so that it does not creak.
If you are still not sure that you will be able to lay laminate flooring yourself, it is better not to risk it and enlist the help of specialists. The overpayment for high-quality installation will more than pay for itself with long-term operation and no need for repair work.
Remember that laminate flooring is sensitive to water, so do not use water-based adhesives. Also avoid sand or fine gravel, which could scratch the finish. Once installation is complete, wipe the floor with a microfiber cloth.
You cannot use water-based glue, as most of the laminate does not “like” water
Laminate floors look noble, neat, they are durable and of high quality. Be sure to take into account the temperature and humidity in the room.
When laying, sort the scraps and try to use them as much as possible during installation.
Small-sized panels are well suited for diagonal laying.
Choosing a floor covering
Choosing a laminate with a chamfer
Most experts in the field of construction and interior design prefer to choose laminate whose panels have a chamfer. However, proponents of using the classical approach refer to the following imaginary disadvantages of such a chamfered laminate.
The chamfer will collect hard-to-clean dust and dirt. In reality, the situation is the opposite - the chamfer allows you to easily remove dust and dirt using a long-bristled brush or vacuum cleaner. The chamfer is most susceptible to swelling and destruction due to possible ingress of moisture.
When producing boards with beveled edges, special attention is paid to treating the chamfers with water-repellent and waterproofing compounds. Therefore, a high-quality lamella board does not have this drawback.
Panel board with artificial seams does not have much visual impact. This opinion is wrong. To visually increase the size of the room, the laminate board is mounted in the transverse direction relative to the long side of the room. And, conversely, to artificially narrow the space, the board is laid along the wall.
Diagonally laid laminate: interior solutions
Try to experiment: for example, panels of colors that contrast with each other or just shades that are slightly different look good - this gives the flooring expressiveness.
You can use several types of laminate at once, alternating dies with each other - it looks unusual and stylish
There should be a slight difference in color from the walls - this is a general rule for room design. Try not to overload the room with dark or light colors in the interior.
If you are using light-colored laminate, it is best to opt for panels with a noticeably expressed pattern - this option is considered the most advantageous.
How to choose laminate flooring for your home
Light laminate laid diagonally helps make the room visually more spacious.
This coating also looks good in small spaces.
Diagonally laid laminate flooring looks great in the bedroom
Designers recommend choosing light-colored coatings if you want to make the room more comfortable.
You can lay laminate flooring diagonally in the kitchen - this is especially “useful” for small spaces
For rooms decorated in a modern style, laying laminate flooring diagonally is ideal.
Of course, dark laminate can also be laid diagonally - it will look good in offices and bedrooms
Colors
The design of laminate with a chamfer is not so wide, since this style is more suitable “for a natural board.” Therefore, manufacturers rarely produce boards “under ceramic tiles”.
Products with a dark chamfer, which ages the lamellas, are considered universal. Light laminate with a chamfer also looks original. As for colors, you can find many styles on the market, including:
- All-white laminate, decorated with unique patterns or textures.
- Bleached oak. Perfect for modern interiors, filling them with cleanliness and freshness.
- Ash. The texture of this wood is compared to noble types of wood. Therefore, this laminate will suit any classic style.
Let's sum it up
In the article, we outlined the basic rules for installing and laying laminate flooring made in a diagonal manner. Despite the fact that this is a rather labor-intensive and sometimes more complex process than installation using the traditional direct method, the result is usually much more advantageous and creates room for creativity and imagination. The room will look much more beautiful and original, often the appearance of the room is truly transformed. Use different colors and feel free to find your own solutions.
We examined the main advantages and disadvantages of this method, as well as the features of its self-installation. If you want your flooring to look good and harmonious, then we recommend that you choose this method.
Feel free to experiment, learn new things and get acquainted with interesting design solutions - and good luck in transforming your home!