Despite the fact that the complexity of laying laminate flooring on a concrete floor is accessible even to non-professional builders, it has several important points, failure to comply with which can cause very unpleasant consequences. Eliminating problems is much more difficult than preventing them from occurring.
Laying laminate flooring on a concrete floor
Installation stages
The concrete base is considered one of the most optimal options of all possible and fully meets the main requirements of coating manufacturers. But to obtain the expected positive effect, several conditions must be met.
Concrete floor quality
Such floors can be made of cement-sand mortar, poured concrete composition or pre-fabricated reinforced concrete slabs. The materials themselves do not differ much; they are all made on a cement basis. Similar requirements are put forward for the surface condition.
- Absolute horizontality. Pouring or installation of finished slabs should only be done level. You can use an ordinary bubble or modern laser tool.
- The difference in height is no more than two millimeters per linear meter. If the deviations exceed the recommended tolerance ranges, then preliminary alignment is required.
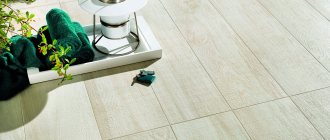
The smooth surface of a properly poured concrete floor allows you to easily lay any finishing coating
Important. It is strictly forbidden to lay laminate flooring on uneven surfaces. None of the pads can correct large construction defects.
Why? Soft pads will sag on the protrusions under the weight of the laminate slats, but they will easily deform over the voids if the load on the floor increases.
Only level substrates guarantee the high quality of laminate floors; underlays can only have a minor positive effect
Expert opinion
Afanasyev E.V.
Chief editor of the pol-exp.com project Engineer.
Not so long ago, laminate flooring was laid on concrete without backing, but glued with special glue. This method guaranteed the stability of the coatings; the glue automatically perfectly leveled the bases. But the technology is quite labor-intensive; to facilitate installation work, the so-called floating method of laying floor coverings on substrates was developed.
Laying laminate flooring on a concrete floor with underlay
Even theoretically, it is impossible to have a high-quality laminate floor if the supporting base does not meet current technical requirements. It is strictly forbidden to start laying laminate flooring on uneven and weak concrete bases. How can they be fixed?
| Alignment method | Brief description of the technology |
Spot repairs | Using a long rule, you need to check the surface of the ceiling and mark areas of critical protrusions and recesses. The tubercles can be cut down with a hand chisel or an electric hammer. The recesses are sealed with cement-sand mortars. To increase the adhesion parameters, the surfaces should be impregnated with any primer before repair. The method is the fastest and cheapest; as for the quality of the floor, it completely satisfies most developers. |
Finish screed | If the concrete base has a lot of critical damage, cracks, or areas of insufficient physical strength, then it is recommended to re-screed. There are many methods and compositions; the specific one is selected after analyzing the condition of the surface, taking into account one’s own skills and financial capabilities. |
Bulk composition | Self-leveling floors make it possible to achieve ideal base performance, but only if the technologies recommended by the manufacturers are strictly followed. The thickness of the leveling layer is selected taking into account the parameters of unevenness, but measures must always be taken to reduce it. Self-leveling floors can significantly increase the overall estimated cost of installing laminate flooring. |
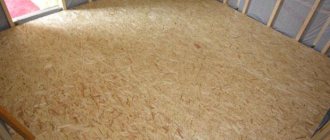
Slabs | It is allowed to use plywood, OSB or cement-fiber boards; each type of material has its own characteristics and must meet the planned operating conditions of the flooring. The method requires a relatively long time and is in the middle category in terms of cost. |
Once the base has been brought to normal levels, you can begin choosing a laminate.
Required tools and materials
To carry out the installation of lamellas, you will need the following tools:
- roulette;
- square;
- jigsaw or hacksaw for metal;
- tamping block with a cross-section of 40 mm and a length of up to 400 mm;
- pencil;
- hammer;
- linings 10 mm thick;
- construction knife;
- S-shaped metal stop for fixing slats in confined spaces;
- drill with bits 20-30 mm;
- screwdriver;
- hammer drill
Materials required to complete the work:
- substrate;
- laminate board;
- polyethylene film for waterproofing the base;
- dowel-nails for fastening plinth holders and connecting strips;
- connecting strips (sills);
- baseboard;
- corner connectors for skirting boards.
Choice of coverage
Even the highest quality concrete bases do not guarantee a long period of use of floor coverings if their type is chosen incorrectly. What do professionals recommend for concrete foundations, what points should you pay attention to?
Laminate class
For residential premises, you need to choose a laminate that has the number “2” at the beginning:
- 21 – the weakest coating, recommended for use in bedrooms;
- 22 – withstands medium loads, can be installed in living rooms, offices and dining rooms;
- 23 – for kitchens, corridors and hallways.
Laminate classes vary in strength, wear resistance and other parameters
There is no need to buy laminate with a large margin of safety, this significantly increases the cost of coatings. Commercial types are not used in ordinary houses.
Lamella material
Laminate flooring from any material can be installed on concrete floors, but it is recommended to take into account the specific operating conditions.
| Type of material | Recommended use of laminate |
MDF | The material can only withstand short-term contact with water. It reacts negatively to increased relative humidity and is not recommended for installation in bathrooms. |
Composite plastic, EVA backing | Can be installed in rooms where wet cleaning is often done: hallway, kitchen, bathroom. |
Flexible Vinyl | It is most resistant to moisture and is not afraid of flooding and other emergency situations. Used for bathrooms, swimming pools, etc. |
The better the material resists high humidity, the easier it is to lay it on concrete bases - there is no need to take special measures for protection.
Preparing the base
Laminate flooring is demanding about the evenness of the base and its cleanliness, which means that the concrete subfloor needs to be prepared before the coating is installed. Preparation times can vary from 3 to 28 days and greatly depend on what work needs to be done. The first step is to remove the old coating and inspect the exposed base for defects.
So, if the old screed is no good, that is, it collapses and is not level, then it will have to be dismantled and a new one poured. If the old screed is in a relatively flat condition, but has minor defects and surface curvatures, then leveling can be done using a self-leveling mixture. If the screed is in perfect condition, then you can simply clean it and then cover it with laminate.
Laminate flooring should only be laid on a leveled base.
Attention! Laminate flooring can be laid on various types of subfloors, as well as on some types of old flooring. But the ideal option was and remains installation on a properly and carefully prepared concrete floor. Then you won’t have to worry about quick deterioration of the new coating for many years if you treat it with care.
TOP 3 Best Russian laminate manufacturers
| Photo | Name | Rating | Price | |
| #1 | Tarkett | ⭐ 99 / 100 | More details | |
| #2 | Egger | ⭐ 98 / 100 | More details | |
| #3 | Kronospan | ⭐ 97 / 100 | More details |
Kronospan
Kronospan laminate is produced in Russia and has a German level of quality, and also meets the highest European standards. The Russian buyer really liked the product.
Kronospan
pros
- simple installation;
- decent technical characteristics;
- excellent price/quality ratio;
- environmentally friendly and harmless to health;
- abrasion resistant;
- a large assortment.
Minuses
- not detected.
laminate Kronospan
Egger
The German company Egger has been producing high-quality flooring for over 50 years. Occupies a leading position throughout Europe. The company has factories in different European countries. Several branches have been built in Russia.
Egger
pros
- Possibility of installation on floors and walls;
- long service life;
- wide selection of design proposals;
- there are waterproof collections;
- acceptable price/quality ratio.
Minuses
- In Russian batches there are defective strips.
Egger laminate
Tarkett
The international company Tarkett produces various floor coverings: laminate, parquet boards and linoleum. During the existence of the company, it has taken a leading position and entered the top five world leaders in the production of floor coverings.
Tarkett
pros
- A wide range of.
- High strength and reliability of layer connections.
- Warranty period 20 years.
- Reliable and simple lock.
- Easy to install and operate.
- Affordable price.
Minuses
- Sometimes there are batches with defects.
- Low sound and heat insulation.
Tarkett laminate
Calculator for calculating the number of laminate boards per room
Go to calculations
Step-by-step instructions for laying laminate flooring
For example, consider the floating technology of laying laminate flooring. The base is concrete, the substrate is moisture-resistant polymer.
Practical advice. If the screed was made recently, then you need to give it time for final setting and complete drying. In most cases, this takes 10–14 days.
It is important that the screed dries well
The screed was made on the ground; for insulation, extruded polystyrene foam boards 10 cm thick were used. To eliminate the appearance of cold bridges, two layers of insulation, each 5 cm thick, were laid.
The final leveling of the base is done with ceramic tile adhesive. This option was chosen for several reasons.
- The glue is very quick to prepare. It is sold dry, you just need to mix it with water.
- The composition has high adhesion rates to concrete surfaces. In some places the thickness of the material is only a few millimeters, adhesive strength plays a very important role. If leveling such a thickness is done with an ordinary cement-sand mortar, then the thin layer will certainly peel off with all the negative consequences.
- The solution contains a filler that binds water. Due to this, moisture is almost completely removed from the base, and this is very important. Laminate should not be placed on wet surfaces; you need to wait about two weeks for natural drying, which significantly increases the time of construction work.
How to level a concrete floor with tile adhesive
Step 1. Using a wide stainless steel spatula, carefully remove any adhesive burrs near the walls. Inspect the entire perimeter of the room and correct any possible problem areas.
Use a spatula to remove burrs
Step 2: Place underlayment under the laminate. A material has been selected with reflective foil on the top side; it will slightly reflect heat rays and prevent moisture from penetrating the concrete base. During the operation of the floor, various emergency situations arise, including bursting of water or heating pipes. Because of this, water can get on the base and it takes a very long time to dry. Aluminum foil will prevent the spread of moisture to all architectural structures and reduce the negative consequences of flooding.
Laying the substrate
The thickness of the lining is 5 mm, which is quite a lot. The choice is related to the design features of the floors in other rooms. The fact is that in the corridor the floor is laid with ceramic tiles; they have a thickness of 5 mm and a glue height of 5 mm. In order to level the planes in two rooms, you have to use such a thick lining. In addition to leveling, thick insulation will be able to retain more heat, which is important for increasing the comfort of living in residential premises.
Foil backing for laminate
Step 3. Seal all joints of the lining layers with regular or special foil tape. Due to this, the tightness of the coating is increased and its movement is eliminated during laying of the laminate.
The joints need to be taped
At this point the preparatory period is over, you can start laying the flooring directly.
Substrates
All craftsmen talk about the need to lay a substrate when installing laminate flooring. And this is true - a substrate is necessary, since it significantly extends the service life of the material, and is also able to smooth out minor unevenness in the base and, having certain thermal and sound insulation properties, can generally improve the operation of the coating. Also, in some cases, the substrate helps protect the material from moisture emanating from the concrete base, and this is also an important factor affecting the use of the material.
Underlay for laminate
Depending on the material from which they are made, substrates come in various types. Moreover, they can be made from both natural and synthetic materials.
How thick should the substrate be?
Laying laminate
First, it is recommended to lay out the lamellas and select the final version. There are quite a lot of tips from designers, you can read them in this article a little lower. We will give one universal recommendation - choose the option that you personally like.
There is nothing wrong with the fact that the slats are smaller; as a rule, various furniture or central heating radiators are placed near the wall. These items hide the asymmetry of the flooring.
Step 1. Decide on the placement of the slats. Manufacturers recommend that the length of the cut piece be at least 40 cm, otherwise they do not guarantee strong adhesion of the floor covering. Such requirements significantly increase the consumption of laminate; not all customers agree with this. As practice shows, the length of the pieces does not affect the strength of the flooring.
Laying schemes for laminate flooring
Why?
- All pieces are mounted against the walls and are additionally fixed on one side with baseboards.
- Few people walk near the walls, the load on the floor is minimal.
- Most furniture is also placed near the wall and covers short slats.
Conclusion. Don't be afraid to save expensive coverage. This does not have a negative impact on the quality of the floor.
Step 2. Place a piece of covering against the wall, insert it into the chamfer and push it tightly. Remember to leave a gap to compensate for thermal expansion. For these purposes, use small pieces of lamellas; their thickness is quite sufficient for safe use of the floor.
Laying the lamella, inserting into the lock
The lamella is moved towards the wall
Step 3. Insert the end of the length of the board into the end of the cut one, align the corners along one line and install the lamella in place. If everything is done correctly, the assembly process will not create any problems.
Inserting the next lamella into the end
Snap
Using the same algorithm, cut and assemble the entire row along the length to the opposite wall. It is much better to cut the material not with an electric jigsaw, but with a small machine with a circular saw. The cut is perfectly smooth, making work much faster, easier and safer.
Laminate cutting
Step 4. Slightly lift the row assembled at the ends, it will fit into the locks of the one already lying down.
Row raised
Using a mallet through the gasket, gently tap the slats into place.
Tapping a piece of lamella with a mallet
A click should be heard; correctly assembled elements automatically assume a horizontal position. If the laminate sags in any places, you need to repeat finishing. The floor should fall into place without additional effort, and the gaps between individual rows should disappear.
Practical advice. When laying laminate flooring, always use a white rubber mallet; a black one leaves a mark when hammered across the surface. It is almost impossible to remove it later.
After the laminate has been laid over the entire surface of the floor, you need to nail the baseboard. It is fixed with dowels to the walls. When drilling holes, you need to monitor their depth. The fact is that it is impossible to completely remove all dust from the holes; when driving a plastic dowel, it moves to the end, accumulates there and does not allow the element to enter to its full depth. It is difficult to get it out of there to fix the problem; the dowel has special grips. It is very simple to prevent the occurrence of an unpleasant situation - increase the depth of the hole by about 1–1.5 cm, dust will collect in the free space.
Fastening the baseboard
Result of work
Leveling the base using a self-leveling mixture
This is the simplest option if the rough screed is not in the worst condition, but only has minor irregularities. In addition, there is no need to dry the floor surface for a long time in order to continue working.
Step 1. The first step is to remove the old floor covering, leaving only one cement screed. Next, the screed is inspected for damage and defects, and its general condition is assessed.
First you need to prepare the base
Step 2. Next, the surface needs to be cleaned of debris, all stains on it formed from other substances must be removed, dried, and all dents must be filled with cement mixture. Before further work, the cement must be dried.
All errors are sealed with cement mixture
Step 3. Now you can start filling the floors with a self-leveling mixture. First, around the perimeter of the room, if it is large in area, you can stick damper tape on the walls. It will help provide the necessary elasticity and keep the floors from cracking. The filling mixture is mixed according to the instructions indicated on the package.
The next step is preparing the mixture for pouring
Step 4. After this, you can start pouring the mixture onto the floor. It spreads perfectly on its own, but still it will have to be helped. The mixture must be poured carefully and evenly, trying not to create waves.
The mixture is poured onto the floor
Step 5. Now the filling mixture needs to be leveled over the floor surface using a long-handled spatula or squeegee. You can do everything with an ordinary wide spatula, but it will be inconvenient.
Leveling the poured mixture
Step 6. When the mixture is poured, it needs to be rolled with a needle roller to remove air bubbles. It is important to remember that you can move around the poured mixture only in paint shoes - special shoes with thin nails on the soles.
Next, the mixture needs to be rolled with a needle roller.
Step 7. After pouring the mixture, before starting further work, it must be dried for as long as indicated in the instructions for using the composition.
Then you need to wait for the mixture to dry
Video - Leveling floors using a self-leveling mixture
Schemes for laying laminate flooring on concrete floors
We have already mentioned above that the final decision is made by the customer, only he decides how beautiful it is and how not. But to make your choice easier, you should be aware of existing recommendations for laying coatings.
- Diagonally. The floors look original, but are not suitable for every style; the design features of the remaining rooms must be taken into account. The disadvantage of this layout is that the amount of unproductive losses of the laminate slightly increases.
Laying laminate diagonally
- The joint lines are directed perpendicular to the window opening. It is generally accepted that due to this arrangement it is possible to hide the contact areas of individual lamellas. Practice shows that there is no difference. Why? If the lamellas have special chamfers, then they are visible in any case; the direction of the light plays almost no role. And if there are no chamfers, then nothing is visible; the direction is guessed only by the decorative pattern on the outer surface.
The joint lines are directed perpendicular to the window opening
As for the advice to use a layout along or across the room, in this case there is no effect either. The room does not visually increase or decrease; the laminate floor looks like a continuous covering. This, by the way, is one of its advantages.
Video - Laminate laying technology
Is waterproofing necessary?
When laying laminate flooring, many often ask the question: is it necessary to lay a waterproofing layer of film on the prepared surface? Sometimes this stage can be skipped, but most often experienced craftsmen recommend not trying to save on film, but still covering the rough base with it before installing the coating. The film will help protect the coating from excess moisture coming from the concrete.
Film for laminate
The film spreads in long strips overlapping each other. The width of the overlap should be about 15-20 cm. All joints must be taped to ensure the integrity of the waterproofing. It is also recommended to apply the film to the walls, and remove excess film after finishing the installation work. The material is laid on a prepared and cleaned base.