Many people believe that only professionals can lay laminate flooring. But, if you understand all the installation details, the process will seem uncomplicated. How to lay laminate correctly, what to pay attention to and what nuances to take into account, read the article.
What will you need for installation?
It takes 3-4 hours to lay laminate flooring in a room with an area of 15–25 m2 on a finished base. This type of coating refers to “floating floors”, which are not rigidly fixed to the base from below, but simply lie on it without fastening. Therefore, you just need to lay out individual laminate lamellas on a screed or flooring made of wood boards, connecting them firmly to each other.
To lay laminate flooring you will need the following tools:
Nothing particularly specialized is needed to install the coating in question. No special skills are required for this. Most home craftsmen can handle this tool without any problems and correctly. Installing interior doors with your own hands can still cause difficulties. With a laminated finish flooring, everything is much simpler.
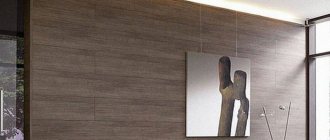
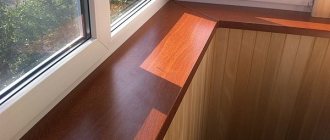
Laminate in the interior
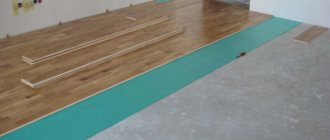
In addition to the lamellas of the laminate itself, in order to lay it on the floor, you will also need a plastic film for waterproofing. Plus, you will need a backing made of cork, foamed polyethylene or other similar material. The purpose of this lining is to increase sound insulation and distribute the load from individual laminate flooring strips to the base.
It is not recommended to neglect laying the substrate. It is provided with all step-by-step instructions from laminate manufacturers. If you don’t put it in, you can immediately forget about the coverage warranty.
Flooring options
Floor preparation
In order for the laminate to last a long time, the base underneath must be perfectly level. Differences in height are permissible only within a couple of millimeters per meter of coverage. If the unevenness on the subfloor is greater, the lamellas will move apart at the joints due to uneven distribution of the load.
The laminate is laid on bases made of:
- floor boards and parquet strips;
- wood boards;
- tiles;
- linoleum;
- concrete (screeds or floor slabs).
Styling tools
The main condition is that the base must be level and stable under the feet of a person walking on it. Sagging boards or recesses (bulges) on the concrete surface are unacceptable here. If there are such defects on the rough base, they should be eliminated before starting to lay the laminate.
If the ceiling or floor covering meets the requirements for levelness and resistance to loads, then it can be left. Otherwise, you will have to dismantle this foundation and build a new one.
Laminate in the house
Leveling the floor
To level the rough base, most often they use a wet or semi-dry floor screed made from DSP. This is the most reliable and durable option. Concrete can withstand heavy loads and is resistant to moisture. However, it will take up to three weeks to set and harden. If you decide to lay laminate flooring on a concrete screed, then repairs to the house may last more than a month.
The subfloor is also made from gypsum fiber boards, chipboard, fiberboard or plywood. This option eliminates wet processes and is faster, since there is no need to wait for the cement mortar to set. However, if pipes break, such a base usually has to be completely or partially replaced along with the laminate. Contact with water for wood and gypsum fiber sheets is contraindicated. But in its finished form, such a prefabricated screed weighs much less than a concrete screed.
Substrate
Almost all manufacturers prohibit laying laminate flooring without a backing. This underlying layer is needed to redistribute the load on the floor, reduce noise and additionally insulate the laminated slats from moisture from below on the base side.
Most often, a film of foamed polyethylene with a thickness of 2–3 mm is laid as a substrate under the laminate. It is not afraid of moisture and is cheap. But you can also use analogues made from cork, pine needles and polystyrene foam. Cork and coniferous options are natural, eco-friendly materials, but they become unusable when exposed to water. Expanded polystyrene boards have increased noise and heat insulation, but are flammable.
Laying the substrate
Comparative characteristics of floor coverings
| Material | pros | Minuses | Average cost per square meter |
| Array |
|
| 2.5 - 7 t.r. (depending on the type of wood) |
| Parquet |
|
| 4 – 9 t.r. (plus the complexity of the work) |
| Parquet board |
|
| 4 – 7.5 t.r. |
| Laminate |
|
| 200 – 1200 rub. |
IMPORTANT
When purchasing material, add to the price per square meter the amount for installation, complexity of work, additional material (backing, plywood, screws). This is what determines the total cost of the floor.
Methods for laying laminate
Before you go to the store for the coating in question, you need to carefully figure out how to calculate the laminate for a room of a specific size in pieces. Nobody needs extra material, and if there is a shortage of it, it is not always possible to purchase even a couple of planks exactly the same as those taken earlier. And here the method of laying out the slats on the floor plays an important role.
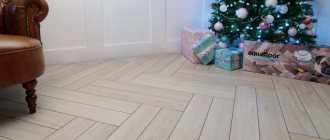
Laminate planks are laid in two ways:
- straight (deck);
- diagonal.
The first one is easier to install and requires less material. In the second case, much more scraps are obtained due to the need to cut the planks at an angle near the walls. But the lamellas laid diagonally in the assembly look more impressive. In both options, the boards are laid with an offset of 10–35 cm to the adjacent row.
Laminate assembly
The connection of laminate planks is made with or without glue. The use of the adhesive method is recommended when it is necessary to increase the moisture resistance of the entire coating. Water then cannot penetrate into the joints between the lamellas and does not harm the substrate and the bottom layer of the laminate.
In this case, the second option is often more preferable. After laying the laminated finish without glue, it can be disassembled if necessary to replace one or more lamellas. It is impossible to separate glued boards without damage.
The laminate is connected using end locks:
- “Lock” (groove-ridge).
- "Click" (simple latch).
- "UniClick" (complex latch).
The first of the locks is the weakest to break, and the third is the most durable and reliable. However, if the laying of the laminate is done professionally, then all of them guarantee a strong connection of the lamellas into a single laminated coating.
The principle of laying laminate
Fastening parts (step by step instructions).
Step 1. Starting installation is very simple: just lay the first board with the ridge to the vertical surface in accordance with the chosen direction. The movement of all work should go from the far wall to the exit.
IMPORTANT
Laminate flooring is installed in a floating manner. Therefore, before fastening the elements, it is necessary to attach wedges to the wall to ensure gaps at the vertical surface (0.8-1.5 cm). This is necessary so that the floor reacts to temperature changes. Under no circumstances should laminate flooring be attached to the base using screws, nails and glue, otherwise the floor will no longer “float”.
Step 2. We fix the second plank (also with a ridge to the wall) with the narrow part at an angle of 15 to 45 degrees, as shown in the figure. The joints must match.
Never make an incorrect connection as this may damage the material.
IMPORTANT
Secure all joints by hand or with a rubber hammer. Heavy iron tools can damage the material.
Step 3. Cut the last planks of each row with an electric jigsaw. Remember about the gap near the wall.
Step 4 . We also assemble the second row. We do not connect it to the first one until the strip is completely assembled. At the same time, we try on the joints, but do not snap them together.
Step 5. We connect two rows: we fasten the second resulting strip to the first at the same angle as the parts in each line.
HELPFUL ADVICE
Many people, including me, use seam paste when fastening parts together. It is needed for additional sealing so that air and moisture penetrate less under the floor during operation. The paste is applied to the ridges and retains its liquid properties for 10 minutes. When laying, remove any excess gel that appears on the surface with a clean cloth.
Step 6 . When I need to lay the laminate where the pipe exits, I measure the distance from the wall to the center of the circle on a board, draw a circle along the diameter of the pipe and cut off part of the board. I apply the treated slab to the pipe, and attach the second element on the other side using glue.
Do the same with the protrusion: measure the angle and cut it, leaving 10-15 mm for a gap.
HELPFUL ADVICE
When processing corners, I make the edge not sharp, but semicircular. This is necessary so that when processing the baseboard, no gap emerges from under it. Believe my experience: minor flaws spoil the appearance of the entire work.
Step 7. The last row, if it does not coincide with the remaining space, is trimmed as shown in the picture. The entire line is snapped into place using a 15 degree angle mounting.
Step 8. After installation is complete, cover the edges around the perimeter with a plinth. It is attached with a drill. It gives the room neatness and integrity. A new door frame is also being installed. If the door remains the same, then the frame at the bottom is sawed down so that the laminate goes under it. Properly assembled material has no gaps or cracks.
How to cut laminate correctly?
You can cut the laminate into the necessary parts with your own hands:
- electric jigsaw;
- small hacksaw for metal;
- a durable construction knife.
When cutting, you must ensure that no cuts or scratches appear on the top decorative layer. Then, on the surface under the sun's rays, they will all be visible to the naked eye. That is why it is not recommended to use a hacksaw on wood with large and medium teeth. It is almost impossible to make a cut without creating unsightly grooves.
Laying laminate flooring near the threshold
To get an even cross-section, it is best to use some kind of metal guide or square. And you should cut out the holes for the pipes slowly with a knife.
Using the tools listed above almost always produces a burr-free cut. If they do form, then such rags can be cut off with a knife or ground off with a flat rasp on wood.
Laying floors around pipes
Conclusion
Thus, you have clearly seen why laminate is the most profitable floor covering option.
It is resistant to heavy loads, easy to assemble, and easy to maintain. The cost per square meter does not exceed the prices for solid wood or parquet. Can imitate a parquet board, a cut of natural wood.
It looks neat and natural. I can say with confidence that laminate is the most profitable option for flooring.
You may be interested
in Which floor to choose for an apartment How to fill the floor in an apartment with your own hands Warm floors in an apartment: a modern choice
Recommendations
Laminate flooring should be laid in compliance with the following simple rules:
- Before installation, the lamellas must lie in the room in a horizontal position for at least a day to cool down or warm up to room temperature.
- Laying laminate flooring is only permitted on dry substrates. If a concrete screed was originally made, then laying the coating is permissible only after it has completely dried.
- Before starting work, the rough foundation must be thoroughly swept so that there are no pebbles or other debris left on it. If you leave them under the laminate, sooner or later the substrate will tear first, and then the coating itself will be damaged.
- To identify differences in the subfloor, you should use a long rule or level - the slightest deflections will be visible in the gaps that appear.
- It is best to lay the planks away from the window so that the seams along the locks are less visible in daylight.
- Compensation gaps 8–10 mm wide should remain between the walls and the laminate. Without them, the laminated coating, during thermal expansion, will rest against the wall surface and rise like a mound in the middle of the room.
- To prevent the slats from moving during installation and closing the gaps along the walls, spacer wedges should be placed. Then they clean up.
- Compensation gaps must also be made in the middle of the room if the coating is more than 10 meters long. Afterwards, these seams must be closed with decorative thresholds made of plastic or metal.
- The substrate and waterproofing should be glued with tape at the junction of their individual strips. At the same time, you cannot nail this sublayer to the rough base with nails or screw it with self-tapping screws. Gaps are not allowed here.
- The first row is laid against the wall with a tenon, for which it is pre-cut so as not to interfere.
If the walls are uneven, then special attention should be paid to placing spacer wedges and laying the first row. The smoother the first slats are laid out, the more reliable the connection of all the remaining slats will be.
If you strictly follow the given step-by-step instructions and recommendations, the laid laminated coating will last for many years. There is nothing particularly difficult about its installation. In order to figure out how to choose the entrance door to an apartment and then install it, you will have to use your head completely. With the floor finish in question, things are not so scary.
Step-by-step instruction
Selecting a layout
The first thing you need to decide is how the longitudinal seams will be located: along the light from the windows or across. Usually chosen along the light, in the direction from the window. However, this is not an axiom, it is a matter of taste or other considerations.
Typically, layout refers to the amount of displacement of each new row relative to the previous one. Let's consider three possible options.
Ladder or actual layout
(or chaotic). The panel manufacturer always recommends a minimum displacement of the transverse seam of the next row, usually 30-40 cm. This means that the displacement can be any, but not less than 30 cm. When laying, in fact, an equal displacement is obtained on different rows, provided the room is rectangular in shape. The floor pattern is a “ladder” with an arbitrary offset. The most economical option.
The layout is realized by placing the trim from the last panel at the beginning of a new row. This is possible only if the cutting is more than 30-40 cm (the exact minimum run-up is indicated by the manufacturer on a specific model) or less than the whole panel at the same distance.
This layout can only turn out to be chaotic if, when finishing a row, there is too short a piece left - you will have to insert an arbitrary piece. Or there are a lot of leftovers from the previous installation and they need to be used. The main condition: you need to observe the minimum displacement of the transverse seams in relation to the previous row - usually the manufacturer indicates this value and it is 30-40 cm.
Laying in half
. The beginnings of each row alternate with whole panels and halves. Thanks to this, the painting of the canvas is obtained in the so-called “checkerboard pattern”. Often the most expensive option in terms of material.
Layout in thirds
- each new row increases or decreases by a third of the length of the panel. In a simple way: the first row starts with a whole panel, the second with a trim equal to 2/3 of the length of the whole panel, the third with 1/3. The fourth row begins with a whole die. The picture of the floor covering is obtained in the form of a “ladder”. Usually a more economical option compared to half installation.
However, efficiency is primarily affected by the length of the panel and the length of the room, or rather their ratio. If the length of the room is divided by the length of the panel without any residue, laying it in half will have virtually no residue. But such an exact match is rare. In general, to accurately calculate the laminate, you don’t need all sorts of calculators, of which there are plenty on the Internet, but to draw several rows on paper to estimate the amount of waste.
Good to know: when using plain panels without a chamfer, there is no visually noticeable difference in how the laminate is laid: chaotically, in thirds or halves (in a checkerboard pattern). The layout becomes noticeably distinguishable when there is a chamfer at the transverse seams or when each panel has strong differences in tone along its length.
On a plain laminate without a chamfer, the transverse seams are not noticeable, so it does not matter much which layout is chosen.
The presence of a chamfer distinguishes each panel well, so the installation option already plays a role in visual perception.