When moving across the floor in an old apartment, every creak reminds you of a thought that regularly comes to mind - about repairing the floor, because it is impossible to constantly experience discomfort looking at the old parquet floor and listening to these unpleasant sounds. But now every step you take, including those related to repairs, should be carefully thought through. In some places you can simplify something or, on the contrary, remove all the old finishing and make a major overhaul of the entire floor. But in the latter case, the classic picture immediately appears in the imagination - a lot of garbage, a lot of fuss, and the result in fact in some cases can be the same as if the old finish remains in place. A reasonable question arises: is it possible to lay laminate flooring on parquet? It turns out that in this case you can really get away with little damage by simply placing a new coating on top of the old one.
Is it possible to lay laminate flooring on parquet?
Relevance of the issue
The issue of major and high-quality floor repairs is faced by many and in most cases depends on the budget and time allocated for the work. Dismantling old parquet flooring is far from a cheap and rather troublesome procedure, as well as a long one, and depending on the situation and certain conditions, it can significantly increase the time of the repair itself. It often happened that when, during repairs, workers or the owners of the house themselves decided to dismantle the old parquet, it became clear during the work that the coating skillfully hid some unevenness, masked failures, which they then had to deal with. The more such problems are revealed during dismantling, the more expensive and time-consuming the repair will be. Even if the dismantling itself was successful, and no serious irregularities or other problems were identified, in any case, the homeowner is faced with the question of disposing of the old coating.
Removing old parquet
Parquet dismantling
On a note! That is why many people try to avoid by all means dismantling the old flooring and lay a new one on top of it, or simply restore the old parquet.
Naturally, there are cases when it is obvious that the old parquet cannot be restored due to some specific reasons. This is usually observed when housing is purchased on the secondary market, in an old building, or from people who simply did not monitor the condition of the floors. In such cases, a major overhaul of the apartment as a whole is necessary. But even in this situation, sometimes you can do without dismantling the parquet flooring.
Result of restoration
Recycled parquet - remove or repair?
No registered user is viewing this page.
8 Amazingly Convenient Kitchen Cabinet Storage and Organization Examples You Never Knew About
Decorating the interior of a gray kitchen: how to enliven the space and make it not boring (82 photos)
The right combination of colors in the kitchen: a useful guide for those who do their own renovations
- Construction and repair
- Foundation
- Roof
- Walls
- Window
- Doors and partitions
- Ceiling
- Balconies and loggias
- Internal structures
- Floor
- Water supply and sewerage
- Heating
- Ventilation and air conditioning
- Gas and energy supply
- Lighting
- Plumbing equipment
- Security and home automation
- Baths, saunas, swimming pools
- Construction Materials
- Decoration Materials
- Tools
- Technique
- Laws and finance
- TechnoNIKOL
- Design and decor
- Apartment
- Bedroom
- Kitchen
- Dining room
- Living room
- Bathroom, toilet
- Hallway
- Children's
- Attic
- Small rooms
- Workplace
- Wardrobe
- Library
- Decoration
- Furniture
- Accessories
- Vacation home
- Landscape
- Redevelopment
- Catalog of houses
- Magazine
- News
- Events
- about the project
- Advertising on the website
- Advertising in a magazine
- Terms of use
- Contacts
- about the project
- Advertising on the website
- Advertising in a magazine
- Terms of use
- Advertising on the website
- Advertising in a magazine
- Terms of use
- Contacts
Are you a professional architect or designer?
IVD. Repair and finishing
Are you a professional architect or designer?
The IVD.ru website is a leading Internet project dedicated to the issues of reconstruction and interior design of residential premises. The main content of the site is the archive of the magazine “Ideas for Your Home” - exclusive author’s articles, high-quality illustrations, practical tips and lessons. A team of professionals is working on the project in close collaboration with famous designers, architects and leading publishing experts.
On our website you can choose comprehensive design solutions; view detailed reviews of the market for construction and finishing materials, furniture, machinery and equipment; compare your own ideas with design projects of leading architects; communicate directly with other readers and editors on the forum.
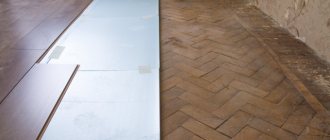
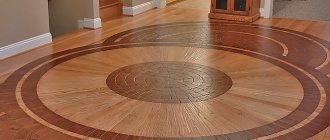
Features of parquet flooring
Parquet is a type of covering that can often be seen in apartments in the old building. It is made of small wooden planks laid in a curly pattern (for example, herringbone). Its main advantages are environmental friendliness, strength, beauty, durability. The material itself can serve faithfully for many years, but it is still worth taking into account the natural factors of wear and tear, due to which it loses its appearance and cannot serve as well as before.
Parquet floor
When deciding to leave this type of flooring and cover it with some other one, it is important to remember its disadvantages. The disadvantages of parquet are:
- high price for the material itself;
- complexity of installation - laying parquet is not as easy as it seems;
- This is a heavy floor covering;
- the material does not like excess moisture;
- Difficult to maintain - requires periodic varnishing;
- parquet is easy to damage mechanically.
Parquet has its disadvantages
It is because of these shortcomings that many give up the idea of using parquet further, preferring to cover it with laminate. You can also use other options for new flooring.
How to prevent the floor from creaking later
A visual inspection cannot reveal another important defect - creaking parquet. Only walking across the entire area of the room helps to find places where the floor begins to creak under the weight of a person. If you do nothing, then after laying the new flooring there will be complete silence when walking for some time. But as the locks wear out, unpleasant sounds will begin to appear.
There are several ways to fix the problem:
- Drill a hole between the creaking parquet floors and drive a wooden chip into it, pre-lubricated with PVA glue, and cut it flush with the floor.
- Firmly attach the planks to the base of the floor with glue or self-tapping screws (both methods can be used simultaneously).
The squeaky strips are attached with self-tapping screws.
- Screw 3-4 short self-tapping screws between the slats.
The preparatory work is completed by sanding the parquet (height differences are insignificant) or scraping, when it is necessary to remove tubercles 4-7 mm high.
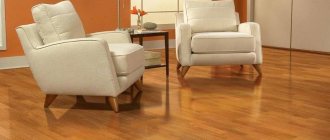
A little about laminate
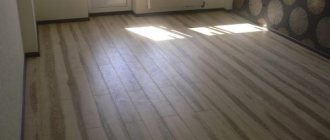
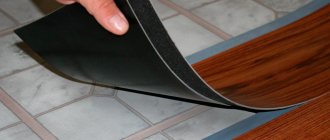
Most often, when installing a new floor covering, the choice falls on laminate. This material is considered one of the most optimal in terms of price-quality ratio. It is based on fiberboard, which is covered at the top and bottom with other layers - the bottom protective and the top laminated (hence the name - laminate). The color of the coating is given by a layer of colored material with a pattern applied to it. It is located just under the laminated coating.
Laminate flooring
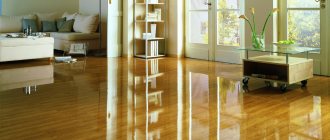
The advantages of laminate flooring include the following:
- low cost compared to a number of other coatings;
- beautiful appearance;
- ease of installation - laminate flooring can be installed independently, without involving specialists;
- a certain level of resistance to external and mechanical influences;
- simplicity and ease of care.
Laminate
But laminate is not without its drawbacks. The first is hydrophobia. It is even higher than that of parquet. But, nevertheless, if the coating is laid correctly or high-quality material is used, then you don’t have to worry about the laminate, even if water is spilled on it. Also, the coating is characterized by lower environmental friendliness and lasts a much shorter period than the same parquet.
Laminate flooring sizes
Prices for Tarkett laminate
Tarquette laminate
Is dismantling the old flooring necessary?
The best option is to remove the old coating before installing a new one.
Indeed, the golden rule of finishers says: before installing new materials, remove all old ones as far as possible.
This approach is dictated by many years of experience in finishing work: the strength of fastening of new materials when installed on top of old ones is usually insufficient.
It depends entirely on how tightly the old coating adheres to the supporting base.
In many cases, old coatings - be it paint, whitewash, concrete screed or, in our case, parquet - lose their adhesion strength to the base as a result of long-term use.
The result is peeling of both individual fragments and entire areas of the coating.
It is understandable that most professionals prefer to completely remove old materials rather than risk using them as a substrate.
This fully applies to old parquet flooring: over time, the wooden covering may become detached from the concrete base.
Therefore, laying laminate flooring on parquet is, in principle, not desirable, nor is installing parquet on laminate flooring. But, as you know, there are exceptions to all rules. Therefore, laying laminate flooring on a parquet floor is quite possible with your own hands if the old floor covering is held strong enough.
The main feature of the flooring installation work is not the installation of the laminate itself, but the correct preparation of the parquet base.
Where to start restoration?
To begin with, I would like to say a few words about the restoration of parquet flooring. The first thing you need to start with is assessing the condition of the parquet and identifying its main problems. Here it is necessary to clearly determine by what percentage the parquet is damaged: if it is within 50%, then it still makes sense to restore it. In most cases it is cheaper and faster.
First you need to restore the old parquet
Restoration of a parquet base usually takes place in several stages. First, the parquet is tested for strength. Old planks should not dangle. If such a phenomenon is observed, then it is necessary to secure them by gluing or nailing. You will also have to fill all the cracks and crevices, and, just in case, treat possible insects such as bark beetles. If the parquet creaks, then it is important to get rid of the annoying squeak. After this, you can try to peel off the coating and varnish it.
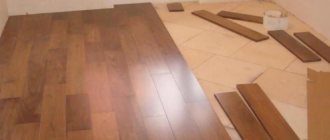
But more often than not, people don’t want to do restoration. It’s easier to cover the old coating and update it by covering it with new material. And in this case, you can use laminate.
Laminate in packages
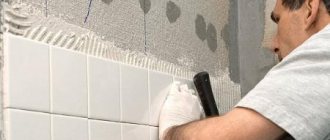
putty
After sanding, it is necessary to putty all the joints and cracks between the floorboards. To do this, use one of the types of putty mixtures:
- solvent-based - dries quickly, easy to apply;
- polymer-based - environmentally friendly material;
- homemade.
Homemade putty
The composition for puttying floors under laminate is made with your own hands by mixing sawdust left after sanding with resin, parquet varnish or PVA glue.
Important! It is not advisable to use acrylic putty mixtures or oil-based compounds to prepare parquet for laying laminate flooring, since they are designed to create the ideal appearance of the surface of the finishing material. The putty is applied with a simple metal spatula.
Puttying parquet
How to lay laminate over parquet?
Let's look at how the process of laying laminate over parquet occurs. In essence, it is not much different from installing a laminate flooring on a regular leveled base, be it a wooden floor or a concrete base.
Preparatory work
Step 1. One of the most important steps in this process is preparing the base, in this case the parquet flooring. To begin with, it is important to make sure that the parquet is still suitable for use, not rotten and that individual strips are not falling off. It is prohibited to lay laminate on rotten parquet. And the falling out strips need to be secured with glue or small nails. The gaps between individual elements can be sealed with sealant. After this, you need to make sure the base is even - laminate does not tolerate uneven surfaces. Small bumps can be removed by sanding the parquet.
Parquet scraping
Attention! The difference in horizontal floor heights under the laminate should not exceed 1-2 mm per 1 m of old covering.
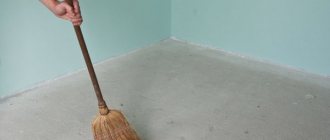
Step 2. Next, you need to thoroughly clean the floors of debris, remove all dust and dirt, and, if necessary, wash and dry the floors.
Floor cleaning
Step 3. Then it is recommended to lay sheets of plywood on the parquet base; they will act as a subfloor. Preparing sheets of plywood mainly involves cutting them and adjusting them to the size of the room or room in which the floor is being changed; it is also important to make markings in advance - it will make installation easier. After preparation, you should begin placing the sheets, the main thing is to fix them correctly. Usually self-tapping screws are used for this, but sometimes they are nailed.
Preparation of plywood
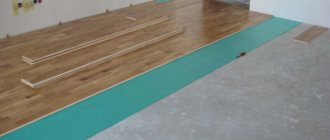
Step 4. Afterwards, you need to lay a special backing under the laminate on the plywood sheets. It cannot be laid overlapping, only end-to-end, so that there are no unevenness. For these purposes, you can choose any material that is simply suitable for installing a laminated coating. Usually, of course, it all comes down to price. It is better to opt for a mid-price substrate, even if you have a small budget. Individual sheets can be connected to each other using masking tape. The underlay is needed to retain heat and smooth out noise.
Laying underlay under laminate
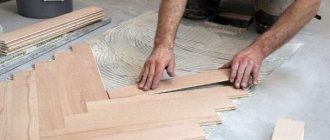
Laying laminated flooring
After the preparatory work, you can lay the laminate. Laying is done in the traditional way. This process almost always depends on the type of connecting locks with which the panels were equipped.
Table. Methods of fixing the material.
| Lock type | Description |
| Lock | This is a laminate with special latches. They work like this: the laminate is laid on the floor so that the ridge of one panel fits into the groove of the previous one. After getting into the groove, it is necessary to “tap” the panels from the end so that they are securely fixed, but for reliability it is better to additionally treat the seams with silicone or glue. In this case, you will get a “correct” and reliable joint. However, it is simply not possible to disassemble such a laminate if necessary. |
| Click | These locks work differently. During their installation, a panel with a tongue is installed at an angle determined by the manufacturer into a previously laid panel with a groove. For docking to occur, it is necessary to apply a slight force and move the panel to a horizontal position until a characteristic click is heard, which will serve as a signal of correct installation. This type of lock device is characterized by a more benign and stable fastening, which usually does not require extensive fixation measures. |
Step 1. First of all, you need to install small 15 mm wide blocks along the walls of the room to make it easier to maintain the required compensation gap during installation. It is needed to ensure that the laminate does not deform during expansion under the influence of temperature and air.
Small bars are installed along the walls
Step 2. Next, the first laminate board is laid. It needs to be laid tightly to the bars.
Laying the first laminate board
Step 3. The formation of the first row of coating continues. The next laminate board must be installed from the end of the previously laid one so that it fits into the groove. Installation is carried out at an angle of approximately 15 degrees. Then the board must be carefully lowered to the floor until a characteristic click appears, which will inform the master that the panel is installed correctly and the lock has latched.
Connecting boards
Step 4. Install the remaining panels in the row in the same way. The latter is cut to the required length; its trim can be used to begin laying the next row, if it is not too short. Cutting it is simple - just attach the board to a row of previously laid panels, resting it against the wall, make a mark with a pencil in the appropriate place, draw a straight line and cut it with a jigsaw. In this case, it is important that there is a lock on the side on which the cut panel will be fixed with the previously laid ones.
The last board will have to be cut
Installing the last board in a row
Step 5. You can start laying the second row just from the trim, if its length is at least 40-60 cm. It is laid along the first row, then the second row is assembled completely.
Laying the second row
Step 6. The second row must be carefully lifted and pushed onto the locks of the first row. Then you need to carefully lower it to the floor so that the locks click into place. It's better to invite help.
The second row slides behind the locks of the first
Step 7. In this way you need to assemble all the covering on the floor.
The remaining boards are laid
Step 8. In the area of heating risers, it is important to carefully surround them with laminate. To do this, holes are marked on one of the lamellas with a diameter slightly larger than the diameter of the riser pipes. Next, you need to carefully cut them out and cut off the top part of the panel, and then push the long part towards the riser.
First, holes for the pipes are marked
The top part of the lamella is cut off
Now the board parts need to be connected
Step 9. Next, using glue, you need to glue the small remaining section of the panel to the previously laid larger one so that the laminate around the riser becomes continuous. The lamella will seem to enclose the pipes.
Gluing a piece of board
Step 10. After this, the cut area can be covered with decorative overlays.
Installation of decorative overlays
Step 11. When laying the last row, the width of the lamellas is also adjusted. It is necessary to make appropriate markings and trim off the excess part of the coating. It is important to cut from the side where the lock is not needed, that is, from the side of the wall. After this, all that remains is to install the cut slats in place and you can install the baseboards by removing the expansion bars. Laminate installation is complete.
Laying the last row
The Importance of Sanding
During preparatory work, partial strengthening of the parquet base is always required. It is necessary to remove the entire parquet block and process it from the inside out with a drill and an abrasive wheel. Sandpaper processing is acceptable. After processing, the parquet block is smeared with glue and returned to its original place. Additionally, the block is strengthened by tapping and driving in nails with a punch.
Unevenness of the parquet base in the form of swelling can be eliminated by using the grinding method. Sanding is often used. In rare cases, it is supplemented with scraping.
Equipment for parquet scraping
Grinding is carried out using special equipment. After the procedure, some parquet floors lose stability. Nails and glue will be required to secure the slabs tightly to the base.
Stage 3. Alignment
If the old wooden floor is of sufficient quality, but at the same time with minor defects in levelness, it can be brought into order by leveling. There are many methods for improving the evenness of wood flooring.
With a scraper or planer
In some cases, a decision is made to lay directly on the parquet. In this case, a scraper is used to maximize evenness and remove the old layer. Sanding is performed using a specialized tool. With the help of a scraper it is possible to process a large area in the shortest possible time.
Flooring scraping
Small curved areas can be negotiated using an electric or hand plane. You should first make sure that there are no sharp objects or nails in the stripping path. It is advisable to recess the protruding caps of the fastening element deeper into the floor.
Using plywood
Plywood can be laid on old wooden floors or on joists. With its help, you can level the old coating without dust and dirt in the shortest possible time. Plywood is attached either with nails or self-tapping screws. Sheets of a suitable size and in the required quantity are purchased in advance.
Working with plywood does not require any special skills, so you can do it yourself. The disadvantage of using additional wooden materials is the increase in the overall cost of replacing the flooring. If renovations are being carried out in an apartment, and the old logs are in extremely poor condition, then it is best to create a reliable foundation in the form of a screed. In this case, the costs will be comparable, while the quality of the latter option will be much higher.
Plywood selection
Among the main parameters that you will need to pay attention to when choosing are thickness and water resistance. If the laminate will be laid in a dry room on an old wooden floor, then non-moisture resistant plywood 10-12 mm thick is sufficient
If plywood sheets are laid on joists, their thickness should be at least 20 mm. In damp rooms, moisture-resistant options should be used.
Laying and processing
The installation method depends on the surface on which the plywood is laid. It is advisable to choose the sheet size such that during installation, as few adjustments as possible are made. If plywood is laid on an old floor, then all bulges and irregularities should first be eliminated using a plane. All nails will need to be driven in so that the plywood fits as tightly as possible. Fastening is carried out using self-tapping screws.
Installing plywood on old wooden planks
If logs are used, then floors are first created, on which sheets are subsequently placed. When working, you should use a bubble and laser level to create a smooth surface.
Do you need plywood for laminate flooring?
Plywood is used as a leveling material, but there are a number of analogues that can also perform this task. Among them are OSB and chipboard. These options can be less expensive and also do a great job of leveling. You should first assess the condition of the floor and select the material to suit your personal goals and budget.
Leveling the floor without plywood
Small cracks can be repaired with wood putty. Also, in very rare cases, if there is a thick wooden floor made of planks, it is permissible to use a self-leveling mixture. If technology is followed, it is possible to obtain an extremely reliable base for laminate flooring that will last for a long period of time.
Before using the self-leveling floor, all openings should be sealed.
Is it possible to lay laminate flooring on an uneven floor without leveling it?
Laminate flooring that lies on a crooked base will fail faster. Moreover, each manufacturer indicates on the packaging the maximum possible difference, which does not affect operation and does not harm the material.
The permissible difference is 3 mm per 1 m or 1 cm per 3 m. Ideally, you should try to create a perfectly flat surface. Strong curvature affects the locks of the laminate. A large load begins to affect them, which is why they simply break and begin to click or diverge.
Is it worth using?
Laminate is an affordable replacement for expensive parquet. It is actively used for renovation of residential and commercial premises. The material is easy to install, but is too demanding on the quality of the subfloor. It is possible to lay laminate on old floorboards, but only if a certain number of requirements are met, the main of which is high-quality and competent preparation of the base, including repair or replacement of damaged elements, leveling the base and the use of a substrate.
The piece strips have locks for connection and fixation in the desired position. No additional fastening to the base is required. Laminate flooring is laid loosely on a prepared wooden base, allowing it to “breathe”, contracting and expanding in accordance with changes in temperature and humidity levels.
If the laminate is statically and securely fixed on a wooden base, the floor may deform along with the rough base
The structural difference of laminate boards is that during installation the material does not need to be firmly fixed with glue or hardware.
The adhesive method for installing laminate flooring exists, but it is rarely used due to the high consumption of glue, the complexity of installation, the impossibility of reusing the coating after disassembling the floor, and the immobility of the surface.
The image above clearly shows what will happen to laminate flooring if it is firmly glued to a wooden floor.
The most widely used method of attaching laminate flooring is without the use of adhesive mixtures. Its advantage is that it provides good independent aeration of materials and, accordingly, decent ventilation of the floor. And a well-ventilated structure, as is known, does not rot and lasts much longer.
If the room is not heated or the humidity level is high, you will have to abandon the installation of common types of laminate.
Area of application of the material
Despite all the artificiality of the laminate, its behavior during operation is not much different from OSB boards or plywood. The main element in the composition of laminated boards is a board created by pressing lumber.
Laminate structure and layers
The base of the laminate determines the scope of application of the laminate. Manufacturers do not recommend using poor quality material when decorating floors in rooms with high traffic levels and high humidity levels. Also, do not place the material in rooms where systematic wet cleaning is provided.
Laminated board is one of the best and most suitable coatings:
- in the living rooms,
- for bedrooms,
- on insulated balconies,
- in work offices,
- for children's rooms,
- in the halls.
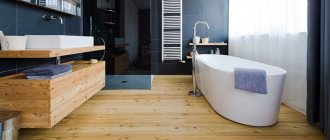
For the hallway or kitchen, it is recommended to use moisture-resistant material made using HDF technology.
To decorate the floor in the bathroom, you can only use moisture-resistant laminate
The only unpleasant moment is the cost of such material. Often the buyer is not satisfied with it, and he makes a choice in favor of cheaper alternatives.
Preparing the base
To lay laminate flooring on a wooden floor, you need to carefully examine the existing surface. Laying laminate over an unprepared base is strictly prohibited; this will greatly reduce the service life of the laminated panels.
The inspection requires identifying the following defects:
- stains from paint, grease;
- cracks;
- fallen knots and formed cavities;
- areas blackened by fungus and affected by rot;
- damaged, sagging elements;
- loosely secured specimens;
- bulges resulting from deformation processes.
Detected defects must be corrected. Sometimes puttying, sanding, sanding will help, in other cases, it is impossible to do without completely replacing the damaged elements.
Subfloor repair
Is it possible to lay laminate flooring on a wooden floor? This cladding method is not prohibited; the main thing is to carry out the necessary repair work.
They may include the following steps:
- removing the coloring composition using an electric plane or sanding machine;
- pre-recess the caps of the fasteners into the floor using a hammer;
- replacing damaged boards with new ones;
- poorly adhering floorboards are securely fixed using self-tapping screws and “ruff” type nails;
- cracks and places where knots fell out are sealed.
Leveling the wooden base
Not a single room can boast of having a perfectly flat floor surface, and both concrete and wood bases necessarily require preliminary leveling.
If we neglect this stage, then the lamellas fastened with glue will last no more than a year, and those fixed using the locking method, about no more than three months. Afterwards they will diverge in different directions, creaking treacherously when walking.
Modern houses allow you to level the existing surface using the following raw materials:
- mixtures with self-leveling ability;
- putties;
- plywood;
- OSB boards,
Each type of alignment of an existing plane has characteristic features. Let's look at each of them.
Self-leveling mixtures (for example, Vetonit 4310): require the following procedure:
- lay a polyethylene film for waterproofing, making sure that there is an overlap on the walls and seams between the sheets. The latter are glued with paper tape;
- a damper tape is attached around the perimeter to prevent expansion of the coating, eliminating the appearance of cracks;
- dilute the mixture according to the instructions indicated on the package;
- mix to obtain a homogeneous mass;
- carefully pour the mixture onto the floor;
- roll it with a needle roller to remove excess air;
- give the mixture time to dry (about a week), only then can you continue working.
Putty, which is a mixture of sawdust and PVA, involves the following stages of work:
- clear the plane of future work;
- install aluminum beacons with a height of up to 2 cm;
- fill the openings with the mixture, creating a layer of up to 10 cm;
- Apply each next layer after the previous one has dried;
- align the last layer using the rule;
- when the last level is dry, you can remove the beacons and hide the remaining traces with putty.
Plywood is the easiest to work with. This material is affordable, and it effectively levels the existing surface. Large differences can be easily removed by laying sheets on the floor; small differences can be removed by applying pads in the form of plywood scraps.
For leveling, it is better to use sheets with a thickness of 10 to 15 mm. For an apartment, the FC brand is suitable, for non-residential premises - FSF (here the level of environmental friendliness is lower). Before starting work, the sheets must be treated with drying oil or an antiseptic that will protect against the effects of fungi and pathogenic microorganisms.
The work goes like this:
- cut the canvas, taking into account the narrowing and expansion of the material due to the effects of temperature and humidity;
- be sure to leave compensation gaps of 5-9 mm between each sheet, from the wall to 15 mm;
- secure the workpieces with cone-shaped self-tapping screws, screw them in around the perimeter with a distance of 20 mm from the edge, about 15 mm between each other;
- the corners of the four panels should not overlap at one connection point;
- To avoid subsequent squeaking of the lamellas, the surface of the plywood must be vacuumed before laying the underlay or waterproofing.
Laying the substrate
Having decided whether laminate flooring can be laid on a wood base, you need to carefully consider each stage of this work. The next step, after leveling, is laying the underlayment.
It performs the following functions if placed on wooden surfaces:
- eliminates existing irregularities;
- serves as a damper;
- provides noise insulation;
- protects against moisture if treated with a special compound.