The peculiarity of the ceiling is that it is least exposed to mechanical stress. No one will stain it, touch it with their hands, or accidentally catch it with a foreign object. This means that the requirements for choosing a material for the ceiling are not so serious. That's why the ceiling is simply painted, left plastered, or ceiling panels are glued on.
But there is another popular finishing option. It is not only practical, but will also transform the room beyond recognition. Ceiling wallpaper is used for this. While it is easy to attach rolled materials to the walls, difficulties may arise with the ceiling. We will look at the technology from start to finish, how to glue wallpaper on the ceiling with your own hands.
Advantages and disadvantages
Like all finishing materials, ceiling wallpaper has its own characteristics, as well as advantages and disadvantages.
| pros | Minuses |
| Huge selection of textures, designs and patterns. | Short-lived. |
| Dense structure, fabric sheets have high noise insulation. | Some species cannot withstand humidity, are afraid of sunlight, and accumulate dust. |
| They don't hide the height. And they are suitable for decorating two-level ceilings. | They do not hide ceiling unevenness; they are glued only to a perfectly level surface. |
| Gluing is not difficult. |
Features of vinyl wallpaper
Vinyl wallpaper is available on paper or non-woven backing. Moreover, each of them has its own characteristics, but they all have common characteristics.
- making seams requires special care, since wallpaper can stretch when pasted and shrink after drying;
- have a dense structure, are treated with a protective layer, are often produced with a washing effect and are moisture resistant, which allows gluing in damp rooms;
- Due to vapor permeability, it is not recommended to cover bedrooms and children's rooms with vinyl.
Watch how to properly glue vinyl wallpaper end-to-end in the following video:
What wallpaper should I put on the ceiling?
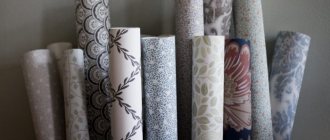
Ceiling wallpapers are presented in a wide range, ranging from the most budget to sophisticated and expensive.
Non-woven
They will be an excellent option for rooms with high pollution and humidity. After all, the dust, dirt and greasy deposits that appear on them can be easily removed with a simple sponge.
Vinyl
Suitable for creating interesting creative solutions. They come in a variety of colors and can be smooth or embossed.
Paper
This type of finishing material can be selected for any interior style. However, they are characterized by rather low strength and cannot be washed, because after contact with water they lose their appearance.
The photo shows an attic with paper wallpaper on the ceiling.
Photo wallpaper
It is quite difficult to decorate the ceiling with this type of wallpaper yourself at home. If glued with the slightest errors, they can completely lose their effect. That is why pasting work is entrusted to experienced specialists. If photo wallpaper with panoramic images covers the entire surface of the ceiling, then the impression of deep and endless space is created.
Textile
They have a rich appearance and will last for many years. One of the disadvantages is that they get dirty very easily and absorb odors.
Natural (bamboo or cork)
Cork is a fairly thick material, does not allow noise to pass through and retains heat, making the room much more comfortable. Bamboo is a natural and natural material. Suitable for finishing rooms with different humidity and temperatures.
The photo shows a bedroom with natural bamboo wallpaper on the ceiling.
Luminescent
During the day they absorb natural light, and at night they emit it in the form of a soft glow. They create a romantic atmosphere due to subdued and unobtrusive lighting, and also serve as auxiliary lighting in the dark.
Liquid wallpaper
Elastic and environmentally friendly. Particularly suitable for ceilings with a large number of corners, protrusions or other irregularities.
Fiberglass wallpaper for painting
They contain only natural materials. They are completely safe for both human and animal health. This ceiling covering is ideal for a bedroom or kitchen.
Washable
Very easy to care for. Any dirt can be removed with a sponge or cloth using a cleaning agent. A huge range of colors will allow you to easily choose an option for every taste and budget.
Self-adhesive
They have a convenient adhesive layer on the back side, making it possible to decorate various types of surfaces with your own hands, from smooth to complex suspended ceiling designs. They can be patterned or plain.
Non-woven wallpaper
Carefully place the folded strap over your shoulder and walk up the stairs. Align the wallpaper with the drawn line and slowly extend it to accommodate the spare margins.
Gently press the wallpaper against the ceiling using a brush to remove any air bubbles, starting from the center and working out to the sides.
After laying out the entire strip on the ceiling, use a roller over the delicate fragments. More details in the tab on applying non-woven wallpaper.
Design ideas and drawings
Thanks to patterns, designs and bold design ideas, the most ordinary ceiling surface acquires a multifaceted, interesting and voluminous appearance.
Sky
The surface of the sky evokes thoughts in a person and distracts him from everyday life and bustle. 3D wallpaper with a picture of the sky will bring air, freshness and serenity to the interior.
Frescoes
When choosing this design method, you need to take into account all the characteristics of the room. Such wallpaper will allow you to divide the room into a relaxation area and a workplace. Frescoes depicting landscapes are perfect for the ceiling in the living room, and fairy-tale pictures will decorate the interior of the nursery.
Glow in the dark stars
They will create an atmosphere of magic and mystery. Having accumulated daylight, fluorescent stars will give a pleasant glow at night, making you dream before bed.
The photo shows the interior of a bedroom decorated with wallpaper with glowing stars.
Space
When choosing space wallpaper, you should not use pictures with large objects, so as not to get the feeling of an enclosed space. Images of constellations and comets with the right lighting will create the impression of space flight.
Geometric figures
Geometry on the ceiling will allow you to achieve harmony in the decor of your home. Squares represent conciseness and restraint, helping to relax and unwind. Thanks to their orderliness, the effect of a calm interior is obtained.
The photo shows a living room with a ceiling lined with bright wallpaper with geometric patterns.
Under the tree
They perfectly imitate wood and harmonize perfectly with a vintage or rustic style room.
The photo shows a living room interior in a modern style and a ceiling covering that imitates wood.
Floral drawing
The quality of the ceiling coverings is very high, and the images are clear and realistic. All together this creates an amazing atmosphere of magnificent fresh flowers. A ceiling decorated with voluminous 3D photographic materials can give a charge of optimism for the whole day.
Mirror
They give a feeling of spaciousness, add light, visually raise the height of the room and create a rich and stylish appearance.
Gozhka
The canvases perfectly hide unevenness, small cracks and roughness. Ceiling wallpaper of this type is also used for painting. Due to their special textured weaving in the form of cells, when painted they become dense and give the ceiling a special volume.
Materials and tools
Wallpapering the ceiling is impossible without purchasing the appropriate materials and a set of tools and accessories. To work you will need:
- ceiling wallpaper;
- primer;
- wallpaper glue;
- paper tape under the seam between the sheets of wallpaper (preferably);
- stepladder (can be replaced with a construction platform or a strong table);
- a bucket or basin for stirring glue;
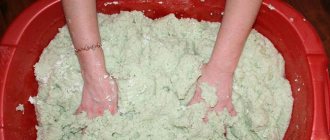
- a screwdriver or drill with a mixing attachment for preparing the adhesive mass (you can stir it manually with any oblong object, even your own hand);
- tapping cord (chalk, construction pencil);
- 5m tape measure;
- in the absence of a beating cord, you will need a long, even strip (the best option is the rule) to apply the wallpaper line to the ceiling;
- stationery knife with a set of replaceable blades;
- a roller with a ditch or a wide brush with soft hair for applying glue;
- a small brush for applying glue to hard-to-reach places when working with non-woven wallpaper - the adhesive mass is applied to the ceiling;
- a dense roller for pressing the trellis sheet (it is difficult to forcefully press the wallpaper sheet to the ceiling with a wallpaper spatula);
- a wide metal spatula for trimming the wallpaper after gluing (if you plan to cut the trellis sheets to size in advance, you won’t need it);
- soft cloth or rags to remove any glue that has come out on the surface of the wallpaper.
Color spectrum
Thanks to a colored ceiling, you can transform the space, enlarge it, reduce it, or give the room a complete appearance.
White
The color of perfect purity, lightness and openness. It looks organic and is an excellent style solution for any interior. Suitable for those who prefer traditional design options and do not accept sudden changes.
Gray
For some, this color is too boring. Others, on the contrary, value it for its noble pearly glow. This design is more likely to suit calmer and dreamier natures.
The photo shows a living room and a ceiling with patterned gray wallpaper.
Beige
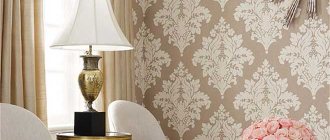
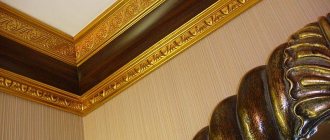
Increases space and does not stand out from the overall appearance of the room. To prevent the interior from looking boring, you can add moldings to the ceiling and walls.
Blue
Creates a feeling of coolness, encourages relaxation and is associated with the endless ocean. Fits perfectly into an interior in a modern, rococo, modern or baroque style.
Blue
A classic choice for decorating the ceiling. Reminiscent of the sky and evokes a feeling of freedom, calm and tranquility.
The photo shows a children's room with blue ceiling wallpaper.
Red
Fire and passion. With proper and bright lighting it creates a feeling of chic and luxury. Light furniture in bed colors will add even more shine to the room.
Yellow
Reminiscent of the sun and summer, creates an atmosphere of happiness and carelessness, and gives the room an original look. The yellow ceiling easily matches furniture and accessories in both modern and classic styles.
Green
Promotes relaxation, so it will be especially appropriate in rooms intended for relaxation.
Brown
Ideal for decorating cozy rooms, creating an even more relaxing environment. This color is relevant for the bathroom.
Orange
Transforms the room and favorably emphasizes its expressiveness, filling the room with warmth and optimism.
Pros of using wallpaper for ceiling repairs
If we compare vinyl wallpaper with other finishing options, we can highlight several of their undoubted advantages:
In addition, the ceiling does not have to be perfect, as, for example, before painting. After all, textured fabrics can easily hide small defects on the surface.
Combination options
They provide the opportunity to implement the most daring ideas, creating an unsurpassed design.
Wallpaper and ceiling tiles
The tile can imitate matting, mother of pearl or wood. By combining it with different options for ceiling wallpaper, you can get a rather interesting and original solution.
Two colors
This is an extraordinary solution that will definitely become one of the distinctive characteristics of the room. An interesting combination would be the following colors: purple and beige, white and black, blue and metallic, lilac and pink.
Ceiling requirements
In general, the key to a good repair is proper surface preparation. Therefore, for gluing to go smoothly, you need to prepare the surface well. It should be smooth, dry and clean.
The quality of wallpapering will depend on the preparation of the ceiling.
In general, the ceiling is prepared in the following sequence:
- first, the old coating is removed from it;
- if there was whitewash on the ceiling, it needs to be cleaned off and washed off well, otherwise the wallpaper will not be able to stick;
- further, a visual inspection of the surface and local repair of problem areas is carried out;
- The final stage is to putty the ceiling, after which it is necessary to clean the surface with fine sandpaper.
In addition, it must be opened with a primer. And also check the surface for mold and mildew. If there are such places, they need to be thoroughly cleaned and opened with a special antiseptic.
Ideas for decorating the ceiling in different rooms
The ceiling can become the focal point of the entire interior and set a certain mood.
In the kitchen
The ceiling covering must be practical, functional and aesthetic. It is advisable to use light, moisture-resistant wallpaper with high permeability. You should choose neutral colors as they hide the accumulated fat on them.
To the children's room
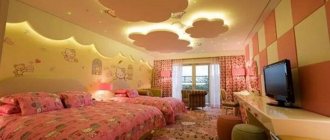
To make this room look individual, it is recommended to use the ceiling as the main color element. Through decor and lighting, you can also add additional accents and create a visually pleasing interior.
The photo shows the interior of a children's room, which is decorated with white wallpaper with birds.
In the bathroom
For a small and cramped bathroom, ceiling coverings with a glossy texture are suitable. Traditional color schemes include various shades of water that harmoniously combine with the shiny surfaces of the tiles.
The photo shows a bathroom in light colors with wallpaper on the ceiling.
In the hall and living room
When decorating, purple or blue tones will come in handy. It is also possible to experiment with black. In combination with the entire decor of the living room, silk-screen printing in black tones will look creative, but there should be a lot of lighting so that the ceiling does not look gloomy.
In the hallway and corridor
When choosing the shade of ceiling wallpaper, you should take into account the color of the walls, floors and furniture. An excellent option for a hallway would be glass wallpaper, because they can be painted with different colors every year and the design of the room can be changed regularly.
In the bedroom
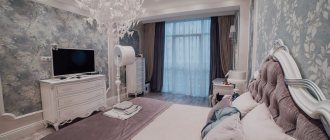
The choice of ceiling wallpaper for this room should be taken very seriously, because they look at it when falling asleep and waking up. An excellent combination can be considered wood imitations with a plasterboard ceiling, and if you correctly install the lighting, it will add new colors to this solution.
The photo shows the bedroom interior and the ceiling decorated with gray patterned wallpaper.
To the bathroom
Finishes in light colors are suitable for visually increasing height. You can stick to the classics, that is, white. The use of silver and light metallic shades is also allowed. An original alternative is a mirror ceiling.
In the attic
Ceiling coverings in light colors with delicate patterns look especially original. Original examples are attic ceilings in a nursery covered with wallpaper in pistachio or fuchsia colors, creating the mood for games.
What type of wallpaper is better to choose
In order for the finish to be durable, you need to find a material that has several properties:
- vapor permeability, then the ceiling “breathes” and does not collect condensation;
- resistance to moisture and mechanical abrasion, especially in the kitchen or hallway (where the ceiling can become damp due to constant temperature changes);
- lightness so that the wallpaper lasts longer.
At the same time, it is desirable that one of the advantages be preserved - low price.
Let's consider which wallpaper is best to choose for the ceiling, taking into account these requirements. The necessary qualities are combined in non-woven fabrics. Both the regular variety and the one with photo printing will look good.
For the kitchen ceiling, a material with a vinyl coating on a non-woven base is used. Paintable wallpaper is also suitable for dry rooms (bedroom or living room). Choose a latex composition that allows steam to pass through. Another suitable option is silk plaster in the mid-price segment.
Paper roll materials are fragile and short-lived, and they are also difficult to glue. The remaining types of ceiling wallpaper are not suitable because they are expensive and do not meet the above requirements.
How to glue wallpaper yourself?
You should be extremely careful and strictly follow the instructions. Before gluing, you need to carefully carry out preparatory work. When choosing liquid wallpaper for the ceiling, it is important to remember that they have their own specific application technology.
Which glue is better to choose?
The glue is indicated in the instructions on the rolls. It is better to choose structural adhesive, taking into account the base material, density, weight of the wallpaper, as well as the type of ceiling, for example: concrete or plasterboard.
Ceiling preparation
It is not recommended to glue wallpaper onto painted or whitewashed surfaces. A clean, primed, slightly rough concrete or plasterboard ceiling without protrusions or recesses would be ideal.
Step-by-step gluing instructions
It is carried out in several stages:
- First, get rid of the old ceiling covering.
- Level the ceiling using a spatula.
- Fill cracks and uneven areas. Achieve the perfect surface.
- Check the ceiling for fungus. If necessary, treat with an antiseptic.
- Prepare, mark and cut wallpaper.
- Apply the required amount of glue to the wallpaper using a roller or brush.
- Start gluing. When gluing wallpaper in corners, you need to take into account the curvature of the corner, since the allowance of the wallpaper strip depends on it. Make sure that wrinkles do not form. To avoid them, you should make cuts and, using a dry piece of fabric, carefully smooth the wallpaper.
Video
This video will clearly show what such finishing work looks like.
Ideas for interior design
Wallpaper for the ceiling is an inexpensive but practical covering. The material does not last as long as some others, but it is easy to update.
Tips for high-quality wallpapering
To achieve high-quality gluing, you should familiarize yourself with a number of useful tips:
- The gluing process should begin in the direction away from the window.
- To do this work by one person without assistants, for convenience you need to fold the wallpaper like an accordion and gradually straighten it during the gluing process. But without some experience it will be difficult to cope with such work.
- It is better to glue the canvases along the length of the room. But they are also glued across, for example, if a print with stripes is chosen, such wallpaper glued across the width of the room can visually make it larger.
- Using wide meter-long sheets saves finishing time, but the process itself is more labor-intensive and energy-intensive.
- To design rounded corners, it is advisable to choose ceiling coverings with a harder and denser texture.
Wide vinyl gluing
We recommend preparing the walls before the ceiling is decorated. Before gluing wide wallpaper, like standard width wallpaper, remove the covers of sockets and switches, and then seal the holes with adhesive tape. You will need to remove screws, nails, dowels and plugs. It is necessary to remove the old ones and carefully remove any remaining traces of them.
When gluing wide vinyl wallpaper end-to-end, start from the top from the window, the direction is from the incident light. If you find any unevenness, make a small cut at the edge of the panels and overlap them. When pasting a room in meter-long stripes, you need to use two stepladders, which will allow you to evenly level the strips over the surface of the walls. Look at the photo on how to properly cover a room with wide vinyl:
You can glue photo wallpaper onto vinyl only if the base of the old canvases is similar to paper. At the same time, the best way to extend the life of photo wallpaper is always to peel off the old vinyl wallpaper and prepare the walls. Choosing a high-quality adhesive will help you correctly stick wide wall coverings.
Stages of covering walls with photo wallpaper:
- We arrange the wallpaper in accordance with the numbering. We draw lines along which we will draw the edges of the first sheet.
- Take the first sheet and turn it face down. The glue is applied to the back side of the wallpaper, using a brush of at least 10 cm. Carefully coat all corners and edges of the photo wallpaper.
- We apply and press the sheet to the starting point, roll it with a construction roller. Glue that goes beyond the limits is immediately removed with a flannel cloth.
- We glue the second sheet of photo wallpaper on the right side of the first one, first draw out the horizontal, then the vertical.
- The overlap between the sheets is 7-10 cm. The overlap lines are trimmed with a metal construction ruler or a sharp stationery knife.
- You should carefully coat the edges and corners of wide photo wallpapers with PVA glue, using a brush 15-20 mm wide.
See what photo wallpaper glued to a vinyl base looks like:
How to paint correctly?
It is recommended to apply two coats of paint. The second layer is applied only after the first has completely dried.
Which paint is better to choose?
The choice depends on the texture of the canvas. Use water-based or acrylic paints that do not contain harmful substances. Almost any paint composition is suitable for ceiling glass wallpaper; for materials based on vinyl and non-woven materials, only certain varieties are required.
Algorithm for painting ceiling wallpaper
There are certain steps that should be followed to complete this procedure:
- Ensure the desired room temperature and absence of drafts.
- Prepare the necessary materials and tools.
- Dilute the paint in the required proportions so that it does not turn out too liquid.
- Apply paint using a foam roller or spray gun.
- Leave to dry.
Video
This video will tell you about proper coloring.
List of tools for work
The main difficulty is that the process will be performed at a height, your hands will always be raised up. Therefore, wallpapering should be done quickly and smoothly. For this, an arsenal of tools and materials is prepared in advance. In addition to the trellises themselves, we will need:
- Stepladder, rack.
- Wallpaper glue (choose the ideal option for each type of product).
- Bucket for preparing glue.
- Narrow and wide paint brush, roller for applying primer.
- Primer.
- Square, tape measure, marker or pencil.
- Sponge or rag.
- Wallpaper or stationery knife.
- A soft plastic roller or spatula.
- Scissors.
- Putty if the ceiling is uneven.
- Sandpaper.
The tools are simple, easy to work with and inexpensive. But, before covering the ceiling with our wallpaper, it is important to carry out a number of preparatory work. Let's look at the entire technology from start to finish.
Ceiling wallpaper and ecology
Many owners of new apartments who are just thinking about choosing a ceiling material are primarily concerned with the issue of environmental friendliness of the finishing coating. The opinion that paper wallpaper is the safest in this regard is debatable.
By themselves, paper, vinyl, non-woven fabric, and glass are quite safe materials for human health. You should pay special attention to components such as wallpaper glue and the paint you choose, but this is a topic for the next article.
Cutting strips and applying glue
It is convenient to cut wallpaper with a stationery knife
Before cutting the canvas, you need to decide on the direction of gluing the vinyl to the ceiling. The fact is that if the stripes are located parallel to the window, the joints between them will be noticeable. Therefore, when gluing with your own hands, it is advisable to position the canvases so that they are perpendicular to the light source.
However, there is not always one window in a room - there may be two or three of them, located on different walls. In this case, it would be correct to proceed from the dimensions of the ceiling and cut the strips according to the dimensions of the long side - this will result in fewer joints.
And during cutting, you need to take into account a small margin. Usually, it is done within 10 cm. Thus, the stripes will extend slightly onto the walls - subsequently, the excess edges can be trimmed with a knife.
Another point - you need to carefully measure the room before cutting. After all, if there are distortions on the ceiling, this must be taken into account. Otherwise, the canvases may turn out short.
Applying glue
When gluing vinyl sheets, glue is usually applied only to the strips. However, in some cases, it can be applied to the base surface. This is done this way:
- the strip lies on a flat surface;
- the glue is applied evenly over the entire surface.
Now you can proceed directly to gluing the material to the ceilings.
Applying glue with a brush
