Functions and scope of use of lime in repairs ↑
Lime is not the easiest material to use. However, it occupies its niche in the building materials market quite firmly and is very reluctant to give up its position. Considering all the advantages and disadvantages, in certain cases the use of lime whitewash is advisable, and sometimes it is more appropriate to choose another method.
Important properties of lime whitewash ↑
The lime known to everyone from school is called calcium oxide in chemistry textbooks. For whitewashing, slaked lime is used, that is, it has reacted with water. Chemically speaking, slaked lime is a strong base - an alkali. It has good disinfectant properties, because an aggressive alkaline environment has a detrimental effect on fungus, insect pests and other unwanted living creatures.
Lime whitewash is not afraid of humid air, does not crack or bubble. In addition to resistance to high humidity, walls treated with this substance are resistant to temperature changes.
For whitewashing it is not necessary to wash off the existing coating; it can be applied to the old finish. Moreover, if a network of small cracks has formed on the surface of the walls or ceiling, treatment with slaked lime solution will strengthen the finish and extend its service life.
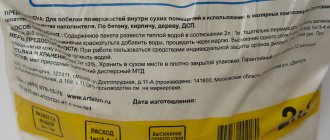
The cost of lime for whitewashing in stores cannot be compared with the price of other finishing materials. This is due to the fact that the production process is very simple - it is a simple firing of limestone in a kiln. Raw materials cost pennies, so the price of the product is low. A thirty-kilogram bag costs about $2.
Where and why is it advisable to use lime ↑
The properties of an antiseptic and fungicide make slaked lime a leader among finishing materials for damp and cold rooms: cellar, barn, garage, basement and the like. It is used for walls and ceilings. The weather resistance of the substance allows it to be used for whitewashing facades.
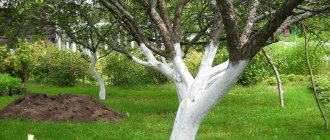
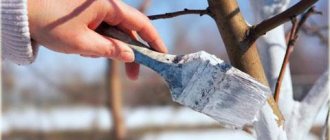
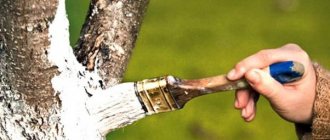
The record holders for using lime for whitewashing and other tasks are summer residents. Here it is applied in full swing. It is customary to whitewash walls both inside and outside, add quicklime to the soil to change its acid-base balance, treat tree trunks to protect them from insects and animals, and borders for beauty.
In those rooms where practicality rather than aesthetics comes to the fore, and where the financial side of the issue is also important, lime solution is also used to cover walls and ceilings. This can be observed in entrances, on staircases, in common corridors, and in the foyer.
It is quite appropriate to whitewash the ceiling in any living space in this way. In schools, hospitals and other institutions, lime mortar is still used for wall finishing. After drying, calcium hydroxide becomes safe and does not release any harmful substances into the air.
Necessary equipment
To process trees, you need to have on hand:
- sandpaper for stripping old, brittle bark;
- a wide brush for old trees and a roller for seedlings;
- whitewash or paint.
You can reduce the amount of work using a spray gun. It will reduce physical labor to a minimum, allowing its owner to do more important things.
Buying lime - which one to buy and how much ↑
Before going to the store, you need to find out what kind of lime to buy for whitewashing - slaked or quicklime, how much of it is required and what other components will be needed. This will save you from going to the construction market again if suddenly the solution is not enough or its properties do not meet your requirements.
How to make slaked lime with your own hands ↑
As you already understand, slaked and quicklime are completely different substances, which are united only by the consonant name and the presence of calcium in the composition. For household repair work, slaked lime is used. It is sold by weight in any hardware store or agricultural department.
However, there are often situations when the farm has a fairly large supply of quicklime and it is advisable to use it rather than buy slaked lime. In this case, you can extinguish it yourself, especially since this chemical process does not require the skills to conduct such experiments in the laboratory.
So, how to prepare lime for whitewashing from lumpy quicklime. First you need to worry about personal protection. Since you will be dealing with a rather aggressive alkali, take care to protect your eyes (goggles), respiratory organs (respirator), and exposed skin (closed clothing and gloves). This must be done in the air.
Video: How to prepare a whitewash solution
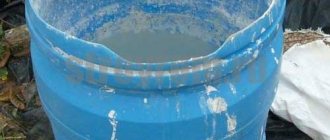
You will need a deep container, such as a bucket, and a mixing tool - traditionally a stick. The list of ingredients is also short:
- lump quicklime;
- water.
The water must be cold, this is the only condition. Even a first-grader will remember the proportion – 1:1.
- For 1 kg of calcium oxide, take 1 liter of cold water.
- Combine all this in a container and mix. Almost instantly you will be able to observe the beginning of a powerful chemical reaction with the release of a large amount of heat. When extinguishing, the mixture sometimes heats up to 150 degrees; it is not for nothing that the substance is popularly called boiling water - the solution literally boils.
- When the reaction stops, heat and gas cease to be released, the lime can be considered “fluffy”, that is, slaked. However, it is not yet suitable for whitewashing.
- The solution should ripen for 2-3 weeks under a lid in a cool, dark place.
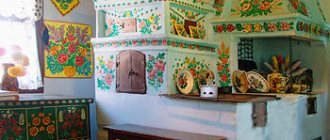
DIY artistic painting
If desired, the stove can be decorated with a design. Folk motifs will add individuality to your home. Artistic painting is easy to do. Coloring composition:
- Dilute multi-colored gouache with water.
- Add 1-2 raw egg yolks to the mixture.
- Stir well until smooth.
- Use as directed within 12 hours.
The design can be applied with a painting brush or with a sponge. The use of stencils is permitted. Painting depends on personal imagination. For beginners, it is better to use simple patterns.
In addition to the egg coloring mixture, the remaining whitewash is used - gouache is added to the solution. High temperature oil paint can be used.
It is best to carry out all furnace work before the onset of autumn. Cast iron parts (oven, doors) are best treated with fire-retardant or silicon-organic enamels. This will protect them from corrosion.
Source: strojdvor.ru
How to apply the composition to a surface according to all the rules ↑
Instructions on how to whitewash walls with lime vary widely. The thing is that each master has his own recipe for a lime mixture, his own tool, and therefore his own technique. But you can try to combine the fundamental points into one algorithm. The result is a universal method, which everyone has the right to supplement or slightly adjust depending on the situation.
Is surface preparation necessary? ↑
If the task is to quickly whitewash the walls and the decorative side of the issue does not really concern you, you can skip the preparation stage altogether. In fact, you can whitewash directly on top of other coatings without worrying that the result will not live up to expectations. But if the walls are covered with adhesive paint, then you need to remove it first.
If speed is not your priority, then it is better to prepare the surface for applying lime mortar. This way the result will be more accurate. The old whitewash is washed off, the swollen areas on the plaster are removed, sanded, and puttied. The same applies to cracks, if any.
Plain water is used as a primer. The surface is slightly wetted for better contact. And if the mixture contains one or more of the additives listed above, then adhesion will be even better.
It is important to protect all other surfaces from accidental contact with lime. All furniture, if it cannot be removed from the room, the floors and walls are covered with plastic film. The worker must wear a protective suit, gloves, goggles and a mask for personal protection.
A few secrets for uniform application ↑
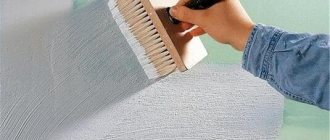
The application process is not particularly difficult. A brush or paint brush is dipped into a container of whitewash and the solution is applied to the walls or ceiling in a thin layer. For ceilings, it is better to use a tool with a long handle. You can make it yourself. This will make your work easier and eliminate the need to climb on unstable structures made from tables and chairs.
Step-by-step instruction
There are several ways to whitewash the surface of walls with lime mortar:
- roller;
- brush;
- spray gun with sprayer.
It is recommended to cover uneven, rough surfaces with a brush or spray. You can achieve high-quality, uniform distribution of lime along the wall.
Surface preparation
If you don’t know what the surface of the walls was previously treated with, it’s easy to check. A small section of the wall is wetted with water. If lime treatment has been previously carried out, the area will darken. You can rub the coating with your finger. If no white mark remains, it means that a lime composition was also used.
Preparation
Proper preparation of the base for whitewashing is an important stage of finishing cladding. The result depends on the coloring effect.
Experts advise following the basic recommendations:
- The room is first cleared of furniture, equipment, and other bulky items. If this is not possible, it is recommended to hide it securely under plastic wrap and secure it with tape;
- to remove the old layer of whitewash, the base is treated with water. Partially wet so that the moisture does not have time to evaporate. Cleaning is a standard soap solution. Experts advise adding a little vinegar and citric acid to the solution;
- immediately after applying the soap composition to a section of the wall with a brush, roller, you need to take a spatula and erase the old layer. It is better to try to prevent old pieces of whitewash from falling onto the surface. The floor covering will get dirty. You will have to wash it several times. The removed pieces are put into separately prepared containers. After treating the area with a spatula, the residues are finally washed away with a damp sponge;
- the wall is treated with an antifungal agent;
- cracks, dents, and potholes are removed. For recesses up to 10 mm, a putty compound is used, in other cases only plaster is used.
If there are visible defects in the form of stains on the surface, you need to eliminate:
- rust is removed with a solution: 7 g of copper sulfate is used for 1 liter of hot water;
- fatty areas are treated with soda ash. A two percent solution is made and applied to the area until the greasy stain goes away. Then, it is recommended to rinse with water;
- remove soot with a two percent solution of hydrochloric acid.
Whitewashing houses: advantages and disadvantages
Whitewashing of walls with chalk or lime is used as application components. The second option is the most common. Today we will consider this issue in detail. Also in the video on how to whitewash walls you can see the details of this work.
Whitewashing for walls involves diluting lime or chalk in water and applying the liquid mixture to certain areas of the building. It is this coating that will serve as protection for the structure.
At the present time, this method of decoration is not popular among the population. However, there are still summer residents who adhere to the traditions of the past generation.
The advantage of whitewashing buildings is as follows:
- These materials are natural and environmentally friendly.
- This is one of the cheapest design solutions for finishing buildings. The price will probably be the lowest.
- Lime has disinfectant properties and therefore prevents the formation of mold and mildew.
- The material is highly moisture resistant.
- The facades of buildings that are covered with whitewash look very good.
- To decorate the surface of a building, you don’t need to spend a lot of time, you don’t need special tools, and a small amount of materials.
- To carry out work on whitewashing a building, you do not need to have any skills; to do this, it is enough to understand the basic principle of working with the material and everything can be done with your own hands. We will consider all stages in more detail below.
Before you whitewash a wall, you need to know the negative qualities:
- No variety of colors.
- Not a long service life, although this is compensated by its low cost.
- When working with lime, it is necessary to use methods to protect your hands and eyes, as the material is very caustic. For protection, use a respirator, goggles, gloves.
- There are very few garden styles that can be combined with whitewashed facades. You can use stylistic solutions such as country or Provence.
- Care should be taken when preparing the solution, as if mixed incorrectly, flaws may appear on the surface of the building. For example, bubbles, swelling of the material or stripes of different colors.
It’s worth saying right away that almost any walls can be whitewashed. Even the adobe walls are whitewashed. But this is more complicated. After all, straw is a material that must be carefully prepared.
If you are thinking about how to whitewash walls with water-based emulsion, then this is done according to the principle of applying chalk or lime. The principle is the same and will be described below.
Whitewashing a building using lime means that you need to apply a pre-prepared mixture to the façade. To do this, a base plane must be prepared. It should be smooth. After all, the coating will repeat all the unevenness.
Attention: Before you start whitening, you must treat the base of the facade with a primer, wait until it dries completely, and only then start whitening manually or using special devices.
Whitewashing the surface of buildings is only possible in the evening or in cloudy weather. Due to the fact that lime is not resistant to high temperatures, it is necessary to avoid exposure to the sun when working.
Attention: The composition must be homogeneous, there should be no lumps or clots. So when kneading it is worth using a drill with an attachment. Then the mass will be homogeneous.
If you choose a brush to apply the material, you must wet it. Some time before work, leave the brush in a jar of water so that its wooden base swells and particles of bristles do not remain on the surface that has already been whitened.
According to the technology of applying whitewash to the facade of a house, it is necessary to cover the base in several layers. The first layer of lime is distributed in horizontal stripes. The second layer is applied after the first has dried. However, it is applied from top to bottom, that is, perpendicularly.
If a spreader is used when whitening a building, then the rule should be strictly followed. The lime mortar is distributed using a machine at a right angle. This is necessary for economical consumption of material and uniform coverage of the entire surface.
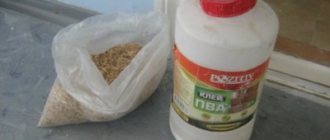
Preparing lime mortar is not difficult. The mixture should include the following ingredients: hearth, slaked lime, wallpaper paste, table salt.
Preparing lime for whitewashing:
- We take a medium-sized container, pour 3 kg of lime into it, mix it with 1 liter of water, add 100 g of salt and glue.
- Stir the resulting mass thoroughly to ensure there are no lumps. Then add water until the total volume is 10 liters.
- Wallpaper glue will give the solution stickiness, making it easier for the whitewash to adhere to the wall surface.
- Salt is added so that hands and clothes do not get dirty when touching it. You can also add blue, then the solution will turn out to be snow-white.
Attention: It would be a good idea to wet the surface of the wall before starting work. Then the whitewash will be better applied and adhere to
Before starting any work with whitewashing, it is necessary to prepare the base so that the whitewashing lays down well and there are no flaws afterwards:
Before starting work, the surface must be cleaned. This material should not be applied to substrates with rust, unevenness, or even efflorescence and greasy stains.
If there are cracks on the surface, they must be treated and repaired. The old whitewash must be removed; it can be removed using a special brush. The entire surface is completely plastered and then primed. Before applying whitewash, it is necessary to cover all objects with film so that the solution does not get on them.
A brush can be used to treat small surfaces. And for large areas, rollers or a sprayer are best. Using a brush is the easiest and most cost-effective way.
As mentioned above, the brush needs to be soaked in a jar of water to prevent lint from getting onto the whitened surface. This determines what the final result of the work will look like. A sprayer is used over a large area. Working with such a device requires compliance with the rules for applying whitewash. The distance between it and the application site should be about 30 cm, and sprayed at a right angle. Then the material consumption will be small, and this is economically beneficial. Not everyone has the opportunity to buy a device; then an analogue of a sprayer can be a regular vacuum cleaner.
Experts can tell you how to whitewash walls and what to consider. There is a lot of useful advice in their advice.
Attention: Lime milk is the best means for disinfecting ceilings and walls. Prevents the formation of mold, mildew and the appearance of bedbugs in the house. To make the mixture, use 1 liter of water and 3 kg of slaked lime, mix them in a container
If you want to get a boiling white color, then add a little blue to the container with the mixture, which is used when washing things. To ensure that the already whitened surface does not stain anything upon contact with it, add regular salt in the amount of 100 grams.
If you want to diversify the color scheme of whitewash, you can use pigment. It is worth noting that it must be resistant to calcareous material. For one kilogram of lime add 100 grams of pigment. For example, stable pigments - chromium oxide, soot, umber. Before adding pigments to the lime mortar, they must be diluted separately in water. Stir the pigment until a homogeneous mass is formed and leave for five hours. Then add the resulting mass to the lime mixture with thorough mixing.
To reduce the possibility of cracking or swelling of the material on the surface, wallpaper glue should be added in a volume of 10%. Then the solution will be viscous and sticky, and will fit better on the wall.
Before starting work with whitewashing, it is necessary to apply water to the surface. The first layer is applied in horizontal lines. It should dry, and then apply the second layer perpendicularly, that is, from top to bottom. The craft should lie evenly.
Lime is not resistant to high temperatures, so you should not start working in the heat. It is also not resistant to sun exposure. This material is best applied in cloudy weather or in the evening. The material consumption per square meter is a little 200 grams.
Before starting work with whitewashing, you need to apply a primer to the entire base and let it dry. And then start whitewashing. You now know how to whitewash walls and can do it yourself. It’s also worth watching the video in this article and photos that will help you do the job correctly and take care of everything. The instructions are completely correct and if you follow them, then the coating will be applied efficiently and quickly. published econet.ru
If you have any questions on this topic, ask them to the experts and readers of our project here.
Did you like the article? Then support us, click
:
Whitewashing is not a very common wall decoration these days, but is still used.
The reason is not only the cheapness of the materials, but also the ability to tidy up the room without using hired force, since you can learn how to properly whitewash walls with lime the first time, during the process. The main thing is to prepare the surface of the walls well for finishing and whitewash according to a good recipe.
Nuances
The nuances of applying whitewash:
- You can slak lime yourself by mixing it with water in equal volumes. The composition is stirred for half an hour. Cover with a lid and leave for two weeks;
- To obtain the desired shade, dye can be added to the lime mortar. For 1 sq. m section of wall will require 0.5 liters of composition;
- The first ball of lime is applied perpendicular to the window, the second - perpendicular to the frame.
Painting walls with lime is a simple and affordable process. Refers to a budget method of surface finishing. It is recommended to use safe work practices and protective equipment.
Why is it better to whiten with lime?
Whitewashing inside houses was previously done either from chalk or lime. Chalk whitewash has visual advantages - the color of the walls turns out pure - completely white or with a tint if dye is added to the mixture. In addition, chalk whitewash lays on the walls in a fairly dense layer - it is not difficult to whitewash without streaks, bald spots, or brush marks.
But lime whitewash has the advantage of being an antibacterial and insecticidal coating. With its help from mold, fungi, insects.
How to whitewash a stove without streaks and cracks
You can whitewash a stove in a country house or in a house without streaks and cracks if you mix the plaster and coloring solution correctly and follow the proportions and consistency. The following points must be taken into account:
- The mixture should not stain clothes. After drying, you need to touch the oven. If no traces of whitewash remain, then everything was done correctly. If it gets dirty, it’s better to bleach it again.
- Whitewash must withstand high heating temperatures. At the end of the work, the stove is heated. Then make sure that the coloring solution does not turn yellow, darken, or give streaks. If deficiencies are identified, the work must be redone.
- You can whitewash the stove with rollers, brushes, or a spray gun. The brushes are pre-soaked in water. You can whiten in two directions - along and across. This is how uniformity is achieved. If desired, repeat the staining.
- The solution applies best to a cooled surface moistened with water.
Masters recommend working with a natural swing brush. In this case, movements on the surface must be carried out confidently. When working with this method, do not wait for the applied layer to dry. Repeated painting with a second layer is carried out immediately.
Preparing surfaces for lime whitewash
We clean the walls and ceiling from old finishes and dirt. If the walls were previously whitewashed, wash off the old layer. We eliminate wall defects, repair chips and cracks with putty, and then sand them.
We prime the surfaces. This is necessary so that the liquid whitewash absorbs less into them and forms a dense, well-adhesive layer. A regular primer is essentially an adhesive composition.
We use slaked lime - paste or prepare fluff from lime powder
Instructions for preparing the solution
The building materials store sells dry lime powder - fluff.
Its price is slightly higher than quicklime. Pushonka is dry slaked lime. The package is enough to treat walls in a room with an area of 12-15 sq.m.
The solution adheres well to smooth concrete walls, and the material consumption is less. Brickwork absorbs more liquid and has an uneven surface, which increases consumption. If whitewashing is done in 2-3 layers, then more solution will be required. In any case, you should take extra powder.
Prepare the solution:
- 1 sq.m will require 500 ml of solution;
- For 1 kg of dry powder you need to take 3 liters of water;
- The paste should be diluted in the ratio of 1 kg of dough per 3 liters of water.
How to prepare a primer for whitewashing with lime
You can purchase a ready-made primer composition or prepare it yourself.
Stir slaked lime in warm tap water (water - half a portion).
Pour salt (coarse, rock) into the liquid.
Add the remaining water.
Separately, mix and grind a small amount of wood glue and sifted chalk powder. You should get a paste similar to cream.
Dissolve the chalk-glue mass in liquid with lime.
The primer composition is ready.
Proportions of ingredients for preparing the primer:
- slaked lime (paste) – 5 kg;
- water – 20 l;
- salt – 200-250 g;
- chalk – 400 g.
- carpenter's glue - about 200 g (we guide ourselves by adding it to the chalk in parts).
We cook wood glue in granules with the addition of water in a water bath.
Instead of wood glue, you can add PVA wood glue to the primer for lime whitewash. Sometimes a strong soap solution is added to it (rub a piece of laundry soap on a grater and dissolve the shavings in hot water). But a primer with soap is weaker than one that contains wood glue - the whitewash can get dirty and crumble.
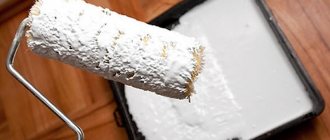
Lime whitewash can be done with brushes
If you use a whitewash roller, the surface will be more neat and even.
Answers to frequently asked questions
Is there a difference when to whitewash trees, in the fall or in the spring?
It is enough to protect the trees with whitewash once. In spring or autumn - it is decided by the gardener himself. Whatever is more convenient. Some whitewash trees twice a year.
What is better - to renew the whitewash of trees several times or to add additional products to the composition?
Also at the discretion of the garden owner. You can give preference to purchased whitewashes, which contain several substances at once. They are both useful and at the same time last longer on the bark.
Do trees really need whitewashing?
Not that this is an urgent need. But whitewashing, firstly, is a very simple agricultural technique. Secondly, it has proven itself to be good in terms of efficiency.