Contrary to all forecasts, the classic whitewashing of the ceiling surface has not sunk into oblivion, and is still actively used today. You can understand this choice: fast, inexpensive and at the same time quite reliable and attractive. However, among those who practice this method of decorating the top of a room, a reasonable question invariably arises: is it possible to whitewash the ceiling using old whitewash? The motive for such manipulations is more than transparent: to reduce all the time spent on decorating the ceiling surface to a minimum. Read below about how this is done.
- Exceptions;
- What you will need;
- Which material to choose? Current prices for chalk and lime;
- Preparing the premises;
- Ceiling preparation;
- Preparation of the solution;
- Whitewashing process;
- Conclusion.
Materials for whitewashing the ceiling surface
First of all, you need to decide how to whitewash the ceiling in your apartment by choosing one of the options. Each of them has advantages and disadvantages.
It could be:
- lime;
- chalk;
- water-based paint.
As for such a material for whitewashing the ceiling as chalk, it will give the repaired surface a radiant whiteness. Even though the room will look good, it will create additional dust. This is explained by the fact that the chalk will gradually begin to crumble. Also, this material is not waterproof, so it is not suitable for repairing the ceiling in the bathroom.
Whitewashing using lime is an excellent way to combat fungus. In the rooms where it appeared, this should be used. In addition, lime on the ceiling is resistant to high humidity. It can be used to paint the ceiling surface in any room, including the bathroom. Lime whitewash successfully hides minor defects such as cracks and cracks.
Before whitening the ceiling with lime, you should take into account the fact that this material can cause an allergic reaction. Also, the surface is not perfectly snow-white, unlike a chalk-based composition.
After applying water-based paint, the ceiling has an excellent appearance; it adheres well to the previous coating. The composition adheres to old whitewash and does not begin to peel off over time. This paint has the only drawback - when using it, repairs can be carried out at temperatures from +5°C. But when painting the ceiling is done indoors, this circumstance does not matter.
If you do not want to wash off the previous layer from the surface, then you should know that whitewashing the ceiling using old whitewash has a number of nuances. The fact is that chalk cannot be applied to lime, and vice versa, otherwise the new layer of finishing will not fit well, resulting in dirty stains appearing on the ceiling surface.
It is permissible to apply the same layer or water-based paint on top of the chalk solution. If the old whitewash on the ceiling was lime-based, it can only be covered with the same material or an emulsion coloring composition. In addition, you need to take into account that enamels or oil paints are not applied to the old chalk or lime layer.
Exceptions
Put a new layer on top of the old one - what could be simpler? Perhaps the apparent simplicity is what attracts property owners who have started a renovation and quite naturally want to complete it as quickly as possible with the best possible result. However, there are exceptions to any rule, and first we will touch on those conditions under which this cannot be done:
- if the old layer is made of lime and there is shedding of the layer;
- there are damage, swelling and noticeable irregularities;
- there are traces of mold or large stains;
- the base layer differs in thickness.
Don’t be scared and critically examine your ceiling for the presence of all of the above - in most cases, simplification is still feasible and brings a fairly pleasant result. Just take a look at the ceiling surface and determine whether its shortcomings are so obvious? You need to understand that new whitewash over the old one performs only the function of cosmetic repairs and is not capable of correcting defects in the base surface.
Tools for whitewashing
Before whitewashing the ceilings yourself, prepare the necessary tools - this work is performed in one of three ways, for which they are used:
- roller;
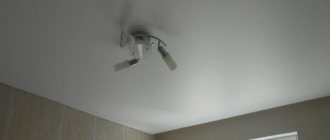
- sprayer, also known as a spray gun;
- brush.
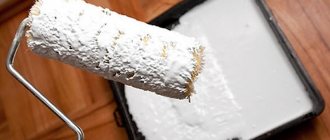
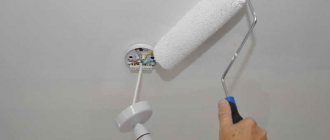
If painting is carried out with a roller, then the coloring composition will lie in an even layer, without forming spots or streaks. To get a good result, whitewash is applied in two layers. You will need to have not only a roller, but also a container for the solution, a mixing tool, a paint tray and a small brush for applying paint where the ceiling meets the wall.
A whitewash brush can be purchased at any building materials store at an affordable price. When using it, the composition splashes, so you should protect the furnishings in the room from it and use special eye glasses.
The use of a sprayer allows you to lay the whitewash in an even, neat layer. Using a spray gun to whitewash the ceiling, you will reduce the time it takes to complete the work. When using paint, make sure it is free of lumps. Its consistency should be more liquid compared to whitewash, which is applied with a roller or brush.
How to prepare for whitewashing correctly
Before starting work, it is necessary to ensure protection of hands, eyes and respiratory tract (prepare goggles, respirator and rubber gloves ). This is very important, since whitewash particles entering the body can provoke allergy attacks.
Furniture is removed from the room, or anything that could not be gotten rid of, and the floor is covered with polyethylene or thick canvas.
Attention: during the whitewashing process, the windows in the room must be closed, otherwise streaks may appear on the renewed surface.
The surface of the flow is inspected for the presence of cracks and chips, all irregularities are puttied and rubbed with sandpaper.
The cleaned, prepared surface is thoroughly primed, after which you can proceed directly to applying new whitewash.
The main question is: how can you cover a ceiling that has already been painted with lime whitewash? The answer is simple - new lime mortar. It's not difficult to prepare. It is enough to mix 2 kg of dry lime, 1 tsp in a clean container. blue and 10 gr. salt (pre-mixed in water), 10 liters of water.
It is easy to check the desired consistency of the prepared solution. To do this, lower a knife into the whitewash, and if the solution does not drain from the blade, then you can safely get to work.
Algorithm of actions:
- Whitewash is poured into the tray.
- The roller is dipped into the paint, rolled out slightly onto the tray and begins to paint.
- The strokes are perpendicular to the window
- After the first layer is applied, the second is applied.
- The joints with the wall are carefully painted with a brush.
An accelerated option is to whitewash the ceiling using a spray gun. The process has its own characteristics:
- The solution should be more viscous than for a roller or brush.
- The whitewash is filtered through a sieve before being poured into the spray gun.
- Using a spray gun, the ceiling is whitewashed in three or four layers.
Choosing water-based paint
If, when deciding on the best option to whiten the ceiling, you decide to use this type of paint, then you need to take into account that there are many varieties of them, they differ in composition and properties:
- Polyvinyl acetate paints. They are the most affordable.
- Water-based emulsions with acrylic additives. They are the most popular. They are used for different surfaces, they are resistant to abrasion, but for ceilings this does not matter.
- Silicone paints. If the ceiling whitewash is being repaired, it can be done without using a primer. This painting composition is distinguished by a high degree of vapor permeability; it is suitable for painting ceiling surfaces in the kitchen or bathroom. This paint can reliably protect the ceiling from fungus.
- Water emulsions with latex. They have excellent water resistance; surfaces painted with them can be washed with detergents. Such compositions are the most expensive among similar products.
To decide which whitewash is best for the ceiling, before purchasing water-based paint, you need to carefully read the label, which indicates the purpose of the composition, consumption per “square” of area and other important information.
A correctly selected composition allows you to create a durable snow-white ceiling covering - it will not turn yellow over time and will be reliably protected from the appearance of fungus.
How to whitewash walls
The composition used for whitewashing is available in three types: lime, chalk, and water-based emulsion. But each finishing material has both its advantages and disadvantages.
Whitewashing walls with lime
To obtain a ready-to-use material, the lime is slaked with water. This type of whitewashing is the most popular. Among the advantages of lime it should be noted:
- good antiseptic and bactericidal properties;
- lime remains on the surface for more than three years;
- walls after whitewashing with lime tolerate moisture and temperature changes well;
- adhesion with other finishing building materials;
- the ability to fill cracks and correct minor surface defects;
- very low price.
However, along with obvious advantages, lime has significant disadvantages:
- Causes a burn if it comes into contact with exposed skin. It is necessary to use protective clothing, a respirator, and gloves;
- in the process of careless, inept work, stains, drips, and stains remain on the surface;
- lime is contraindicated for those who suffer from allergies.
Application of chalk
Along with being cheap and environmentally friendly, chalk has a number of advantages over lime:
- safe to work with;
- shades of white after application are more saturated;
- is hypoallergenic.
Chalk also has disadvantages that need to be taken into account:
- does not like high humidity. Since when interacting with water, the surface begins to crack, swell, and peel off over time;
- if used improperly, it leaves bubbles, drips, and stains on the surface;
- constantly stains and stains everything around - furniture, clothes, curtains.
Whitewashing walls with water-based paint
It would be more correct to call painting walls water-based paint. Since the composition usually contains lime, they talk about whitewashing, not coloring. In any case, this is a good alternative to chalk with a number of undeniable advantages:
- moisture resistance;
- wear resistance;
- high antiseptic properties;
- environmental Safety;
- easy to apply to the surface;
- dries quickly;
- safe to use.
The disadvantages depend on the composition of the water-based paint and its constituent polymers. For example, vinyl or latex enamel is ideal for surfaces that constantly experience high moisture and temperature changes. Acrylic under such conditions will crack and peel off like chalk.
We recommend reading the article about types of paint
Whitewashing using water-based paint
Before whitening ceilings by applying a water-based emulsion over lime, the previous layer should first be coated with an acrylic primer. Then it doesn’t hurt to make sure the surface is durable; to do this, you can try to scratch it.
Paint is applied only when the ceiling is not crumbling. When painting over chalk, there is no need to do any preparation. The water-based composition will adhere to the ceiling without the use of a primer.
Before starting renovations, you should prepare the room. Objects in it are carefully covered with film or taken out of the room to protect them from paint.
When applying the coloring composition with a brush, first the strokes are placed perpendicular to the windows, and then parallel to them. If the final layer is parallel to the light source, there will be no noticeable streaks after the paint dries.
Preparing the premises
- remove all small-sized furniture from the room, and securely cover what cannot be removed with plastic wrap along with the floor;
- you should clear the room of furniture so that you have room to maneuver;
- Close the door to the room tightly, as well as all the windows, otherwise you risk causing streaks to appear on the ceiling that has not yet dried.
Repair with chalk
Before you make a ceiling with whitewash, you should prepare a chalk solution, for which 10 liters will require 50 grams of wood glue and 5 kilograms of chalk. Its consistency should be such that the composition does not drain from the knife. If this is not the case, add chalk. You can add blue to the mixture to make the surface snow-white, without yellowness.
The technology for repairing a ceiling with chalk is no different from the process of applying water-based paint. First, choose a repair tool - a brush, roller or sprayer. The composition should lie in an even layer.
Quite popular today is adhesive whitewashing of the ceiling, which contains glue; it is much easier to apply and holds more firmly. If a surface covered with simple chalk can stain your hands upon contact, then adhesive painting has no such disadvantages. In addition, this whitewash can be given any color shade.
Whitewashing the stove with your own hands so that it doesn’t crack or get dirty
Regardless of whether people live in a city or a village, many use a Russian stove at home, in the country and in bathhouses. The stove, heated with wood and coal, provides heat, is used for cooking, and thanks to its decorated tiles and artistic painting, is a decoration for any home. Before the heating season, it is advisable to whitewash the stove to clean it of dirt and give it a fresh look.
How to properly prepare a stove for whitewashing
There are various DIY methods for whitewashing the surface of a stove. In practice, chalk, lime, putty, and tooth powder are used for the stove. Which method the owner wants to choose depends only on personal preferences. Each of the coloring options is suitable if you mix the components correctly, observing the proportions.
Do not use a water-based solution of purchased paint, since as the fireplace heats up, fumes harmful to human health will be formed.
Before whitewashing the stove, it is necessary to wear protective clothing, rubber work gloves, perform preparatory work in the form of cleaning and plastering the surface, and also grout the brick. It is important to prepare the place of work:
- cover the floor and furniture with plastic film;
- clean the surface of the fireplace from debris and dust;
- Grout the masonry with clay, cement or asbestos, moistening the surface with water.
The stove should be whitewashed only after plastering to avoid smoke from entering the room through cracks and for a good appearance. To ensure that the solution does not crack, lasts a long time and does not stain things, the home master must adhere to certain rules:
- Inspect the surface of the stove, remove old whitewash, soot, grease stains and cracked plaster, to apply a fresh layer of a new heat-resistant mixture. Soot stains can be easily removed with a brush or a metal sponge. In this case, you need to move the tool carefully so as not to create additional cracks. Soda ash will thoroughly remove grease stains.
- If the previous whitewash is clean and in good condition, it does not need to be removed. Simply wipe it with a damp cloth to remove dust. Wetting the surface is useful for better application of the plaster.
- The layer of plaster mixture should not be thick. You need to apply the composition with a spatula or brush to avoid unevenness. Additionally, wet the surface with water.
- Heat the stove several times to allow the plaster to dry. Many craftsmen recommend not to heat the surface too much, especially on the 1st day of drying. Gradual drying will set the solution and prevent cracking.
- Then you can whitewash the stove.
The plaster is sold in dry finished form. It is mixed with water and used. You can purchase a heat-resistant mixture, for example, “Emelya”. The best homemade fireproof putty for a stove: clay, sand, cement, lime (1:1:1:1). The ingredients are thoroughly mixed with water and used.
Following the advice on preparing the surface of the stove and the rules for applying whitewash promotes long-term operation without frequent painting.
Recipes for whitewash solutions
You can quickly whitewash the stove using the traditional or modern method. The main thing is that the applied paint lies evenly, so that you cannot accidentally get dirty on it. Traditional means for whitewashing a stove include lime solution, chalk and white dental powder. The modern method includes a mass in the form of a paste - putty. It is available in many repair supply stores.
Experienced stove makers praise the product and note that it does not fade, lasts a long time and does not stain things. Putty for whitewashing the stove is very easy to prepare: it is diluted with water (2:1). The packaging of the product tells you how to properly knead the mixture without lumps.
Before you start whitening, it is advisable to heat the stove in the house a little - two hours will be enough. So l
The coloring agent will adhere better.
Mortar
To whitewash a stove with lime, you must take precautions to avoid contact of the solution with exposed parts of the body and eyes. It is better to wear long rubber gloves on your hands. You need to work slowly and without making sudden movements.
Lime burns are a rather unpleasant phenomenon. But despite the danger, lime is considered a good whitewashing agent and has been used in everyday life for many decades. Lime colors and disinfects the stove from fungi, harmful microorganisms and insects. The following solution recipes are used:
- Lime powder is mixed with water and table salt (35-40 g). Salt gives strength and prevents surface cracking. After painting, it is recommended to light the oven to dry.
- Lime, chalk powder and carpentry glue are mixed with water and then whitened. 100 g of glue is enough.
To increase the durability of the coating, some craftsmen recommend adding Oxol drying oil (2 tsp) to the lime solution.
Chalk based whitewash
A good effect is obtained when painting with an inexpensive natural material - chalk, which creates a rich color on the surface. The disadvantage of this method is considered to be white marks on hands and clothes with each touch. There are several recipes for chalk solutions. Most Popular:
- Dilute chalk with water (2:1), stir and apply immediately.
- Take dry chalk powder, water or skim milk. Stir the mixture until smooth, add natural grated heated soap and 100 g of wood glue.
- The composition of chalk with milk is considered ancient. Proportion of ingredients: two parts milk and one part chalk.
Whitewashing a stove with chalk solution is cheap and quick, but this method often produces stains and requires several layers.
When liquid is added, the chalk turns gray. When the hearth dries, it will turn snow-white. You can add up to 50 ml of blue to the chalk mixture, which will prevent yellowing.
Lime whitewash
To prepare a lime mortar for painting the ceiling surface, take 2.5 kilograms of lime, add 100 grams of salt, pre-soaked in water, and also a little blue. All components are mixed, and water is poured in so that the resulting volume of the mixture is approximately 10 liters.
The rules for how to whitewash a ceiling with lime are similar to the recommendations for how to apply water-based paint and chalk mortar.
What is the best putty for stoves and how to use it
Fire-resistant finishing mixtures are durable and do not deform under high temperatures. Cracks worsen the appearance of the fireplace and allow carbon monoxide into the room, so heat-resistant putty for stoves is used. The composition is purchased ready-made or prepared using hand-made technology using heat-resistant materials.
Content
Composition of materials and mixtures for the oven
The walls of the stove become hot during operation, so the usual mixture will crack and crumble after a few months. The raw materials for mixing refractory putty for the furnace are sand, cement, gypsum, lime and clay.
Recommendations for preparing the solution:
- it is preferable to use lime or clay in the composition, but be sure to add asbestos;
- Complex cement-based mixtures can be used, but asbestos or other fibers remain an additional component;
- straw or hemp can replace asbestos.
Store-bought dry putties are sealed with water in accordance with the instructions on the package. The finished mixtures in buckets are pre-mixed. The amount of solution that is used before hardening and loss of plasticity is prepared.
Prepare the composition yourself to coat small fires; for large stoves it is better to purchase high-temperature mixtures prepared at the factory.
Materials
Sand is a sedimentary rock with a loose structure, consisting almost entirely of silicon dioxide. River, sea and quarry types can be used for the solution. Sand grains formed in reservoirs are round in shape with a smooth surface.
Clay is a sedimentary rock containing kaolinite, which when dry is dust and becomes plastic when moisture is added. Porous and waterproofing material is characterized by sinterability, fire resistance, viscosity, and shrinkage.
Lime is obtained artificially by burning carbonate rocks and includes large amounts of calcium, magnesium, and dolomite. Lime dough or a slaked variety (kipelka) is used.
Asbestos refers to mineral filaments from the group of silicates, which in nature form flexible fibers. It is classified as a carcinogen, has high heat resistance, does not dissolve, but fluffs up in water. In oven putty it serves as a binding and dispersed component.
Cement refers to astringent hydraulic inorganic substances obtained artificially. When moistened, it forms a plastic mixture, which subsequently hardens and gains strength not only in air, but also in water.
Important nuances
When repairing the ceiling surface, you should take into account the purpose of the room. For example, if this is a bathroom, it requires the use of a special composition that is resistant to high humidity and can protect the ceiling from fungus. Otherwise, the paint will lose its attractive appearance within a short time and, most likely, will begin to crumble.
When performing painting work, it is necessary to remember safety, since the whitewash must not come into contact with the respiratory system, eyes or skin. To do this, use a respirator, rubber gloves and special glasses. The fact is that the coloring composition can cause serious allergic reactions, and sometimes chemical burns.
Tips: how to whiten correctly and effectively
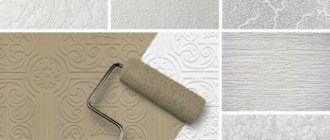
Before carrying out the actual work, you need to acquire a suitable tool: roller, brush, spray gun.
Most often, in terms of financial accessibility, brushes and rollers are used. Whitewash, after thorough mixing, is applied in at least 2 layers. The brush is pre-soaked so that it swells. Then its fibers do not fall out to the surface.
It's much easier to work with a roller. Since the surface is smooth, perfectly white. After completing the work, do not forget to rinse the tool so that it can be used again.
There are important safety rules that must be strictly followed:
- Protective clothing must cover the entire body. First of all, eyes, nose, mouth;
- If lime gets on your skin, rinse it thoroughly with water. Otherwise, you can get a serious, slow-healing burn;
- stains that inevitably appear on the walls can be removed with water and a sponge. But you need to wash them while they are fresh, and not let them dry out.
If you follow these simple rules, whitewashing walls will not take much time and effort. The surface, when properly applied with lime or chalk, will delight the eye for a long time, and will also make the room sterile, clean and aesthetically pleasing.
Removing old whitewash from the ceiling
Despite the fact that there is a technology for how to whiten a ceiling with your own hands without washing off the previous layer, to obtain a high-quality result you need to clean the surface and be sure to level it.
You should definitely wash off the previously applied whitewash that does not adhere well to the ceiling. If it is not removed, you cannot expect a decent result. When the chalk or lime layer is smooth, thin and firmly in place, painting can be done over it.
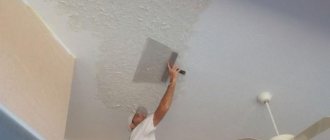
If you still need to prepare the ceiling for whitewashing, proceed as follows to remove the chalk:
- The foam sponge is moistened in water so that it becomes damp and drops do not drip from it.
- They pass it over the surface over and over again, thereby washing off layer by layer, wetting it as often as possible.
- Finally, wipe the ceiling with a wet cloth, frequently dipping it in water.
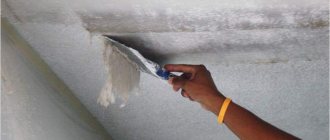
As for the lime layer, it is much more difficult to remove:
- First of all, moisten the entire ceiling surface, for which you can use a spray bottle.
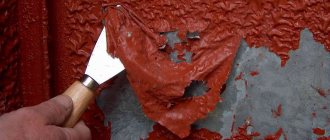
- The soaked material is removed with a scraper or spatula.
- Then thoroughly wash the ceiling with a sponge or rag to remove any remaining dust and lime.
It is better to work in sections: while the soaked lime is removed from one of them, the surface of the other absorbs moisture. As a result, you can prepare the ceiling faster. Also, special means are used to wash off the previous whitewash.
Building materials stores sell a remover that is applied by spray. After it dries, a crust forms on the ceiling; it must be removed with a scraper. Finally, wash the surface with a rag.
There is another option for deleting the old layer. Vinegar is added to the water in the amount of one tablespoon per 5 liters and 50 milliliters of bath foam. The components are thoroughly mixed and applied to the ceiling. After 20 minutes, it is cleaned with a scraper and wiped with a wet cloth.
There is another way to clean old whitewash. You need to mix water and flour. The resulting paste is applied to the surface and allowed to dry, after which removing the old layer is not difficult.
Is it worth finishing the surface without pre-cleaning?
So, we found out whether it is possible to whitewash the ceiling using old whitewash. In principle, this is allowed. If all the recommendations listed above are followed, the owner of an apartment or house can ultimately obtain a fairly even and beautiful coating. However, unfortunately, such finishing will have to be corrected in the future sooner than if the ceiling had been previously cleaned.
Therefore, before deciding to whitewash without removing the old layer, you should think carefully. The lime sticks to the ceiling quite firmly. Therefore, if the surface is finished with it, applying a new layer without removing the old ones still makes some sense. But chalk can be removed from the ceiling very easily - just with a rag and water. Therefore, in this case, it is more advisable to pre-clean the surface.
Professional ceiling painting
If you do not have enough skills and knowledge on how to properly whitewash ceilings, you can use the services of professionals. This solution has many advantages. It allows you not only to save time, but also to get excellent results. A professional will use a minimum amount of paint to whitewash the ceiling, so the repair will not cost much more than painting it yourself. The main thing you should pay attention to is the skill of those who are to be hired.
It must be remembered that whitewashing old paint is an inexpensive and simple way to transform the interior of a room for the better. It should not always be used and only when the previous layer is even and holds up perfectly. In this case, water-based paint, lime, and chalk applied directly to the old base will adhere reliably.
Whitewashing is not difficult. You need to turn to experts for help and hire professionals in order to save time if the owner of the premises is a busy person and does not have the opportunity to carry out repairs.
We install a multi-level plasterboard ceiling ourselves
The work will require special attention, so take your time to do it as quickly as possible. It's better to spend more time, but then you will enjoy the result.
- First of all, you need to mark the ceiling surface around the perimeter. To do this, it is best to use a laser level. The consumption of drywall and profiles depends on how correctly the measurements are taken. Place marks at the fastening points of the guides, and drill holes in these places with a hammer drill.
- Installation of a plasterboard ceiling is carried out using two types of profiles: guide and ceiling, or frame. Secure the horizontal profile along the marking line. Insert dowels into the holes and secure with screws.
- Install a rack profile inside the resulting guides and secure it with self-tapping screws. It is at this stage that insulation and soundproofing material can be laid.
- After the installation of the frame is completed, proceed to fastening the sheets. You will need a helper for this as the sheets are very large. Apply the drywall to the frame and begin attaching it. Use a special screwdriver attachment for this; it will help tighten the screws to the desired level.
- Trim the sheet of drywall with a hacksaw where it sticks out. On the sheets of the first level, mark the boundaries of the second level with a pencil. Attach the profiles and guides for the second level directly to the first layer. For a straight ceiling, use a two-level connector: it allows you to fix the levels one below the other.
As you can see, a do-it-yourself plasterboard ceiling, even a multi-level one, is not a very difficult task.
Painting the ceiling after preparatory work
The surface that we are going to paint is already clean, primed and dry.
We protect the walls with adhesive tape in places where the ceiling adjoins them (so as not to stain them).
painting work from the corners (it’s easier to do it with a brush).
We paint along the lines along the walls.
Apply the first layer of paint across the room (taking into account the direction towards the window).
The second layer of paint is perpendicular to the first.
The question “how to paint a ceiling if it’s whitewashed” has been removed, the work is finished, the newly finished ceiling is clean, fresh and neat.