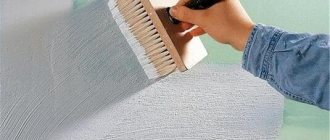
Whitewashing, or, as it is otherwise called, lime painting of walls, is one of the cheapest types of repairs to wall and ceiling surfaces. To prepare a lime mortar for painting, you will need lime paste, as well as bluing to give the mortar a bluish tint.
In addition, you will need a large brush to whitewash the walls with lime. By the way, the surface can be painted not only with ordinary whitewash, but also with colored whitewash: to do this, special dyes should be added to the mixture, which are intended for coloring lime mortar.
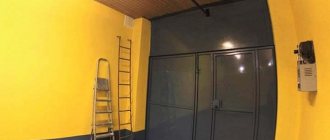
What paint is best to paint an iron garage?
To paint the garage
made of metal, use epoxy, rubber, organic, polyvinyl chloride, alkyd and oil
paints
.
... Mesh and honeycomb areas
are
best painted
with a brush. A paint roller is suitable for painting solid surfaces, such as metal sheets, solid sections.
Interesting materials:
How to calculate square meters of walls? How to calculate the square of a wall? How to calculate square area? How to calculate the square meters of a room's ceiling? How to calculate the square meters of a room's walls? How to calculate square meters of a room? How to calculate the square footage of a floor calculator? How to calculate the quadrature of a wall? How to calculate the square footage of a room's wall? How to count floor squares?
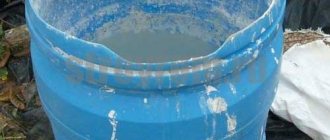
Are you preparing the solution correctly?
Whisk for whitewashing
It should be especially emphasized that the quality of whitewashing walls with lime depends, first of all, on whether you have prepared the solution for the job correctly. You will get a high-quality mixture if you follow the following proportions.
For six to seven liters of cold water, take a standard package of lime paste (it weighs 4.5 kilograms). Gently and thoroughly mix the resulting solution - your mixture should be homogeneous in appearance, similar to cream or sour cream.
If you want to paint the walls and ceiling white, you need to add ultramarine blue to the ready-made whitewash mixture. At the same time, remember that ultramarine powder is diluted in cold water in advance (the color should be uniform, deep blue). Then gradually pour the finished liquid into the lime mortar, achieving the desired shade.
Help with advice.
Guys, tell me what to paint the walls in the garage with. I won't plaster. I want to paint the brick right away. What paint should I buy?
Comments 39
Facade paint. Doesn't stink, coverage is good, two coats are enough for the eyes. Not very expensive
any water-emulsion from a construction store, as well as primer for the same tasks.
The best option. Covers everything in two layers. The price is very cheap. I painted an insulated balcony, a summer house, and a garage. Great paint. You can add callers
Be sure to prime with a deep-penetrating primer (maklovitsa or spray), and then you can use a façade water-based emulsion. Friends bought Knauf Mp40 plaster as an economical option, diluted it with water and painted the brick with rollers, cheaper than paint and also lasts
Facade paint will help
Invite guys with spray cans, give each one their own plane, let them fantasize.
What if you just spray it with a caller, lime fights well against all sorts of viruses))) and dampness!
First, you need to beat off the mortar build-up in the seams and cover some areas with cement mortar. Remove dust with a brush and paint with any façade paint. It wouldn’t hurt to run over the primer with the same spray gun. The paint is white, you can tint it, but only the whole volume at once, otherwise you will have to select it. Paint only with a spray gun. There are inexpensive electric ones. The main thing is to dilute it thinner and paint over it several times. Success guaranteed! Don't forget about electrics. Place the cable in sockets and switches on a painted surface.
How about the third topic? that everything stops at 2?
Water-based paint, light colors. The lighter the walls, the better, there will be more light. Dark walls are only for gatherings with friends and drinking beer; you won’t be able to do anything with your car in the garage.
Preparing walls for whitewashing
If whitewashing is applied for the first time
In order for whitewashed walls to look beautiful, the surface must be prepared for repair. If the walls are simply plastered and have never been whitewashed before (as, for example, in a new building), the work is simplified. True, under these circumstances it is necessary to whitewash the walls in three layers.
The first layer can be applied without using bluing. When the base layer has dried, you can apply subsequent ones, to which, if necessary, you will add ultramarine blue or a special dye of a suitable shade. As for the surface drying time, it is approximately five to six hours for each individual layer.
Removing rust and grease stains
Sanding the ceiling surface
In the same case, if the surface of the walls is not ideal, careful preparation should be made for applying a layer of lime whitewash. First of all, carefully wash off any stains on the walls, as well as rusty stains, with plain water. Then treat these areas well with a solution of copper sulfate. The proportions for preparing this solution are as follows: from fifty to one hundred grams of vitriol are diluted in one liter of boiling water.
What to do if there are greasy stains on the walls you plan to whitewash? In this case, soda ash will come to your aid, from which a two percent solution is prepared.
Dampen a clean white rag with this solution, and then blot the stain thoroughly. Hold the rag until the stain is completely gone. Next, the surface treated with soda ash solution should be thoroughly rinsed with water.
No soot, cracks or whitewashing at 100%
But if the walls are quite smoky, another recipe will help you. Take a solution of hydrochloric acid (two or three percent) and wipe the surfaces to be whitewashed with this solution.
If there are cracks and other defects on the walls, you will need to repair them before starting to whitewash the walls. This will require putty. You don't have to buy an expensive branded mixture.
You can easily make the solution yourself. To do this, take one part plaster, two parts chalk, and two parts wood glue (diluted). Keep in mind that when diluting wood glue, you also need to take into account the rules regarding proportions: for example, fifty grams of glue are required per liter of water. As a result, you will get a simple, but high-quality putty mixture.
There is another recipe for excellent putty. Take lime paste (that is, thick slaked lime) in the amount of two and a half kilograms. Add five liters of water to it. And finally, add one more component - one hundred grams of ordinary table salt (it must be diluted in hot water).
Then you need to add another five liters of water to the resulting solution and mix everything carefully and thoroughly. Then strain the mixture through a fine sieve. The last stage is the addition of wood glue diluted with water in a ratio of one to ten, as well as with chalk powder (about two hundred grams).
This amount of putty will require about one and a half liters of adhesive solution. So, as a result, you get an excellent consistency, which you can later also use for priming walls. This composition creates an even, smooth film and can easily replace an expensive branded primer. As for applying putty, you will need an ordinary spatula.
Painting methods
To get a good result, it is important to choose a convenient and most suitable tool for applying paint , depending on the type of paint chosen. It is also important to consider during what period the painting is carried out.
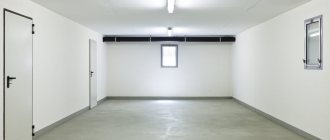
If painting work is carried out immediately after completion of construction in an empty garage, it is advisable to use a special spray gun . The process will go quickly with its help, and the paint will be applied evenly.
Work in a garage that is already in use and equipped with furniture and various objects should be carried out using brushes and rollers. With their help, you can reach hard-to-reach places, and the paint will not get on various objects.
It is better to paint a brick wall with a brush ; this will allow you to thoroughly paint both the brick and the cement joints. A roller is not suitable for painting such walls.
Technology of work execution
to paint the walls in a garage ? To ensure better adhesion of the paint to the wall surface, it needs to be primed .
This will also reduce paint consumption. The primer is selected specially, suitable for specific coatings.
Modern materials also help prevent the formation of mold and mildew on the walls.
If the walls of your garage are prone to condensation, purchase a high-quality primer and carefully treat the surface with it. Otherwise, after painting, the walls will be covered with dark spots, which will give them an untidy appearance.
If you decide to apply a new coat of paint over the old one, you will need a primer for blocked substrates and a matting undercoat, they will help achieve an even finish in tone and texture.
Let the primer dry well, then begin painting . It is advisable to apply the paint in two layers, allowing each to dry thoroughly. Apply the first coloring with vertical strokes, and the second with horizontal strokes. This method will help to achieve an even tone, without streaks or imperfections.
Thus, painting the walls in the garage is a simple process that you can completely handle on your own. By refusing the help of professionals, you will significantly save your own money.
General recommendations
- Calculate the cost of whitewashing taking into account the amount of materials required. To do this, knowing the consumption of paint, chalk or lime, glue, blue and other components, calculate their cost. Add the cost of tools (brushes, rollers, pallet, etc.). It will still be cheaper than ordering suspended or suspended ceilings.
- While whitewashing and drying the ceiling, avoid drafts and direct sunlight, otherwise the result of your work will crumble.
- Make sure that during whitewashing the solution (paint) is distributed over the ceiling without the formation of drops or sagging.
- Do not forget about safety precautions - wear protective gloves, goggles, and a hat.
Article on the topic: What kind of garage to build at the dacha
If all whitewashing rules are followed, the next ceiling repair will be needed in 3-5 years.
Loading…
So, how to whitewash a house?
When whitewashing buildings or houses, this type of improvement will be the most economical. Chalk and lime have antiseptic properties and therefore the formation of mold and mildew is excluded. Due to the fact that the structure of the lime mortar after drying prevents the penetration of moisture, its use will be appropriate on a decorated surface.
Due to the fact that lime mortar is resistant to changes in temperature and air humidity, it can be safely used in unheated rooms.
Chalk whitewash, like lime whitewash, is of natural origin and is considered an environmentally friendly material, and most importantly safe to use. After applying the chalk solution and drying it, the walls of the building or rooms become snow-white.
If for some reason it is necessary to remove the chalk coating, then this process will not be difficult - the chalk easily dissolves in water and is washed off. In order to refresh the interior of a room with chalk whitewash, you do not need to have special skills, and the only tools you need are a container for the solution and a brush (roller). The only drawback of this material is its unsuitability for use in high humidity environments.
Proper handling of lime mortar
There are two types of lime that are sold in stores - slaked and quicklime. In the first case, this is an almost finished product in the form of a powder, and in the second, the lime must be slaked independently. Quicklime is sold in the form of stones. They are placed in a container, always metal, and filled with water. The water will react with the lime stones and the slaking process will begin.
In this case, you should be in clothes that completely cover your body and wear glasses. The reaction is violent and is accompanied by boiling, the splashes of which fly in all directions. In direct contact with skin, this solution causes a burn.
The extinguishing process can be stopped by adding a little water. Slaked lime has a thickness that is compared to sour cream. Before whitewashing begins, it is made liquid and applied to the surface. The solution can be made colored using dyes. After adding them, the lime mortar is strained to prevent color spots and spots.
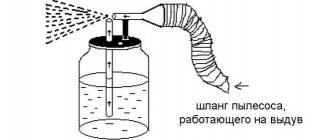
What to whitewash, everyone decides for himself. This could be: a vacuum cleaner, roller, brush, spray bottle. For good and uniform coloring, apply two layers. The first is horizontal, the second is vertical (for manual whitewashing).
If the solution is applied with a spray gun, then at a right angle. This will avoid drips and paint the surface evenly. Many years of people's experience advises applying layers of whitewash one after another, without waiting for it to dry, and if the second layer is rubbed well, a shine will form. To make it perfect, you need to rid the room of drafts.
Surface preparation
Before you start whitening, you should clean the surface and eliminate all defects. Cracks must be sealed and then rubbed over. In order to completely hide and strengthen the wall, it is treated with a primer. For better adhesion of the whitewash to the surface to be painted, it should be moistened with water or wallpaper glue should be added to the solution.
When working with lime mortar, it is necessary to protect the body from contact with it. It is necessary to work with gloves. If lime gets into your eyes, rinse them immediately with plenty of water. The chalk solution does not cause burns and is completely safe.
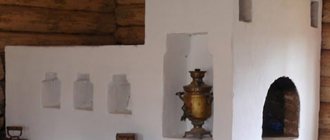
Lime or chalk mortar can be used to process and decorate not only buildings and rooms. Tree posts and borders painted white look beautiful.
If you decide to whitewash the inside of the house, then before starting work, be sure to cover all objects in the room with construction adhesive tape, including radiators, pipes, baseboards, sockets, etc.
You now know how and with what to whitewash a house. Good luck!
Lime whitewash is used less and less in modern decoration. However, there are situations in which quick and inexpensive repairs are required. This material is also preferred by people who, from Soviet times, have retained the habit of using it to “ennoble” the ceiling surface. In general, lime whitewash continues to be used today, so the issue of proper dilution of the working mixture and maintaining the correct consumption of material has not lost its relevance.
We properly dilute lime for high-quality whitewashing
If “active quicklime” (CaO) was purchased, then it must be diluted with water (proportion 1:1) to obtain the working composition – “slaked” lime (calcium hydroxide). During the reaction, an abundance of thermal energy is released, and the mixture begins to boil, producing steam and splashes.
Attention! Safety glasses, thick rubber gloves and very thick (preferably rubberized) clothing will prevent you from getting traumatic burns to your eyes and skin!
After the completion of the violent slaking reaction, the lime cannot be immediately used for work. The solution needs to sit for at least 13 days.
However, there is an excellent alternative option - to purchase ready-made, crushed slaked lime. It’s easier and faster to prepare, and it’s absolutely safe to work with.
The powder material is diluted with water to the required density and 2.6 tbsp is added. spoons of regular drying oil, paint blue (the amount depends on the desired result) and 110 gr. table salt. All these proportions are indicated for 10 liters of lime mass.
Important! Blue and salt must be thoroughly stirred and dissolved in heated water before adding to the working mixture!
Additional additives are required for: - blue and salt - give the whitewash mixture pronounced whiteness; — drying oil – promotes high-quality adhesion of the applied whitewash to the main surface, and also gives the coating additional strength.
The solution saturation of whitewash directly depends on the method of its application. If you use a brush, the whitewash solution becomes thicker. When using a sprayer, the whitewash mixture must first be liquefied and thoroughly filtered. As a result, the layer turns out thinner and “thinner”.
Consumption indicator of lime mixture during whitewashing
The amount of whitewash used directly depends on two factors: - the method of its application; — quality and preparedness of the treated surface. Smooth walls require less whitewash than brick surfaces.
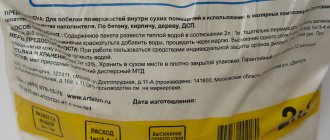
Reference! The average estimated consumption of the finished whitewash mixture per square meter of surface is 0.51 liters!
If you purchase ready-made whitewash powder for dilution, the correct proportions (in addition to additives) will be as follows: 1 kg of dry crushed powder per 3 liters of clean water. For example, a two-kilogram package of powder composition should yield 6 liters of ready-to-use whitewash mixture. This amount will be enough to cover 12 square meters. m. smooth and 7.8 sq. m of brick surface.
Lime dough
In stores you can find another type of lime - ready-made lime dough, which is an intermediate state between powder and solution.
This substance must be diluted to working condition in the following proportion: one kilogram of dough per liter of clean water. Knowing that 1 liter of whitewash is enough to cover 2 square meters with high quality. m of wall surface, you can very easily calculate the required amount of lime paste.
Method for calculating the amount of lime substance
As noted above, lumpy “quicklime” must first be “quenched”, and then more water must be added to the required consistency.
The entire technological path is as follows: 1. Lumpy lime is “quenched” with clean water in a proportional ratio of 1:1. The result is a wet powder. 2. Add 2 more parts of water to the resulting powder to form a lime dough. 3. The dough is diluted with water to the required concentration of the working composition.
Thus, from a kilogram of lump lime, ideally, you should get ten liters of good whitewash, completely ready for use!
Conclusion
Of course, the process of preparing a lime mixture is somewhat approximate, so accurately calculate the amount of initial material and the exact volume of the finished composition.
Lime is not an expensive construction and finishing material, so it is better to buy an additional supply so that the lack of working solution does not affect the quality of the finish!
There are a huge number of ceiling finishing options, but the most affordable and simplest is whitewashing. If you have a limited budget for renovations, this solution will be the most optimal, and a clean and smooth surface will in any case give the room a neat, well-groomed appearance. In addition, whitewashing the ceiling with your own hands will not take much time and will not require much effort.
You cannot whitewash a ceiling using an old coating: when wet, the previous layers of whitewash will begin to peel off and stick to the brush, making the process difficult. In addition, the surface will not be perfectly smooth, which is completely undesirable. When cleaning the ceiling, you must take everything out of the room or cover it with polyethylene, otherwise you will have to wash everything from lime and plaster.
Step 1: Surface Cleaning
For cleaning you will need:
- bucket with water;
- sponge;
- medium-sized metal spatula;
- clean rags;
- ladder.
If you clean a dry ceiling, a lot of dust will rise, and the process itself will take a long time; It is much faster and more convenient to remove the whitewash after moistening. You should not immediately wet the entire area, as the surface dries out very quickly; it is better to divide the ceiling into small sections and moisten as you go.
After wetting the whitewash, you need to wait a few minutes until the layers are saturated with water to the base, then the coating can be very easily removed with a spatula. Finally, wipe off any remaining chalk or lime with a clean, damp cloth until no traces remain.
Step 2. Sealing joints and cracks
For further preparation you will additionally need:
- serpyanka;
- putty;
- sandpaper;
- primer;
- brush or roller;
- level.
There are always joints between the ceilings, which gradually diverge over time. To prevent them from appearing on the ceiling, they are embroidered, filled with putty mixture, and covered with sickle tape on top. Putty is again applied over the serpyanka and thoroughly rubbed with a spatula, making the surface even.
While the joints are drying, the ceiling is carefully inspected and defects are eliminated. Small cracks are simply rubbed with mortar, recesses and chips are puttied.
Step 3: Remove stains
Very often stains appear on the ceiling that show through the finish. It can be quite difficult to remove them, but this must be done at the preparation stage, otherwise after a while they will again be visible through the whitewash layer. Stains from water leaks are removed using bleach or bleach: dip a sponge in the liquid and press it onto the stain until it lightens. Of course, you need to wear rubber gloves to protect your skin.
To remove rust stains, you will need copper sulfate. Prepare a saturated solution of bright blue color, spread the stain well, let it dry and repeat everything again. If necessary, re-process until the marks fade. After this, the problem areas are well primed and dried.
Step 4. Alignment
When all noticeable defects have been removed, a level is applied to the ceiling surface in different places to determine the magnitude of the differences in height. If there are recessed areas, they are puttied separately, and when the solution dries, the entire ceiling is covered with putty. Usually a finishing putty is used, which is applied in 2 layers 1-2 mm thick.
To work, take two spatulas - a narrow and a wide one; when applying, hold the spatula at a slight angle to the ceiling. The resulting sagging or stripes are removed after the mixture has dried with sandpaper. It is necessary to sand the entire treated area to give the surface maximum smoothness. Finally, the ceiling is wiped with a dry cloth to remove dust and primed.
How to wash off old whitewash from walls?
Painting the ceiling
If there is already whitewash on the surface of the walls, before applying layers of new material, you must get rid of the old one. Ordinary chalk whitewash from the walls is washed off with water. To do this, you will need to apply water using a roller - the entire surface of the wall is treated with moisture evenly.
It is best to go through the walls several times, maintaining short periods of time between applying water. If the walls do not get dirty, you can be sure that the existing whitewash has been removed efficiently.
We invite you to familiarize yourself with useful tips that will help you remove old whitewash from walls quickly and thoroughly.
- Before you begin removing whitewash with water, be sure to prepare the room. If possible, remove all furniture from the room, and cover the floors, window openings, and doors with polyethylene. In the same case, if it is impossible to remove the furniture, also protect it with plastic film. Keep in mind that whitewash is very difficult to remove from surfaces;
- Before starting work, be sure to turn off the power to the electrical wiring in the room. Be careful and careful;
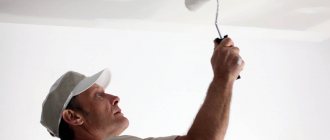
- It is advisable that the person working in the room has a reliable headdress. Many builders, by the way, use caps made from newspapers. Wear gloves on your hands, because the effect of lime on the skin will not be beneficial at all;
- In case you are working at arm's length (for example, at the top of a wall), try to ensure that dirty water does not flow under the sleeves. To do this, you can attach a plastic cover to the base of the roller. In this case, your hands will remain clean and dry.
Once you have thoroughly wetted the whitewash on the walls, you can begin to remove it. Usually the walls are cleaned well from the old layer - if you, of course, conscientiously moistened them with water. We take a spatula and get to work.
And after the whitewash has been removed from the walls, we carefully inspect the walls for the presence of weak plaster. Be sure to scrape off any old, crumbling material. If voids suddenly appear in the layer of plaster, remove them and then cover them with fresh mixture.
Prime the surface of the walls
Mortar
After all the work on cleaning the walls and putting them on has been done, it is time to coat the surfaces with a primer. This is the last preparatory stage before starting the whitewashing procedure.
You can use the recipe above or any other available and effective composition for the job. So, for example, the primer is prepared in this way. You need to take three kilograms of lime paste, about two hundred grams of ordinary laundry soap (or rather, soap shavings), and about one hundred grams of drying oil (“Oxol”).
Slaked lime is diluted in four liters of water. In another container, grated or chopped soap is diluted in three liters of hot water, and drying oil is added to the solution. The two resulting solutions are mixed. That's all - a high-quality primer is ready. The only thing is, do not forget to dilute it with water immediately before work (the total volume of the solution should be about ten liters).
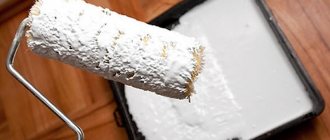
Of course, the main purpose of using a primer is to create a thin film on the wall surface through which paint cannot penetrate. This way, the surface will be painted evenly and dry more evenly. Apply the prepared primer to the wall surface with a roller. You can also use a wide brush or paint sprayer. Wait until the layer dries. And only after that you can begin the work of whitewashing the walls.
If you decide to whitewash both the walls and the ceiling in a room, you must start work from the ceiling. And only when the ceiling is completely dry can you begin to treat the surface of the walls with lime mortar. This is the basic rule for whitewashing walls with lime.
The walls should be whitened in this way: the hand moves from top to bottom, and certainly in one direction. One layer of whitewash for the walls will not be enough; you will need to apply two, and in some cases even three layers. Each layer of lime whitewash must dry thoroughly. It will take on average five to six hours.
When treating the surface of walls with lime mortar, do not forget that the container with the mixture must be shaken, thus mixing the contents. The fact is that lime paste quickly settles to the bottom of the container. If you notice that the solution has become thicker than you need, add water (a little, of course) and mix thoroughly.
Only if you whitewash the walls with lime correctly, following all the rules and recommendations, will the surfaces look perfect when the work is completed.
Since ancient times, whitewashing houses and outbuildings with chalk or lime mortar has been popular and accessible to anyone. Nowadays, in order to whitewash a house yourself, there are many products offered on the market, but, as before, chalk and lime remain among the traditional ones and many do not want to give up their use.
In addition to the fact that lime mortar and chalk are natural and harmless to humans, they are inexpensive. There is an opinion that a whitewashed house is found only in rural areas, but one may disagree with this. Country style looks good in any room.