It is no longer uncommon to see khaki-colored cars for non-military purposes on the street. More and more car owners are choosing this color for their vehicle.
Painting a car in khaki color
Cars are painted this way mainly for fishing, hunting, and frequent agricultural use. In some cases, special-purpose vehicles have this color. Here we need to make a small clarification - depending on the brand of the car, problems may arise when passing a technical inspection or completing documents.
It should be noted that getting this color for a car and painting it yourself is not difficult. The main thing you need to know to get the right color is to mix colors correctly. Not the least place in this process is occupied by preparatory work on the surface of the car.
Origin of color
Initially, the word “khaki” as a color designation appeared in Britain in the mid-19th century, and it was borrowed from the Hindi language and translated as “earthy shade, soil color.” Units of the Indian Army in the service of the kingdom then wore khaki uniforms. The useful properties of the shade - the ability to be invisible on the ground and hide dirt - were soon borrowed by other countries for army clothing. Khaki also quickly entered fashion trends, becoming an integral feature of casual style.
Required Tools
To paint a car khaki with your own hands, you need to have:
- material for gluing unnecessary areas of the car;
- masking tape;
- paint;
- paint thinner;
- an abrasive machine or sandblaster to remove the old coating;
- putty;
- surface degreasing agent:
- priming;
- a gun with a nozzle for spraying paint;
- polish;
- liquid wax
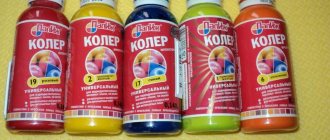
Necessary materials for car painting
What tools will you need to create camouflage on your car with your own hands?
Painting a car always requires preliminary preparation of the surface, provision of the necessary tools and the purchase of quality materials. The set of tools changes based on the specific type of drawing.
When painting a vehicle in camouflage color, you will need minimal skills in working with paint. To make the task easier, it’s good to have special stencils. You can do without them, but then the complexity of the work increases.
During the work process the contractor will need:
- plenty of paper, you can use old notes, newspapers, magazines or unnecessary books;
- a considerable amount of masking tape, preferably with different strip widths. Basically, the process takes 5 narrow and 5 wide tapes;
- more flannel rags, they must be dry and clean;
- 1 glass of gasoline;
- 0.5 l of solvent;
- a special varnish that will be used to open the surface to create a matte and glossy look;
- one halogen lamp with a power of 1 kW;
- an ordinary metal spatula, it is better to work with a relatively narrow working surface - 7 cm;
- auto enamel is present on the shelves of most stores in the form of a high-pressure spray can. To cover the entire body you will need about 4 pieces of all colors.
Masking tape for car painting
If you plan to use a stencil, you must first decide on the shape and size of the spots. After the thinking stage, you need to stick a vinyl film on the surface or use cardboard, just be sure to use a dense base. These materials will be used to create the drawing. Vinyl film is simply glued to a one- or two-color body, and a shape is cut out of cardboard and the recess is treated with a spray can.
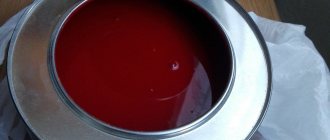
Getting khaki from brown
After you have mixed the base brown color, add a little white color. Enter a small amount first, less than the other colors you added to make brown. If you add the same amount at once, you may lighten it too much. Now you have a basic, fairly soft brown color. Determine for yourself whether it is close enough to the khaki you would like to use for your painting. Often in painting there are times when you need a more specific version of a color that will suit your vision. The resulting shade can be refined by adding more or less of any of the primary colors or white paint in order to change it to suit your needs.
How to get khaki color
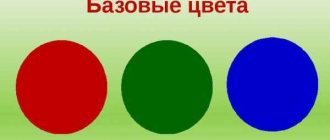
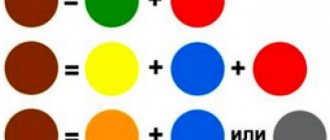
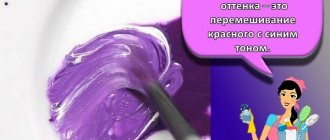
The easiest way to make khaki is brown. If it is not available, you must first make a basic brown from paints: combine the primary colors (blue, red, yellow) with each other in equal proportions. It is best to take materials using a palette knife, as the likelihood of measuring components of equal volume is higher. Next, based on brown, khaki is obtained by combining with additional shades.
Another option for creating khaki is to mix raw umber and titanium white. In appearance, the finished shade will be a warm, grayish-green. It is perfect for depicting natural themes, and in interior design - for decorating walls with Venetian plaster. You can add a drop of yellow to the finished color, for example, cadmium yellow, this will add warmth to the tone. To cool the shade, add a little blue paint.
Olive khaki matches
Olive khaki is a rich, golden-green shade that looks incredibly good with gold and brown. The tone is full of elegance and looks good on silk and satin fabrics in evening dresses. It contains the magic of luxurious style. It emphasizes tanned skin, slim figure and refined taste.
Favorable combinations with olive khaki would be sunset pink, fuchsia, cardinal, mango, golden copper, old gold, honey, green tea, malachite, dark blue, sky blue, thistle, eggplant, chocolate, cinnamon, ivory, black -grey.
How to change the resulting khaki shade
If you don't get the shade you want, follow these simple steps to change your khaki color. You can use them to change the shade according to your needs. Before you get a khaki color that is close to the shade of café au lait, you can add white paint. Add a little at a time until you reach your desired tone. Using one of the primary colors can also help create the desired color, from soft to rich. Adding red or yellow will make the khaki color warmer and lighter, while the blue tone will be cooler. To make it even warmer, experiment with adding red or yellow paint. You need to do this little by little. If you want a very light khaki, the easiest way is to use a lot of light paint and a small amount of the base brown you mixed earlier. Adding dark to light is easier than the other way around. You can increase or decrease the saturation and brighten the khaki color by adding more base brown to the mix. You can make it more muted by adding gray paint.
Advantages of each type of camouflage
If you still have questions or doubts regarding the choice of pattern or color, it is worth exploring the advantages of camouflage varieties:
- winter. Optimally suited for winter, the car receives a coloring of white snow and dark spots that appear when the cover lies for a long time. In other seasons, the car will not have camouflage, but in the city it looks interesting and unusual. The advantage is the minimal visibility of surface contamination; after hardening, it is difficult to distinguish between the design itself and the dirt;
- digital. It is the most modern option, which is in demand among young people. It is not intended for camouflage, it performs only a decorative function;
- deserted. Mainly used for people living in arid regions with clay and sandy soils. It camouflages especially effectively in the autumn, but in other seasons it does not help hide the position;
- forest. It is deservedly considered the most universal, as it is well suited for almost any season, and also does not impair the appearance in urban environments. Among all the options considered, this is the most striking camouflage.
Winter camouflage for car
Painting process
The paint should be applied with a gun with a nozzle diameter of 1.4-1.6 millimeters. Movements should be smooth and you should gradually move clockwise around the machine. Please note that you need to wear a respirator when working.
The amount of paint must be diluted immediately. Otherwise, you may end up with a color mismatch on the surface of the car. It is better if the car enamel is available with a little reserve.
It will dry completely in 7-8 days. Until this time, it is not advisable to use the machine. Car paint should dry in a dry, warm, well-ventilated area.
Adviсe
Some useful tips:
- to give an original look, it is worth using large spots of different sizes in the design, which move from one body element to another;
- A special protective surface is formed along the contour to prevent paint from crawling beyond the contour;
- You cannot start painting a spot until the previous layer has completely hardened;
- for the integrity of the picture, the drawings need to be drawn overlapping;
- each spot must be applied 2 times to prevent color transparency;
- When drawing, you need to move with the spray can only in a clockwise direction.
Neutral Khaki in Fine Art
Protective shades, which have a more pronounced tone, have a raw umber appearance. They are widely used to dim the brightness of other colors, and also, with active dilution, to draw flesh color. Thicker, richer khaki tones are used to decorate the ground, tree trunks, and military-themed designs.
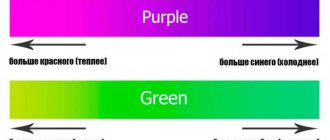
Khaki is considered a neutral color. It goes well with many shades, is not bright or flashy, therefore does not irritate the eye and can be used as a background tone. Khaki belongs to the brown spectrum, and can be created by combining complementary shades that are opposite each other on the color wheel (for example, red and green, blue and orange). However, finished colors will vary greatly in the presence of greenish, yellowish or gray undertones. It is quite difficult to achieve a strictly defined shade: you will have to experiment with paints.
How to paint a car camouflage
To correctly apply camouflage, you can be guided by a previously proven technique, which includes all the features of applying the coating. Nevertheless, this procedure opens up wide scope for the owner for imagination and the implementation of the most extraordinary creative ideas.
One way or another, the painting technology presented using the presented method has a number of features. In order for the camouflage to be carried out in accordance with all established canons and rules, certain requirements must be adhered to.
- painting should be done in a ventilated room using personal protective equipment;
- Initially, a base layer is applied, occupying most of the body element;
- a transition is gradually made to smaller details;
- the base layer should be lighter than all the others. It is applied, as a rule, in 2-3 approaches;
- after applying it, the paint should dry;
- the next stage is applying a stencil and applying masking elements of the 2nd layer;
- you should adhere to a pre-thought-out sequence of applying stains;
- stains should not merge with the first base layer;
- the stencil, for greater fixation, should be secured with masking tape;
- it is necessary to use different variations of colors alternating with each other;
- It is best to make the boundaries of the spots blurry, smoothly blending into each other;
- when using a spray gun, to apply stains, you need to adjust the torch to the smallest spray sector;
- You should not apply a large number of spots so as not to overlap the background layer;
- When using a matte finish, in the future, to protect it, several layers of varnish can be applied to it.
Fine art and khaki
This camouflage undertone is similar to raw umber. They are used to neutralize other pigments, and when diluting khaki, they can be used to draw body lines. If you take a tone of great saturation, then you can use it to draw the ground, trunks and military themes.
This color is considered neutral. It looks great with a variety of other colors, it's not flashy, doesn't hurt the eyes, doesn't bother you, and is great as a base.
It belongs to the brown palette, and can also be obtained by combining secondary colors, which in the circle of tones stand as opposite colors (for example, red and green).
But the finished result will be very different: green, yellow or gray will predominate.
Getting a specific undertone is problematic: you will need to do a lot of experiments with pigments.
Car wrapping with vinyl film
A fairly common way to apply a camouflage coating to a car is to use vinyl film. This approach does not require highly professional skills and abilities. All you have to do is purchase the film at your nearest store and go ahead.
Despite the ease of the presented method, in order to obtain the desired result, it is necessary to adhere to a certain sequence of actions:
- Carry out a full car wash with water;
- do not start applying the coating until the body is completely dry;
- dismantle all third-party elements;
- degrease the body surface;
- Apply the film evenly to the selected body element.
This method has also gained enviable popularity due to the fact that vinyl film is available in a wide variety. In addition to the traditional coloring, all kinds of camouflage are offered, some of which even copy the coloring of wild animals of the African prairie.
Once an attribute of military camouflage, camouflage, due to its unusual design, began to be widely used by owners of civilian cars. It is believed that it best emphasizes the character of the owner - a strong-willed, selfless person.
One way or another, a car with such a unique surroundings will undoubtedly attract the attention of passers-by, and if necessary, it will certainly help to hide in the folds of the terrain from a potential enemy.
The final stage
If you want to get a matte surface of the car, then the surface must be treated with matte varnish. Like most paintwork, it is better to apply it in 2 layers. After the varnish has dried, the car can simply be treated with regular metal polish.
Khaki is a light shade of tan, but khaki usually includes a range of different tones, from greenish to dusty earthen, collectively known as camouflage or camouflage. This color was often used by armies around the world for military uniforms, including camouflage. The word for color appeared in the mid-19th century thanks to units of the British Indian Army. They used the Hindi word "khaki" to refer to the color of their uniform. Tan uniforms were preferred because they did not show dirt, but the main reason why all colonial units of the British Army eventually began to dress in khaki was that this shade created excellent camouflage. In Western fashion, it is the standard color for casual dresses and casual trousers. The military uniform itself is also often called khaki.
What is camouflage? Real camouflage and camouflage stylization
Camouflage (from the French camouflage) is a camouflage concept that is part of modern military tactics. Simply put, camouflage helps objects painted in it be less noticeable. For the first time, camouflage in a simple form was used in the mid-18th century. Camouflage for weapons and equipment was used by the French in 1915, then began to be used by other armies in the First World War. Camouflage then became popular in fashion and art. Many designers past and present use camouflage in their clothing lines.
Effectiveness depends on the contrast of colors. A strong contrast with the base color, which breaks up the contours of the vehicle, is better suited for forests where the play of light and shadow is important. While low contrast is better suited for open areas with little shadow structure.
The so-called digital camouflage provides a camouflage effect due to the pixel print.
It helps to reduce the visibility of an object at different distances. When painting camouflage, visual destruction of the shape is achieved by adding uneven lines to objects with an even shape. The object is painted using 2 or 3 contrasting colors. The colors of the actual camouflage must match the colors prevailing in the area where the object is used. Objects appear darker in the upper layers and lighter in the lower layers as the upper part receives and reflects more light. This principle is especially important when painting vehicles. There are no special rules for the size of camouflage patches. They depend on the size of the object being painted and the size and type of objects in the environment. If you look at an object from a distance, small spots merge into one common color and do not visually destroy the shape of an object painted in camouflage. Thus, small spots in true camouflage are ineffective.
Real camouflage can be easily distinguished from imitation. True military camouflage is designed to camouflage the shape of a vehicle so that it blends in with the surrounding area. If you look at military equipment, you can see how camouflage spots of different colors seem to envelop and pass over the lines of the body, making it shapeless from afar. Therefore, it is important for what purpose you paint camouflage. If this is just an imitation and creation of a military style, then it does not matter how the spots will be located and what color they will be.
Preparatory stage
It is better to carry out such painting work indoors in the warm season. First you need to thoroughly clean the work area from dust and unnecessary things.
The surface of the car should be washed and dried. All components that will not be painted must be removed. This includes handles, locks, mirrors, insignia. Anything that cannot be removed must be covered with thick paper and secured with masking tape.
After the car has been cleaned and covered with protective material, you can begin to remove the paintwork. Since it is quite difficult to do this manually, it is better to use a special grinding machine with fine abrasive or sandblasting (how to choose a sandblasting gun). The final stage in this case is blowing the car with compressed air.
Removing paint from a car
How does the process of applying paint to a car when creating camouflage take place?
There are several basic ways to paint a car, each method is significantly different and requires full consideration separately.
To create camouflage without a stencil, you need to follow the instructions and be extremely careful. Application algorithm:
- Using narrow tape, you need to draw the spots on the car that the person expects to get. It is better not to bend the tape, as there will be paint in places where the sticker is loosely attached.
- It’s worth covering everything around the stains with newspapers; they protect the rest of the car from paint and create a clear shape. Wide tape is used to secure the paper.
- The darkest shade of the selected colors is applied first. When the first layer has hardened, you need to re-coat it with a spray can to enhance the color and reliability of the paint.
- After the stain has completely dried, you need to remove the newspapers and tape. Now the procedure is repeated with new spots. It is preferable to overlap the second material onto the first so that the pattern merges.
- The second color should be applied in two layers, but first you need to wait until it hardens. It is recommended to apply the lightest color at the end.
- After painting is completed, all remnants of the protective coating from the newspapers are completely removed, and the work performed is inspected. If there are places where paint has penetrated between the tape and the newspapers, you should remove the coating using a solvent.
- Automotive varnish is applied on top of the body to create a uniform color. It is recommended to add a solvent and a fixative to the varnish composition. The varnish should be applied in 2-3 layers.
Painting a car under camouflage
In the case of a stencil, the principle of coating with paint is almost the same; the key difference is that there is no need to cover areas with tape and paper. Here a stencil is glued to the same places, and everything inside is filled with paint. The disadvantage of this method is the lack of variety in the pattern, that is, all elements are identical in size and shape. To create a variety of designs, you need to spend a lot of time making stencils. A unique design and interesting shape are only possible with several stencil shapes.
There is an alternative way to create camouflage, it is also the most affordable and requires the least amount of time. Thanks to the vinyl film, the body receives additional protection from the adverse effects of weather and scratches.
Follow the instructions for application:
- Initially, you need to try the film on the vehicle, just fix it with tape for a while. Using any marker, you should mark the areas where the section will take place. Before cutting, it is worth considering that in places with depressions and bumps, more material will be required. Trimming can also be done after sticking; then all areas that should not stick must be treated with masking tape.
- Apply a special spray to the gluing surface, and then apply the adhesive side to the body. Before drying, you can adjust the location of the film.
- Use a rubber squeegee to remove bubbles from the film. You need to achieve a perfectly smooth surface without bubbles.
- To improve the adhesion of the film along the joints, it is worth going over the joints with a hair dryer. The heater must be used carefully, otherwise there is a risk of damage and melting of the film.
- The greatest attention should be paid to areas with bends; you need to even out the film over the entire surface as much as possible, and to make it pliable, lightly treat the surface with a hairdryer.
- Having taken a squeegee from felt, it is recommended to repeat the procedure of leveling the material. At this time, you can still reheat the film.
- Trim unnecessary edges of the material with a construction knife and reinforce the edges with sealant to extend the service life of the coating.
Pasting film on cars camouflage
After covering with film, you need to give the vehicle at least 12 hours to harden. When the material has set, the process is complete, but you should not wash the car for another 1 week.
Using the CMYK model
You can also find exactly the khaki shade you need using the CMYK color model. CMYK is an abbreviation for cyan, magenta, yellow and black. Find the brown you want. Using graphics editors, you can calculate the exact percentages of magenta, yellow, cyan and black needed for that color and then mix them accordingly. Please note that magenta, yellow and cyan are more accurate primary colors, but they are not the standard for paint mixing today.
What acrylic paints to mix to get khaki
We have already considered the question of how to get khaki color and mixing which shades will help you get closer to solving this problem. Now let's try to create the desired shade using acrylic paints as an example. To work, we will need the paints themselves in several basic colors: red, yellow and blue, as well as white. For our purpose, cadmium red, cadmium yellow medium, sky blue and titanium white are suitable. But you don't have to use these exact shades; try using a classic version of each primary color and an opaque white paint.
We also prepare additional tools:
- brush;
- water to clean the brush;
- work surface for testing mixtures;
- palette for mixing colors;
- palette knife;
- paper towels to clean paint from palette knife between mixing.
How to Mix Acrylic Paints for Brown
Before getting the khaki color from the colors of the base palette, we place on it approximately equal-sized drops of red, yellow and blue, leaving a large amount of space between each of them. Add white, then combine equal parts of each of the base colors. Mix them together using a palette knife. The process will turn the cloudy mixture into a rich brown color. Depending on the base shades used, results may vary slightly.
Types of camouflage car colors
There are many varieties of painting a car in camouflage. Camouflage, as you know, is a method of camouflage characteristic of military equipment. So, depending on various external factors, various changes were made to it to give the car greater stealth.
It is customary to distinguish at least 5 types of camouflage. Each of them is strikingly different from each other, both in the method of application and in appearance.
The first type of camouflage, as the name suggests, is used to covertly move vehicles in urban environments.
It has a number of distinctive features. Thus, it is characterized by more angular straight lines. The choice of colors is largely limited to two or three shades. Among them: blue, white, gray.
The winter variety of camouflage is characterized by gray and blue blurry spots against a white background. In some cases, the use of several chopped corners and edges is quite justified.
From an aesthetic point of view, white camouflage is not very popular. It is most often preferred by those who are not averse to hunting somewhere in the taiga forests in winter.
In addition, there is the so-called sand camouflage. Its second, no less popular, name is “desert storm”. In this type of color, pale yellow, brown and yellow shades can be traced. The method of its application has a number of nuances.
So, when applying layers, they resort to various spraying methods. Final finishing with several coats of varnish completes the operation. It is worth noting that such camouflage, in the case of its civilian use, hardly lives up to its name. It is used only for aesthetic purposes.
Anyone who likes to play games often chooses a pixel color for their car, it looks unusual and attracts the attention of others.
But the traditional type of camouflage, made in the “Khaki” style, looks much more colorful. Dusty earthy tones give the car the features of a real military vehicle, skillfully hidden from enemies.
Surface finishing
After the paintwork has been completely removed, you need to degrease the surface. Please note that this cannot be done with ordinary solvent or gasoline. To do this, you should purchase a special liquid. It can be applied using a sprayer or a gun.
After the surface of the car has dried, all chips and minor defects should be repaired with putty. After the treated areas have dried, the surface can be primed. It is better to choose the color of the primer as close as possible to the color of the paint. It is better to apply the primer in 2 layers. At this stage, the preparatory work can be considered completed.
Puttying machine
Features of preparing a car for painting
First of all, you need to prepare the area for painting; it must have a roof and good ventilation, since when vinyl melts, toxic substances are released. In the work box, you need to remove everything unnecessary, or better yet, do a wet cleaning. Only now can you start preparing the car:
- use heated water and soapy water to remove all dirt;
- wait until the surface is completely dry and remove all body parts that should not be painted. Dismantling the elements is not necessary; you can cover them with film and secure them with tape at the edges;
- treat with a special degreaser, solvent or gasoline. Care must be taken to ensure that no dust particles or particles of rags (lint, threads, etc.) remain on the surface.
If during surface treatment areas of paint swelling were discovered, the flaking layer should be removed using a spatula. To make paint peeling easier, it is recommended to heat the area with a lamp.
Preparing the car for painting