Currently, stretch ceilings have become very popular. They look quite aesthetically pleasing, hiding all sorts of irregularities, defects, etc. But it is not always possible to simply install a structure and forget about it; sometimes you have to resort to the help of ventilation. In what cases is ventilation necessary for suspended ceilings? And does such a need exist at all? The answer will most likely be “yes,” especially if a film stretch ceiling is installed. The absolute water- and air-tightness of polyvinyl chloride sheets entails some problems (moisture condensation in the space behind the PVC film, the formation of mold as a consequence of this, etc.), the solution to which will be ceiling ventilation.
Types of ventilation for suspended ceilings
High-quality ventilation will help get rid of possible problems, including the formation of mold and other activity of harmful microorganisms, the appearance of rust and the formation of condensation.
There are two key types of ventilation: natural and artificial.
Natural ventilation
This option is suitable for rooms that already have a functioning hood. Often such structures are located in the bathroom and kitchen. This is the most affordable type of ventilation that fully complies with the requirements of sanitary standards. In order for the change of air masses to be as fast as possible, it is necessary that fresh air flows penetrate into the room without obstacles, displacing carbon dioxide.
The entry of air masses occurs through cracks, windows and doors. In turn, carbon dioxide rises and is removed from the room through an exhaust hood located in the bathroom, kitchen or toilet.
This type of ventilation is the most economical to carry out an exhaust hood under a suspended ceiling, since operation does not require additional equipment or energy resources. However, this system has several disadvantages. In order for natural ventilation to provide air change, it is necessary that nothing obstructs the air masses. Another disadvantage was the fact that the basis for the operation of ventilation is the temperature difference. And this is only possible during cold periods, which reduces the work of air exchange.
Artificial ventilation
This type of ventilation is also known as mechanical. This is explained by the fact that for the normal functioning of air exchange, additional equipment is used, the task of which is to constantly change the air in the room. Often this is the only way to ensure a stable indoor microclimate.
The artificial ventilation system consists of several elements, including a fan, an air filter and an air heater. Being components of a single system, their work ensures the circulation of air masses over a large area. The only caveat is that energy resources are required for operation. If for some reason the voltage weakens or disappears, the ventilation system will not work.
Ceiling diffuser: installation
There are two ways to connect diffusers to ventilation ducts: directly or through an adapter (static pressure chamber). The second option is more correct, but it requires a larger gap between the base and decorative ceilings.
If the shape and dimensions of the ceiling diffusers and ventilation pipes match
To connect the ceiling diffuser directly to the ventilation pipes (branches), a tee/splitter is placed in the ventilation pipe at the installation site. The device is placed in the free third exit.
Cutting a hole directly in the pipe for its installation is the wrong decision. The housing protrudes beyond the pipe, impeding the movement of air, the performance of the system drops, and over time a dust plug forms, which can completely block the clearance. In general, this should be avoided.
The outlets from the main pipe must be selected so that they can be conveniently connected to the diffusers. It is not difficult to connect a round diffuser to a round outlet from the air duct, and a rectangular diffuser to a rectangular one
It is also important that their sizes match. This simple truth must be remembered when creating a system, choosing tees or making bends with the appropriate parameters
If the shape and size match, installing a ceiling diffuser is not a problem
Diffusers of matching sizes are installed in ventilation ducts simply by inserting them. Models that are small in size and weight can be fixed to the box using sealant (neutral silicone). This is how models with a round base are usually attached.
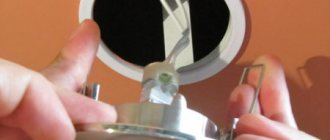
For suspended ceilings of various types (plasterboard, plastic, Armstrong), a special fixation system has been developed - Clip in. It consists of spacers like those you see on recessed ceiling lights.
More massive square/rectangular models are attached to the walls of the box using self-tapping screws or on hangers from the ceiling. The first option is simpler, but it is better not to use it, since dust collects on the protruding self-tapping screw. Unless the design provides special protrusions for fasteners. Otherwise, over time, a solid plug will form in the place where the self-tapping screw sticks out, preventing the passage of air.
An example of using an adapter - a round ceiling diffuser is connected to a rectangular ventilation duct
If the outlet is made of corrugated material or there is a desire to do everything “right,” heavy cases are suspended from the ceiling on studs or hangers.
Using adapters
Adapters or static pressure chambers help to avoid such unpleasant phenomena as drafts. In this tank there is a uniform redistribution of air, which flows in an even flow over the entire surface of the grille. But these devices have a significant drawback - they “steal” the ceiling height. Models with side connections are smaller in size, but still take up enough space.
Types of adapters for ventilation ceiling diffusers
Most often, the static pressure chamber is a parallelepiped, to the bottom of which a diffuser is attached. On the top or side there is an outlet for connecting a ventilation duct. It can be of any required shape: circle, square, rectangle, oval.
Adapters available:
- With built-in rotary valve. If the diffuser model does not provide for adjustment, this can be done using an adapter.
- With removable filter. They also allow you to clean the incoming air.
- With air flow divider. This is a sheet of metal with a small cell. Placed on powerful supply systems, it allows you to evenly distribute the air flow over the entire surface of the grille. .
Static pressure chambers for ventilation diffusers are most often made from galvanized steel. Sheet thickness - 0.5-0.8 mm. There are companies that will make a device according to your parameters. There are also standard adapters on sale for standard solutions. They can be made of steel (galvanized, stainless) or plastic.
Plastic adapters fit into corrugated or plastic air ducts
If necessary, the static pressure chamber is lined with insulation. This is necessary so that when the warm surface of the adapter interacts with cold air, condensation does not form on it.
One way to install an adapter for a ventilation diffuser
If the diffuser is connected via an adapter, the main task is to secure this device. If it is a suspended ceiling, you can attach the camera to profiles. In the case of a suspended ceiling, you will have to hang it from the main ceiling. The methods are known: studs or perforated hangers.
How to make a hood under a suspended ceiling
Installing an exhaust structure is quite a difficult task. However, you can cope with it yourself, having certain knowledge and skills. To prevent possible problems, it is necessary to involve experienced specialists who know what is needed to install a hood.
Before installing PVC, you must perform a number of mandatory operations:
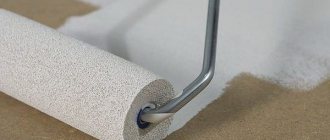
- thermal insulation of the concrete base of the ceiling, which will significantly reduce the amount of condensation;
- sealing all seams and joints of ceiling and wall structures;
- strengthening the surface of the ceiling base using special building compounds. This will prevent the plaster and concrete particles from falling off;
- all wooden ceiling surfaces must be treated with antiseptics and fire retardants;
- The inter-ceiling coating is treated with special substances to prevent the penetration of rodents and insects.
Once the base of the ceiling is prepared, you can begin laying ventilation ducts, after which the PVC will be installed. Particular attention should be paid to the installation of ventilation grilles that will be responsible for air exchange.
Installation of this structure is carried out according to the following scheme:
- before installing the PVC sheet, it is necessary to secure the air ducts, stretch the wiring, fix the exhaust duct under the suspended ceiling, and check the tightness of all joints;
- after this, a PVC sheet is installed, in which holes are carefully cut according to the size of the ventilation grilles;
- To ensure that the holes for the hood in the suspended ceiling do not lead to deformation, protector rings are put on them, after which a ventilation grill is mounted and secured in the resulting opening.
How to make a hood in a suspended ceiling in a bathroom
If the bathroom has functioning ventilation, there will be no problems with installation. For it to work well, it will be enough to install ventilation grilles on opposite sides of the PVC structure. They need to be fixed using adhesive. The grille will be attached to the outer surface, after which you need to cut out part of the film from the inside.
If the bathroom does not have an exhaust structure, you will need to install it yourself. To ensure air exchange, you need to install an artificial ventilation system. To do this, prepare all elements of the system, including the heater, fan and air filters. Before installing PVC, it is worth laying cable channels for laying electrical wiring and ensuring the installation of a hood.
The specificity of installing a hood in a bathroom is that air masses must change constantly. Foreign odors may accumulate in this room, so the task of ventilation will be to remove them in a timely manner.
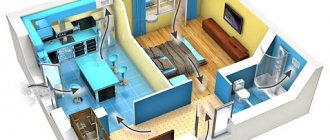
In order for the work to be completed to the highest possible quality, it is necessary to initially calculate and install the system:
- determining locations for installing exhaust pipes;
- laying pipes for exhaust hood under a suspended ceiling, electrical wiring;
- fixing all hood elements to the concrete base of the ceiling;
- installation of a stretch ceiling, including installation of fastening baguettes and tensioning of the canvas;
- fastening of decorative grilles that will mask the ventilation ducts.
How to make a hood in a suspended ceiling in the kitchen
The installation of a hood in a suspended ceiling in the kitchen follows strict regulations, consisting of a number of mandatory actions:
- Electrical power is supplied to the location of the fume hood. All switches and sockets must be grounded.
- Using a simple pencil, you need to mark the place where the structure will be fixed in the suspended ceiling. If it is located at a considerable distance from the ventilation shaft, it is necessary to use flat pipes for air circulation, which will be hidden behind the suspended ceiling.
- After marking, fasteners are applied to the ceiling base and places for self-tapping screws are marked. It is recommended to use anchor bolts as fastening elements.
- Prepare the air duct assembly for exhaust under the suspended ceiling. If it consists of several parts, they must be fixed together with sealant.
- The ventilation duct is attached to the shaft. It is necessary that the position of all parts of the structure be correct. You can verify this using a building level.
- After everything is securely fixed, you can proceed to the installation of PVC. First you need to make holes on it and attach tread rings to them. Pipes responsible for air exchange are discharged through them.
Important! The installation process is completed by connecting the hood with a conductive channel. To make the design more aesthetically pleasing, you can install a decorative hood for suspended ceilings that will match the interior of the kitchen space.
Why do you need a diffuser?
For ventilation to work effectively, air flow distribution is necessary. If additional devices are not used, air will be supplied in a continuous stream, which will significantly reduce the efficiency of the system. In this case, the air circulation will affect only a small part of the room, and the direct flow will provoke a draft.
Classification
Diffusers for ventilation differ in the following parameters:
- Installation method - ceiling, floor, or wall units.
- Purpose – supply, universal, nozzle and exhaust.
- Installation – internal and external.
- Material: plastic, metal.
Most often in modern interiors you can find ceiling and slot diffusers. Slotted elements are designed for use in rooms with ceiling heights up to 4 m. They are universal and work both for air removal and air supply. The design of these elements consists of a metal body with slotted holes. A cylindrical roller installed in the housing controls the direction of the air stream. As a rule, these elements are equipped with an air flow control system.
The height of the holes can vary from 8 to 25 mm, and the length up to 3 m. Thanks to this design, diffusers can be mounted in a continuous line. These models are installed in wall structures and suspended ceilings. The installation height must be at least 2.5 m.
Ceiling diffusers can be exhaust or supply. The shape of a ceiling diffuser can be round or square. The size of round elements in diameter can vary from 10 cm to 60 cm. Square ones can have a side size from 15 to 90 cm.
Ceiling air distributors are mounted in suspended ceilings, plasterboard structures and suspended ceilings. The distribution of air flow in ceiling elements can be turbulent, fan, conical, vortex and nozzle.
Regardless of the shape and installation method, the following requirements apply to air distributors:
- Low noise during operation.
- No drafts.
- Stylish design.
It is by these three criteria that professional designers make their choice. Today there is a large selection of different models on the market. The most popular are round and slotted instruments.
How to hide a hood under a suspended ceiling
PVC coating is in demand due to the high aesthetics of the structure. Installing ventilation can affect decorative parameters. Therefore, when installing a ventilation system, it is necessary to hide the corrugation from the hood under the suspended ceiling.
To do this, before tensioning the canvas, you need to install a special box made of plasterboard or PVC. In this case, the operation of the unit will be as quiet and noiseless as possible, vibration and possible air fluctuations will not affect the PVC sheet.
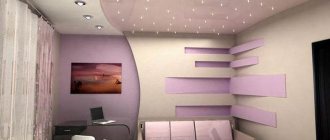
Another option to hide the pipe from the hood under the suspended ceiling is to install a two-level PVC structure. It is enough to lower the level above the area where the hood is located so that its elements are not noticeable. This option is the most preferable, as it will allow you to create a unique structure with an interesting design.
Criterias of choice
Even if you have decided which type of device from the list is suitable for your kitchen, you still need to arm yourself with additional technical knowledge.
Performance
According to construction and sanitary standards, a coefficient has been calculated for each room, with which you can determine how much air should be replaced with fresh air in one unit of time.
To calculate the power of a ventilation device, a hood built into the ceiling or a wall-mounted one, the volume of the kitchen is multiplied by the air replacement factor. To the result obtained, add 15% - the resistance of the filters and the loss of power at the bends of the air duct.
Noise level
The exhaust fan, which is an indispensable part of the kitchen hood, should not produce noise above 40-50 dB. Some devices, in order to increase power, are equipped with several such fans at once. If your kitchen boasts a large area or high ceilings, be prepared for increased noise levels from the operating ventilation unit.
Filters. Let's start with the fact that a grease filter comes complete with all types of hoods. But it can be reusable (steel, aluminum) and disposable (plastic, padding polyester and non-woven fabric). Coal ones, as already mentioned, are installed on recirculating hoods to trap extraneous odors. The latest filters are disposable. That is, their service life is quite short.
Control Panel
Slide switches are economical from a financial point of view, but are not durable and quickly become overgrown with grease. A keypad is the best and not too expensive option. On “advanced” hoods a touch panel is installed.
Construction and appearance. A hanging hood is the cheapest and most convenient option for a kitchen where it is not possible to connect it to the ventilation duct. The built-in model is suitable for compact kitchens: small dimensions, pull-out metal filter. The dome hood resembles an open umbrella in shape and is mounted on the wall or ceiling.
A hood with built-in lighting is a popular option among consumers
Tips and tricks
Experts recommend adhering to the following tips when installing ventilation:
- After installing the hood in a suspended ceiling, you must check that its components do not come into contact with each other. Otherwise, the vibrations and vibrations that occur during fan operation will affect the PVC coating. As a result, the canvas may become deformed, which will negatively affect functionality.
- It is not recommended to seal gaps in the ventilation shaft with foam. If you install a ventilation grille in the opposite part of the PVC, even when the ventilation is not working, air exchange will take place.
- The suspended ceiling and the hood from the gas water heater must be harmonious. Therefore, to ensure safety, it is necessary to hide the ventilation elements in special decorative boxes.
- When installing the exhaust unit, it is necessary to ensure that all elements are secured as firmly as possible. Otherwise, vibration will occur during ventilation operation. It will affect the aesthetics of the coating, as the canvas will constantly vibrate.
Important! Before installing PVC, it is recommended to increase the level of waterproofing of the concrete base. This is explained by the fact that the presence of a ventilation grill reduces the tightness of the structure. Such a canvas will not save you from a flood from above.
Methods for masking pipes
Instead of corrugation, you can use a plastic pipe of round or rectangular cross-section, suitable in size for the diameter of the channel. To connect short sections, adapters of various configurations are used. The disadvantage of a plastic pipeline is the loss of traction when it is long. Therefore, it is recommended to use such a plastic box only if there is a ventilation hole next to the hood.
You can decorate a corrugated sleeve in the following ways.
- A box made of plasterboard. It is built on a frame made of metal profiles and then painted in a color that matches the design of the kitchen.
- Built-in furniture. The air duct is inconspicuously placed in the walls of a high wall cabinet suspended above the stove. This option is suitable in the case of a built-in hood mounted at the bottom of such a cabinet.
Both options can be combined with lighting made from LED elements, which will add comfort and brightness to the lighting in the kitchen.
- Cornice of a kitchen set. The exhaust pipe is passed close to the wall along the top of the kitchen furniture, and it becomes closed behind the cornice.
- Suspended or stretch ceiling. In this case, the corrugated pipe will be completely hidden. The ceiling height will lose from 13 to 15 cm.
- Decorative elements or painting of corrugation, which will act as an element of the kitchen interior.
If your kitchen is decorated in a high-tech style, the aluminum corrugation can be left as is, without masking. It goes well with this style.
Indications for use
If we are talking about installing ventilation in a suspended ceiling, then the answer will be positive, not negative. Factors contributing to ventilation of such a structure (more so in the case of foil than textile construction) may include:
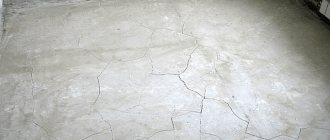
- Condensation accumulation. Stretch ceilings provide a thermal barrier in living spaces. It is able to maintain a constant air temperature on both sides. The difference in temperature inevitably causes condensation in the ceiling space, which can lead to failures in the electrical systems located there.
- Formation of mold, mildew. The combination of moisture, darkness and warm air generated by a suspended ceiling actively contributes to the formation of mold in the space between the ceilings.
Manufacturers impregnate the stretchable material with an antibacterial compound, but this is not enough for complete disinfection - mold still appears.
Deflection of stretch ceiling. Subsidence can occur for a number of reasons, including increased air temperatures in the summer. If you exclude technical, structural reasons for sagging, install an air exchange system to equalize the temperature in the spaces inside the room and between the ceilings.
Vibrations on the ceiling. The difference in pressure between the room and the ceiling changes when doors and windows are opened - at these moments the suspended ceiling fluctuates significantly.
Smell of mold
Mold and mildew occur in conditions of high humidity and lack of air movement. The space between the sub-ceiling and the membrane is an ideal environment for the development of harmful fungal parasites.
The appearance of mold and mildew in an apartment is extremely harmful to people. They lead to frequent colds, and in the long term - to severe allergic reactions and respiratory diseases, including asthma.
In addition, high humidity and fungus spoil things, furniture and room decoration, and damage household appliances.
What do car mechanics advise?
Before removing the starter and changing the bendix, make sure that the battery is charged. There are funny cases when the problem was not in the overrunning clutch, but only in a discharged battery.
Don’t skimp on small things - be sure to install only a new washer and retaining ring.
Before installing the bendix, thoroughly rinse and lubricate all rotating parts and armature splines.
When disassembling the starter, write down the sequence of actions. This will make it easier to assemble the unit.
Before installing the starter, check it. To do this, take two wires that are used to start cars in cold weather. Connect the “minus” to the body, the “plus” to the contact on the solenoid relay. If the starter is working properly, a characteristic click will be heard and the overrunning clutch will move forward.
Requirements
The requirements for ventilation systems are based on safety and efficient operation, so it is not recommended for homeowners to neglect them. Let's list the basic rules:
- The noise level of ventilation equipment installed in a residential building should not exceed 30 dB. Use only quiet appliances in the bathroom.
- To maximize duct exhaust, a ceiling exhaust fan is positioned opposite the front door, from which it draws fresh air.
- The unit should be installed as far as possible from electrical heating mechanisms, as it can withstand temperatures up to 50 degrees. If the temperature rises to a critical level, the fan will fail.
- The power, performance and energy consumption of the device depend on the size of the room and frequency of use.
- The air duct ventilation shaft must be clean. Standards for installation and indicators of ventilation systems are given in SNiP 41-01-2003. This document describes the maximum permissible dust content in the ventilation duct and the air exchange rate.
Best Fan Models for Bathrooms
| Brand | Manufacturer | Power | Performance | Price |
| CATA E100GTH D100 | Spain | 8 W | 95 m3/h | 6630 rub. |
| Blauberg 100 Aero | Germany | 14 W | 102 m3/h | 1900 rub. |
| VENTS 100 D | Ukraine | 14 W | 95 m3/h | 670 rub. |
| Equation D100 29dB(A) | Spain | 15 W | 95 m3/h | 1320 rub. |
| ERA 4S | Russia | 14 W | 80 m3/h | 424 rub. |
Useful video
Let's watch a useful video on how to make ventilation in the bathroom:
Professional skills and tools are required; some work can be done independently. Special installation: suspended ceilings, plumbing work, connecting electrical appliances, cladding - performed by professionals. This way you can complete the repair faster. If you want to save materials and time, order turnkey work. Don't try to do the work with different teams if you don't want hassle.
( 2 ratings, average: 5.00 out of 5)
Stretch or membrane ceilings allow you to decorate the interior of any room. A perfectly smooth surface, for which you can choose your favorite color or leave it white, has gained well-deserved popularity. However, behind the smooth surface there may be dangers hidden for the time being - dampness, mold and mildew. To avoid this risk, it is necessary to ensure ventilation (ventilation) of the inter-ceiling space.
Where needed
The bathroom is the first place where you should focus your attention. A large amount of moisture regularly accumulates in this area. In this case, you should use larger vents than in other rooms to supply as much air as possible.
There are not many problems with humidity in the kitchen, but there are others: grease and soot that also get into the air. Like water, they can settle on all surfaces. It is worth paying attention to this and calming down in advance, because it will be almost impossible to clear the building.