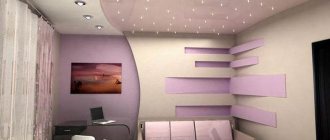
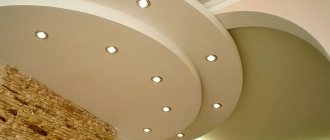
Ceiling structures of suspended and tension type are equipped with various types of lighting fixtures. Most often these are spotlights - small-sized spotlights of low power, located in a certain order. By distributing them over the area of the ceiling and walls, directing beams of light or scattering them, designers zone the space.
As a result, per square meter of room there are sometimes 1-2 light sources that require scheduled maintenance or replacement in case of failure. It is difficult to complete this task without knowledge of electrical engineering and the design of a specific model, but it is possible. A plasterboard ceiling, although fragile, can still be manipulated by a non-specialist with a minimum of damage to the structure, while a tension fabric does not forgive mistakes, and in the event of a puncture or cut it can burst along the way. The situation is complicated by differences in the design of fastening systems used by different companies, so it is necessary to consider the features of the main types and models.
Types of lamps for spotlights
Spotlights use incandescent, halogen, fluorescent, LED
lamps. Spotlights use all types of lamps - incandescent, LED, fluorescent, halogen. Recently, people have given preference to energy-saving sources - fluorescent and LED.
The most famous and cheapest sources are incandescent lamps. They are a flask containing a thread inside which produces light when an electric current is passed through it. Sources with filament are used less and less often, as they heat up, consume a large amount of electricity, and have a short service life. Incandescent lamps are not suitable for suspended ceilings - when heated, they can deform the canvas.
Halogen products are more efficient than incandescent lamps. Their service life is longer, and the cost is about the same. Halogen devices also heat up, so they are not recommended for use in suspended ceilings.
Fluorescent light bulbs consume less electricity than previous devices, which is why they are called energy-saving. The devices provide high efficiency and good luminous flux. They can be used on suspended ceilings as they do not heat up. One of the disadvantages is the presence of mercury vapor in the composition.
The most modern and promising solution is LEDs. These semiconductor devices have many advantages - long service life (about 50,000 hours), minimal electricity consumption, safety, environmental friendliness, and lack of ripple. There is only one drawback - the high cost, but it is gradually decreasing. If you calculate how many other types of lamps will be needed to equal one LED, you can see that diodes will be a better purchase.
Frequently replacing light bulbs can damage the base and cause it to fail. This is another reason why it is better to choose LEDs.
Components of the structure
Almost all lamps have a similar design, including:
- housing holding wires and cartridge;
- clamps to ensure reliable fixation of the lamp body;
- protective cover made of glass or plastic;
- a clamp with which the entire installation of the structure is fixed to the ceiling.
If you know about the structure of all elements, replacing a burnt out light bulb will be much easier.
How to remove a light bulb from the ceiling
Installation of a ceiling spot
The lamps are fixed not in the suspended ceiling, but mainly. The frame of the spot is installed to the main ceiling; only the decorative part is located on the canvas. The socket is fixed to the frame or hangs on a wire, the light bulb itself is fixed in the lamp.
Replacing a light bulb in a suspended ceiling must comply with four basic rules:
- use a stable ladder to remove the lamp;
- work with gloves and use special tools;
- do not lose the stopper when replacing MR16 lamps;
- remove the lamp carefully without damaging the suspended ceiling.
To work you will need the following tools:
- stable stepladder;
- indicator screwdriver;
- pliers;
- flat and Phillips screwdrivers;
- stationery knife;
- terminals.
The first stage of the process is the mandatory shutdown of power at the distribution panel. You need to check if there is current using an indicator screwdriver.
Before replacing, you need to understand the design of the spots and light bulbs. They consist of two parts - the platform and the lamp itself. A lighting device is held on the platform. A decorative ring is placed on the ceiling canvas, which also serves as a retainer for the film from tearing. Lamps for lamps are different. They can have the usual appearance - a bulb and a base, or be built into a housing that removes heat. If the light source is one piece with the body, everything changes together. If the lamp is inserted into the housing, only the bulb with the base is replaced.
How to remove an LED light bulb from a suspended ceiling:
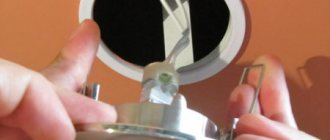
- Carefully remove the support ring. It can be picked up using a special tendril.
- To get the lamp, you need to press the springs inward and pull it down.
- Remove the fastener from the damaged lamp and unscrew it.
- Strip the insulation and disconnect the wires.
- Carefully read the instructions for the new light source.
Afterwards, you can begin installing a new lamp and reassembling the chandelier.
Selection of lighting fixtures
The devices vary in size and design. They complement the chandelier or completely replace it. The last technique is suitable for a room with a low ceiling. The body is made of plastic and aluminum, less often of gypsum. The shape is usually round, but can also be square.
By mounting method
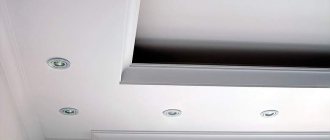
- Overhead structures - the body protrudes beyond the level of the stretched film. The base may be located lower. It is mounted on a horizontal platform, which is attached to the ceiling slab with screws. The height of the platform coincides in level with the height of the film. A hole is cut in the PVC. To prevent it from spreading, it is wrapped around the edges with a pressing thermal ring, which acts as a frame. In addition, it protects the material from overheating. Then the base is screwed in. Static models are available, as well as devices with a rotating mechanism that allows you to change the angle of direction of the rays.
- Built-in - they do not protrude beyond the level of the stretched covering. It is placed in the framed hole and snapped using a special spring. The canvas cannot be placed as high as in the case of overhead structures. This creates certain restrictions for apartments with low ceilings. In addition, the spots will take less time to heat up and more time to cool down. Rotating mechanisms for cartridges are not used with this installation method.
Types of socles
How to remove an LED lamp from a suspended ceiling depends on the type of base and the method of its fixation. There are 3 types used in lamps:
- Threaded. They are designated by the letter E. In Russia, sockets E14, E27, E40 are used. Removing such a lamp is simple - you need to hold the bulb with your fingers and twist it counterclockwise.
- Pin base G. The pins perform the function of fastening and supplying electricity to the lamp. Emitters with direct contacts are easy to remove - just pull the device towards you. Products with thickening at the ends must first be turned counterclockwise 20 degrees, then removed from the body.
- Bayonet V. Such sockets in Russia and Europe are used only in vehicles. Reached by turning counterclockwise.
Each type of base is divided by diameter and method of fixation. This must be taken into account when purchasing a new emitter.
Selection of a new light source
The easiest way is to replace the halogen with an LED with the same type of base. To do this, it is enough to remove the transformer from the circuit, since the LED operates directly from a 220 W network. The situation is more complicated when, instead of a two-inch MR16, you have to install a GU53 tablet with a wider diameter. To do this, you need to glue a new tread ring around the small old one onto the tension fabric and trim off the excess fabric. If a universal mortgage is installed on the main ceiling, then it is enough to cut a new hole along the line on the platform with a stationery knife.
Trimming the lampshade to the required size.
In the case of homemade platforms, you will most likely have to remove the canvas, since cutting out a new seat without damaging the fabric of the stretch ceiling will be difficult.
Homemade plywood mortgage.
In some cases, you can install overhead spots or a chandelier on a homemade mortgage.
Expert advice
LED lamp design
When performing work to replace broken lamps, you need to remember several nuances:
- replacing the source in suspended and suspended ceilings is similar, the diagram is the same;
- if a halogen lamp is installed, you can change it only with gloves - grease marks can damage the bulb;
- if a light bulb burns out in the same place more often than others, the problem lies in the socket - it will have to be replaced;
- it is recommended to use the same type of light sources with a similar color temperature within the same room;
- during power surges, the screw bases may become welded to the cartridge and not be pulled out - then the flask needs to be covered with tape and more effort must be made to remove it;
- You can make the light visually brighter using white LEDs;
- you need to buy lamps with the same base and pay attention to the power.
It is not recommended to replace the lamp yourself if the wiring is damaged. In this case, it is better to call a specialist. Also, the help of a specialist is needed if the new lamp does not fit the size or shape of the installed mortgage.
Notes
- Ryabtsev A. N.
// Physical Encyclopedia / Ch. ed. A. M. Prokhorov. - M.: Great Russian Encyclopedia, 1998. - T. 5. - P. 221. - 760 p. — ISBN 5-85270-101-7. - .
- Bobukh, Evgeniy
[tung-sten.no-ip.com/Texts/Popsci/VisionOfAnimals.htm About animal vision]. Retrieved November 6, 2012. - Soviet encyclopedia
- L. B. Borisov
Medical microbiology, virology and immunology. - MIA, 2005. - pp. 154-156 - . docs.cntd.ru. Retrieved February 15, 2022.
- GOST R 53491.1-2009 Swimming pools. Water preparation. Part 1. General requirements (DIN 19643-1:1997)
- . // hindu.com. Retrieved June 17, 2012.
- . //phys.org. Retrieved June 17, 2012.
- Alexander Sergeev.
.
Posters - Electromagnetic radiation
. elementy.ru (2009). Retrieved October 27, 2022.
No tags for this post.
Precautionary measures
When working with electricity, it is important to follow safety precautions. Electric current when exposed to a person can be fatal. Therefore, it is important to turn off the electricity supply to the apartment before carrying out installation work.
All work must be carried out with gloves and glasses, in a convenient and safe place. You cannot change a light bulb using an uncomfortable and unstable stool or ladder. The process must be carried out carefully so as not to damage the canvas, ceiling lamp or electrical wiring.
Subtleties
Remember that LED lamps require some space around (minimum 2 centimeters). Otherwise, cooling will not occur properly and the system will burn out.
How to install a lamp with a driver?
Simple connection and reliable operation are the main advantages of simple luminaire circuits equipped with drivers. Choose an inverter that has enough power to keep the system running smoothly. Otherwise, there are no difficulties; the wires are connected to the base in a standard way.
How to embed a chandelier?
First, they connect the electrical part, then move on to installing the chandelier. Controllers usually display special diagrams that facilitate the installation of elements. Then they move on to installing the mounting strip that comes with the chandelier. The chandelier is hung on decorative bolts.
Installation of LED strips
Here are a few steps, the work is done quickly:
- Determine how long the tape is needed.
- Connect the tape to the controller.
- The controller is connected to the power supply.
- The assembled system is connected to an outlet.
- The selected ceiling structure is being installed.
The main thing is to assemble the electrical circuit correctly, since errors occur frequently at this stage.
Possible mistakes
Before replacing the lamp, you need to turn off the electricity in the apartment.
The most common mistakes during installation and dismantling include:
- Replacement with power on. This mistake should not be made; it can lead to serious injury.
- Trying to change the lamp immediately after turning off the light. Even LED sources can get a little warm, so you need to wait until they cool down.
- Selecting a radiator with an unsuitable base.
- Touching a halogen lamp with bare hands. There will be traces of grease on the source, which may cause the flask to crack.
- Using higher wattage light bulbs. This problem is especially relevant for halogen lamps. The GU5.3 base does not make good contact with lamps above 40 W, so it is better to use fluorescent or LED sources. It is not recommended to install lamps with a power higher than 35 W on suspended ceilings.
It is important to pay attention to the choice of lamp. You should carefully inspect the device for defects and check the strength of its parts. It is not recommended to buy cheap LED sources from unknown manufacturers. Such products can quickly fail, do not meet the declared characteristics, and have flickering. It is better to purchase a lighting device from well-known companies.
Spotlights for suspended ceilings perform 2 functions - lighting and decorative. In such devices, LED bulbs are used to save energy and money. They are characterized by long operating time, high brightness and efficiency, safety and reliability. But even with a long service life, the light bulb can break or burn out. You can replace it yourself without turning to a specialist for help. To do this, you must follow the replacement instructions and not violate safety rules.
Required Tools
It is not always possible to carry out basic work of replacing lighting fixtures on a suspended ceiling with bare hands - you need tools and devices:
- a sliding ladder (stepladder) will help you reach the ceiling and work in comfortable conditions (if you don’t have one, you can use a table);
- An indicator screwdriver will help to check the presence of voltage in the wiring of the lighting fixtures being replaced - a break in the electrical network by an electrical switch often leaves the red wire energized, since it is not a phase that has passed through the switch, but a zero;
- pliers will help remove the retaining rings (the task will be especially simplified if they have pointed jaws);
- two flat screwdrivers will help pull the light source with a spring fastening system out of the socket;
- a Phillips screwdriver is needed to unscrew the terminals when changing the cartridge;
- a stationery knife will help to strip the wires of the purchased lamp;
- A terminal block will be required if the wires were connected by twisting before replacing the socket.
Video on the topic
To consolidate the material covered, we suggest watching a video with tips on replacing lamps in spotlights. In the first video, the author shows how to get the lamp itself; it clearly demonstrates the fastening mechanism.
The second video shows replacing the MR16 GU5.3 12V lamp from halogen to LED.
https://youtube.com/watch?v=jKTsSvxmIgM
In this video, the author talks about the types of lamps and fixtures.
https://youtube.com/watch?v=qFUdEj7JWs0
The latest short video shows how to replace lamps with GX53 socket
Changing lamps is quite simple, but without certain knowledge you can damage the ceiling structure
Do it carefully and follow the tips in this article
Installation features
To correctly connect spotlights, you need not only to choose the right circuit. It is necessary to follow a certain sequence of actions, which depends on the type of ceiling.
You just need to connect a few spotlights - and you have a beautiful interior
In suspended ceilings
Spotlights are usually installed with suspended or suspended ceilings. If the ceilings are suspended, all wires are laid in advance. They are attached to the ceiling without connecting to power, the lamps are placed and secured on pendants, then the wires are connected to them and the operation is checked.
Prepared for installation of suspended ceilings
Before installing suspended ceilings, turn off the power, remove the lamps and remove parts that may be damaged by temperature. After installing suspended ceilings, holes are cut in the material (the lamps are visible or can be felt), sealing rings are installed, and then the lamps are assembled.
In plasterboard ceilings
If the ceiling is made of plasterboard, you can proceed according to the same scheme, but the lamps must be installed after the ceiling has been plastered. That is, separate the wiring and leave the ends of the wiring hanging freely. To avoid problems with determining the location of lighting fixtures, it is necessary to draw a detailed plan indicating the exact distances from the walls and from each other. According to this plan, markings are made and holes are cut out using a drill with a crown of the appropriate size. Since there may be small movements - a few centimeters - when cutting the cable, leave a margin of 15-20 cm. This will be quite enough (but do not forget that the wires are attached to the main ceiling and they should extend 7-10 cm beyond the level of the drywall. If the ends turn out to be too long, you can always shorten them, but extending them is a big problem.
If you need to install a converter
There is a second way to connect spotlights to a plasterboard ceiling. It is used if there are few light sources - four to six pieces. The entire installation of spotlights along with wiring is done after the work on the ceiling has been completed. Before installation begins, the cable/cables from the junction box are led beyond the ceiling level. After finishing the puttying and sanding work, markings are made and holes are drilled. The cable is passed through them, bringing the ends out. Then the lamps themselves are installed.
Everything is simple, but this method cannot be called correct: the cables simply lie on the drywall, which definitely does not comply with fire safety standards. You can still turn a blind eye to this if the ceiling is concrete, the cable is non-flammable, the cross-section of the wire is not small, and the connection of the wires is done correctly.
Sequence of work in photo format
If the floors are wooden, the PUE requires installation in non-flammable all-metal trays (cable ducts) or metal pipes. You can install such wiring only before starting work on the ceiling. It is very undesirable to violate installation rules - wood, electricity, heat generation during operation... not the safest combination.