Simple and easy to install, elegant and aesthetic, structures made from gypsum plasterboard (plasterboard sheets) have long captured the market. Illuminated plasterboard niches are an easy way to visually enlarge a space and achieve unique results while spending a minimum of money.
Now it is difficult to find at least one room in the decoration of which this material would not be used. In hotels and private homes, city halls and finished product warehouses - we meet it everywhere. This is due to low cost, practicality and speed of installation - qualities that other materials do not have. It’s hard to imagine, but gypsum boards have practically driven out such a profession as plasterer from our lives. After all, there was no longer any need to carefully, time-consumingly, in dampness and at great cost to build the walls. It’s enough just to “pack” them with magic sheets.
But not everyone understands and uses the full potential of these sheets. One of the features of structures that can be built on this material is multi-stage design and the use of internal space. This is exactly what I want to talk about in more detail - using the example of niches on the walls and ceilings of an ordinary apartment.
Using drywall you can make multi-stage and use the internal space
Preparatory work
Before installing a plasterboard niche under LED lighting or other types of it, it is necessary to carry out preliminary preparation, which consists of the following:
- removing all irregularities from the working surface;
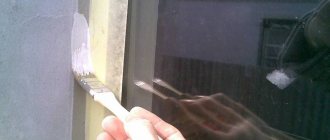
- treating the wall with a primer;
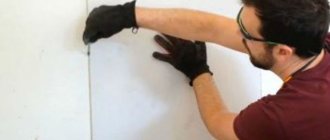
- applying markings to the wall for attaching profiles.
It should be remembered that marking should be done only with the help of a building level, otherwise there is a high risk of curvature of the future structure.
Marking – it is worth noting here that before the procedure it is necessary to level the surface, get rid of bumps, irregularities and roughness. After this, you need to draw all the lines, they must be perfectly even and located strictly perpendicular to each other. To avoid unevenness in the niche frame, you can use a special level, which is great for creating even markings.
A very important point in marking is that you need to calculate all the dimensions as accurately as possible, not forgetting the thickness of the plasterboard sheets, as well as the size of the screwdriver, because it must fit into the structure for installing the side walls.
Fastening profiles - all profiles must be secured along the lines through a sealing tape; dowel-nails are perfect for this, because they are recognized as the most convenient and strong.
To finish the ceiling and floor with a profile, you also need to adhere to the parallel fastening technique (they must be parallel to the wall), and they must first be cut to their full width. This step is done so that in the future you can easily insert side profiles.
How to sheathe a plasterboard structure?
You need to start work by attaching the sheets to the niche, to do this you should first install the sides, and then the top and bottom edges, for this you need to use self-tapping screws of dimensions 3.5x25/35, and you need to make sure that the caps are pressed into the sheet by about 2 mm . After this, you can move on to cladding the pediment.
The best materials for shelves of this design are plywood and chipboard.
It is worth noting that joints between the sheets should not be allowed to form near the corners, and the position of the sheets must be monitored; the beginning and end of the niche should in no case interrupt the sheet, their ends should extend beyond the niche.
Once the structure is completely ready, you can begin finishing the plasterboard niche. Here you can turn on your imagination. Wallpaper, paint, decorative plaster, artificial stone, etc. can be used. On the slider below you can see examples of niche finishing.
Paint finishing
Stone finishing
Original finish
Wallpaper
How to make a plasterboard niche with lighting with your own hands
Among the numerous building materials used for finishing work, plasterboard is the most popular. Using the material in question, it is quite easy to level any surface, including even the ceiling, and construct very interesting structures, for example, partitions of various configurations, shelves, arches and even niches.
Installation of sheets is quite simple, and among the advantages are the following:
- environmental cleanliness;
- acceptable cost.
ease of use;
Moreover, thanks to easy processing, using plasterboard, you can assemble such a device, for example, a niche for a TV, which will harmoniously fit into the finished interior and even become its decoration if fancy LED lighting is used during assembly.
Having the necessary tools in their own arsenal and having purchased the material in advance, home craftsmen can easily cope with such creative work, adhering to the advice and recommendations of experts.
Peculiarities
Drywall can be considered one of the best building materials. Rare repairs can be carried out without using its sheets. There are a large number of available options for its use - ceilings with one and several levels, slopes, smooth walls, partitions and screens. Among these and many other options for using drywall, the niche is not the least important.
The advantages of gypsum boards are quite obvious:
- lack of toxic properties;
- strictly standardized sizes;
- possibility of use in a variety of conditions;
- ease of decoration.
The plasterboard slab is always 120 cm wide and the length is either 250 or 300 cm. The material used for the walls is 1.25 mm thick.
A thinner gypsum board (0.95 cm) is used for ceilings, and for arches an even thinner option (0.65 cm) is needed.
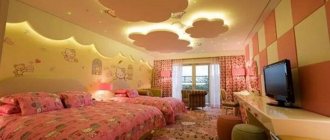
Plasterboard niches are much better than the usual exquisite furniture , because they allow you to abandon bulky hanging shelves and whatnots, and original-shaped stands. Such designs are not very practical, are not suitable for every interior and often serve only as dust concentrators. With the help of recesses, it is easy to place the most important and pleasant things for people on the walls, give them a new meaning and radically change the atmosphere in the room. In addition, you can remodel the appearance of a room very quickly and at minimal cost.
This is interesting: Plasterboard ceilings in the interior (16 photos): design options and ideas
Box formation
The box for hidden LED lighting is the most important component: a strip is mounted in it, which will reflect light rays from the ceiling surface and distribute them throughout the room.
Box assembly steps:
- draw the boundaries of the future box on the base ceiling;
- attach a supporting profile along the border of the drawn line;
- stepping back 10-15 cm from the wall, secure another load-bearing profile, forming the inner perimeter of the box;
- every 40 cm, attach cuttings of the starting strip to the profile, the length should extend beyond the base drawn line by 10 cm;
- connect the supporting and starting profiles with suspensions;
- sheathe the gypsum board frame;
- Install corner profiles at the joints of plasterboard sheets, seal the seams with putty, sand them, and prime them.
Box frame
Popular options
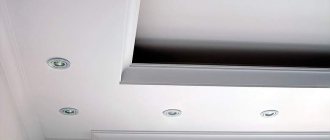
The most popular options for masking lighting fixtures is installing a niche or box. Both options are suitable for multi-level plasterboard ceilings. Note! The box and niche do not require large sizes. It will be enough to create a narrow structure to hide even an LED strip with all its accompanying elements (controller, power supply).
Exterior finishing
1. Apply putty to the surface of the entire niche. In this case, special attention should be paid to joints and fastening points; they should not have differences in level.
2. Use coarse-grained and then fine-grained sandpaper to rub the putty until it is perfectly smooth.
3. The putty must be treated with a layer of deep penetration primer.
After carrying out these manipulations, it is necessary to decorate a niche made of plasterboard with LED lighting in accordance with the interior of the entire room. It can be covered with wallpaper, covered with artificial stone, painted or made into decorative stucco from plaster. Photos of a plasterboard niche with lighting in it show the variety of finishing materials that can be used to decorate the structure.
Algorithm of actions when installing lighting
- The lighting strip can be attached directly to the inner wall of the niche. However, if you want the light to be directed inside the structure or install hidden lighting in a plasterboard ceiling niche for illumination, you need to make a special side. For this, a starting profile is attached to the edge of the opening or ledge, and a strip of plasterboard is attached to it from the inside. On the outside, the side can be sheathed with gypsum board together with the rest of the box or trimmed with plastic or metal overlays.
- The piece needed for your purposes is cut from the LED strip coil. You can only cut according to special marks so as not to damage the equipment.
- When illuminating the ceiling, on the contrary, it may be necessary to extend the tape. The contacts are either soldered or connected by connectors.
- LED lamps are connected to the power supply in accordance with the polarity, operation is checked, if everything is in order, the tape is glued along the desired contour.
The LED design of such structures not only creates coziness and proper, diffused lighting, but also helps to save on electricity. And we suggest talking about how to make a niche out of plasterboard, for example, on the ceiling next time.
Author of the article
Share this article with your friends:
Tools and materials
To begin with, you should be patient, and, of course, the necessary materials and tools:
- plasterboard sheets;
- metal profile (guide and main);
- assembly adhesive;
- drywall knife;
- drill;
- a screwdriver (you can do without it by simply purchasing a special attachment for a drill);
- self-tapping screws (12 mm long);
- LED cord with transformer - they come in different types. They differ in color saturation, number of colors, and there are even options with remote control. The cheapest option is a regular one-color cord. If you decide not to save money, you can purchase a multi-color element with built-in various glow programs.
Find out also how to cover a ceiling with plasterboard yourself.
Stage-by-stage design
Installation and subsequent modification of the project is not difficult, the main thing here is to follow the sequence of actions:
- fixing UD profiles with self-tapping screws, this is done according to previously applied markings;
- vertical installation of CD profiles in UD profiles, it is better that the distance between the latter is 60 centimeters, U-shaped fastenings are welcome;
- horizontal fastening of CD profiles on the sides of the structure;
- when the frame is assembled, the TV cable and electrical wiring (backlight) are laid;
- drywall, pre-cut into pieces according to the drawing made, is attached to the metal frame profiles;
- the entire finished structure is processed using putty.
As you can see, there is nothing particularly complicated in this process.
It is very important to prepare a diagram, materials and tools in advance - and then building a niche will not take much time and will be enjoyable
Things to remember when constructing an opening:
- drywall should not extend beyond the profile lines with its edges;
- it is necessary to maintain close contact of the pieces of material with each other;
- if some parts still stick out beyond the boundaries defined by the diagram, remove them using a stationery knife;
- the more ideal the finished look of the product, the easier it is to then apply putty on it, giving it the required shape;
the self-tapping screws used to connect the drywall to the profiles should be “heated” so that the heads do not protrude above the surface, otherwise you will not be able to level them with putty; careful puttying of the joints is necessary, followed by gluing the seams with sickle tape; after drying, you need to walk over the surface with sandpaper; the opening is primed, puttied and painted or covered with wallpaper.
Your TV niche is ready!
4 606
You can share or save the article for yourself:
There are no comments yet, but you can write your opinion or ask a question.
Installing an LED strip in a plasterboard box, illuminating the wall
- For uniform LED illumination of walls from the ceiling made of a plasterboard box around the perimeter, the gap between the wall and the edge of the box must be at least 50 mm, 30-100 mm is acceptable.
- If you stick the tape on the inner wall of the box, as indicated in the figure, then a sharp light transition (stripe, the border of the illuminated and unlit area) will be visible on the wall when the backlight is on.
- To illuminate the wall as much as possible, the LED strip is glued to the ceiling.
- For soft lighting, it is better to stick the tape to the bottom of the box.
- Often the internal dimensions of the box allow you to place a power supply, dimmer, controller and wires inside to power an LED strip more than 5 meters long.
- If the niches do not have an internal space (side), then during the repair it is necessary to remove the power wires from the tape box in advance and in a separate place (niche, box) in which to place the power supply, dimmer, and controller.
Lighting installation
The best choice for illuminating a niche is an LED strip. Installation of spotlights is more difficult and more expensive.
A recess in the wall with lighting can be made in two ways: attach the tape directly to the surface of the niche or remove it behind a special protrusion. For the second case, a side is pre-installed along the edge of the niche. It can be done from a guide profile masked with a strip of drywall.
When installing lighting, follow the following instructions:
- Measure and cut the ribbon to the required length. Do this carefully, in places marked for such cases. If necessary, extend the tape by soldering contacts or using special connectors.
- Connect the LEDs to the control unit. It is important to observe the polarity of the connection. It is recommended to select the transformer power with a margin of 20–25%.
If the total length of the tape is more than 5 meters, connect individual pieces in parallel: this way the glow of all LEDs will be uniform.
- Apply voltage and check the backlight for functionality.
- After checking, remove the power supply inside the structure. Apply the tape to the desired location. Make sure that it does not come into contact with the metal of the frame or other elements.
As you can see, setting up a niche with lighting is not such a difficult task. For more detailed explanations of each stage of work, watch the video and ask our expert questions in the comments. Mr. Build is always happy to help!
How to properly illuminate a niche with LED strip
Creating beautiful lighting for a niche with an LED strip has a number of nuances known only to specialists. We will tell you about them simply and clearly for readers who are far from electrical and electronics. Please note that the choice of tape depends on the required brightness of the luminous flux and the size of the niche. In a deep niche, a significant part of the light is absorbed, and the output brightness is minimal. The shallow niche space gives more light to the outside, allowing the use of low-power strips.
Power, type and density of LEDs on the strip
Many customer questions concern the choice of LED strip for niche illumination based on power, type and density of LEDs per linear meter.
Let us explain that the brightness and uniformity of the lighting strip depend on the correct choice of these characteristics. If you choose a tape with sufficient brightness, but insufficient density of diodes per meter, the glow will be uneven. In the opposite case, sufficient density but insufficient brightness results in uniform but dim illumination.
The standard size (SMD2835, SMD5730, etc.) and placement density of ice emitters can be varied to obtain approximately the same result. For example, soft decorative lighting can be obtained by selecting different options for the ribbon parameters:
- SMD3528 - 120 pcs/linear. m (optimal combination of brightness and uniformity);
- SMD3528 - 60 pcs/linear. m (low brightness, large distance between diodes);
- SMD5060 - 60 pcs/linear. m (bright, but uneven).
As you can see, the results are similar, but have obvious differences.
The best criterion for choosing a tape is its rated power per linear meter (W/m). In this case, you can get the most harmonious solution:
- up to 10 W – decorative lighting of niche space;
- 10-15 W – additional lighting;
- over 15 W – main lighting.
A consultation with a Ledrus specialist will help you quickly select the best model for your individual requirements.
Color range of emitted light
A choice of LEDs emitting monochrome light is possible: white, yellow, blue, red, green. They are great for decorative lighting of niches and creating a color accent on a certain area of the wall. For full illumination, models with yellow and white radiation are selected.
LED strips with RGB light-emitting diodes can glow in any colors and shades that are selected from the control panel. In addition, you can change the brightness and intensity of the emitted light.
Colorful temperature
Each person individually perceives color temperature, that is, one or another version of white. The choice of this parameter of the LED strip depends on the characteristics of perception. Suggested versions:
- warm - from 2700 to 3500 Kelvin. It is distinguished by softness and comfort of perception;
- neutral – from 3500 to 5000 K. Pure white color, not irritating to the eyes;
- cold - over 5000 K. Has a blue or blue tonality. Not recommended for residential premises.
When choosing a color temperature, it is necessary to take into account the surrounding interior and the purpose of the room. If the walls and furniture are decorated in warm colors, then you should give preference to warm shades. For an office or library, a neutral/cold shade is better, as it will drive away relaxation and promote increased productivity.
Technology for manufacturing a frame from a metal profile
Before installation, the drawing of the future niche is transferred to the wall, measuring and marking the dimensions. If necessary, adjustments are made. Having retreated from the wall a distance equal to the required depth of the shelves, mark the place where the guides are attached to the ceiling.
A plumb line will help to achieve strict compliance with the location of the profile on the floor: when applying the thread to the line on the ceiling, you should put a mark where the tip of the load will be located.
For accurate measurements, remember that the plumb line must hang freely, without touching the floor or walls.
After marking, the frame from the profile is installed.
- Along the marking lines, metal profiles PN 30x27 are attached to the ceiling and floor with dowels, in which the vertical posts of the frame from the PP 60x27 profile are installed and fixed with self-tapping screws.
- Between the racks near the wall and at the outer part of the future niche, horizontal bundles of short sections of PP are laid, their length is equal to the depth of the recess. The distance between them should not be more than 40-50 cm. Fastening is carried out using self-tapping screws. Horizontal compliance is checked using a building level. This is especially important if you plan to install shelves that rest on these structural elements.
To give strength to the outer corners around the recess, 2 profiles can be connected so that they form a structure closed on all sides. Arched or curved lines in the design are made from a special profile or the sidewalls of a regular PP 60x27 are cut to the base so that it can be bent along the required contour.
If the niche is equipped with hidden lighting, a border can be made around the entire perimeter. To do this, profile sections on the outer wall are installed so that they extend beyond the frame. Elements of open lighting are installed after the final finishing of the surfaces.
Frame assembly
According to the drawn up drawing, it is necessary to make markings. Fastenings of guide profiles are indicated on the walls, ceiling and floor. They start marking from the ceiling, transferring the lines to the floor using a plumb line. This will allow you to maintain the entire niche in a single plane. The dimensions of the future recess are indicated on the wall.
Profiles are mounted:
- The guides are attached with dowels in increments of 35–40 cm. First, damper tape is glued to their back sides adjacent to the ceiling.
- Having installed the guides on the floor, ceiling and walls, install vertical racks. The profiles are cut so that they are slightly smaller than the nominal size, inserted into the guides and secured with “bugs”. The correct installation of each rack is checked using a level.
- Horizontal jumpers are being installed. They form the internal space of the future niche and give rigidity to the entire structure. Drywall fragments will also be joined on the lintels.
If you plan to equip a niche with shelves, then the lintels should be positioned according to the distance between them. The lower plane of the recess, on which household appliances will be installed, should be additionally reinforced with a profile.
A niche may have curved planes. Then to install the frame you will need a special arched profile.
You can also cut the sides on the guide at certain intervals, as shown in the photo. The smaller the bend radius, the more often the cuts are made. The profile processed in this way can be easily bent to the required angle.
USEFUL INFORMATION: Assembling a frame from a metal profile for plasterboard
The ceiling is made of plasterboard with lighting around the perimeter. How to choose LED strip
Light-emitting diode (LED) strip is a narrow flexible strip no more than 9 mm wide. Conductive tracks, diodes and resistors are applied on top of the product.
When choosing a suitable option for installing a plasterboard ceiling with LED lighting, it is recommended to pay attention to the following points:
- Diode type. The most common diodes are SMD3528 and SMD5050. The first variety (3528) always gives one color of illumination, the second can be white or multi-colored. The SMD5050 diode is more expensive and consists of three crystals, which ensures its durability. SMD3528 tapes last less due to the gradual burnout of the phosphor. This causes the light to appear blue.
- The frequency of concentration of LEDs on the surface of the strip. The most common bands are with a frequency of 30,60,120 light bulbs per 1 running meter. As the density increases, the brightness of the illumination increases. To equip a plasterboard ceiling with perimeter lighting, the density of the SMD3528 tape should be at the level of 30 or 60 diodes. If the goal is to illuminate a stretch glossy ceiling or partially illuminate a room, it is recommended to use SMD5050 tape with a density of 60 diodes or more.
- Shades. To achieve multi-colored backlighting, you need to purchase 5050 strips, the base of which contains blue, red and green diodes.
- Degree of protection. Tapes can be equipped with additional protection against moisture. Such products are covered with special silicone insulation, which allows them to effectively resist flooding from above.
- Equipment. LED strips must be equipped with a power supply. As additional equipment, SMD5050 tapes can contain a remote control system and controller. You also need to choose skirting boards for the LED strip that will optimally fit the ceiling.
Sources of light
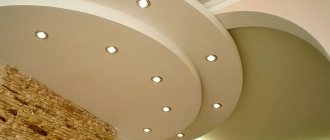
Plasterboard ceilings can be single- or multi-level.
On a single-level ceiling it is possible to install an open type of lighting. If desired, it is also possible to install hidden lighting, which will additionally require the installation of a ceiling plinth.
On a multi-level one, you can install hidden lighting or its combination with open lighting.
The weight of all lamps attached to a single-level plasterboard ceiling should not exceed 10 kg.
If the ceiling is single-level, then the following lighting options are suitable for it:
- Built-in spotlights, which are small light sources with built-in LEDs. The body of such models can be mounted flush with the ceiling or protrude slightly beyond it.
- Overhead models can vary in size, number of lamps, design, etc. Installation is carried out on a frame located under the tension fabric.
On a multi-level ceiling, it is possible to combine open (similar to single-level) and hidden lighting, for which the following are suitable:
- Easy to install LED strips. On their back surface there is an adhesive composition covered with a protective layer. When installing, you need to remove the layer and stick the tape in the selected location.
- Duralights are transparent (colored) cords with incandescent lamps or LEDs located inside.
- Neon tubes are glass tubes that are filled with a mixture of inert and luminous gases. They are installed every 5 meters, do not make noise during operation, and consume a power of 100 W.
Neon tubes are not popular for installation in apartments, because... The transformer required for their operation consumes a lot of energy and is noisy during operation.
A type of neon tube is a neon cord. The transformer is already in it, and runs on ordinary AA batteries. But its power for illumination is insufficient, which explains the need to combine it with LEDs.
For example, you can install spotlights around the perimeter of the room, and hide duralight in a plasterboard box - as a hidden backlight, which is not visible until it is turned on. Such hidden lighting will create a beautiful twilight at night. Combined lighting can be made for a living room, bedroom or children's room.
Built-in wall lighting
Among the variety of lighting elements, built-in lamps are very popular. They illuminate the room well, and there is no need for additional wall or hanging fixtures. The built-in elements can be turned on all at the same time or only one lamp. In most cases, such lighting is built into plasterboard walls and involves the following actions:
- Before starting work, it is necessary to determine the areas in the room that need lighting and its intensity. If you need to illuminate a certain place, you should calculate the power of the lamps so that the light does not turn out to be too bright.
- At the preparatory stage, you should also pay attention to the style of the room. Lighting should match the interior.
- It is not recommended to install lighting elements only in the central part of the wall. Symmetrically located lamps at an equal distance from each other will look more attractive. Thanks to this arrangement, the lighting will be evenly distributed throughout the room.
- Next, you need to designate the placement of the lamps in the wall. Since plasterboard sheets are mounted on a frame, the material should be pierced in designated areas to ensure that there are no crossbars. If profiles are detected in this way, the fastening areas must be shifted.
- Then you need to measure the diameter of the lamp and, using a compass, make the appropriate marks on the wall surface.
- A hole is cut in the designated place using a knife.
- Next, you need to remove the power wire and strip its ends. Connecting clips are used to connect the wire to the lamp.
- The electrical box is inserted into the hole and then secured with screws.
- Then a lamp is placed in it, which is fixed with a spring. This greatly simplifies the installation process.
- At this point, the backlit plasterboard wall is ready.
Shapes and sizes
Take a close look at your living room. Its shape, size, and finish will tell you how best to decorate the niche.
For rooms with narrow, long furniture, a horizontal recess is suitable, while a vertical recess will fit perfectly next to a window or door against the background of large furniture. It is worth considering the option of a corner niche: without cluttering up the space, it will bring freshness to your interior. In addition to standard niches in the wall, floor niches are very popular today. They are used for large vases and TVs. To disguise curtain rods, niches in the ceiling are used, creating the effect of textiles flowing from the ceiling. Whatever place you choose for the niche, it is important to remember that it should not be blocked by furniture.
If you wish to disguise the appliance, the surrounding wall design must match. A modern design is best - clear lines, glass and metal inserts.
It is not necessary to maintain correct lines and equal distances. Complex geometry will only enhance the effect of the new element.
Adding a variety of lighting will highlight the design of the room. It’s worth thinking about this at the niche design stage in order to install all the necessary lighting fixtures on time. It will be too late to do this after registration. There are a lot of lighting options: lighting devices can be different in color and shape, located around the entire perimeter or work in a single point. LEDs are in demand. Their advantages include soft diffused light, ease of installation and cost-effectiveness.
Be sure to consider the expected load on the niche, especially if you plan to use internal shelves.
Having familiarized yourself with all the nuances, you can begin to design a niche.
Shelves made of plasterboard with lighting. Types of plasterboard shelves
There are several main parameters by which such designs differ. Before choosing one option or another, you should familiarize yourself with them.
Table No. 1. Types of gypsum plasterboard shelves
| View | Description |
| Open | Such shelves mainly have a decorative appearance; they are placed to display various souvenirs, cups, photographs and other decorations. |
| Closed | These are already more functional shelves, so they are often made deep to accommodate many items. |
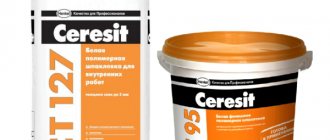
Materials and tools
The purchase of material begins after the dimensions of the recess have been determined and a detailed drawing of the future structure has been made. Calculations are made with some margin. To create a niche with lighting you will need:
- Drywall. In most cases, a regular wall modification with a thickness of 12 mm will do. For rooms with high humidity, moisture-resistant plasterboard is used. Fireproof is used if the niche is combined with a powerful electric fireplace.
- Guide and rack profile. A frame made of galvanized metal profiles is stronger and more durable than one made of wood.
- Fastening elements: dowel-nails, small metal screws, or “fleas,” for connecting profiles and longer ones, 25–30 mm in size, for installing drywall.
- LED strip and controls or spotlights.
The tools you need to prepare are:
- Hammer. It is used to drill holes in the wall for dowels, through which guide profiles are fixed.
- Screwdriver. It is very problematic to screw a large number of screws into metal with a screwdriver. It’s a good idea to purchase a special bit for drywall that limits the depth of screw insertion.
- Metal scissors. It is better to cut off the necessary profile fragments with them, rather than with a grinder.
- A spatula, brush and roller are useful for processing the mounted structure before finishing.
- Measuring and marking tools: tape measure, level, square, pencil, plumb line.
Design and design ideas
As mentioned above, there are a huge number of design options:
- Using spot lighting in a niche, in this case the lamps can be mounted in both the lower and upper parts of the structure. A rather interesting solution would be the direction of lighting from bottom to top.
- LED backlight. Lighting elements are very often combined with a stereo system to create a kind of light and music.
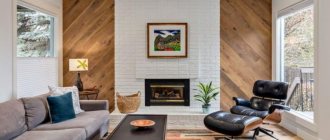
- Sometimes the back side is finished with decorative stone, photo wallpaper, or simply painted with paint that is slightly lighter than the rest of the structure.
Niche design option
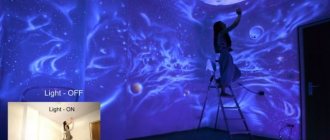
- You can also cut out various shapes in the material so that when the backlight is turned on, they cast a shadow.
- Sometimes they make several niches nearby at the same time to install a TV and speakers for it.
- An electric fireplace will look great under the TV; it does not provide heat, but simply acts as a piece of furniture.
- The shelves around the TV can be used to place boxes, figurines, books, some even place a small aquarium.
- For lighting, you should use exclusively LED lamps, since they practically do not emit heat.
In some cases, a niche is used for decorative zoning of premises. Then the TV plays the role of a partition in the room
In this case, it is very important that the size of the niche for the TV matches its pedestal for normal and safe installation of the device. A device with a rotating base is perfect for this design - this way you can take turns watching TV in different parts of the room
All elements of the resulting structure should be made in light colors, since dark drywall will create the impression of a hole in the room.
Plasterboard cladding
Before installing the gypsum boards, electrical wiring is laid, placing it in cable ducts or fireproof corrugations.
The gypsum board sheet is cut into suitable fragments.
Mr. Build recommends: take the required dimensions from the frame, not from the drawing. During the installation process, changes in the dimensions of the structure are possible, and if the measurements are incorrect, the pieces of plasterboard do not fit together.
The cutting is carried out as follows:
- Marking lines are applied to the plasterboard.
- A paint knife is used to cut through a layer of cardboard on one side of the sheet, after which it is carefully broken and turned over.
- The top covering is cut through on the second side (as in the picture).
- The cut is processed with fine sandpaper. If a joint of fragments is planned in this place, then using a special plane a chamfer is made at an angle of 45˚.
- Sheathing begins from the inside of the niche. Fragments lying in perpendicular planes are mounted so that one element covers the end of the second.
- The drywall is fastened with self-tapping screws in increments of 25–30 cm, slightly recessing their caps into the material. When using a special bit, the risk of damaging plasterboard sheets is minimized.
- Special corners are attached to the outer corners of the structure to protect the fragile drywall from damage.
After cladding, the surface is prepared for finishing:
- The seams are glued with fiberglass reinforcing mesh and covered with putty. The rules for processing seams are described in detail here.
- After the putty has dried, they are rubbed down with fine sandpaper.
- The entire surface of the niche is treated twice with a universal primer. After applying the first layer, wait until it dries completely, and only then apply the second.
- The last stage is puttying the entire structure using standard technology. If the niche will be tiled, putty is not needed.
The nuances of covering gypsum board niches
This process has several features.
- When adjusting gypsum boards, try to avoid large gaps, this is especially true in corner areas. After all, even after careful finishing they can crack.
- If the construction of curved surfaces is envisaged, it is recommended to use a special, thinner type of material: the so-called arched plasterboard. It bends much easier than standard wall or moisture resistant.
- To give the appropriate shape, do not wet the sheets; after drying, they become more brittle. It makes more sense to use the “dry” bending method, making transverse cuts and filling the resulting gaps.
- When puttying, the joints are sealed with reinforcing mesh and a special putty compound for seams.