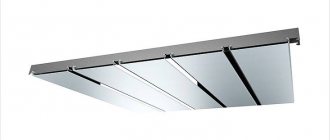
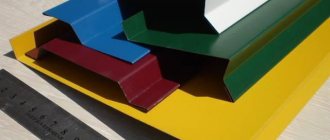
For those who strive for originality in the interior, a semicircle of plasterboard on the ceiling would be an excellent option. When creating such a figure, a logical question arises: how to give the desired shape to a rigid sheet without damaging it? For those who have not yet dealt with drywall, it seems that this is impossible. However, experts assure the opposite. You can look at the photo to make sure of this.
Variation of gypsum plasterboard on the ceiling
A semicircle made of gypsum plaster is an original design solution, be it a commercial or residential space. An unusual figure will become the highlight of the interior, emphasizing its advantages. A semicircle is a complex configuration, but if you understand the subtleties and nuances, technical aspects, then you can make it without much effort.
The decisive moment is applying the markings. Carry out this process carefully, paying attention even to small details. Initially, circles are drawn on the surface, marking the places where the configuration turns into a straight line. Then marks are made on the wall and ceiling to attach the supporting frame. To attach drywall, it is required, so you will have to bend both the material itself and the metal profiles.
Marking
To avoid confusion, lines are drawn with different pencils or markers. It is better to mark the boundaries with thicker lines.
What is required for installation?
In fact, installation is simple. Let's take a closer look at what you need to do.
A set of tools - you can’t do without them. This includes:
- perforator;
- rope (soft wire will also work);
- scissors for cutting metal parts;
- marker or pencil;
- level;
- devices for cutting material - a knife or saw.
Material. In this case, sheets of plasterboard, that is, gypsum board, are used. It is better to purchase them with a reserve. This is due to the fact that accurate calculations cannot always be performed.
Metal profiles. They are needed for the installation of a rigid supporting frame.
Screws and self-tapping screws, crab fasteners will be needed for installation.
Important! The surface is first completely cleaned of old finishing.
Making a semicircle on a plasterboard ceiling is easy if you adhere to all the technical points. This solution is becoming increasingly popular, as it provides many advantages:
- simple technology;
- ease of use and affordable cost;
- environmental friendliness;
- visual increase in the height and space of the room;
- the ability to equip the figure with lamps;
- originality.
Using a semicircle, cornices or other structures are masked.
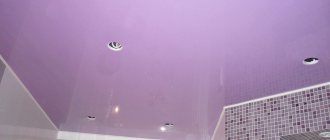
The use of a semicircle from gypsum plasterboard in the Art Nouveau style
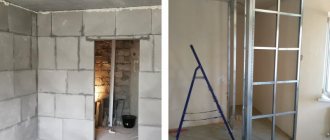
Plasterboard wall in a semicircle
To create such a wall with your own hands, you need to put in a little effort and have a little knowledge.
To make an even line of a semicircle, you need to use a thread and a pencil (a kind of compass).
- for the durability of the plasterboard structure, a galvanized profile is required;
- to bend the gypsum board to the required radius, you need a template;
- with a small bending radius, water will be required for the wet method;
- the height of the wall to the ceiling will be easier for installing the structure.
How to mark up material?
As mentioned above, the final result depends on correct and competent marking. Before this process, the remnants of the old finish are removed, the lighting fixtures are dismantled, and then the surface is primed. Then they start marking.
For this you need a rope and a pencil. The first should be equal in length to the radius of the circle of the desired installation. The remaining details depend on the location of the figure. To draw a circle, proceed as follows:
- correctly determine the center of the figure;
- a self-tapping screw is placed in the center, to which one end of a thread of the required length is attached, and a marker or pencil is directly tied to the other;
- a figure is drawn using the resulting mechanism.
Outline of a figure
Markings can be applied in several ways. In each case, you should proceed from personal preferences and the characteristics of the room.
Ceiling plasterboard
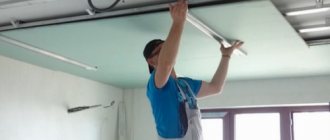
To sheathe a rounded profile with gypsum board sheets, you usually buy a “designer” version of the material. But sometimes they use ordinary gypsum board, moistening it, making cuts and perforations on it. They cut it like this: mark a line, make a cut along it with a construction knife and break it on a hard surface, then cut it on the other side. For installation, cross-shaped metal screws 25 mm long are used. About 60 pieces are spent on one sheet. Lifting the gypsum board should be carried out by two people so as not to damage it. When screwing, make sure that the cap is completely buried in the drywall, otherwise the protrusions will interfere with the puttying of the surface.
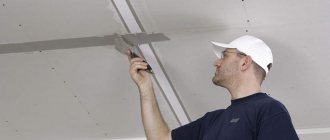
The edges of the sheets must have beveled edges. They are installed in such a way that there are grooves between them, which are then filled with putty. Therefore, after cutting the drywall, the edges are processed with an edge plane. Metal corners are placed on the corners of the structure, which are then also puttied. The rest of the surface is primed and then puttied, first with the finishing solution and then with the starting solution.
If you know how to install a semicircular ceiling, you will understand how to make figured interior solutions from plasterboard. By applying this knowledge in practice, you will be able to create a ceiling of any complexity, taking into account all the details and subtleties of design.
Types and features of plasterboard ceiling lighting
Frame installation
Before installing the figure itself, install the supporting frame. Note that it must be stable and rigid.
Installation of supporting frame
To achieve this, it is recommended to use the following types of galvanized metal profile:
- Guide profiles. They are used when installing the frame around the perimeter to the walls of the room.
- U-shaped or string suspensions.
- Ceiling profile. Used when attached to guide strips over the entire base area.
- Connectors. They are also commonly called “crabs”.
After the supporting frame is installed, the installation of the rounded element begins. This is done by making cuts. The more often they are located, the easier it is to bend and give the desired configuration to the strip. The optimal distance is 5-7 mm, be sure to maintain the same distance. The notched strip is easy to bend to create the desired shape.
Plasterboard sheets are easy to install on ceiling cladding. The installation technology is no different from the usual one. The only thing is that you need to bend the vertical strip.
Installation procedure
Having completed the markings, proceed to install the structure. To begin, mount the frame, for which you need:
- Guide profile 27 x 28 mm, attached to the wall;
- Ceiling profile 60 x 27 mm;
- Special “rivets” – crabs;
- Straight (or U-shaped) suspensions or strings. Direct hangers are used if the distance from the main ceiling to the suspended structure is no more than 11 cm, and string hangers are used when this distance is exceeded.
Materials required for the frame
Now cut the UD profile to a length slightly larger than the circumference. It is necessary that there are two such parts - for the floor and the ceiling. Using dowels, mount guides through the holes in them approximately 10 cm from the ceiling. If there are no such holes, make them yourself with a distance of 50-60 cm. Then vertical guides from the profile are installed between them, which are fastened with crabs at the joints of the profiles. The distance between them is one meter. Be sure to secure the crabs with self-tapping screws on all sides. Pay attention to the rigidity of the suspended structure.
Bend options
The last thing to do is distribute the wiring inside the frame. After this, proceed to installing the gypsum board on the horizontal surface of the ceiling structure.
GCR bending options
As already mentioned, gypsum plasterboard is used to install the semicircle. This is a composite building material based on gypsum.
It would seem that such material cannot be bent, but it is quite possible. Today there are two methods of bending - dry and wet. Each of them has its own characteristics. In the first case, it is important to consider that the flexibility of gypsum plasterboard directly depends on the thickness. This option is best used when a large radius semicircle is mounted. For this, parallel cuts are made on the material.
If you decide to use the wet method, stock up on a roller and an awl. Pierce the sheet of drywall in several areas. This procedure is performed only from the top side. The more punctures, the sooner the plasterboard will get wet. Wet the material with a roller until it stops absorbing moisture. After this, it is given a certain shape, in this case a semicircle.
Material bending methods
In any case, there is a risk of spoiling the material if you do not follow all the subtleties and nuances. So proceed with caution.
Useful tips
If the defect is large, you will have to call in specialists to reinstall the ceiling. But in this case you can still save on the cost of the baguette. Do not try to repair a large defect yourself - this can lead to dire consequences.
And in any case, if you have doubts about your skills, you need to turn to professionals. The manufacturer will give advice on how best to repair the damage, or will carry out the repairs themselves in a short time and with a guarantee, and will also help if it is necessary to provide material for a patch (especially if the ceiling is colored).
The choice of actions when cutting a ceiling with uneven edges is also narrowed. In this case, after sealing the cut on the sides, you need to make its edges even. Then there are a couple of options left - masking with a lamp/grid or any object of your choice, or a colored decorative insert.
The fabric ceiling is resistant to mechanical damage, but will not save you in case of flooding. Small cuts in fabric can be easily repaired on your own. Due to the indicated properties, fabric ceilings are not recommended for installation in bathrooms. If the family has small children and/or pets (cats, birds), it is better to install a fabric-based ceiling in the living quarters.
A PVC ceiling will withstand flooding very well, but if there is mechanical damage, repairing it will be problematic. Therefore, it is recommended to install it in the bathroom or kitchen, where the likelihood of flooding is higher than in other parts of the apartment.
On a glossy PVC sheet, all damage that was repaired without replacing the sheet will be much more noticeable in the future than on a matte one.
And remember - following the rules for using a stretch ceiling will minimize the likelihood of a violation of its integrity, and it will please the eye for a long time! If handled with care, a stretch ceiling will last at least 30 years.
Below are the basic rules, following which you can avoid repairing a suspended ceiling in the future:
- install a suspended ceiling at the final stage of repair;
- do not install a suspended ceiling in a country house, in a sauna or other rooms that may not be heated;
- built-in lamps must have a power of up to 40 watts;
- carefully clean the ceiling panel, for example, using a damp sponge or suede cloth, use non-abrasive products without acetone;
- when cleaning or working with a suspended ceiling, remove jewelry and watches from your hands;
- Do not put pressure on the ceiling panel.
To learn how to repair a cut in a stretch ceiling with your own hands, watch the following video.
Creative idea for any design
A semicircle made of plasterboard looks original in any interior, from classic to modern. Installation of such a structure is simple, but before carrying out it is better to consult with professionals who have experience in carrying out such work. This will avoid errors and inaccuracies.
Do not forget about the need for finishing work. By following the instructions and tips, you will get an unusual and unsurpassed design that will attract the attention of guests.
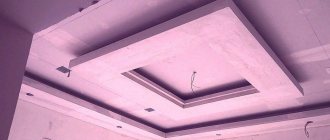
Final result
To ensure the repair is successful, carefully study the photo and video materials.
Repair of fabric base fabric
Repair of fabric fabric is carried out in different ways, depending on the size of the tear. If the size of the cut is small, up to 2 cm, then this place can be carefully sealed with a special compound for tightening the edges or simply with tape. Such actions primarily prevent the defect from increasing, and also visually hide the breakdown.
A spotlight will perfectly hide the cut site.
If the size of the breakdown is large enough, then you will have to work hard and show considerable imagination to eliminate the defect. First of all, a deep cut must be immediately sealed with tape so that the defect does not increase. Then, to your taste, choose one of the repair options: a patch, a neat seam or a spotlight.
- The patch is made from glass wallpaper or tape on a fabric basis. These materials are applied from the inside, carefully pulling the edges together with your hands, fixing them with glue. Outside, you can come up with an original application: a luminous star, a butterfly (depending on the theme of the ceiling design). Application is performed if appropriate. In the case of a single-color fabric, the tear area is sealed on the outside with a color film identical to the color of the ceiling, or painted over with the same color.
- The tear site can be carefully sewn up with nylon thread. To do this, you will need to remove the fabric and use a sewing machine to stitch up the torn area with an invisible and durable seam. The seam area is also painted over, and this must be done extremely carefully.
- An excellent way to disguise a ceiling defect is to install a spotlight. The lamp is mounted in the center of the tear in the canvas, and the emerging edges of the hole are repaired using the above methods.
Such actions are appropriate for minor structural damage.
But what to do if the fabric is carelessly torn and the gap exceeds 25-30 cm? In such cases, the ceiling will have to be completely replaced
Repairing a stretch ceiling is not as big a disaster as it might seem at first glance. Thanks to the latest technologies, it is possible to carry out repairs and turn the rupture site into an exclusive design idea.