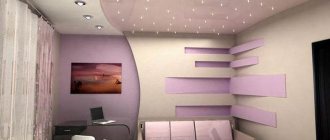
Installation of light sources in PVC ceiling
When planning, selecting and installing lighting devices, consider several nuances.
For good illumination of rooms with a height of more than 2.6 meters, ceiling lamps are installed in increments of no more than 1 meter, and the distance from the wall to the first device is no more than 0.6 meters. Point light sources illuminate the space below them in a cone with an angle of only 30˚. Before installing ceiling light sources, prepare a layout diagram. This will help you clearly plan the wiring, calculate the number of devices and cable length, placement and type of switches.
To install lamps on your own, you will need to prepare:
- lighting devices in the estimated quantity (plus 1 or 2 pieces in case of replacement);
- wire, length is checked with the diagram;
- terminal blocks;
- electrical tape;
- switches.
Installation of lamps
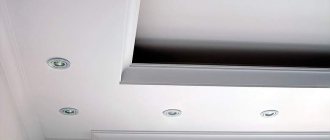
When choosing spotlights for installation in a plastic ceiling, please note that the power should not exceed 40 watts. Otherwise, there is a risk of plastic heating, deformation and the release of toxic fumes
LEDs or halogen lamps are selected taking into account power and illumination. The wire for plastic is fireproof, multi-core. The terminal blocks connect the wires well, but they need to be checked approximately every two years.
The wire is fixed in the places where the lamps are installed, at the point of the proposed hole, in the panel we make a loop of 10-14 cm wire. For convenience and reliability of fixing the wire on the frame, use plastic latches or clamps. Do not over-tighten to avoid damaging the braid. After pulling the wire, the ceiling is covered with plastic panels.
Use a wood bit to make holes. The diameter must match the size of the lamps - less than 4 mm of the diameter of the front ring. The standard diameter is 58-74 mm. When planning the installation location, weigh everything carefully, since it is difficult to correct the consequences of making a hole.
Making holes in PVC panels
https://youtube.com/watch?v=AqFCVOLHCPU
Proper bathroom lighting layout
High-quality lighting is the result of proper placement of lighting equipment and lamps correctly selected in terms of power, taking into account the type of room.
The bathroom lighting arrangement diagram is presented as follows:
- Overhead lighting or ceiling lamps (spot, ceiling lamps);
- Working or auxiliary zoned lighting (spots, wall lamps);
- Bottom lighting.
Decorative lighting can be provided as floor spotlights around the perimeter of the bath. If the bathroom has decor in the form of steps, niches or a pedestal, then floor lamps will highlight them in an original way.
To choose the right lighting equipment for the bathroom, it is worth considering the recommended lighting standards. So, according to the ISO 8995 standard, a bathroom needs an illumination of 200 lux (lx). This standard is based on the technical features of the bathroom, taking into account human needs, on which physical and mental health are based. This indicator is taken to calculate the power of the lamps. It is also worth considering the light parameter per square meter of room, measured in lumens.
For a small bathroom, both parameters are equal. To determine the lamp power in watts required per square meter of room, there is a special formula. Or you can use data from special tables. For example, a 35-watt halogen bulb corresponds to 670 lumens. Taking into account the standard of 200lx = 200lm per square meter, this value is enough for a bathroom measuring 3 square meters, but not enough if the size is larger than three.
When choosing lighting, you need to know the area of the room and the required power of lighting equipment, taking into account the recommended standards.
Spot location rules
True, in order to squeeze the maximum aesthetic appeal from the mounted panel, you need to know the basic rules for the safe placement of spots on a stretch ceiling. Let's try to list below those that are considered basic:
- if the spots are located along the wall, then maintain the minimum distance required for high-quality light dispersion - 20 cm. If you ignore this recommendation, you will not be able to get the level of illumination you want from the mounted lamps;
- the recommended distance between spots is from 30 centimeters, the optimal one is determined by local need and the type of stretched panel;
- parallel placed spotlights visually lengthen the room - this can be successfully used for rooms that need some visual correction;
- a rectangular arrangement is ideal for small and narrow rooms, but most often requires support in the form of “heavy artillery” - a weighty chandelier in the center;
- if you use spots in connection with stretch ceilings made of ordinary PVC film, then the maximum permissible power for halogen lamps is up to 20 W, for a satin panel a little more - up to 35 W;
- the exact number of lamps is always determined by the type of light pattern in the room, but one spot can illuminate no more than 2 m2 of free area. This figure must be kept in mind when drawing up a plan for the placement of spotlights on a suspended ceiling.
How to position?
Before installing spotlights, it is important to create a diagram of their location. If the calculations are incorrect, lighting will negatively affect the interior and energy consumption
Do not forget that the minimum distance from the edge of the wall to the spotlights should be 20 cm, and from the PVC seam - 15 cm. The ceiling lamp can be placed either symmetrically or asymmetrically.
In long rectangular rooms, place spots along the ceiling. For spacious rooms, the “oval” scheme is suitable - a circular arrangement that maximally illuminates either the central part or the corners.
It is better to combine a corner arrangement in the form of semicircles with a chandelier. If you are not going to “arm yourself” with a chandelier, give preference to a cruciform design. To visually expand the square meters, use the “rectangle” sketch. For proper zoning, there is no more optimal solution than an “arc”, which places the right accents in the interior.
Basic rules for placing spotlights
There is only one rule here - do not place lamps closer than 15 cm to the seam of the stretch ceiling. Because if you do otherwise, there is a high risk of damage to the tension covering during installation.
Otherwise, there is complete freedom of action, but if you want to maintain at least some geometry, then it makes sense to adhere to rule number two - do not place the lamps closer than 20 centimeters to each other.
And, if the exact distance is not your case and you want to depict chaotic chaos on the ceiling, then rely solely on your taste.
And yet, before making holes in the stretch ceiling, it is better to carefully draw circles with chalk on the surface itself, in the place of the intended points. This way you can see it much better than drawing on paper. It’s always the same in the picture, but in reality everything looks completely different, and you can’t fix the hole!
Better spend an extra half hour, draw everything and look carefully at what comes out. As a rule, after such a sketch, the desire to experiment with asymmetry instantly disappears.
Lamps
Each of us knows how necessary light is in a room, especially in the evening. And in a room where there are no windows, light is necessary even during the day. It is in toilet rooms that there is often no window, and if one is provided, it is located high and has a small size. In such small, dark rooms, lamps are needed, because one lamp, even the most intense one, is not enough.
There is a huge range of electrical appliances on the sales market. Also, for complete and high-quality lighting, the interior, the color of the walls, and the presence of a mirror are important. In small rooms it is better to give preference to walls with light colors and pastel colors. You can make the floor a dark color, then such a contrast will look rich and very beautiful, and most importantly, the lamps on light walls will glow brighter, which will visually enlarge a small room, and the brightness of the light will pleasantly please the owners
Pay attention to the ceiling; under no circumstances should it be darker than the walls.
Also, LED spotlights occupy a leading place in the sales market. They took their high positions due to such qualities as efficiency, simple installation, and a high level of protection against high levels of humidity. At the same time, the light from such lighting is very soft, non-irritating. If you plan to install a suspended ceiling in the toilet and evenly distribute spotlights around the entire perimeter, then the result will be stylish, interesting, and cost-effective. Also modern design in the apartments is represented by illuminated stained glass windows. Such lighting will make any room spectacular, even the toilet room.
Don’t think that lighting must be in places that are familiar to us; today’s design has no boundaries or clear rules. You can install the lighting in any convenient place, be it a cabinet, shelf or sink.
Wall lamps look very nice. They are characterized by a large selection of sizes, shapes, and colors. Even the most picky buyer will find exactly what he needs. But if the room is small, it is better for you to abandon hanging lamps and give preference to ceiling lamps. But if the toilet room looks like a long corridor, then wall lamps located on both sides of the walls will look very elegant and beautiful. This decision will delight not only you, but also your guests.
It is better to decorate a toilet option with low ceilings with a regular flat lampshade, the range of which has no limits. You can expand the boundaries of your imagination in a large toilet room. Moreover, it can be either separate or combined with a bathroom. Here you have the opportunity to use all kinds of lamps, backlights, floor lamps, wall sconces. A decorative mirror with lighting looks very impressive.
Despite the many design options, you should not forget about safety rules. Be sure to follow the location of lamps and sockets; they should not be located closer than 60 centimeters near sinks, toilets, and shower stalls. Open models should not be placed on the floor to avoid the possibility of getting wet. Connect devices with a two-pole RCD. All these recommendations will make your toilet not only beautiful, but also safe.
Features of the selection of lamps for suspended ceilings
Stretch ceilings are different, and so are lamps. The most key point in selecting spots for a stretch ceiling is not their visual appeal and size, but their power. You should “dance” from it, since there is a high probability of damage to the coating due to heat.
But a melted stretch ceiling cannot be repaired, you understand. So, be careful at this moment so that it doesn’t cause excruciating pain later.
What types of suspended ceilings are there: film (PVC) and fabric. Moreover, both the one and the other option do not tolerate strong heat, but the fabric one is a little more stable. In addition, if you heat up the film ceiling too much, in addition to rapid deterioration, you will daily receive a portion of formaldehyde vapor into the air, since it is released at temperatures above 70 degrees.
So, what then is the optimal possible power for spotlights?
For fabric ceilings:
- Halogen – up to 35 W
- Incandescent lamps – up to 60 W
For film ceilings:
- Halogen – up to 20 W
- Incandescent lamps – up to 40 W
There is also another great option - LED lamps. Their cost is slightly more than those mentioned above, but:
- last much longer;
- There is no way they can melt the ceiling;
- since they emit almost no heat at all.
But there is also one small point here: in order to “start” these lamps, you need to connect them to a special adapter, which not only heats up, but literally “burns”. Therefore, under no circumstances place this device on the ceiling itself, under the film!
It is better to place it somewhere on the wall, in a corner, behind a curtain. This will be even more convenient for you, since adapters periodically need repairs, and disassembling a suspended ceiling for this purpose is not fun for the faint of heart, to put it mildly.
Apart from this, we have nothing more to add. You are free to choose absolutely any design and size of spots, based solely on your taste and wallet.
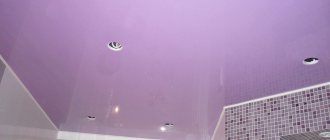
Stretch ceiling design in the bathroom
Let’s immediately agree that since PVC film better suits the specifics of bathrooms, further discussion will only be about it.
Having decided for ourselves whether it is worth making a suspended ceiling in the bathroom , the next step is to decide on its design.
Matte or satin white canvases are suitable for rooms of classical and Scandinavian style, as well as shabby chic, retro and Provence. The main decorative role here is assigned to furnishings, so the decoration of the walls and ceiling should be done in light, neutral colors.
But modernism, with its laconic forms and a minimum of accessories, often requires additional bright accents. Such a coloristic “highlight” could well be a colored ceiling in the bathroom :
Advice: there should not be a lot of color in the interior. A bright ceiling needs a calm, monochrome environment. But it is advisable to maintain the color accent in some more details.
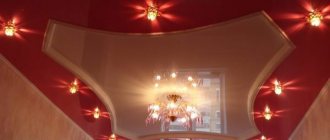
Separately, the red stretch ceiling should be highlighted. Some people find this color too intrusive and aggressive. However, with the right background, we, on the contrary, will receive a powerful charge of positive energy, as the photos below clearly prove:
The black stretch ceiling looks original and stylish. And to prevent it from turning out too gloomy, you need to choose glossy canvases that give a mirror reflection.
And here’s another popular solution: a light stretch ceiling in a beige bathroom. This combination will appeal to adherents of classical traditions.
But the most interesting effects are created by a stretch ceiling in the bathroom with photo printing. It seems to give birth to another dimension, especially if a 3D print is used.
Tip: do not forget to select only thematic images. Fruits and animals (except sea creatures) in the bathroom will look ridiculous. The same cannot be said about clouds floating across the sky, drops of water, beautiful shells and ocean or city landscapes.
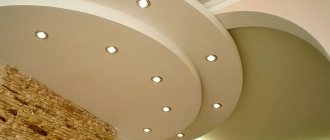
Two-level stretch ceilings
To create stepped structures, plasterboard boxes with openings cut out in them are used, which are covered with PVC film. Two-level ceilings are suitable for bathrooms with a large area - they help highlight various functional areas.
In addition to the play of volumes, color is used to create contrast. Often the stretch ceiling is decorated with a print.
The undoubted advantage of multi-level structures is their impressive design, the main disadvantage is the complexity of installation and high cost.
Important: the ceiling should not contradict the overall style of the bathroom, being in harmony in color and shape with the rest of the interior elements.
Examples in the photo:
Principles and selection criteria
During a room inspection, measurers can offer several dozen options for the placement of spotlights on a suspended ceiling. Small lighting bulbs can be combined with chandeliers or LED strips. All these combinations will result in a huge number of design options, so it’s worth taking technical aspects into account.
Area and layout
First of all, you need to keep in mind the size of the room, its purpose and the coefficient of natural light in the room
It is important to remember that you can reduce the brightness using additional switches or a combination of several lamps, but it is impossible to increase the illumination. Installation specialists will help you calculate a favorable light level
physical characteristics
Spot lamp models are most often built into the ceiling or installed in close proximity to it. In this case, heat release indicators are taken into account. Tension models in which PVC film was used will not withstand a load of more than 40 W. Fabric models cope with the heat emission of 60 W bulbs. Halogen lamps reduce the permissible parameter to 20 and 35 W. These values are extremely important, because they allow you to increase the service life of the ceiling.
For very spacious rooms, experts recommend installing a chandelier in combination with spotlights. The latter act as a room divider into zones and create comfort and a pleasant atmosphere. The chandelier will provide the required level of lighting when necessary.
Design Features
If the design of suspended ceilings with spotlights does not involve the installation of a full-fledged chandelier, then it is worth considering the option of installing elements with external fastening. This will solve the issue of thermal conductivity and increase the permissible power.
It is recommended to additionally equip halogen lamps with a dimmer. A special device for smoothly adjusting the light is not suitable for energy-saving lamps, since the models will periodically turn off completely and quickly fail.
A master measurer will be able to accurately calculate the required number of lamps. The basic standards look like this: one chiseled lighting element should account for 2 m2 of ceiling space. This means that for a room of 25 m2 you need to install about 15 lamps. But the standards can be adjusted, since it all depends on the model, power, type of ceiling, room, combination with other elements and level of natural light.
Lighting calculation
Before choosing the type of lamps, you need to calculate the lighting for the bathroom. There is an international standard according to which the illumination level in the bathroom should be 200 lux (lux - “lux”). This is the figure at which light does not harm vision and health in general. Light flux per 1 sq. m. area is measured in lumens. For a bathroom, 200 lux is approximately equal to 200 lm/sq. m.
So, for a 4-meter bathroom you will need 200 lux X 4 - 800 lux (approximately 800 lm). So that you understand what kind of illumination this is - one incandescent lamp with a power of 75 W produces a luminous flux of 935 lm, which is enough to illuminate a bathroom of 5 square meters. m. Almost the same amount, 860 lm, is emitted by an LED lamp with a power of only 10 W. A 55 W halogen lamp produces a light flux of 900 lm, but, as you remember, the use of halogen lamps of such power is not always appropriate with a PVC stretch ceiling.
Thus, calculating the correct lighting in the bathroom is simple mathematics from a school course.
Correct placement of lamps
Before attaching the lamps, you need to decide on their location. There are several functional areas in the bathroom, each of which takes into account:
- room size;
- color of walls and ceiling;
- presence of window openings.
Bathrooms in multi-storey residential buildings are small in size, but have great functionality. As a rule, such rooms contain a shower stall, a washing machine, and a sink with a mirror and shelves. But even with an acute lack of space, lighting in the bathroom should be multi-level. For example, several built-in ceiling lights can set the overall background, and adjustable wall sconces will add light near the mirror with the sink. Properly lighting a larger room is more difficult. You will either have to use your own imagination, or trust a special company engaged in lighting and bathroom design.
It is worth noting that there are many options for organizing lighting in a large bathroom. However, today the most relevant is three-level lighting, which involves the placement of lamps of different types at different distances from the floor. The overall luminous flux is determined by ceiling lamps. Built-in models in bathrooms with plasterboard and suspended ceilings look practical and modern. They can form geometric shapes or be located above the most popular places: shower stall, front door.
Local (spot) lighting in the bathroom is formed by wall sconces or spots located near mirrors or along the perimeter of the room. They are connected from a separate switch and used to obtain greater light output.
The third level serves as decorative lighting and is necessary to create a relaxing, intimate environment. These can be ready-made LED light sources built into a shower stall or bathtub. Or projects made on the basis of RGB LED strips, allowing you to set the brightness and color of the radiation according to your own mood.
Advantages of waterproof lamps
Safety comes first here
and this is extremely important when planning and installing a lighting system in the bathroom. There is high humidity here; there may well be splashes of water on the lighting fixture
In addition, condensation simply forms on the lamps, since there is strong evaporation of moisture.
Swivel waterproof lamp
There are several points here.
- Devices with moisture protection guarantee safety during operation, protect against electric shocks and prevent short circuits in the electrical network. This is necessary directly to ensure the protection of the life and health of the owners.
- Duration and quality of operation are also of great importance. Special waterproof lamps work in the bathroom without failures and function for a long time. In this case, standard devices will quickly fail. As a result, the savings when purchasing them will be only apparent, and the real costs of lighting will increase.
- Each owner needs to objectively assess the complexity of the operating conditions of lighting fixtures in the bathroom. There is excessive humidity there, water constantly evaporates in large quantities. This is especially dangerous when working with electricity.
Why should you use LED lamps?
Compared to other artificial lighting sources, LED lamps deserve the highest rating. Their superiority when organizing lighting in the bathroom is in the following points:
LED lamps are completely interchangeable with all known types of light bulbs, as they are manufactured for all types of sockets. Taking into account this fact, switching to LED lighting in a bathroom that has already undergone a major renovation will not be difficult. The temperature of the body of a high-quality LED light bulb does not exceed 80°C, and the body of the lamp itself with such a lamp remains cold or barely warm. As a result, overheating and subsequent yellowing of the ceiling sheet are eliminated. You don’t have to be afraid to use any type of spotlights. In addition to the usual standard voltage of 220 V, light sources are commercially available that are designed for a voltage of 12 V (safe for lighting rooms with high humidity). LED lamps can be produced without the use of glass and, unlike incandescent and halogen lamps, do not explode when switched on at high voltage. Based on personal taste and the color of the interior trim, you can choose LED lamps with the most suitable shade of white light. The high efficiency of light sources based on LEDs has made it possible to reduce the size of LED lamps and luminaires
Compact and at the same time bright lamps not only emphasize style, but also save space, which is important for small bathrooms.
Which suspended ceiling to choose for the bathroom
Not all finishing materials feel equally “good” in the specific microclimate of bathrooms. This statement is also true for stretch fabrics. They come in two types:
- from PVC film
- on a fabric basis (polyester with polyurethane impregnation)
The first option is optimal for rooms with high humidity, the second can be used with great restrictions: only in spacious rooms where good natural ventilation is provided.
Fabric stretch ceiling
This variety is usually used for interiors in a classic style. Absolutely devoid of shine, the canvases with a pleasant texture do not differ in appearance from traditional plaster. They can be painted many times, decorated with photo printing or painted by hand. Stretch ceilings with patterns look no worse than real frescoes.
Advantages of fabric sheets:
- large width (up to 5 m), allowing you to cover rooms with one sheet, without additional connections;
- ease of installation - unlike PVC analogues, it does not require the help of professionals or special equipment;
- strength, resistance to mechanical stress;
- immunity to low or high temperatures;
- air and vapor permeability, due to which fungus and mold do not develop on the ceiling;
- environmental friendliness;
Cons when it comes to the bathroom:
- fabric sheets will not protect in case of flooding: with a large amount of water, they will not only begin to let it through, but will also become deformed, beyond the possibility of recovery;
- such a ceiling is very difficult to clean from limescale and traces of splashes;
- high price, which in this case is unjustified, since fabric will last less than vinyl.
Fabric stretch ceiling in the bathroom, photo:
PVC sheets
If fabric ceilings are more suitable for the living room or bedroom, then unpretentious and waterproof vinyl sheets are recommended for the bathroom.
There are three types of PVC film:
- glossy
- matte
- satin
The first variety has good reflectivity. There is even a mirrored stretch ceiling that conveys reality almost without distortion. It is not only creative, but also visually “doubles” the room, creating the impression that it is more spacious and brighter than it actually is.
hvOrdinary glossy stretch ceiling in the following selection of photos :
Matte film looks elegant. Its texture resembles that of fabric. The material does not reflect light at all, so it is well suited for interiors where there are already shiny surfaces, for example, glossy furniture facades or tiles.
In the photo there is a matte stretch ceiling:
Advice : if it is not clear which one - matte or glossy stretch ceiling to choose for the bathroom, you need to weigh the pros and cons of each coating. First of all, the design of the bathroom is taken into account. Glossy PVC film will perfectly complement interiors in high-tech and modern styles, while matte is intended for minimalism, classics, Provence, country and loft.
Satin fabric has a soft, diffused sheen. This is a universal choice for bathrooms of any style and size.
Vinyl stretch ceiling in the bathroom. Advantages and disadvantages
Among the advantages of PVC sheets it should be noted:
- Ability to retain water, elasticity. When flooded, high-quality vinyl can withstand up to 100 liters of water per 1 m². After removing the liquid, the ceiling is stretched again and is suitable for further use.
- Resistant to stains. To clean a PVC ceiling, you only need a sponge and plain water. More difficult stains can be removed with liquid detergent. Then the surface is wiped with a microfiber cloth to avoid streaks or white deposits.
Attention: it is easiest to care for a glossy ceiling, but a matte one will require more effort. However, shiny surfaces become dull when washed frequently and reflect light less well. In addition, stains and water droplets are more visible on them.
- Varied design. In addition to three types of texture, PVC film pleases with a wide selection of colors and shades. It can be decorated with photo printing , including with a 3D effect.
- Health safety. Contrary to existing opinion, high-quality polyvinyl chloride ceilings are non-toxic, and the characteristic smell of the new canvas quickly disappears.
Flaws:
- PVC film can be easily damaged by a sharp object.
- Installation of the canvas is carried out only by specialists, using a heat gun, which heats the material, making it plastic.
- The insufficient width of the film (no more than 3 m) forces several elements to be connected in large areas. The seam between them, even with very careful soldering, can be noticeable.
- Cracking at low temperatures. In country houses where the heating is not turned on in winter, it is better to avoid PVC film.
- Vinyl does not allow the ceiling underneath to “breathe”, which leads to the appearance of mold.
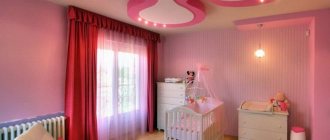
Children's room
A children's room is an ordinary room for you, but for a child it is a whole world. This is a bedroom, a playroom, and a work area all at once. Therefore, it is most logical to delimit specific zones with spotlights. The work area, where the child will do homework, read, draw or write, as well as the play area should be very well lit - this is where as many spotlights as possible should be concentrated. They can be placed, for example, at an angle. This option is also suitable for the living room, where the emphasis is, for example, on the recreation area. But in the place in the baby’s room where the bed is, there may be fewer light bulbs.
Features of lighting in different rooms
Each method of arranging lighting fixtures is attractive in its own way, but is not universal, that is, it cannot be used in any room. That is why next we will look at the features of the location of light sources in different rooms: living room, hall, kitchen, bedroom, etc.
Corridor
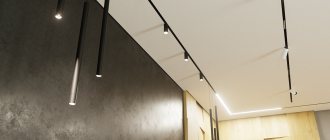
In most apartments, the corridors are quite inconvenient, narrow and long, often L-shaped, so it is recommended to place the light here individually. For rectangular and elongated corridors, it is better to place spots along the perimeter of the ceiling, highlighting the center if necessary.
Kitchen
In the kitchen, it is best to place lamps on a suspended ceiling according to this principle: concentrate the light above the dining table, it is good if it is a chandelier, and in the work area it is good to install spotlights. The most suitable schemes in this case are 2, 5, 8 and 9 (see table). This arrangement is recommended to ensure that only the necessary parts of the kitchen are illuminated. By the way, this also allows you to save electricity, because you can always turn off the lights in the area that is not needed now.
Hall
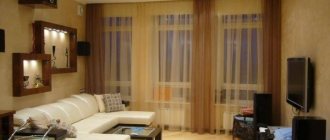
There are a huge number of options for arranging lamps in the hall; suspended ceilings provide a wide field of activity here. The choice of lamp placement in this case is limited only by your imagination. You don’t have to install a chandelier, if the spots are arranged in a circle, this will give soft, subdued lighting. If you install a chandelier, make sure that there is a separate switch for it, so you can turn it off if desired and enjoy the soft diffused light from spotlights. This is very convenient when watching TV. Classic types of arrangement of light sources in the living room are illustrated in diagrams 4,6, 7,12. Also, for reading, it is good to place a sconce near the sofa.
Bedroom
The bedroom is a place of relaxation, so there is no need for bright lighting, which means it is quite possible to do without a chandelier. Nowadays, spot lighting, placed in a circle or oval, is increasingly used in bedroom interiors. You can also arrange the lamps in a checkerboard or zigzag pattern to add some flair to the room. Sconces near the bed are also relevant for reading.
Children's
Since the children's room is often divided into 3 zones: study, play and sleep, it is recommended to apply zoning of the room and approach the lighting individually. The brightest lighting can be achieved using spotlights above the desk, a chandelier for general lighting, and a sconce placed near the bed.
Bathroom
And finally - the bathroom. When placing lamps on a suspended ceiling, of course, you need to take into account the size and layout of the bathroom. Also note that only moisture-resistant lighting fixtures can be installed in this room. They can be placed around the perimeter of the room or in a checkerboard pattern. Placing a sconce in the area of the mirror and dressing table adds a lot of coziness to the bathroom.
That's all the basic rules that need to be followed when placing lighting. We hope our recommendations will be useful to you, will make your work much easier and will help you create skillful lighting in your home.
How to cut a hole for a lamp on a suspended ceiling
What we need:
- thermal ring
- glue
- knife
- small screwdriver
Depending on the manufacturer, tread rings can be clear or white and can be made from a variety of materials. You should not save on them; a difference of 2 rubles may later result in a replacement of the canvas. The main burden of removing heat from the lamp falls on the thermal rings.
The diameter of the ring should be selected correctly. It should not fall into the hole in the installation platform. But also, the protector ring should not be too large and extend beyond the edges of the mounting cup of the lamp. Usually the cut-in diameter is written on the box with the spot.
To fix the thermal ring on the canvas, a special glue from the cyanoacrylate group is used. For example, such as Cosmofen or even regular instant in 3g tubes.
When applying glue to the tread ring, be careful. Don't overdo it and overfill. Excesses protruding from the outside of the ring can be noticeable, especially if the diameter of the lamp just overlaps them. Whereas the glue that comes out inside is not so dangerous
It is important to position the ring correctly on the ceiling - there will be no second chance. If the ring is pressed tightly to the film, fixation occurs almost instantly
After the glue has completely dried after 3-5 minutes, check if the ring is holding well. It should be firmly and securely glued along its entire length. If there are any omissions, they must be eliminated. A drop of Cosmofen on the end of a screwdriver will help with this. You can easily remove dried glue from a screwdriver with a knife.
Then, as we are convinced of the reliability of the reinforcement of our future hole, we can move on to the next step. You need to cut the film right under the ring. You should not leave the fringe of the canvas inside. This will allow you to easily install the lamp in the future. Use only sharp knife blades!
Spotlights in the interior:
Now let's move on to specifics and use real examples to see how they can be arranged. As we have already said, a schematic picture is very different from reality, and you can see this by looking at our selection of photos.
Kitchens
Usually, the question of how to arrange lamps in the kitchen is not too complicated. The room is, as a rule, small and there is no point in placing lamps around the perimeter or in some figurative way.
Practicality is important in the kitchen, which means you just need to “blow” the lumens over the work areas: countertop and table.
There are no other functional places in the kitchen. True, if you have a large one, with an “island” and other unusual elements, then be sure to take into account their presence and do not leave it without lighting. A gloomy kitchen is a gloomy sight.
Bathroom
In the bathroom you need to illuminate the bathtub itself, the sink, and the rest is optional. In general, bathrooms are rarely particularly large, therefore, for a standard 3 - 4 squares, 5 small lamps arranged in a circle are quite enough.
Living room
Particular attention should be paid to the placement of spots in the hall, since the style and general appearance of the room directly depends on this. Spot lighting alone is not enough here, for one simple reason: it will look boring
It is better to combine spotlights with other lighting fixtures, and it is advisable to place them in tiers, in special ceiling niches, which must be done in advance, at the stage of planning the ceiling itself.
Living rooms in which zones are separated from above, using differences in the ceiling, look very interesting. For example, above the sofa there is a tier, above the dining table there is a circle with spots, etc.
Bedrooms
Spots in the bedroom are a matter of business
But in this room, more than in any other, it is important to remember about glare
If the stretch ceiling is glossy, then you shouldn’t bother with spotlights at all. For a rest room, glare is an aggressive and irritating thing that will interfere with sleep.
In this article we have covered everything and even more on this topic. We hope that after reading our material, the placement of lamps on a suspended ceiling is no longer a problem for you!
Installation features
It is better to entrust the installation of a suspended false ceiling to experienced specialists. The customer will only have to control the progress and quality of the work, as well as the compliance of the final result with the overall aesthetic idea.
In practice, the entire process is relatively simple and does not lead to large-scale rearrangements in the room. First of all, guide profiles and electrical wiring for lamps are installed along the perimeter of the walls in their upper part.
Then the film is heated with a special heat gun until the material is given acceptable mounting elasticity. Without turning off the gun, the edges of the PVC sheet are carefully tucked into special grooves on the guide fittings, after which the edges are securely fixed.
After this stage is completed, the thermal installation is turned off. As the film cools, it “shrinks.” When completely cooled, it is pulled very tightly between the walls, resulting in a perfectly flat surface. Lamps (most often, spotlights) are inserted into holes made in advance in the canvas and connected to the electrical network.
How to correctly connect a lamp in the bathroom ↑
Often the ceiling is made of seamless plastic panels. They are attached to a wooden sheathing (or sheathing made of metal profiles). The distance from the base (concrete floor) to the sheathing should be such that the hidden part of the lamps fits there.
In those places where the installation of light sources is planned, the panels are cut with a construction knife. The holes should be of such a diameter that the uneven edges of the plastic are covered with a decorative overlay. The cable cores are connected to the terminals of the device, which is fixed to the ceiling using spring latches.
The light is fixed
Another finishing method involves the use of moisture-resistant plasterboard. This is possible in rooms with good ventilation. Drywall is attached to the sheathing at the required distance from the base. Holes are cut in it using a bit and an electric drill. They come out with smooth edges. Installation of lighting elements is carried out similarly to the method described above.
Making holes
The third finishing method is using stretch film made of polyvinyl chloride. All preparatory work is carried out in the same way as in the case of finishing the ceiling with plasterboard and plastic. But at the light installation stage you will need special plastic rings. Their diameter corresponds to the diameter of the hidden part of the body. The rings are attached to the film, which is cut through with a sharp knife
Proceed with caution: accidentally touching the film with the sharp edge of a knife can damage the ceiling. Thick plastic rings are necessary to ensure that the spring latches hold the point securely
It is advisable to install LED lamps: they practically do not heat up and are not dangerous for polyvinyl chloride film.
PVC film ceiling lamp
Installing a lamp in the bathroom can be done independently if the owner of the house is familiar with the nuances of electrical installation work and the basics of electrical engineering; if not, then it is worth inviting specialists.
Lighting in the bathroom. Installation of lamps
Stage 1. Planning and creating a wiring diagram
Planning begins before installing a suspended ceiling in the bathroom, since electrical wiring is carried out before its installation and you need to outline where each lighting fixture will be located. This will allow you to install the necessary fasteners for the lamps and connect the lighting wire to them.
It is also important to remember that if a low-quality wire is used, the suspended ceiling will need to be dismantled for repairs.
2nd stage. Electrical installation
Since the hygiene room has a suspended ceiling, the cable must be placed in a corrugation, which will protect the fabric in the event of a short circuit and the wire will have a high temperature. If you plan to install a point device, then you can do without corrugations, since their voltage consumption is 12V and the wire does not heat up much.
We install fasteners under the bathroom lighting fixture
We apply a plumb line to the place where the lighting fixture will be and fix these points on the floor. This will make it easier to find the installation location after the suspended ceiling is installed.
If you plan to install a heavy lamp, then drive in an anchor hook in the place where you plan to install it.
Installation of an overhead chandelier is carried out on an embedded plywood part or mounting cross, which we install on the ceiling. We drill a hole in the center of the plywood piece and insert a wire into it.
We install support rings under the built-in bathroom spotlight, which we fix on metal hangers.
Electrical installation is carried out using dowel clamps or clips in increments of 0.5 to 1 m. The main thing is that the wire does not sag. If the base bathroom ceiling is made of concrete, then we make holes for the fasteners using a hammer drill. We pull the wire into the corrugation using a broach.
We install distribution boxes. Then we connect the wire to them.
3rd stage. Installing a bathroom lamp
Installation of a hanging chandelier
- After the bathroom suspended ceiling is installed, we fix the thermal ring at the attachment point.
- We cut out the suspended ceiling inside it, hang the device on a hook and connect the wire.
- We screw the lamp into the lamp. Installation completed.
- We repeat the first point, as in the previous case.
- We fix the fastening strip to the mortgage using self-tapping screws. We connect the lighting wire to the source and fix the lamp to the mounting plate.
- We repeat the first point (see above).
- Next, connect the lighting wire through the connectors.
Installing built-in spotlights
- We compress the spacer springs and install the bathtub into the support ring.
Thoughtful lighting in each zone is the key to a comfortable, stylish and beautiful room in which we put ourselves in order in the morning and evening before going to work or before going to bed.
Today, you won’t surprise anyone with a suspended ceiling, because it is a popular, practical and original solution from the point of view of interior design. But this requires special lamps for suspended ceilings, the varieties and features of which we will discuss in our material.
- 1 What you need to know
1.1 Types - 2 Nuances of choice 2.1 Lamps 2.1.1 Incandescent
- 2.1.2 Halogen
- 2.1.3 LED
Plastic panels
One of the popular materials used for finishing ceilings is polyvinyl chloride (PVC) panels. They have their advantages and disadvantages, but the main advantage is that they allow you to embed light sources. We’ll talk about how to do this and how to arrange the lamps in this article.
Plastic is an inexpensive type of finishing for ceilings. Installation of PVC panels does not require special skills, and anyone who owns a tool can install a plastic ceiling at home with their own hands.
The range of PVC panels makes it possible to choose products to suit your taste, harmonizing with the interior of the room. The choice of plastic coverings is wide; they are available in various types:
ceiling-mounted, lightweight and elastic, but requiring careful handling during installation; wall, hard and heavy; glossy, varnished; with thermofilm decor; textured like wood, marble, etc.;
Plastic panels are made in various sizes, take this into account when purchasing materials
An important advantage of plastic is its moisture resistance; it can be easily washed by any means. Installation of plastic panels is carried out in bathrooms and toilets; they are used to decorate loggias, verandas and saunas
Plastic options are available with a beautiful coating and texture, and the panels will decorate even an expensive interior.
Plastic panels
PVC boards differ in how they decorate the surface with a pattern. Simple and economical - white, smooth, without a specific pattern and plain. Coating options of other colors and textures are available, which are applied in two ways:
- transferring the ornament from the thermal film base to the PVC panel, this method is simple and economical;
- direct printing, allowing you to obtain a high-resolution design with a rich color gamut. It is done on special equipment.
No. 4. The need for ceiling lighting
As already mentioned, one source of lighting is not enough even in the smallest bathroom. The function of general lighting is usually performed by ceiling lamps, which must be present in the bathroom. So, for ordinary ceilings it is better to choose a chandelier, and for pendant ceilings you can use recessed lamps. It is also worth considering the height of the room, and do not place long chandeliers in low rooms. An excellent option is a spotlight, the direction of which can be adjusted to provide a sufficient level of illumination in any area of the room.
The shape, design and color of lighting fixtures can be very different, and here the choice should be based on personal preferences, the design of the room, but not forgetting about functionality.
What to consider when choosing devices?
In the process of creating a design project, it is necessary to select the optimal model of the lamp, taking into account the characteristics of the room, the design and texture of the finishing materials.
For example, built-in models are not suitable for arranging a bathroom with a ceiling made of a monolithic concrete slab. In this case, it is better to use overhead fixtures or ceiling fixtures in the form of chandeliers.
In an effort to create a stylish interior and a comfortable environment, special attention must be paid to the choice of lighting equipment. In this case, it is necessary to take into account the design, characteristics, dimensions, lamp power, methods of mounting the electrical appliance and the need for additional structural elements
When arranging a spacious room, designers advise focusing on traditional lighting solutions that will fit perfectly into the interior
If the bathroom is large, then a beautiful chandelier will look organic. But spot models, correctly and evenly distributed throughout the ceiling space, will allow you to create a stylish interior that takes into account current trends.
When choosing lamps, the following factors must be taken into account:
- room area and distance between lamps;
- zoning of the room, the need to highlight separate areas;
- instrument level;
- interior style direction;
- color scheme of walls, floors, furniture and plumbing;
- the presence of mirrors, tension structures, ceramic tiles and other surfaces that reflect light.
Before you begin installation work, you need to think through the layout of the light sources and the nuances of cable routing. Some models offered by manufacturers in the assortment require the creation of special conditions.
The quality of products directly affects their service life. Expensive branded models of built-in or surface-mounted lamps compare favorably with cheaper ones. They are of higher quality, wear-resistant, and therefore retain their aesthetic appearance for a long time.
In an effort to create a stylish and original interior in the bathroom, we must not forget about safety. Electrical devices intended for installation in rooms with high humidity must have a maximum degree of protection, which corresponds to the IP65 marking.
The bathroom is divided into zones with different humidity levels. The bright blue area is exposed to maximum splash water.
When arranging rooms with high humidity levels, certain rules must be followed.
The following recommendations will help you organize safe room lighting:
- You can only use moisture-resistant electrical appliances with a degree of protection of IP24;
- in areas of high humidity, install low-voltage devices up to 12 V;
- use lighting devices of protection class 2 near the bathtub or shower stall;
- it is desirable that all metal parts are made of stainless steel or have anti-corrosion properties;
- Light bulbs and other heated parts of electrical appliances must be equipped with protective covers or shades.
You should also remember about the features and properties of light rays. So, next to the washbasin it is better to use lamps with a softer yellow light. Otherwise, the mirror will reflect rather pale skin, which will prevent you from applying makeup correctly.
Our recommended article will familiarize you with the rules for choosing color temperature and the nomenclature designations of lighting devices, which allow you to select an LED light bulb in accordance with this important characteristic. Proper lighting should be bright, soft and diffused
This will highlight the colors of the interior elements and finishing materials and create a cozy atmosphere.
Proper lighting should be bright, soft and diffused. This will highlight the colors of the interior elements and finishing materials and create a cozy atmosphere.
For a bathroom with dimensions of 5x2 m, 2 lamps of 60 W are sufficient. You can use 2 lamps spaced on the sides, but in this case the mirror will require additional lighting. You can get acquainted with guidelines for selecting lighting devices for the bathroom in an informative article, the content of which is entirely devoted to this issue.
Unusual design solutions
Thanks to the variety of shapes, sizes and colors of LEDs, it is possible to realize amazing lighting projects for the bathroom by installing a variety of lamps in the suspended ceiling. In addition, simple ceilings made from a single layer of film are gradually being replaced by more interesting, multi-layer solutions that allow the installation of several types of LED lamps at once. Precisely LEDs, because such solutions require close contact between the lamps and the ceiling material.
“The sky in stars or in diamonds” are some of the most common and no longer unique ideas for decorating a bathroom with the help of a stretch ceiling and specially selected lighting. Photo printing and the original interaction of images with light are coming into fashion. But in most cases this is only decorative lighting, and a main light source is also needed. Often the problem is solved by LED strip mounted around the perimeter of the tension structure.
Useful information: “How to install a suspended ceiling in a bathroom”
The bathroom is one of the most important rooms in our lives. Often, only in the bath can you relax and relieve the accumulated burden of worries and problems, have a good rest after hard work or cheer up before work. Proper lighting is a key element of the “healing effect” of a bath on a person. When using a suspended ceiling in a bathroom, it is necessary to rely not only on the safety of lighting for health, but also take into account the characteristics of the bathroom and the lamps themselves.
Which lamps are best to use in the bathroom ↑
Incandescent lamps are gradually becoming a thing of history. The reason is not only their high energy consumption: during operation they become very hot, which is dangerous for plastic. High temperatures cause it to turn yellow and a fire is possible. The dimensions are also not in their favor, because of which they have to lower the suspended ceiling sheathing low.
Compact energy-saving fluorescent lamps heat up less, but their high cost is not justified by their service life.
The variety of shapes allows you to choose an option for any interior
Halogen devices are a glass bulb with an incandescent filament placed in it. Inside the flask there are bromine or iodine vapors that prevent the tungsten filament from burning out. This increases the service life of halogen lamps.
LED lamps are assembled on the basis of LEDs - semiconductor devices. They do not heat up, which means they are the most economical and optimally suited for the bathroom. They are currently the most expensive, but as demand increases, the price goes down.
LED dots are the most economical
It is preferable to use lamps operating on reduced voltage. To do this, a 220/12 V step-down transformer is installed under the suspended ceiling. The power of the transformer is selected in accordance with the total power of all lamps (plus some reserve is needed).
Installation is recommended using a step-down transformer
Optimal types of light bulbs
Each type of lamp corresponds to a specific type of light bulb. For example, in LED models an incandescent lamp is unacceptable
This nuance is important to consider when choosing products.
For installation on the tension fabric, energy-saving, LED, halogen light sources, incandescent lamps, and fiber optic threads are used.
In general, any light sources are suitable for tensile structures, but with several clarifications:
- It is better to give preference to frosted light bulbs;
- in spotlights you should not use incandescent lamps;
- together with halogen light sources, installation of an additional transformer is required;
- permissible power of incandescent lamps is no more than 45-60 W, halogen lamps – up to 35 W.
Incandescent lamps are placed in pendant chandeliers fixed at a distance of at least 0.4 m from the film ceiling. They emit standard diffuse light, but are the least economical option among the rest.
Halogen lamps are more economical and durable. These devices have good color rendering and provide intense bright light in the room, but are very limited in color gamut.
LED bulbs are the most optimal, environmentally friendly and cost-effective option. They hardly heat up during operation, which is why they are the best type of light source for suspended ceiling surfaces.
Manufacturers provide a long warranty for many models of LED lamps for up to 10 years.
LED lamps are characterized by a wide range of color temperatures - from cool white to warm yellow. The devices do not create a flickering effect and emit a fairly soft light.
When purchasing lighting fixtures with already built-in LEDs, you need to clarify the possibility of replacing them. If it is not provided, then if the light bulb fails, you will have to change the lamp
Fluorescent light bulbs are durable and economical. They provide high-quality diffused lighting, do not heat up, and do not illuminate the surface. Thanks to the low energy consumption, the relatively high price of the products quickly pays off.
Since they are characterized by relatively large sizes, they are not suitable for every lamp model. The main disadvantage of fluorescent lamps is their low startup speed.
Fiber optic threads are another option for a light source, which is often combined with tension fabrics. They are characterized by low heat transfer and a small amount of light. Usually they are used exclusively as decorative lighting.
With the help of luminous threads and special attachments, bewitching effects of the starry sky, flames, and northern lights are created indoors
The cost of optical fiber is an order of magnitude more expensive than other elements, but it is justified by its durability.
How to correctly calculate the required number of lamps
Before making the correct selection of the number of lamps for the room, you need to decide on the type of light sources used. Their number will depend on this.
To perform the calculation you will need the following data:
- room area;
- type of lighting sources installed in the room;
- the presence of windows in the room and their installation location;
- methods for zoning room area;
- interior design, as well as the purpose of the room.
An example of calculating the number of light sources is given in the table.
| Room | Standardized quantity for incandescent light bulbs, W/m2 | Normalized number for diode light sources W/m2 |
| Bathroom | about 20 | 2-3 |
| Living room | 22 | 3 |
| Corridor | 12-16 | 1-4 depending on the purpose |
| Bedroom | 15 | 2 |
| Children's | 60 | 6-10 |
For a room with an area of about 20 square meters, you will need approximately 10-13 light sources. To ensure a more convenient arrangement of lamps, it is recommended to select an even number of lamps.
It is better to choose more light sources, since spotlights emit soft lighting, it will not harm a person.
Ceiling spots in the interior: photos in different rooms
If you have not seen the arrangement of the lamps on the ceiling, it is quite difficult to imagine the result from the diagram. Even the simplest diagrams - in the corners, in a semicircle near one of the walls, along opposite or adjacent walls - are quite problematic to imagine. Moreover, the appearance varies significantly depending on the shape, size of the lamp, and the type of lamp selected for it. After all, they are available with different scattering angles - from narrowly directed (about 30-40°) to shining in different directions (120-180°). That’s why in this section we have collected photos of schemes, and grouped them by type of room, because the appearance also changes depending on the design.
Living room
A chandelier is most often used in the living room, and most often it is quite large. If the room is square or close to square, it makes sense to choose symmetrical schemes. They emphasize the correct geometry.
Spotlights are located around the chandelier and in the corners
This is only true for those cases where there is no need to emphasize zoning. In this case, asymmetry is more suitable and you can use spots that differ in appearance.
In some areas the number of spots may be greater
In living rooms, a large number of light sources are most often used, which are divided into several groups. This makes it possible to vary the lighting intensity over a wide range.
Zoning is emphasized not only by light, but also by lighting
It doesn’t matter whether with or without a chandelier, but the diagrams contain more than a dozen spots, and more often - several dozen. So in this case, to save energy, it makes sense to install LED lamps
Yes, they are much more expensive, but in terms of efficiency they have no equal. At least for now.
Bedroom
The location of the lamps on the ceiling should be selected taking into account the fact that the atmosphere should be cozy and relaxing. Therefore, when choosing lamps, you need to choose them with a warm glow temperature, that is, those that give a slightly yellowish light. You should not place lamps with a blue or bright white tint in the bedroom - it will be difficult to relax.
The light should be warm
Bedroom lighting schemes are usually not very complex. A circuit of small lamps around the perimeter of the room, maybe a slightly larger number above the bed. That's all the delights. The simpler the better. The task is to create a cozy atmosphere and everything is subordinate to it.
If you want something original
If there are other areas in the bedroom - a dressing table or even a workplace, you can “add up” the illumination with the help of wall lamps. The second solution is to install more lighting fixtures in this area, put them on a separate switch and turn them on as needed.
Sconces are usually hung at the head of the bed, or table claws are placed on bedside tables.
So when choosing a layout for built-in lamps in the bedroom, one of the main rules is brevity.
Kitchen
Most often, a kitchen, even a small one, is divided into two parts. In one they prepare food, in the other they eat it. When developing a lighting scheme, these zones are often emphasized. In this case, spots are usually placed along the kitchen unit, and a rectangle, oval, or arbitrary figure is built above the table.
Arrangement of lamps in the kitchen: two zones, two schemes
If the kitchen is very small, you won’t be able to set up complex circuits. In such cases, spots are distributed around the perimeter or along two walls - opposite or adjacent. This needs to be looked at depending on the situation, but both options are good.
Simple designs are more often used in kitchens
An oval or square also looks good. Just don’t install large lamps with complex shades in a small room. They, of course, look beautiful, but they are more suitable for the living room; in small quantities they are good in the bedroom. Even in the corridor and hallway they are appropriate. But not in the kitchen. Firstly, they are very difficult to wash, and secondly, they do not look good in a small room. Laconic forms are more suitable here. But a circle or a square - the choice is yours.
How to properly place spotlights in the kitchen
You can use different types of lamps. For example, as in the photo - on long legs. By the way, this is one of the trends. Lampshades can be of any shape, but the most common are cylindrical or round.
Position light sources
Before placing lamps in the bathroom, it is recommended to determine the number of functional spaces. The wide rooms have several levels.
- wash areas with a sink and mirror are designed;
- area for water treatments with shower or jacuzzi;
- space for changing clothes and placing things.
Small built-in lamps with a gentle light also illuminate furniture structures - shelves, cabinets, cabinets.
The location of lighting fixtures at the ceiling level depends on the size of the room
It is important to calculate the dimensions of the room in order to determine the best layout, but which arrangement is more harmonious will also depend on the design solution. Lighting can be represented by 1 lampshade or a complex combination of lamps of different types
Combining lighting systems at different levels is popular. The basic principles of bathroom design involve lighting the work area, which includes a mirror, washbasin, and shelves.
Preference is for unobtrusive soft light. Lower lighting often serves as interior decoration. Such lamps are placed 40 cm from the floor or on the lower surface and under interior items. It is possible to place light sources on the steps and under the podium.
Washbasin and mirror lighting
The middle level includes the installation of lighting fixtures above the bathroom mirror and washbasin. The requirements for the devices are to create natural light, a clear image on the glass surface - without distortion or shadows.
Experts recommend hiding lighting fixtures in white or matte lampshades so that the radiation is soft and diffuse.
The optimal arrangement of devices is on the sides of the mirror or along the perimeter. Any type of lamp can be installed. It is better to avoid devices under the mirror, because... they create glare on surfaces.
Bathroom vanity and mirror lighting
Shower or bath lighting
The shower or bath area requires additional lighting to create a cozy atmosphere. Specially designed luminaires for wet environments are suitable.
The structures can be designed in the form of sconces. Lamps are also placed in the center or spotlights are mounted in rows. The system of overhead lamps will help to visually expand the space and increase the level of illumination.
Bath lighting
Mistake 1. First beauty, then safety
When choosing light in the bathroom, use the principle of safety first, then everything else. No matter how beautiful the sconce is, it is not suitable for the bathroom if its protection index against moisture and dust is 0.
IP index on the packaging, photo example
Index of protection of the lamp against dust and water
The IP index consists of two numbers - IP 44. The first number (from 0 to 6) is the degree of protection against the ingress of solid particles (dust), the second (from 0 to ― protection from the ingress of liquid. The higher the number, the higher the protection. See the value on the packaging, lamp body or in the product characteristics in the online store.
The more IP a bathroom fixture has, the better.
Decoding the IP index for luminaires on the diagrams
Bathroom luminaire placement area based on IP
The choice of IP index for a lamp depends on where you install it - that is, on the location area.
- zone 0 - moisture enters directly by stream (bottom of the shower stall, bath screen, etc.);
- zone 1 - moisture often splashes (the wall of the shower stall, walls near the sides of the bathtub, etc.);
- zone 2 - moisture splashes infrequently (60 cm from the sides of the bathroom, behind the shower doors, etc.);
- zone 3 - moisture enters very rarely or never (near the ceiling, etc.).
From here it becomes clear that the sconce near the mirror should have a min IP index of 44, and the built-in lamp in the bottom of the shower should have a min IP index of 67.
Safe and unsafe zone for placing a lamp in the bathroom, taking into account the IP diagram