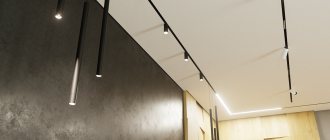
Both conventional and LED spotlights for plasterboard ceilings are used very actively today: unlike traditional ceiling lamps and chandeliers, they provide uniform illumination of the room, while significantly reducing energy consumption.
Of course, to achieve the best result, you need to select lamps taking into account all the requirements, and also install them according to the rules - but this is exactly what my article will help you with.
These small lamps are very easy to install
Preparation
Properly organized room lighting provides a pleasant and comfortable pastime, helps decorate the interior or create effective visibility in the work area. However, to achieve high-quality lighting effects, it is important to correctly select the necessary materials, tools, equipment, plan the location, etc. First, let's look at the possible options for tools that may be useful to you for carrying out activities for installing spotlights.
Required tools and materials
In each specific situation, the installation of a spotlight can differ significantly, since the process is associated with the characteristics of the ceiling structures, the stages of repair work and the tools and devices available.
The most relevant tools are for drilling holes in drywall; this process can be carried out using:
- A special flexible crown for working on plasterboard is the best option, as it is designed specifically for plasterboard ceilings. The set contains several ring-shaped files of different diameters, which are inserted into the drill attachment.
Flexible crowns
- Circular tile drill (ballerina) , despite the fact that their direct purpose is to work on ceramic surfaces, they do an excellent job with drywall. A significant advantage of such a drill attachment is the ability to set the center of the hole with fairly high accuracy.
Crown on tiles
- Jigsaw - working with an automatic blade is more difficult than with previous attachments, but it is still possible to make a hole close to round in shape.
Using a jigsaw
- Drill bits - with its help you can drill a fairly large number of holes in a circle, and break out the inside with your fingers.
- A hacksaw blade or a stationery knife are the most difficult options, since all the work will have to be done manually.
Using a utility knife
You can take any of the above tools for working on drywall that you have on hand. Most of them can be driven automatically using a drill, a screwdriver, or a hammer drill with a drill function.
To connect spotlights you will need connecting wires or cable. Connecting wires to the lamp can be done using soldering, terminals or sleeve crimping. When working with cable and wire products, you may also need pliers, wire cutters, and pliers to remove insulation. To tighten/unscrew the bolts, you must use slotted and Phillips screwdrivers.
Spot lamp selection
The very concept of a spotlight comes from the English lexicon, where they are called spot. In domestic usage, such lighting devices are called soffits, spotlights or spots; the main difference between such lighting sources is their local location and the same effect. However, the variety of their shapes, design features and design requires a responsible approach to choosing a spotlight model for installation in a ceiling frame. The division is made according to a number of factors, so below we will consider them all in turn.
Based on the type of lamps installed, lighting spots are divided into:
- Incandescent lamps are the simplest option, but are characterized by very low efficiency, only about 5% of the electricity is spent on lighting and poor light output of 8 - 10 Lm/W;
- Halogen lamps - have slightly better light output than incandescent light bulbs from 12 to 18 Lm/W, but are not easy to touch with bare hands;
- Fluorescent light bulbs are a category of gas-discharge lamps that have a high light output of 40 to 60 Lm/W, but contain toxic mercury, which is easily absorbed into drywall. They belong to the category of energy-saving lamps, therefore, despite their high cost, they can significantly save energy.
- LED light bulbs are the most effective, as they can provide from 90 to 120 Lm/W and are completely safe for humans. They also fall into the category of energy-saving devices. LED lamps are often used for LED lighting of premises.
For spotlights, the most profitable are fluorescent and LED lamps. They generate relatively little heat, consume little electricity, and can provide a wide range of color temperatures - from warm to cold spectrum.
By type of base - there is quite a wide variety of connection options, but in spotlights they are used with base G, E and non-separable models. In the latter, the light bulb is not separated from the lamp; they use built-in lamps and the entire lamp must be replaced.
By type of base
In terms of overall dimensions, they can have different diameters and heights, which must be taken into account in relation to the size of the plasterboard boards in which they will be installed. The height of the ceiling light should be less than the space in the niche behind the drywall so that it fits freely in the hole.
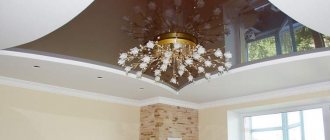
Based on the method of arrangement, recessed and surface-mounted ceiling lamps are distinguished. The first of them are completely hidden under drywall, overhead devices remain outside, and the mounting method is identical to that of a chandelier.
Built-in and overhead
According to their design, they can be stationary or rotary, single or block. Stationary spotlights illuminate only a strictly defined area, while rotary spotlights can change the position of the illuminated area. Single ones contain only one point of the lighting device, while block ones contain several at once in one housing.
Stationary and rotary
Electrical wiring diagram above a suspended ceiling for spotlights
Typically, there are two schemes for switching on spotlights and, accordingly, two types of wiring - parallel and star. A parallel wiring diagram above a suspended ceiling is also called a loop and provides for parallel joining of all lamps, with conductor connections in the lamp itself or next to it.
The “star” circuit is a connection of conductors at one point, and the installation to each lamp is carried out with a separate cable.
The choice of wiring diagram should, in theory, be based on the convenience of wiring and maintenance of the entire circuit. But when working with spotlights, there is a peculiarity - different operating voltages of future lamps - 12 V or 220 V. As you know, according to Ohm’s law, with the same power, voltage and current are inversely proportional. In simple terms, a small current and a large voltage in one case, or a large current and a small voltage in another.
Choosing a wire for electrical wiring above a suspended ceiling
Before buying a cable for electrical wiring behind a suspended ceiling, you need to calculate the required cross-section of conductors, which directly depends on the number and power of the installed lamps. For example, we plan to install a suspended ceiling in one room with a chandelier and lighting around the perimeter of eight lamps. Typically, a recessed spotlight on suspended ceilings has a power of 35-50 W. This means that the total maximum possible power of a circuit of eight lamps is 400 Watts.
Let's consider a parallel wiring diagram. If lamps with a voltage of 220 V are used, we will get a total current of 400 Watt/220V = 1.8181 A. This means that the cross-section of the wire for such a garland should be about 10 times smaller - at least 0.1818 sq. mm. When using 12-volt lamps, we get a current of 400 Watt/12V = 33.3333 A and, accordingly, a cross-section of 3.33 square meters. mm!
But no one lays such a powerful cable; usually for lighting wiring they use a wire with a cross-section of 1.5 mm. The long-term permissible current from the PUE for a copper conductor with a cross-section of 1.5 mm2 is 19A. To correct the situation, you need to use a thin cable to deliver 220 V from the lighting box under the ceiling to the transformer or, better, two transformers. And from each transformer, connect 12-volt lamps with a thick wire along the ceiling. You can also carry out wiring for an operating voltage of 220 V and low current, and install your own low-power mini-transformer for each lamp.
Let's consider a star connection diagram in two stages: from the mounting box to the star connection point, and from the connection point to each luminaire.
For a voltage of 220V, the “box-star” section has a current of 400 W / 220 V = 1.8181 A. The section of each of the eight “star-luminaire” lamps operates at a current of 50 W / 220V = 0.2273 A. According to the calculation results, based on section with maximum current, the cross-section of the wires must be more than 0.18 square meters. mm. From the standard range of cables produced, with a double reserve, a wire with a cross-section of 0.5...0.75 sq.m. is theoretically suitable. mm.
For a voltage of 12V, the “box-star” section current is 400W / 12V = 33.33. The star-lamp section operates at a current of 50W / 12V = 4.1667 A, which is exactly equal to an eighth of the total current. For eight star-lamp sections, a cable with a cross-section of at least 0.5 sq. mm is suitable. But what to do with the “box-star” section? Strictly speaking, the lighting box contains 220V voltage. Only after the transformer do we deal with 12V and powerful current. The solution is on the surface: connect a thin 220V wire from the box to the transformer under the ceiling, and after that, from the connection point, distribute 12V with thick wires to each lamp. Or you can, similar to a parallel connection, wire everything with a thin wire under 220V, and install a mini-transformer on each lamp or use a lamp with a built-in transformer.
From all of the above, an unambiguous conclusion follows. Before you begin installing electrical wiring above a suspended ceiling, you need to know exactly which lamps will be used. The considered case is somewhat exaggerated and serves as an illustration of the problem that can be encountered when designing electrical wiring for spotlights.
For lighting wiring, in the vast majority of cases, a cable with a core cross-section of 1.5 square meters is used. mm type VVGng or stranded wire with a total cross-section of 0.75 sq. mm. PVS type. If you have these two tools, you can estimate the current load of the circuit and determine where you need to place one or more transformers.
Installation Requirements
There are no general requirements for installing spotlights in plasterboard, but there are recommendations regarding some parameters. Firstly, built-in lamps must provide good visibility or local illumination in a certain area. Secondly, the choice of installation location and technical parameters must be consistent with other elements of the lighting system - hanging chandeliers, LED strips, sconces, etc.
Thirdly, it is recommended to maintain the distances between spotlights in the following ratios:
- If lamps are mounted in rows, then there should be no more than 1 m between them;
- Within one row, the distance between spotlights should not exceed 1.5 m;
- If there are several rows, then the point devices should be staggered relative to each other;
- The distance from built-in spots to walls or windows should be at least 0.5 - 0.6 m.
How to hide LED strip
There are many ways to install diode strips; very often they are used in multi-tiered ceiling structures to emphasize each fragment. But even if you have an ordinary flat ceiling, you can also play with it in an interesting way. You can install such lighting even alone. In this case, you will need a special wide cornice for LED lighting.
Let's take a closer look at the algorithm of actions:
- Using a building level, mark the line for the location of the cornice, 10 cm from the ceiling.
- Glue the cornice using liquid nails, titanium or acrylic putty.
- Carefully glue the joints between the cornice strips, especially in the corners.
- Run the wiring into the cornice and connect the power supply that needs to be secured to the wall.
- Connect the LED strip to power. If you need to connect more than 5 meters of tape, then each section is connected to the power supply in parallel.
Selecting an installation location and mounting holes
Installation of spotlights is carried out in accordance with the characteristics of plasterboard structures and the planned quantity. The simplest option is considered to be the option during installation of the frame, when both the placement of electrical wiring and the location of the profile can be adjusted. If the ceiling tiles have already been installed and the finishing work has been completed, then the location will be selected in accordance with the type of structure and installation method.
For recessed spotlights, it is necessary to select a free space in the drywall where there is no metal profile, otherwise you will have to change the sheet of drywall and re-carry out the finishing work. If the marks on the places where the profile was laid have not been preserved, then you can use a magnet to find them.
Profile in hole
If the lamp is overhead, then the installation location is chosen, as for the location of the chandelier. In this case, you can use two methods of fastening: using metal screws or using butterfly dowels. For the first option, select a place where there is a profile behind the drywall. In the second case, the installation location is not tied to the profile; the butterfly dowel is installed under any conditions.
Layout
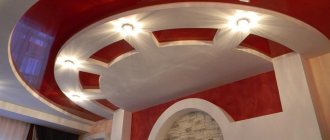
The principle of installing point lighting devices has no strict boundaries. The location on the suspended structure is determined based on your needs for room illumination or the creation of decorative lighting; perhaps the diagram should become a figure for decorating a plasterboard ceiling. Below are commonly used luminaire placement options:
Lamp layout diagrams
Lighting lamp type
An important role when organizing ceiling lighting is played by the type of lighting lamps that will be used in the lamps. A number of factors will depend on their correct choice - efficiency, durability, lighting quality and, most importantly, safety. What type of lamps can be installed in luminaires intended for installation in plasterboard? Three options can be considered the most successful:
- Luminescent. This type of light bulb is perfect for any type of ceiling light. Fluorescent illuminators are economical, hardly heat up, and last a long time. The only problem is that they are relatively large in size, which means that the lamps will not be quite miniature.
- LED. Semiconductor light sources are an ideal option for ceiling lamps, both built into plasterboard and overhead. LEDs are economical, durable, do not heat up much, have good color characteristics and are very compact. The only drawback of such illuminators is their fairly high cost.
- Incandescent lamps . These can be either the familiar bulbs with a spiral or their halogen counterparts. When choosing this option, it is necessary to take into account that both of them get quite hot. This can be dangerous in terms of fire, and drywall does not like high temperatures.
Particular care should be taken when installing halogen light sources in drywall. The bulb of these lamps, even in open lamps, heats up to 250 degrees Celsius and higher.
Installation process step by step
To install spotlights in drywall, you will need to perform the following sequence of actions:
- Apply markings for future installation locations on the plasterboard structure. It is advisable to use measuring devices to ensure that the hole is centered.
- Select the diameter of the drill bit according to the diameter of the spots. It is desirable that it be a little larger, then the lamp will easily fit into the diameter of the hole.
- Turn off the power supply to the electrical network at the input panel if the connection and installation of electrical wiring has already been completed. If the power supply system for spotlights is not yet connected, you can skip this point.
- Drill a hole in the drywall or make one using any of the methods described above.
Make a hole in drywall
- Pull the power wires out through the holes and clean their edges.
Get the wires
- Make an electrical connection to the spotlight to the wiring line.
Connecting the lamp to the wiring
- Hide the wiring in the frame and install the soffit in the drywall, secure it with spring fasteners.
- Install an LED or fluorescent lamp into the socket. If necessary, secure with a spring pin.
Secure the lamp with a pin
Lack of light
The fourth argument against spots is that in the end they all provide very little light. No matter how many you place them, no matter how brightly they shine, the room where these light sources are located is always dark.
This happens due to the fact that they shine in a beam and strictly on the floor, and not in all directions.
They cast light cones of light onto the walls, which do not contribute to the normal reflection and propagation of rays. That is, the light does not fulfill its main task - it does not fill the room as with daylight.
Something else can be seen below, but the room as a whole remains poorly lit. This causes discomfort and you always want to increase the number of lamps or their power.
Or additionally turn on a chandelier or table lamp.
Here, read user comments from YouTube.
Rules and tips
Before installing spotlights, it is advisable to familiarize yourself with the basic tips and rules developed by installation specialists:
- If you want to regulate the power of the light flux, then before installing the spots you need to select dimmable LED lamps and the same switch.
- Never use twists for electrical connections; this is an extremely dangerous option.
- If there are suspended ceilings in close proximity to the spotlight, carefully select the power of the light bulb, as the film may be deformed.
- When installing halogen lamps in a spotlight, do not touch the bulb with your bare fingers - this will shorten its service life.
- If you need to power spotlights from low voltage, they are connected via a power supply or transformer. The power of the transformer or unit is selected depending on the power of the lamps.
- In cases where the installation of a point device requires special care, the mounting springs are tightened with wire, which is cut after installation.
How to calculate a transformer
Transformer is a device that transforms 220V voltage to 12V voltage. If you use 12 volt light bulbs, be sure to install a step-down transformer.
We choose it by power. To calculate the power of the installed light bulbs, we multiply by their number and add 20% - the power reserve.
There are induction and electronic transformers. Induction is a cheaper option, although more reliable. Electronic ones are more expensive, but they are lighter in weight. The wire leading to the transformer should be less than two meters to avoid power loss.
How many lamps should I choose per room? We calculate based on the fact that one square meter requires illumination of at least 20 watts.
Advantages of single-level ceilings with lighting
You can make a single-level ceiling with your own hands, with a minimum of knowledge.
- GCR is very easy to work with. Even a complete beginner in this matter will be able to quickly grasp the essence and do everything on their own at the simplest level.
- Many lamps on the ceiling make any irregularities on it visible. However, the drywall is smooth, so there is nothing to be afraid of.
- If a short circuit occurs, the fireproof drywall will not ignite.
- It is possible to give as much light to certain parts of the room as necessary.
- A single-level structure can be assembled by anyone, unlike elaborate multi-level ceilings. There is no need to think through boxes and niches. There is also no need to spend a long time calculating the correct frame design for all ceiling levels.
Preparatory work
If there are several spotlights and they are located at a small distance from each other (up to 500 mm), then it will be enough to stretch the wire to the nearest one. This process is carried out before the installation of the ceiling structure begins. Then, after the ceiling is completely installed, the cable is routed from device to device. Which wire should I use? Of course, from the point of view of ease of connection to the marks, it is flexible multi-core, but from the point of view of quality and reliability of installation, it is necessary to choose the same one as for all wiring. More often it is a hard copper wire, for example VVG-2x1.5.
We fix the wires in the terminal block
If a step-down transformer is used, then there is one important nuance. When using low supply voltage for halogen lamps (12 Volts), the voltage drop in the wires will be of great importance. In short, the wire must have a cross-section of more than 1.5 sq. mm, preferably 2.5. And the length of the cable to each lamp must be the same, so that the voltage drop is the same.