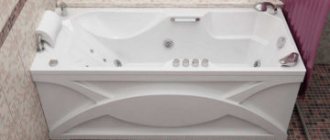
Today, there are several options for installing a bathtub. The most popular ones are support legs and brick base. The first method is chosen by those who want to leave as much free space as possible, even in such a small room as a bathroom.
If the bath rests on legs, then the floor underneath remains free. This means that you will have fewer problems with cleaning, and you can always carry out minor plumbing repairs under the bathtub without dismantling the support. In addition, open access to the space under the bath allows you to constantly keep this area clean and promptly remove puddles of water, dirt and objects that get there during bathing.
In addition to standard installation legs, there is a wide range of decorative supports on sale that will look great in an interior stylized in classic, baroque and other retro styles.
Read about what rules for installing legs exist for different types of bathtubs in our article today.
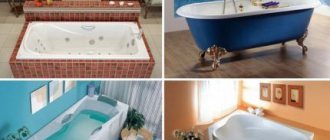
Types of claw foot baths
Cast iron
The very first bathtubs put into mass production were made from cast iron. This material is incredibly durable and wear-resistant - a cast iron bathtub will serve its owners for decades without losing its original properties. Cast iron plumbing is durable, has good thermal conductivity and is easy to maintain. Its disadvantage is that cast iron is very heavy, which complicates the transportation and installation of plumbing equipment made from this material.
Steel
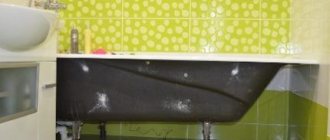
Steel is a fairly strong material, but not as heavy as cast iron, which is why it is more popular among buyers. Another plus in its favor is that steel plumbing belongs to the budget class. A steel bathtub is easy to install and easy to maintain. Such a bathtub will have two major disadvantages: a short service life and a complete lack of sound insulation.
Acrylic
Acrylic is a more modern and expensive material than cast iron and steel. Today, acrylic is used to make not only bathtubs, but also other types of sanitary equipment. Acrylic plumbing has a beautiful appearance, a pleasant feel and, most importantly, a non-slip surface. The disadvantage of acrylic bathtubs is the fragile structure of the material, which precludes the use of cleaning products containing aggressive substances.
In addition to the three materials listed above, the assortment of stores selling sanitary equipment includes bathtubs made of plastic, quarry, marble and other materials of both artificial and natural origin. We will not dwell on them in detail, since our task is to talk about the most common types of bathtubs.
Model selection
If you intend to completely replace the bathtub, you must immediately decide on your choice. Only a competent approach will help you buy a plumbing fixture that will fully meet the needs of all apartment residents. Among the options on the market, the most popular products can be identified:
- Steel ones are affordable and easy to use. The peculiarity of this option is that, with certain skills, such a bathtub can be installed by one person. The only drawback is that the enamel of such a product deteriorates extremely quickly, so durability is out of the question. A steel bathtub is an ideal solution for small rooms where it is necessary to install the plumbing fixture as close to the wall as possible. This allows you to significantly protect yourself from deformation and the need for replacement in the future.
- Cast iron - they have a long service life and do not require special treatment. However, such baths are characterized by extremely high cost and complexity of installation, which is caused by their significant weight. It is impossible to install a bathtub on a ready-made siphon, so you have to attach it to it in advance, which is quite difficult in cramped conditions of a small space.
- Plastic - have become very popular recently and can boast of their environmental safety, durability and attractive appearance. Acrylic bathtubs are more expensive than steel ones, but they are cheaper than cast iron ones.
Having decided on the material suitable for manufacturing, you can begin to select the size of the product.
During the selection process, you should pay attention to the height of the side, the depth of the bowl, its length and width. The most suitable height of plumbing fixtures can be determined by the average height of family members
In addition, you should definitely take into account the presence of children in the apartment. For adults, the optimal height is 60-70 cm. If you have children, it is better to choose smaller products.
Each type of bathtub has its own distinctive features in terms of dimensions:
- Cast iron products are presented in two versions: miniature (120x70 cm) and European standard (140x70 cm).
- The length of the bowl of a steel bath is 150-180 cm, and the width is 85 cm. Sometimes on the market you can find products made of economy-type steel. The length of this model is 120 cm, which makes it an excellent option for a small room.
- Acrylic bathtubs come in a wide variety, so there are a lot of options when choosing. On the market you can find models with long and short bowls. It all depends on the overall configuration of the product.
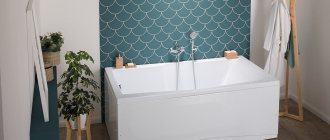
The bath can be wall-mounted or corner. A distinctive feature of wall-mounted products is that they are mounted as close as possible to one of the walls, while corner products are installed at the corners.
Wall-mounted bathtubs come in a variety of shapes. The most popular is oval, which looks more stylish and elegant. As for corner baths, they are usually found with regular geometry, less often in asymmetrical shapes.
Finally, you need to decide on the manufacturer of the plumbing equipment:
- Cast iron bathtubs on the domestic plumbing market are represented by three large ones, Roca and Jacob Delafon.
- Among steel options, the products of domestic companies are in great demand, and among foreign ones we can highlight the Spanish brand Roca and Portuguese products BLB.
- Acrylic bathtubs are presented in the greatest variety. On the market you can find products from European countries, Turkey and China. Among the most famous manufacturers are the Czech company Ravak, the Polish Cersanit and Kolo, and the Spanish Pool Spa.
Required tools and materials
In order to install a bathtub on legs, regardless of the material it is made of, you will need the following consumables and equipment:
- pencil or washable marker;
- roulette;
- building level;
- set of adjustable legs;
- support frame for the font;
- set of fasteners;
- silicone-based sanitary sealant;
- drill or hammer drill with a set of drills.
Options for installing an acrylic font
Several options are being studied for how to install an acrylic bathtub into place with your own hands. One of them is selected, for example, self-mounting on legs. Fixing the font is the simplest. Legs are mounted on strips prepared along the length and screwed to the outer side of the bottom of the structure with self-tapping screws.
Regardless of what configuration the bathtub is installed, installation is carried out in accordance with the sequence. It is impossible to start work without assembling the frame:
- prepared to the required length for the legs of the plank;
- legs are attached to the slats;
- the legs are fixed on the bowl;
- a siphon is assembled with further connection;
- height adjustable;
- the outer side of the font is foamed.
It is impossible to say that the bathtub is now securely installed. Its sides are completely free and without support. If there are large people in the family, then the bowl will sag under their weight. Therefore, you can’t do without a durable, well-made frame. Three options for creating a frame:
- The frame is made at the factory from a profile pipe with a large cross-section.
- A brick cushion is built under the bottom of the font.
- The font is supported simultaneously by legs and a brick base.
Preparatory work
Before you begin directly installing plumbing equipment, you need to prepare your workspace. First you need to dismantle the old bathtub.
It is advisable to replace the entire drain-overflow system along with the bathtub, so without any regrets we remove the old siphon, faucet, etc. Don’t forget to turn off the hot and cold water supply in the bathroom first.
If necessary, we clean the floor and walls in the area where the bathtub will be installed from remnants of building materials. We clean all surfaces from dirt and mold. After this, it is recommended to treat with a special antibacterial composition that prevents the formation of fungus and mold.
We sweep all the garbage off the floor and cover it with cellophane or old newspapers. The workplace is ready, you can begin installing the bathtub on legs.
Wall mount
If you need to fasten an acrylic bathtub 170, 180, 150 cm wide or another size, you can position it in one of four positions. The following options are possible:
- Near one wall.
- In the corner. The bathtub has long and short sides in contact with two walls.
- Close to the niche. The bowl is fixed between three walls.
- Island location. The bathtub is not in contact with any wall and is located in the center of the room.
It is believed that the most durable installation option is to install the bathtub in a niche. This can be done in typical Khrushchev buildings. In such apartments the bathroom is very small. Therefore, by purchasing an acrylic bathtub 150x70 with or without a frame, you can ensure reliable fixation of plumbing between three walls. If the room is spacious, such an installation will be more difficult to complete. It will be necessary to build another partition to create a niche of the required size.
However, there are many ways to firmly fix the bathtub. It may not be in contact with the walls at all. True, it is much more convenient when the plumbing fixtures are not located in the center of the room. This option is suitable only for owners of very spacious premises.
To perform correct installation, you need to use special clamps. The fastening material must hold the bath firmly in the wall. Its main element should be bent upward. This will allow him to get closer to the wall below. The side of the bathtub is put on the fasteners. This way he can press closely to the wall below.
In order for the clamps to perform their intended functions, it is necessary to carry out precise markings, as well as control the position of all components during the installation process.
Installation of a cast iron bath
- Since the floors in our apartments are often not at all level, it is recommended to first install adjusting screws on each of the support legs. With their help, it will subsequently be possible to level the bathtub horizontally so that the overflow drainage system works normally.
- We attach the legs to the bathtub in pairs - first the two front ones, and then the two back ones. There are several fastening options - Velcro (feet on a self-adhesive base), wedges and coupling bolts. The adhesive-based legs should simply be pressed against the bottom of the bathtub for a few seconds. The wedges are driven into pre-drilled holes. Pinch bolts are also inserted into the holes and tightened tightly.
- The second pair of legs is attached to the already upside down bathtub. In this case, under the side on which there are no legs yet, a reliable support is installed that can withstand the weight of the cast-iron bathtub.
- When all four legs are in place, the bathtub should be leveled horizontally. Use a building level for this. Pay special attention to the sides that are adjacent to the walls. The gap between the wall and the edge of the font should be as small as possible.
Mounting methods
There are few ways to install a font on legs - only four:
- Using bolts - this is how cast iron and steel bathtubs are installed. This method is the most common; bolts allow you to level the bathtub, which is very convenient.
- Using wedges - this installation is simple and does not allow the bath to be deformed or the enamel to be damaged. The holes on the “ears” of the font are matched with the holes on the legs, then a wedge is driven into them.
- With the help of metal pins - a structure of four legs is used, which is also attached to the “ears”, but at the same time is tightened with metal pins.
- Using a self-adhesive layer - this method is used to attach acrylic hot tubs to the legs. In this case, special legs with a self-adhesive layer are used, which follow the shape of the bottom. These legs have height adjustment, which allows you to level the surface if the floor is uneven.
We recommend reading: Installing a bathtub, adding a shelf to the bathtub and installing a screen under the bathtub. DIY bathroom renovation - VIDEO
Installation of a steel bath
Installing legs on a steel bathtub is much easier, since a plumbing fixture made of steel weighs several times less than a similar one made of cast iron.
- We turn the bathtub upside down and try on the support legs to the fastening points. The first pair of legs should be located between the center of the font and the drain hole, at a distance of about two centimeters from the latter. The second pair will need to be installed as close as possible to the opposite edge of the font.
- If necessary, carefully straighten the supporting metal profile, taking care not to damage the bathtub.
- Support legs are usually attached to a steel bathtub using adhesive-based pads. Before removing the protective film from the linings and gluing the legs to the bottom of the bathtub, the fastening points should be degreased. Any solvent or alcohol solution is suitable for this. We heat the pads with glue, peel off the protective film and firmly press each of the support legs to the bottom.
- After the adhesive has set, you need to attach the adjusting pins to the legs. They are threaded, so you can simply hammer them into the plastic tips. Then firmly fix the studs on the legs using nuts.
- Using a building level, we find the correct position for the steel bathtub in the horizontal plane. We make markings on the walls and, in accordance with them, install the bathtub in place.
- If desired, you can glue several plates for sound insulation.
Summing up communications
The instructions for installing a steel bathtub indicate that after installing the latter at the site of use, communications must be installed. An overflow funnel and siphon are installed, sewer pipes are connected, and taps are attached.
Connection nuances:
- Before starting installation, treat the rubber gaskets with silicone;
- Installation of the drain gasket is carried out externally. The gasket between the overflow and the hose is placed with a cone in the direction of the piping;
- use fum tape if threaded ones are present.
Connect the pipes and install the siphon correctly as follows. Water fills the bathtub and the drain opens. If there are no leaks, then the installation was completed correctly. If not, you should repeat the installation again, checking the instructions point by point.
Installation of an acrylic bathtub
Acrylic bathtubs are most often designed specifically for installation on legs. This makes our task much easier, since a set of supports and fasteners, as a rule, comes with the device, and the sequence of steps is described in detail in the installation instructions.
- As in all previous cases, the first thing you need to do is try on the support legs to the installation site and make markings.
- The next step is drilling the holes. Acrylic is a fragile material, so the bathtub should never be drilled through. Be sure to use a drill stop.
- Then we install the main fasteners on the bathtub - guides for the frame and support legs.
- Now you need to mount the drain-overflow system and install it in place. An acrylic bathtub is mounted to the wall with a siphon.
- We turn the bathtub bottom down and carry it to the installation site. We take the building level and determine the optimal position for it. We leave markings on the walls.
- In accordance with the markings made, we install mounting hooks to the wall. They will give the structure additional strength and protect the bath from deformation.
- Now the bathtub can be safely installed in place, because it will be supported not only by the legs, but also by metal hooks.
Siphon assembly
Step 1. Check the completeness of the siphon spare parts and their technical condition. Carefully inspect the rubber rings and gaskets; their surfaces should be smooth, without depressions, sagging or burrs. If the plastic elements show signs of shrinkage of the material during cooling, you are dealing with an unscrupulous manufacturer; never buy such products. Lay out all the elements on a clean surface and study their purpose. Before doing this, read the instructions and familiarize yourself with the attached assembly diagram.
Siphon kit
Step 2. Start assembling the kit from the largest part - the flask or other siphon seal. Pay attention to which side the cone seals should be placed; when tightening, they should enter the pipe and increase in diameter, and not be pressed against the end of the tube.
Step 3. Attach the overflow tube and replace the drain grate. Make all connections by hand, do not clamp the elements too tightly. Before installing the drain and overflow grilles, remove the protective film around the openings. Let the rest of the surface remain protected; the film is completely removed only after all installation work is completed.
Siphon assembly diagram
Now you can install the acrylic bathtub and connect the drain.
The final stage
After all the installation work is completed, there are still many small but important things to do.
- We install the mixer and drain-overflow system (if you did not do this at the main stage). We connect the bathtub to the water pipes.
- Now we need to check our design for leaks: close the drain and fill the bath with water. After a few hours, we will carefully examine all connections for leaks. If any are found, we eliminate them using bathroom sealant.
- The next problem that needs to be solved is sealing the gap between the wall and the font. To do this, you can use one of the proven methods - sealant, border tape or bath corner.
- Finally, care must be taken to ensure that the not always attractive support structure is hidden from prying eyes. For these purposes, a decorative screen is usually installed under the bathtub. You can assemble it yourself from plasterboard and cover it with ceramic tiles, or you can buy a ready-made sliding screen made of plastic or plexiglass.
Screen removal instructions
The method for quickly removing a decorative panel depends on how it is secured. If supporting elements are not visible in the gap near the floor, then the screen is installed on screws, magnets or springs. The presence of legs indicates that the structure was installed by surprise. The absence of a gap indicates that the panel is held in place by clips and latches. Once you know the mounting method, you can remove the screen from the acrylic bathtub and keep it intact.
about the presence of self-tapping screws . They need to be removed using a thin sharp knife and using a screwdriver or screwdriver to unscrew all installed screws. The absence of plugs does not always indicate the absence of mounting screws. A good craftsman can create an inconspicuous decoration using high-quality sealant. You can find the screws using a small magnet that will stick to the steel caps.
If the plugs and legs are missing, simply pull the panel down. If the applied force is not enough, in addition to magnets , additional latches were used for installation. In this case, the top of the panel must be pulled towards you, and after snapping, down to unfasten the magnets.
The screen mounted on springs needs to be pulled down and the panel removed from behind the side. After this, all that remains is to disconnect the springs from the hooks.
To remove a vertically , screw in the support legs until the top edge extends beyond the side. After this, the panel itself will fall into your hands.
When installing on clamps, you first need to pull the top edge of the panel towards you, and after disconnecting the latches and moving the screen over the side, lift it up
What material is the frame for the bathtub made of?
The frame for a bathtub with your own hands can be made from different materials - the only condition according to which their choice can be made is the ability to take high loads and successfully withstand high humidity. Such materials include wooden timber pre-treated with water-repellent impregnation, a galvanized profile for plasterboard structures, as well as an iron profile pipe. You can’t think of better materials than these, and we will consider them for suitability for making a bathtub frame.
- Wooden beam. An excellent material, but it has one drawback - it rots over time. In addition, wood is highly susceptible to deformation depending on the ambient temperature and humidity. In principle, this problem can be solved with the help of modern impregnations, which can make wood resistant to water and temperature, as well as protect it from rotting. The advantages of using wooden beams include ease of processing - to use it to build a frame for a bathtub, you do not need a special tool. If desired, you can easily get by with a hand saw and a screwdriver.
- Profiles for plasterboard structures. The main disadvantage of this material is its low strength. Let's face it - profiles are not designed to withstand the kind of load that usually falls on a bathtub frame. Therefore, this material is used mostly for the manufacture of a decorative or auxiliary frame - in such situations, the main load from the weight of the bath and the water in it falls on the legs. If we talk about a full-fledged load-bearing frame made of this material, then it needs to be strengthened, and this is done with the help of the same wooden beam. You understand that purchasing two materials at the same time is, at least, wasteful.
- Metal frame for a bathtub made from a profile pipe. In my opinion, this is what you need - depending on the pipe used, you can even put a heavy cast-iron bathtub on such a frame, if, of course, such a need arises. This material has one significant drawback - to make a bathtub frame from it you will need welding equipment and skills in its use. The only disadvantages include the metal's susceptibility to corrosion, but this problem can be quite easily solved with the help of modern primers.
In principle, the question of how to make a frame for a bathtub can be solved with the help of other similar materials; there are quite a lot of them in the modern world
When choosing these materials, be sure to pay attention to the strength characteristics and correlate them with the load that the bath will put on them
How to assemble a bathtub onto a frame is shown in the video.
https://youtube.com/watch?v=Ckp-btoi4UI