Choosing an acrylic bathtub an important matter, but the correct installation is much more important. Even small errors in installation often cause breakdowns, and this is not always solved by minor repairs. It happens that after improper installation, a complete replacement of a plumbing product is necessary.
The main advantage of an acrylic bathtub is its light weight, thanks to which you can assemble and install it yourself; how to do this correctly in order to use the bathtub comfortably for a long time, we will analyze in detail in this article.
How to install it yourself: basic methods
On your feet
How to assemble?
It is recommended that before starting work, you study the assembly instructions from the manufacturer, which detail all the nuances for a specific model. Typically, a structure with legs is assembled as follows:
We have discussed detailed instructions for installing an acrylic bathtub on legs with all the nuances in this
article .
- On the case turned upside down, you need to find special places reserved for the legs. As a rule, if the bottom has no holes, the mounting areas are marked by the manufacturer with symbols or stickers.
- Using a drill or screwdriver, you need to drill holes for fasteners. It is very important to be extremely careful and control the depth of the drill so as not to break through the bottom. To do this, you should measure the length of the screw in advance and mark this distance on the drill using a piece of electrical tape.
- If drilling holes is not required, you will see special mounting pads for quick installation. You just need to screw the legs there.
- After installing the legs, carefully turn the bathtub over and place it in the designated place. Be sure to cover the bottom of the bathtub with soft materials so as not to damage it during further installation by accidentally falling objects.
The legs must be installed in the places provided for this purpose. Otherwise, the unequal load will cause the bathtub to tip over or become deformed, and drilling in other places may cause cracks and leaks.
Height adjustment
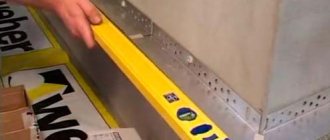
To adjust the height of the legs, you will need a building level and a wrench.
First, level one leg against the wall, then adjust the position of the others according to its height, starting with the second leg against the wall. The legs are adjustable depending on the dimensions of the bathtub, optimally 60 cm from the floor to the edge of the side.
If the wall is already covered with ceramic tiles up to the future level of the bath, then the side of the bath should be adjacent to the lower edge of the lining, so the legs are adjusted accordingly.
If the manufacturer does not provide a difference in height for a more convenient drainage, then it is enough to adjust the pins so that the legs of the drain are 2 cm shorter than the legs of the headboard.
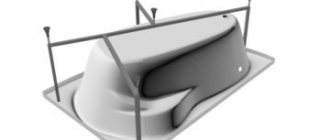
On the frame
Installing a bathtub with a frame is practically no different from the method with legs, only there will be a little more work. Below are the main assembly steps:
Read detailed instructions and tips for installing an acrylic bathtub on a metal frame
here .
- Unpack the frame elements;
- Turn the bathtub over;
- Make markings indicating the places where the elements are attached;
- Drill holes for fasteners in specially marked areas or thickenings of acrylic;
- Screw the mounting brackets to the bottom;
- Attach the legs and other frame elements.
ACRYLIC BATH ASSEMBLY DIAGRAM:
Use frame elements and fasteners for installation only from the manufacturer, their dimensions are accurately calculated. If there is a need for replacement, select exactly the same size as the factory products.
On bricks
Sometimes a bathtub is sold at a low and favorable price, but without a frame. In this case, you can make brick supports. This frame is very strong and durable, but making it is much more difficult than assembling a frame from the manufacturer. How to put it on bricks?
- Mark the bottom edge of the side on the wall;
- Drill several holes for fasteners according to the markings;
- Secure the metal profile;
- Mark the places on the floor where the bricks will be located;
- Carry out brickwork in the marked areas;
- To make a difference in height on one of the masonry, you need to lay a metal plate or a large amount of mortar;
- Wait for the solution to dry completely;
- Place the bathtub on the resulting base;
- Install and seal communications;
- Fill the bath with water and check for correct installation and tight connections.
A detailed step-by-step analysis of the installation and all the details of manufacturing a brick frame:
Methods for installing panels in the bathroom and types of frames
Plastic panels can be installed with your own hands using two fastening methods:
- frame;
- frameless.
To make it easier to figure out which fastening method to give preference to, here are a few differences between the two fastening methods:
- the metal frame takes up quite a lot of useful space, which is so critical for a toilet or bathroom;
- the metal frame consists of separate profiles, so the installed plastic has voids underneath that are easy to push through;
- in the case of the frame fastening method, there will be a void between the wall and the plastic in which various microorganisms will develop;
- to make a frame for plastic panels, you will need to purchase metal profiles and various fasteners, while for the frameless method, you will only need glue and liquid nails.
The most common methods of fastening plastic panels
Panel mounting options
Noise insulation
Overview of the main methods
An acrylic bathtub, unlike a steel bathtub, does not need noise and thermal insulation as much, but if you want to ensure real silence and comfort in your home, then you should think about sound absorption of your bathtub.
Vibroizol
A unique material consisting of rubber and bitumen, with an adhesive composition on one side, invented for soundproofing cars. Excellent soundproofing for a bath.
Foamed polyethylene
The material not only suppresses noise, but also perfectly retains the heat of the water. It comes with a metal or foil layer, which improves its insulating properties.
It will be more convenient to work with a material that has a self-adhesive layer.
Step-by-step instruction:
- Cut a piece of the required size;
- Apply adhesive if the material does not have a self-adhesive function;
- Apply the adhesive layer to the surface and press gently;
- Coat the entire outside of the bowl.
Vibroplast
Polymer, plastic and durable material with a durable aluminum layer, copes well with noise and heat insulation. Eco-friendly, withstands high temperatures, moisture resistant, inexpensive.
- Cut a piece of the required size;
- Warm the material thoroughly with a hairdryer, it will become more elastic;
- Remove the protective film and apply the piece to the surface;
- Warm it up again with a hairdryer, pressing the material tightly;
- In this way, cover the entire surface of the bath with vibroplast.
Polyurethane foam
The method is most popular due to its simplicity and accessibility. This kind of processing is easy to do with your own hands.
For a better result, there are some tricks: it is advisable to use special foam for indoor work , work at high temperatures, warm up and shake the can before work.
- Protect the floor from foam with film or newspapers;
- Seal the technical holes on the inverted bathtub;
- Degrease the surface with an alcohol-containing solution;
- Start processing from the sides of the hull to the bottom;
- Carefully and evenly distribute the foam tightly;
- Work intermittently and let the treated areas harden.
detailed instructions on how to foam a bath in our special article.
Some rookie mistakes
Fastening an acrylic bathtub to the wall can be done by inexperienced craftsmen. To install the bowl correctly, you need to consider a few simple tips. Some beginners make mistakes when fixing plumbing fixtures to the wall. As a result, the bathtub wobbles, and the joint sealed with sealant begins to leak water. If no action is taken, the drainage system or bathtub body may be damaged.
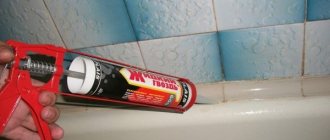
To avoid problems later, you should not think that by moving the bathtub close to the wall and covering the joint with sealant or a special solution, you can achieve good fixation. To achieve this, you need to use brackets, brackets or other suitable fasteners. You can also make a cut into the wall, creating a groove. However, ordinary mortar or sealant will not be able to firmly fix the bathtub against the wall.
It is also worth noting that many craftsmen cover joints using gypsum-based solutions. Of course, such compositions are distinguished by their whiteness. But gypsum mixtures are absolutely not suitable for wet rooms. Therefore, when creating the final finish, you need to use special white or transparent sealants. They must contain antiseptic components. Thanks to the use of sanitary sealant, fungus and mold will not form at the joints.
Having considered how to mount an acrylic bathtub to the wall, you can install it yourself correctly. In this case, the plumbing will last a long time and will not become loose or collapse.
Bottom reinforcement
How to strengthen the bottom of the bathtub so that it does not sag? bricks as additional support . The use of such a base will strengthen the structure, but in case of dismantling difficulties will arise.
The method of arranging the support is called combined, since bricks are used together with the factory base.
- First, install the legs and adjust them in height;
- Measures the distance from the floor to the bathtub and determines the height of the brick support;
- Carry out masonry work;
- Check the length of the legs and the height of the brickwork (they must match exactly to evenly distribute the load on the supports).
- The masonry is covered with a dense layer of polyurethane foam and a bathtub with legs is placed on it;
- The font is filled with water for better “gluing” with the brick.
Large gap - what to do
It often happens that after the bathtub has already been installed, there remains a decent distance between it and the wall. Since in this case there is no three-way fastening, it will wobble. In order to firmly fix it, it is necessary to create a frame that can simultaneously be used as a shelf for shampoos and various jars.
Wooden bath frame
What will you need? First of all, the frame is assembled using metal profiles. Then it is covered with plasterboard. For this purpose, special moisture-resistant drywall is used. You definitely need to make a niche with a door so you can get to the plumbing system.
Shelf between the bathtub and the wall
Alternatively, instead of a frame, you can attach a block to the wall so that its top is slightly higher than the level of the bathtub. A shelf is made on the block that will lie on the bathtub. At the same time, it should have a slight inclination inward so that water does not accumulate.
Tiles are laid on the plank
How to fix it to the wall yourself so it doesn’t wobble?
The convenience of installing a bathtub to “bare” walls under the top tiled area or to walls entirely finished with ceramic tiles depends on various factors, such as: the dimensions of the bathtub, its shape and the size of the room. Let's look at the main differences in the installation.
Despite the presence or absence of tiles at the installation site, the methods of fastening to the wall are not very different. You can use both fasteners from the kit and wooden blocks and metal profiles.
Installation to tile or under tile, which is better?
When installing a bathtub against a wall, you may encounter three different situations:
- bare plastered walls;
- tiled walls up to the upper planned boundary of the bath;
- fully tiled walls.
Many people wonder: is it possible to first install a bathtub against bare walls, and only then cover it with tiles or lay mosaics? This option has the right to life; first you need to install fasteners on the wall and then “plant” an acrylic bathtub on them. The most important thing with this installation option is to ensure that during further wall cladding you do not damage the coating of the already installed bathtub. Therefore, under no circumstances should you tear off the protective film from the bathtub. It is better to do this after finishing all the work.
Pros:
- ease of bath installation;
- no need to worry about the safety of the tiles.
Minuses:
- With further wall cladding, the surface of the bowl can be damaged.
If you plan to cover the walls after installing the bathtub, be sure to cover it with several layers of mounting film and line the bottom with foam rubber.
This way you will preserve its original appearance. In the second case, you must first:
- place the bathtub against the wall;
- adjust the legs so that along the entire perimeter the distance between the sides of the bathtub and the lower edge of the tile is no more than 5 mm;
- install the mounting plates on the wall so that they tightly press the upper sides;
- check that the bathtub rests on both the legs and the mounting plates;
- using silicone sealant, carefully seal the gap between the tile and the bathtub.
Pros:
- aesthetics;
- maximum sealing of the joint.
Minuses:
- inconvenient installation, it is very difficult to cope with such a task alone;
- the need for accurate calculation and consideration of all sizes.
Third case: how to fix it to the wall if the tiles are already there? This option differs from the first one only in that when installing fasteners to the wall you need to be more careful, since the tiles are a rather fragile material. Below are detailed instructions for using wall mounts. Attention, so that the tile does not crack: first make a hole in the tile using a special drill, and only then insert a drill into the same hole to drill out the concrete.
Pros:
- the safest way for the bathtub surface.
Minuses:
- the tile may be damaged.
It is impossible to answer the question which of the above methods is better. All options have their pros and cons. Of course, it is easier to attach the bathtub to bare walls, but in this case you will have to attach the facing tiles as carefully as possible so as not to damage the acrylic bowl.
How to use wall mounts, step by step instructions?
- Move the height-adjusted bathtub close to the wall;
- Make a mark along the edge of the side;
- Move the body aside;
- When filled with water, the bathtub will sag a little, so the fasteners must be installed just below the marked line;
- Drill holes for plates or hooks in the required places;
- Attach hooks or plates to the marked area;
- Hook the side of the bathtub onto the fasteners;
- Fill the bathtub with water;
- Check that the bathtub sits tightly on the side supports.
For greater reliability, you can coat the side of the bathtub with sealant and thus firmly glue it to the wall.
After attaching the bathtub to the wall, you can safely remove the protective polyethylene, because all the dirtiest work has already been done. How to remove the film? You need to carefully pry it from one of the corners with a fingernail or a sharp object, and then smoothly pull it off the surface - everything is extremely simple.
If necessary, instead of fasteners and frames from the manufacturer, you can use metal profiles or wooden blocks.
A frame is made from suitable sized bars or profiles around the entire perimeter of the bathtub. After adjusting the height, the bathtub is attached to the wall precisely due to the frame.
For step-by-step instructions for attaching a hot tub to a wall with examples in pictures, see our articles: installation on legs, installation on a frame.
Factory fasteners and frame
Providing the ability to secure an acrylic bathtub against shifting in a horizontal plane, manufacturers complete the plumbing fixtures with metal brackets or polymer fasteners of a similar shape.
Factory-made bracket for attaching the side of the bowl to the wall.
A staple is a curved steel strip, one plane adjacent to the supporting surface, the other forming a hook. Plastic fasteners are formed in extruders or cast entirely.
Plastic factory fasteners for bathtub
The step-by-step installation method to the supporting structure is as follows:
- the frame elements are attached to the bowl with self-tapping screws from below;
- the bathtub is installed at the place of use, the sides are aligned in a horizontal plane due to height-adjustable legs;
- the upper edge of the bowl and its adjacent sides are marked on the walls;
- the bathroom is moved, the height of its side is measured, the markings on the walls are moved lower by this value;
- staples or plastic fasteners are mounted along the line;
- the bowl is raised above the hooks and placed on the sides.
The standard supports for the height-adjustable legs of the power frame of an acrylic bathtub usually do not have holes for attaching them to the floor. The most inexpensive option for fixing a plumbing product in a horizontal plane is to make such holes, marking them after adjusting the height, removing the bathtub, and drilling blind holes in the floor.
If the bathtub is installed after the walls are covered with tiles or PVC panels, then the gap remaining between its sides and walls is sealed with sealant by default.
This material is actually an adhesive with high adhesion to plastic and ceramics. Therefore, the bathtub bowl is guaranteed not to wobble, even without additional measures to stabilize the spatial position.
Special models
Corner
Assembly and installation of corner fonts follows the same rules. The only thing is that such products must be placed only on the frame that comes with the kit, this is due to the peculiarities of the shape of each model. As a rule, the manufacturer completes its product with detailed instructions. Therefore, any man should be able to handle the assembly and installation of corner bathtubs.
Hydromassage
But hot tubs are not so easy to assemble. This will require much more time and effort. Indeed, in addition to the direct installation, it is also necessary to connect the pump system and configure everything correctly. But don’t be afraid of this, because we have described all the nuances in detail in this article:
Pros of acrylic bathtubs
Mass production of acrylic sanitary ware began in the 80s of the last century. The popularity is easily explained by the presence of advantages that differ from steel bathtubs.
- Weight. The models are considered the lightest in the plumbing products segment. The heaviest sample weighs 25 kg. You can install an acrylic bathtub yourself without outside help.
- Thermal conductivity. Of course, in terms of heat retention time, acrylic cannot be compared with a cast iron or steel bathtub. However, the material is able to maintain the set water temperature for at least one hour.
- Design. The plasticity of acrylic allows you to realize all geometric shapes. The range of models includes eight types of directions.
- Hygiene. The structure is not porous. From this fact it is easy to conclude that the material has the ability to repel fat and dirt formations. Another consequence of density is the ease of care of the product. After the hygiene procedure, it is enough to wipe the surface dry.
- Installation. Installation of acrylic bathtubs is accessible even to consumers who do not have experience or skills.
Complex cases
The convenience of installing a bathing tank depends on the location of the pipes (water supply and sewer). The liner, if it is located under the bathtub, is made with rigid pipes; hoses are not used.
Typically, pipes are hidden in boxes or embedded in the wall. If there are difficulties due to the incorrect location of the drain, pipes, or outlet pipe at the bottom of the bathtub, then you need to use a frame with adjustable supports. This will allow you to raise the bowl to the required height to ensure the operating parameters of the drainage system, for example, slope.
The frequently used external drain connection can become a hindrance when installing a bathtub on bricks or a welded non-adjustable base. For such cases, aluminum or galvanized prefabricated frames are available for sale.
The final adjustment in height occurs by scrolling special elements along the threads. To fix it, clamp the part with the nut provided for this purpose. The supports resting against the side are adjusted smoothly, without over-tightening the threads and creating excessive pressure.
Pedestal installation
Installation on a pedestal made of stone or brick is the most labor-intensive option. In addition, the method requires construction skills and takes a long time. The fact is that each row takes at least two days to dry. Considering that at least two such rows are required, it is not difficult to calculate that the construction of the pedestal will take 4–5 days.
- Clean, wash and dry the floor area.
- Make formwork from wooden boards. Length, width, height are determined by the design and dimensions of the model.
- The finished cement mixture is poured inside the formwork.
- After 2–3 days, a brick base is laid on the dried pedestal.
- After the solution has set, polyurethane foam is applied to the bottom and edges of the sides of the bathtub. The bottom of the bowl is pressed against the base.
- The installed bath is filled with water and left for a day.
Final works
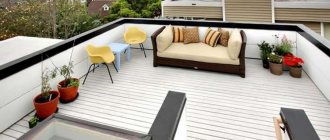
The space below is often covered with a screen. You can make it yourself - from moisture-resistant plasterboard, MDF, plastic panels or brick. The materials are painted on top, tiled, mosaiced, covered with film, and covered with decorative plaster. If the screen is monolithic, not sliding, it is necessary to provide a technical hatch in it - in case you need to clean the siphon. The photo shows an example of such overlays.
Did you like the article? Subscribe to the channel to stay up to date with the most interesting materials
Sustainability
The installation of an acrylic bathtub does not have to be trusted to professionals. You can do this work yourself if you wish. To do this, you need to take into account that the stability of this product in different planes is not the same. Thus, in the vertical direction, the structure on legs is stable. Manufacturers create supports that can withstand the weight of a bowl of water. This is easy to feel if you stand inside the bathtub.
However, in the horizontal plane the material cannot boast of stability. Acrylic and steel bowls quickly come out of balance in this direction. If the bathtub is left to move horizontally during installation, the sewer connection may be damaged.
It is also worth noting that an acrylic bathtub 170 cm long in a bathroom with dimensions, for example, 180x200 cm, can only be adjacent to the wall on one side. In this case, its side parts remain unfixed. The tightness of the joint between the wall and the bathtub will certainly break down over time if other fastening options are not provided.
For a bowl made of acrylic, it is important to choose one of the correct installation options. This will allow you to securely fix the bowl in a horizontal plane, avoiding troubles in the future.
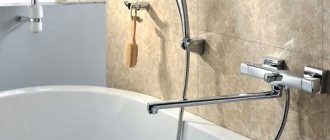
Siphon assembly
The quality of the plumbing service depends on the correctness of actions during the final stage. Siphon models, as a rule, are supplied to the retail chain in disassembled form. The instructions accompanying the product provide step-by-step recommendations for assembly and connection. The consumer can only act without deviating from the proposed points.
The instructions common to all types and types of siphons are as follows:
- Check the included list for completeness.
- Inspect parts for defects.
- Assemble starting with the flask.
- Connect the overflow pipe.
- Place the drain grate after removing the protective film.
- Insert the pipe into the hole.
- Install and secure the bathtub.
Finally, you need to check that the connection is correct. To do this, fill the bathtub with water to the brim and leave it for a while to detect leaks.