Wooden houses are gradually darkening. As walls age, they lose their attractiveness and protective properties. Heating costs increase, living comfort significantly decreases, and drafts appear. The way out of the situation is to line a wooden house with bricks. Decorative masonry will serve as a wind barrier, update the appearance of the facade and extend the life of the building. The main thing is to take into account the nuances that help avoid problems.
Selecting the material
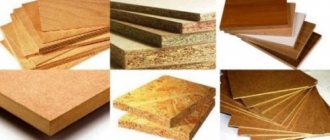
To cover a wooden house with bricks without unnecessary worries, you need to select the material and calculate the required amount. Types of bricks for laying walls:
- Silicate is cheap in price, but heavy and will increase the load on the foundation. It is also weak in frost resistance.
- Hyper-pressed - lime is added to the clay during production. The outer side of the brick is often made to look like wild stone.
- Ceramic is very hygroscopic. The structure of the brick is porous. Moisture gets into the pores, in the cold it freezes and destroys the brick.
- Clinker is the most expensive in terms of cost. Differs from the above, better quality and frost resistance.
The number of bricks can be calculated in the following way:
- Find out the area of the front side of the brick. To do this, you need to multiply the length of the brick by the height.
- 1 sq.m. divide by the area of the brick.
- Subtract 15% from the resulting number for seams.
- As a result, we get the number of bricks per 1 square. m.
- We multiply the resulting number by the total area of the walls.
- We subtract 10% from the result for window and door openings.
- In the end, we received the number of bricks needed to cover the house.
It is advisable to carry out all calculations carefully so that when cladding the house you do not stop at the most interesting place. Imagine that 200 bricks are not enough to complete the laying. At such times, finding the exact brick can be a difficult task. And the lining of a house made of bricks of different shades is unlikely to have a decent appearance.
First stage
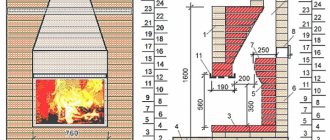
First, you need to understand the scale of the work. To prevent the wood from rotting, there should be a gap of 40–50 mm between the walls of the house and the masonry. If the cladding of a wooden house with brick is accompanied by insulation of the walls, the thickness of the insulation must be added to this gap.
On average, this can be 20–25 cm. This is the size the foundation should protrude from under the walls of the house. You can do without insulation, it's up to you to decide. Then there should be about 15 cm of free space on the foundation. If the foundation of the house does not have the necessary free space for finishing, you need to pour a new one.
And one more important point. Before covering an old house with bricks, you need to measure the roof outlet. The minimum size should be 35–40 centimeters. Otherwise, water from the roof will flow behind the cladding.
Technology for creating brick cladding
How to cover a wooden house with bricks? As with other cladding options, the process begins with pre-treatment of the walls: they need to be coated with antiseptics and fire retardants, and then a wooden frame and insulation will be installed.
How to properly line a wooden house with bricks? To connect a wooden wall and brickwork, metal pins are used, which are placed into the wall at an angle and into the mortar between the bricks.
Such fasteners should be located every 100 cm horizontally and every 4 rows vertically. This will turn the building into a single monolithic structure, and the house will be more durable.
How to brick a log house? All facing work can be carried out only after shrinkage has been completed.
At least six months must pass from the moment of assembling the log frame of the house: only when the logs finally take their places can they be covered with brickwork and bandaging. It is advisable to level the walls, the cladding should be positioned strictly vertically, the location of the bricks is checked using a building level and a plumb line.
General rules
Before covering an old house with bricks, it is necessary to provide a foundation support for the masonry. If the thickness of the brickwork is assumed to be half a stone and a ventilation gap is planned, the free part of the foundation base must be at least fifteen centimeters.
According to building codes, a brick overhang of four centimeters is allowed, so the width of the free foundation strip can be reduced to twelve centimeters.
If a house lined with brick needs to be insulated at the same time, the width of the foundation should provide for the thickness of the insulating material and maintain a gap for ventilation. When conducting new construction, such features should be foreseen in advance.
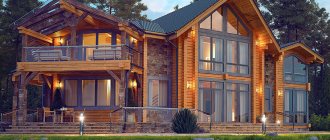
Covering the house with bricks
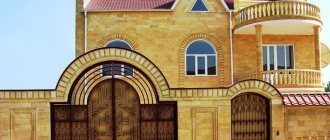
Decorative facing brick allows you to create truly original facades.
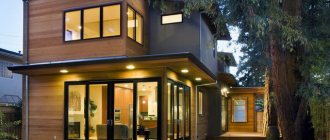
Combinations of wood and brick are most often found in finishing work. Some home craftsmen decorate wooden walls with bricks, while others, on the contrary, decorate the interior of a brick house with wood.
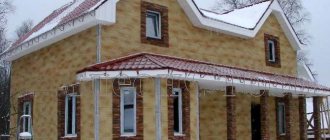
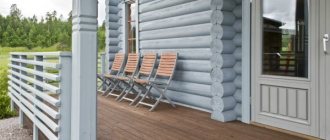
Modern decorative facing bricks allow you to implement any design solutions. For example, by choosing a brick to match the tone of the wood, you can not completely clad the building, resulting in a wooden veranda for a brick house.
House designs with brick bottom and wood top are also very popular. In this case, everything is in your hands, but if you want not only to update the facade, but also to thermally insulate the building, while protecting the wooden walls, then the cladding should be done completely.
Foundation
Exterior view of a lined foundation
Cladding work should begin from the foundation. It’s great if at one time it was already poured to the required width, sufficient to complete the facing masonry. However, in most cases, when carrying out work, the foundation has to be topped up.
Most often, specialists make a shallow foundation; less often, they install a columnar foundation with a reinforced concrete grillage.
Advice! For cladding, the minimum width of the foundation is enough - the width of a shovel. The depth should be determined based on local conditions. It is best to focus on the foundation of the house.
Several mistakes in wall cladding and insulation
Most often, decorating the outside of a wooden house with brick involves insulating the walls. And to refuse this procedure is, to say the least, stupid, because firstly, this does not require any additional actions (the insulation is placed between the wall and the cladding), and secondly, in the conditions of our harsh winters, additional thermal insulation will be useful. At the same time, the price of insulation is low and will not bring you significant expenses.
And to do everything right, you should listen to a few tips:
- Before cladding, the walls are lined with glassine or roofing felt, which should allegedly provide their protection. However, this should not be done, because such materials are practically vapor-tight. Moisture will simply condense on their inside, which will cause the wood to become damp over time and begin to rot. And even the presence of a ventilated gap between the roofing felt and the brick will not give you anything in this case.
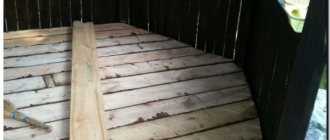
- Wooden walls are lined with bricks closely, without a gap.
A gap of 5 cm is almost unnoticeable, but it plays a very important role in maintaining the integrity of load-bearing walls.
And the mistake here is not in the absence of insulation. Such structures simply need a ventilated gap. For example, in winter, warm water vapor, penetrating out through the walls, without encountering an obstacle on its way, comes into contact with the cold surface of the facing brick. What happens? Naturally, condensation forms.
It will not be difficult to guess the consequences - damp, rotting walls and constantly damp brick, on the outer surface of which efflorescence can form over time, spoiling the impeccable appearance of your brick facade.
- Using insulation with low vapor permeability, such as polystyrene foam, is also a mistake. Polystyrene foam and similar materials do not allow walls to “breathe”.
Wall masonry
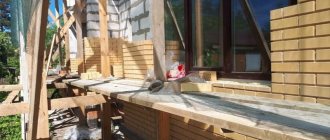
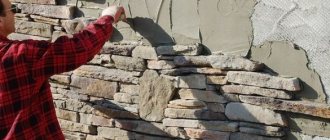
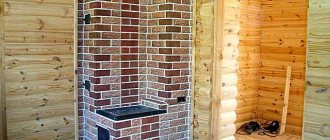
Before starting laying, the walls should be prepared. The preparation process includes preliminary cleaning of dust, dirt, and moss. All hanging structures and iron objects are dismantled. After this, they move on to treating the wood with protective materials. Antiseptic treatment is carried out carefully and several times, this will prevent damage to the wood by fungus, mold and various pests. To insulate the walls, you can use mineral wool slabs, but this is at the discretion of the owner.
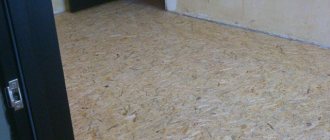
After all the preliminary work has been carried out, they proceed to lining the walls. To do this, we prepare a cement mortar; the optimal ratio will be one to four. The first layer is laid on the previously laid waterproofing. Waterproofing is usually made from roofing felt; it is enough to lay it in two or three layers. The masonry is not carried out closely; it is necessary to make an indentation of six centimeters from the wall to create natural ventilation.
Scheme of facing a wooden house with bricks
Laying the first row will require special care and precision. Any deviations are not allowed; everything must be carefully verified by level and vertical plumb. If these conditions are not met, serious discrepancies and uneven walls may result at the end of construction.
In the second row of masonry, a space is left between the side joints of the brick that is not filled with mortar - this is natural ventilation. The same holes will need to be made in the upper part of the wall in front of the roof. A drainage hole is made in the first row of masonry, it is then covered with a fine mesh to prevent the penetration of pests.
Features of wall lining
The construction of walls is a simple process; it is performed in the same way as conventional brick partitions. But there are some differences and features. If the outer wall is a front wall and no additional processing is expected, the lining is immediately cleaned. All remaining mortar should be removed in a timely manner; it is better to rub the seams with a special device - jointing. The seam itself must be perfectly even; each row is checked with a level and plumb line. To strengthen the walls, a reinforcing mesh is used; it is enough to lay it through three or four rows of masonry.
Strengthening walls
Be sure to connect the brickwork to the wall of a wooden house. This is done using pins, plates, nails or anchors. Part of the metal structure is firmly attached to the wooden wall, and the other is fixed in the masonry. You can treat the metal with an anti-corrosion coating, this will increase the service life of the fastener. The distance between fasteners can be from half a meter to 70 centimeters.
How to calculate the number of bricks
When calculating the amount of material, the formula is used: 50-55 bricks are needed per square meter of masonry. Therefore, for calculations, you need to obtain the area of all walls and multiply it by 55. For accurate calculations, the area of door and window openings is subtracted from the total area.
It is recommended to increase the resulting value by 10-15% - this is necessary to provide a reserve in case of combat during construction and transportation or in case of detection of a defect.[P3]
To predict the cost of work, the consumption of the solution should also be taken into account. It is calculated according to the rule: 2 kg of mixture is used for each square meter. Brick cladding not only makes a home more attractive, but also protects it from aging, weather, and outside fires. This technology requires precise calculations, but you don’t have to be a professional builder to use it. The main thing is to be consistent and attentive.
Preparation
Before starting work, it is necessary to determine what type of brick will be used. The choice of brick is varied: silicate, clinker, ceramic. It all depends on the goals pursued during cladding. If the goal is only to insulate and improve the characteristics of the house, sand-lime brick is suitable; if you want to clad the building in order to improve its appearance, you need ceramic brick; you can use clinker brick, but it is much more expensive. You can use building grade bricks, but after construction there will be additional waste of time and money on plastering the outer surface.
If you use building grade bricks for cladding, you will need to plaster the surface
In the process of work, in addition to bricks, you will need sand, cement, crushed stone and reinforcement. Bricks can be purchased immediately by making a preliminary calculation of the required quantity. It is better to make a purchase with a reserve of 10-15 percent more than the calculated quantity; during cladding or transportation, the possibility of damage cannot be ruled out. Cement and sand, as well as other materials, can be purchased as they are consumed.
How many bricks will be needed? On average, up to 50 pieces are required per square meter of cladding. Cement should be chosen grade 200 or 250. You can buy a ready-made mortar to fill the foundation, this will significantly reduce the work time and save money.
Foundation
When facing with brick, a foundation is required. You can use an existing one, but if it is insufficient, you will have to fill in a new one or strengthen the old one. For a facing wall, this will be more likely not a foundation, but a kind of foundation. But it must be reliable, since the weight of the walls will be impressive. The sufficient width of the trench for the future foundation is 30 centimeters; it must be at least 50 centimeters deep.
To make the mortar required when pouring the foundation, you should take care of a concrete mixer. The volume will be large, and mixing concrete manually is a very labor-intensive process. The tools you will need are shovels, a crowbar, a trowel, a pick, formwork materials, a hacksaw, a hammer and a level.
Be sure to place reinforcement in the shape of a rectangle before pouring concrete into the trench. Then the trench is filled with concrete; for a high-quality foundation, it is done at a time - continuously. After this, the concrete is compacted to eliminate air voids at the base of the future wall. Even ordinary sticks are suitable for these purposes. After a few days, the concrete will harden and you can begin laying the walls.
Scheme of strengthening the foundation of a wooden house
It is worth noting right away that a properly prepared and poured foundation will become a reliable support for the future structure, so there is no need to neglect this stage.