Bas-relief is a type of decoration in architecture. Means "low relief" in French. The convex image stands out above the wall by half its volume. Buildings have been decorated with relief decoration since the Paleolithic. Then these were rock paintings. Then the art spread to the Ancient East. Only aristocrats could afford such sophistication. Ancient Egypt is considered the founder of the use of bas-relief in decoration. It was used to paint the tombs of the pharaohs. In Ancient Greece and Rome, bas-relief decorated temples. In Soviet times, it was used in the decoration of buildings, structures, theaters, metro stations, monuments, etc.
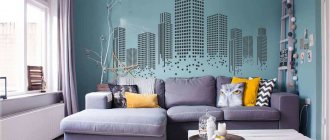
Beautiful bas-relief in the interior
Bas-relief on the wall
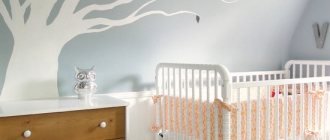
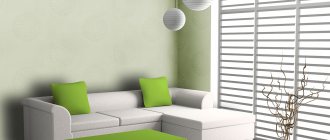
Bas-relief with a tree in the interior
Advantages of wall bas-relief
The bas-relief in the interior looks very elegant and original. The room creates a special charm. This is an excellent option for decorating an empty wall, or masking its uneven surface. In addition, you can choose the composition to suit your individual taste. And recreate it, right on the wall, with your own hands.
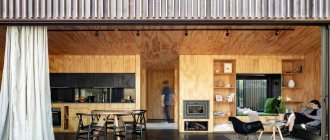
Room design with bas-relief
Bas-relief in the bedroom interior
See also Lifehacks for home and interior, photos.
Bas-relief as an interior element
Bas-reliefs will help to dilute the dullness and monotony of plain surfaces of walls and ceilings, especially when adding decorative elements or additional colors is undesirable.
Even the simplest bas-relief design will enliven the surrounding space if you can choose the right lighting.
A universal solution for all styles when decorating walls and ceilings are branches and a tree trunk or an abstract pattern that can fill the wall without overloading the space.
Bas-relief can be created in several ways:
- by sculpting directly on the wall surface;
- by manufacturing individual elements and then mounting them on the wall;
- in the form of a three-dimensional picture made on a solid base (for example, on a gypsum fiber sheet).
USEFUL INFORMATION: Design options for a children's room
What is needed for work
The main materials used are gypsum, plaster, clay, papier-mâché, and polystyrene. They also use a metal or wooden base, which is poured or processed as intended by the composition, and then mounted in the desired location on the wall.
Each bas-relief, created manually by the author, is exclusive. Even the same drawing will look different in different rooms. The bas-relief is specially created for a specific interior, so it will still not be possible to repeat the masterpiece twice. Such high uniqueness makes each decor unique and inimitable.
Beautiful bas-relief with nature in the interior
Bas-relief with dandelions in the interior
Bas-relief in the interior
Bas-relief images are used in many architectural styles, from Gothic to Art Nouveau. However, for Gothic it is an integral element. On temples, images not only served a decorative function, but also showed biblical stories so that illiterate, ordinary people could see important events from holy scripture. Just look at the main doors of the Milan Cathedral.
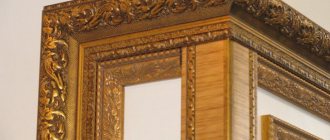
In the Baroque, bas-relief images served as an accent of luxury in the interior. Basically, scenes from myths were recreated there. An example of Petrine Baroque is the Summer Palace in St. Petersburg.
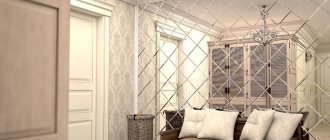
The Art Nouveau bas-relief can be seen in the Metropol in Moscow. Today this decor decorates apartments, offices, cafes, country houses, etc. Bas-reliefs look especially unique in the interior of an apartment in niches decorated with lighting. This is how hallways, staircases, and bedrooms are decorated. Various lighting options, with spotlights or hidden lamps, accentuate attention in the interior.
Bas-relief decoration in combination with wood, forged metal, glass, stone, leather, marble, etc., looks expensive and truly exclusive. Moreover, you can make the bas-relief yourself.
Bas-relief with nature in design
Beautiful bas-relief in design
See alsoModular paintings in the interior
Useful tips
If the sculptor plans to create large bas-relief details, then for additional stability it is better to use wire. The frame will also simplify the sculpting process. The top of the bas-relief can be coated with a layer of primer or water-based paint. For alabaster, such a coating will only add gloss, but for more fragile plaster or sensitive plaster it will provide additional protection. While working, it is better to use a professional set of stacks that will help you create even the smallest details.
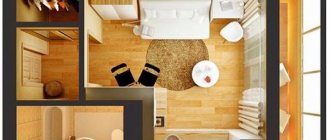
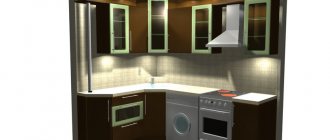
Choose the bas-relief not only to the style, but also to the character of the room. Culinary themes are suitable for the kitchen: voluminous still lifes, flower arrangements or panoramas of ancient cities. Stylish images of natural elements will look organic in the bedroom: bouquets, trees, animals. In a children's room, with the help of relief, you can create a real fairy tale, and its scenes decorate the entire perimeter of the room.
Professional decorators recommend not using false walls, arches or furniture to zone small studios. Bas-reliefs are perfect for these purposes; in combination with color differentiation, without further ado, they will make it clear where the functional zones are divided.
Bas-reliefs are not very often used in design. It is much easier to cover a wall with photo wallpaper with the desired image. Many people are intimidated by the complexity of the process. If you have patience, you can find hidden talents in yourself and decorate every room of your apartment with three-dimensional paintings, making its design original and unique. To get inspired, you can study the magnificent sculptures decorating Moscow's Bolshoi Theater or the numerous houses on the streets of St. Petersburg.
Creating a bas-relief with your own hands
Work begins with preparing the wall. It is cleaned, primed and dried. Then the selected image is drawn. The easiest way to make a bas-relief on the wall with your own hands is with plant prints. Today they are used quite often and it is easier to make them.
Necessary materials:
- solution of gypsum, alabaster or other material of your choice;
- wood cutters;
- stencil or film;
- paint, varnish for impregnation;
- tile adhesive, screws, nails, etc.
First you need to draw a theme. Moreover, applying the image also depends on the method of work. If this is a finished painting that will then be attached to the wall, then there are some rules.
Bedroom interior with bas-relief
Interior with bas-relief
Beautiful bas-relief in the interior
- Assemble a frame with sides for the picture. Available materials are suitable for it.
- Cover the resulting form with film. The main thing is that there are no folds.
- Pour the prepared mixture into the mold.
- After the form has dried, use cutters to mark the outline. This is where a ready-made stencil comes in handy.
If it is decided to initially make the bas-relief on the wall, then it is cleaned and primer is applied. The outline of the design is drawn on the dry wall. You can make a stencil in advance.
Next comes the creation of the relief. If the picture is made separately, then after the form has dried and the outline has been marked, a new solution is prepared, which creates the volume of the picture. The work is done layer by layer in order to notice and remove flaws in time. If the bas-relief is created directly on the wall, then first a rough layer is made, the necessary zones are filled with mortar, and excess fragments are removed. Then everything should dry. And only then they complete the finishing, bringing it to an aesthetic appearance.
There is a very easy method of relief application, suitable for both types of work. Based on the drawing, forms are made for its relief areas. These forms are filled with the mixture, and then the finished pieces of the design are attached to a wall or picture, the seams are covered with plaster and sanded with sandpaper.
Bas-relief with a flower in the interior
Bas-relief in the interior
See also: What can you paint on the wall?
Features of bas-reliefs
Several features of bas-reliefs that set them apart from other types of interior decorations:
- This decorative element can be made from any material (papier-mâché, plaster, decorative plaster, polystyrene, metal, etc.) that is sufficiently plastic or suitable for pouring into a mold.
- Modern bas-reliefs are easy to make and install, are lightweight and have a reasonable price, but if they are made from natural materials (wood, stone), then at a considerable price they look truly unique, extraordinary and exclusive.
- The subject of the image is chosen based on the tastes and needs of the customer; it can be antique, semi-antique, neutral or emphatically modern.
- In addition to visual appeal, such decorative elements will help hide communications, defects, and uneven surfaces.
How to attach a separately made picture
To do this, use tile adhesive. A painting that weighs more can be attached using nails, self-tapping screws, or by deepening it into the wall. To do this, prepare a niche and insert an image into it. All seams are easily covered with mortar and sanded down.
The finished wall bas-relief is thoroughly sanded with sandpaper, all cavities and seams are cleaned of dust, primed with a special brush and painted. Water-based paint works well, covering all protruding parts. Here it is better to use a regular sponge.
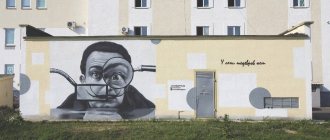
Bas-relief with a girl on the wall
Bas-relief in the interior
Beautiful bas-relief in the room
See alsoBaroque room
Bas-relief painting
As we have already mentioned, the materials for creating bas-reliefs can be different. But beginners are recommended to start with gypsum mixed with plaster. Don’t worry, even the simplest gypsum stucco molding will elevate the room, giving it elegance and solemnity.
The easiest type of three-dimensional decorative element to create on your own is a bas-relief painting. The advantages of this product:
- for this type of bas-relief there is no need to prepare a wall;
- there is no fear of failure: if the picture does not work out, you can postpone the work for a while or abandon the idea altogether, without damaging the decoration in the room;
- The bas-relief in the form of a painting can be moved to another place at any time and taken with you to a new place of residence.
DIY plaster mold
Not all forms can be purchased in the store. However, if the desired form is not found, you can make it yourself. For example, there is a bird or some kind of animal in the picture. You can buy the figurine or toy you need and place it in a plywood box. Fill its contents with liquid silicone, which is sold in all hardware stores. A day later, after the silicone has dried, the box is disassembled, the figurine is taken out and that’s it. The required form is ready. The alabaster mixture is poured into it well. Moreover, silicone molds do not need to be lubricated, unlike baby beads made of plastic material. The latter should be lubricated with vegetable oil.
To prepare the alabaster mixture, take: gypsum - 2 parts, water - 1 part. The prepared mixture is poured into molds and waits for about a day to dry completely.
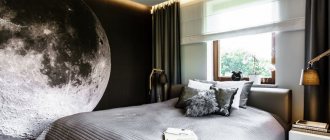
Bas-relief with a butterfly in the bedroom
Bas-relief with landscape
See alsoLarge paper flowers in hall decoration
Bas-relief with lilies
Creating an image occurs in several stages.
- Plaster and primer are applied to the prepared surface. Primer paint is great because it creates a rough finish when it dries, which helps hold the next coat.
- One layer of wax is applied.
- A transparent polyethylene film is fixed to the entire surface of the painting.
- A sketch of flowers is applied to the film.
- Under the film, in accordance with the sketch, a second layer of wax is applied.
- A bas-relief is created
- The surface is painted over and honed.
Bas-relief with flowers in the bedroom
Bas-relief with a waterfall
Beautiful bas-relief on the wall
See alsoKnitted items for home decoration
Stages of creating a painting yourself using the bas-relief technique
The sequence of work when creating a bas-relief in the form of a painting with your own hands will be as follows.
- We decide on the image, its details and components.
When choosing an image for a bas-relief, you can consult with a specialist who can suggest the theme and era that best suits the overall style of the apartment.
- At the same stage, we determine the size of the future bas-relief and its location.
It should be understood that the larger the size of the image, the more space is needed to “read” it; on small stucco molding, the decor will be correspondingly smaller, more detailed, and will require greater skill in execution.
- We prepare a sheet of gypsum board or gypsum board and draw a sketch of the future three-dimensional painting on it.
- We mix the gypsum plaster and apply it using a palette knife - a special spatula for painting - onto the work surface. You can form parts with palette knives of various shapes, fingers, and brushes. There can be several layers of material, the main thing is to wait for the previous one to dry
- After drying, the surface of the bas-relief is sanded with fine sandpaper and primed.
USEFUL INFORMATION: How to decorate a door in a room with your own hands: design and decor
- If desired, the bas-relief can be painted, subjected to an artificial aging procedure, and given an antique look.
Before deciding to paint a bas-relief, think carefully: beginners are in most cases disappointed with the results of this stage, since it requires special skills and knowledge. In addition, a white or only slightly tinted bas-relief in most cases looks much better than a product painted in different colors.
Some tips
Before gluing the elements to the wall, it is better to lay them out on the floor and see what happens. This way you won’t have to remove and glue the fragments several times, and the wall won’t be stained with an extra layer of glue.
The antique figures in the image only look good in a frame. To do this, the picture frame is fixed to the wall, and its internal space is leveled with putty. Then the pedestal is attached, the figurine is glued to it, all corners and crevices are puttied. The remaining decorative elements are added, and the entire picture is completely covered with paint in several layers.
Putty bas-relief is very easy to make. The images on the wall are built up gradually, in layers. To avoid cracks in the drawing, you need to add PVA glue to the putty. For 0.5 kg of putty - 1 tbsp. l. glue and 100 gr. water.
Trees in bas-relief
Bas-relief with landscape
This decor is sensitive to moisture, dust and tobacco smoke. A fresh bas-relief must be carefully protected from this. The varnish layer is updated depending on the amount of dust and light falling on the image. You need to wipe the bas-relief with a dry or slightly damp cloth. Soft panicles work well. Over time, gaps and cracks still become visible. It is enough to periodically cover up and tint any defects that appear.
See also Bottle decor for rooms in different styles
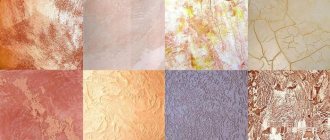
What materials are used for bas-relief
Today in special departments for construction and repair you can find mixtures that are used for finishing and rough finishing. What are bas-relief motifs made from?
To do this, select the following list of materials:
- Decorative plaster. In the store you can find special types of adapted mixtures made in the form of dry ingredients. When selecting consumables, it is important to consider their composition. To make the bas-relief neat, it is better to choose gypsum-based plaster. It dries quickly, and to work with the composition you will need a minimum of tools;
- Putty. In this case, the use of an oil or alabaster mixture is not acceptable. These compounds have low adhesion to the primer mixture. For the work process, it is better to choose acrylic compositions based on quartz sand. Thanks to the rough surface, it is possible to increase the adhesion between the decorative elements and the concrete wall;
- Gypsum or potassium hydrogen sulfate. It is recommended to be chosen by beginning masters. The drying speed of one layer ranges from 5 to 25 minutes depending on its thickness. For work, it is recommended to choose a molding grade whose fraction is no more than 0.3 mm;
- Clay. It is recommended to choose it for the implementation of plant ornaments and botanical motifs. For work, it is better to choose pottery types that contain plastic additives;
- Stone. Working with this type of raw material is quite difficult. Professional stone carvers can create unusual elements. The finished picture made from stone elements looks luxurious and impressive. Most often, such decorations were used to decorate ancient castles and monasteries.