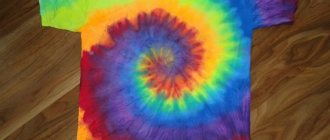
Anyone who intends to master the art of airbrushing probably knows what it is. Therefore, a brief description of this type of fine art is given more with the goal of introducing the reader to the topic rather than with the goal of enlightening him.
So, airbrush art (there is another synonymous term - airbrushing), like any other type of painting, is, first of all, drawing. Painting is divided into separate types and directions depending on the technique, materials and tools used.
In airbrushing, liquid or powder dyes are used to create an image, which are applied by spraying with compressed air. Instead of an artist’s brush, an airbrush is used, and instead of a canvas, a variety of surfaces are used (mobile panel, refrigerator door, car body).
What do beginner airbrush artists need?
If airbrushing is an art, does that mean you need to have natural abilities? Talent? Preferred, but not required. It is enough to be able to draw as part of the school curriculum, learn how to use an airbrush and acquire the necessary tools.
“Gentleman’s” kit for a beginner airbrush artist:
- airbrush;
- spray gun*;
- compressor*;
- drying chamber* or infrared mobile drying;
- set of paints;
- drawing surface;
- solvent;
- containers for paints.
The * symbol indicates positions that are mainly necessary for the systematic and, first of all, professional practice of this craft. And you can master the intricacies of the craft, which is airbrushing for beginners, with a minimal set of tools and materials.
Initial skills and abilities:
- mastery of traditional drawing techniques (drawing on paper);
- Proficient in Photoshop (or other photographic editors) to create preliminary sketches;
- developed imagination and aesthetic taste;
- patience, perseverance and perseverance.
Imitation of sports cars
Many car enthusiasts apply longitudinal plain wide stripes to the hood and roof of the body, similar to how it looks on racing cars. This is especially true for owners of sports cars and foreign cars with squat bodies and streamlined shapes. From the outside it often looks like a continuation of a double solid line of the road.
In most cases, it looks quite interesting, but this tuning option is more suitable for car enthusiasts whose philosophy of life is freedom, movement, activity, and sport. It is unlikely that the owner of a luxury car or an inveterate conservative will come up with the idea of decorating the car in this way. Although, what the hell is not joking?
Tools for a beginner airbrush artist: gun, compressor, paints
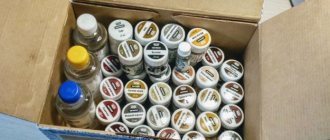
Paints. There are matte and shiny (with a metallic effect), black (light-absorbing) and fluorescent (self-luminous).
Spray. The simplest pressure paint sprayer is a regular spray can.
Spray gun. Having mastered all the basics of “aerosol” craftsmanship, you can move on to more delicate and accurate work. And here you will need a special tool - a spray gun or an airbrush. The spray gun (painting gun) is easy to use, inexpensive, but only suitable for wide spraying of paint.
For a finer spray, you will need an airbrush (a small spray bottle similar to a fountain pen). It uses compressed air, is equipped with a regulator and replaceable heads, which allows you to spray paint in a stream of different thicknesses and obtain different spray densities.
Airbrush. There are many different types of airbrushes, but they are all almost the same and differ only in price, manufacturer and equipment.
As for quality, for little money (the price varies up to 3,000 rubles) you can buy a very decent instrument yourself. If you have ever held a fountain pen in your hands, you won’t have to get used to the airbrush for long. The only difference concerns the index finger, which must remain on the button at all times. A professional airbrush is not cheap (average price 7,000–35,000 rubles).
But it is not at all necessary to buy an expensive tool, the main thing is that it is of high quality and has a double-action regulator, when using one button you can regulate the supply of paint and air at the same time.
In single-action airbrushes, the air supply is not regulated, which complicates the artist’s work, especially if the design is complex and includes transitional color zones. Important detail: the nozzle diameter should be up to 0.3 mm, no more. With a diameter greater than 0.3 mm, thin lines cannot be drawn.
Compressor. You will have to pay at least 3,500 rubles for a new compressor. Although, why not pump up a regular car camera? It is quite capable of providing the required pressure in the range of 200–500 g/cm². There are many different types and modifications of compressors, but the main characteristics by which they differ can be summarized as follows:
- noise level: high (very noisy in operation), medium (relatively quiet), low (silent);
- receiver size (if any): with a large receiver and a small one;
- power level: high (high power) and low (low power).
A compressor is an integral component when working with an airbrush. There are membrane and piston models, with and without a receiver.
Expert opinion
Ilya Vyacheslavovich
Consultant for body repair at krasymavto.ru
Ask a Question
When purchasing an oil compressor, immediately buy a filter for it in order to prevent oily drops from getting into the paint and, subsequently, into the work.
Which one to choose depends on the financial capabilities of the buyer, on the nature of the tasks assigned to the compressor and on the conditions in which it will be operated.
If a living space is used as a workshop, and even in an apartment building with poor sound insulation, then you need to choose a membrane model whose operating sound does not exceed 55 dB. And even better - an oil silent compressor.
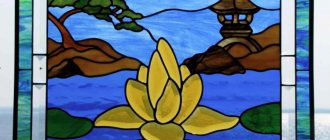
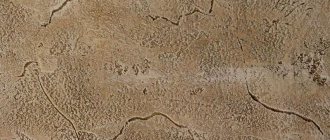
Additional accessories. Using special attachments when applying paint, you can achieve the effect of marble, natural stone, wood, water surface, etc.
How much is done
Depends on the workload of our specialists and the time of your request. If there are free specialists, we will finish it in a few hours. If not, you'll have to wait. We usually process your order within 1-3 days.
This time is enough to thoroughly wash the surface of the body, degrease it and prepare it for further work. We work carefully and apply stripes strictly from the center to the edges. We remove air bubbles so as not to spoil the appearance of the car.
To sign up for pasting, it is better to fill out an application in advance. Usually our schedule is scheduled 3 days in advance. However, it also happens that clients reschedule, so seats become freed up. In such cases, we can take the car for wrapping on the day of your call.
How to choose paint?
Before asking the question: “How to learn airbrushing?”, you need to study information about the materials used.
Three types of paints are used:
- artistic;
- automobile;
- for airbrushing.
But in order to decide which one to choose, you should consider the features of each of them. There are many varieties of car paints, but you need to pay attention to the two-layer system, the “base”.
It consists of two components: paint and a varnish applied over it for fixing. Each company has such a “base” on sale, and for a beginner it is recommended to choose an option in the middle price position, for example MOBIHEL Base MIX, the range of which includes 41 colors. Such car paints dry quickly, and if necessary, it is possible to remove them from the surface using a solvent.
The coloring pigment included in the “bases” is quite small, which is why they are compatible with small nozzle sizes. Working with such paints can be harmful to health, so the use of a respirator, hand protection and a ventilated room are mandatory means of protection.
Artistic samples are harmless to the body. You can use acrylic, stained glass paints, watercolors, oils – there are too many varieties to list. They can be removed without using a solvent until they dry completely.
Important! In order to dilute acrylic to a transparent state, use a binder. Many people confuse it with a regular solvent, but there is a significant difference.
The dilution base maintains the desired viscosity of the paint, which is subsequently adjusted with an alcohol solution.
Flaws:
- irreversibility, after final drying they do not dilute;
- since large pigments are encountered, the airbrush nozzles may become clogged;
- when water is added for dilution, they dry slowly;
- may create unwanted drips.
Reference! As for ready-made airbrush paints, novice artists are advised to try themselves initially with the above-mentioned options, and then select suitable narrow-profile products.
But there are also some restrictions in the choice of material for drawing. Alkyd enamel, gouache and nitro paints are contraindicated for this fine art technique.
Types of vinyl film
Traditionally, the basis for any pattern is divided into four types:
- Premium is the highest quality material. Capable of protecting the surface from corrosion, scratches, chips, and paint fading. Resistant to abrasion for a long time.
- The plotter base is more elastic. Suitable for partial stencil application. Has a wide range of colors and patterns. Apply for a short period of use.
- The cast vinyl base can stretch even when cold. It is good to use on corrugated surfaces.
- The economy option is intended for short term use. Fans of frequent design changes can use it for their own purposes. The costs are low, but the quality characteristics are lower than other types of vinyl base.
Most often, airbrush workshops use premium stickers. But the choice always remains with the client.
Choose what suits you. Become unique in all areas of your life, and masters of their craft will help you realize any dream.
Training: from a basic stencil to a complex drawing
Before deciding on a large-scale project in the form of an infernal flame on the hood or a predatory lion on the doors and hood of a car, you need to moderate your creative fervor and start by developing automatic movements so as not to think about how to hold the airbrush, where to put your finger and at what angle to direct the jet paints.
Your own apartment can serve as a real training ground for honing your skills (unless, of course, this causes violent protests from its other inhabitants). Painting a refrigerator according to sketches, a computer and other household appliances using stencils will not be suitable as a thesis work, but as a coursework for a first-year “student” it will be quite suitable. Just as the inept hand of a first-grader draws on sticks and circles, laying the foundations for future calligraphic handwriting, so regular, tireless drawing of simple figures, lines and smooth transitions at the beginning of training will allow the future virtuoso master to perfectly master all the intricacies of the art of airbrush drawing. You can comprehend this science on your own, choosing the path of trial and error, popularly called the “poke method,” endlessly experimenting, trying, quitting and starting again.
If you suffer for a long time, perhaps something will work out. But it will take a lot of time, effort and money to paint. Isn't it better to learn from real masters of the airbrush craft? Moreover, this can be done with almost no financial investment.
On the Internet there is information about airbrushing, lessons for beginners and ready-made diagrams describing execution techniques for various drawings, sketches and stencils. Here is an example of such a simple and very useful lesson, of which there are many on the Internet. There you can also ask for advice on airbrushing from more experienced professionals.
Basic mistakes
The biggest mistake beginners make is using too thin paint. You will not be able to work with such material. Any drawing, even a small one, will require a lot of time. If the stencil does not adhere tightly to the surface, then drops of paint will get into the gaps, which will be very noticeable when viewing the work closely.
When working without patterns and stencils, you risk getting uneven lines of different widths. If you understand that you cannot make a beautiful stencil yourself, it is better to order it on the Internet, then you are 100% guaranteed a beautiful drawing.
On a note! You should not rush this work, as if you do everything too quickly and do not allow the paint to harden properly, smudges may appear on the surface.
Airbrushing is a way to decorate your own car, which will never lose its popularity, despite the fairly high price and complexity of the work. This work can be done with your own hands, at home, but this will require patience and a willingness to strictly follow the rules.
Preparing the surface for airbrushing and preparing the dye
For this lesson you will need three album sheets. Take the first sheet and attach it to a flat surface using tape or magnets (if the surface is metal). It is advisable to divide the sheet into several parts with lines in order to create a drawing sequentially in fragments.
Useful! The album sheet is only suitable for training, as it is the cheapest material. To create non-educational drawings, more durable materials are needed (metal, plastic, glass).
Let's look at the work with the car body and the walls of the room. First, a car part (for example, the hood) is cleaned; this can be done with detergent. After this, degreasing is carried out and all irregularities are removed. Next, so that the new paint interacts better with the old one, the surface is pre-sanded.
This is done using Scotch Brite or a sanding machine. Matting can be done in any direction, the main thing is not to rub the old layer of paint down to the metal. Special pastes will help with grinding, the price of which is about 600 rubles. After this, the body is treated with a cloth soaked in degreasing liquid. They blow on the surface and begin to create a pattern.
For serious projects, it is better to choose expensive, professional paints, but airbrushing for beginners is not so demanding, and for the lesson you can use any paint, even the cheapest. The working mixture is diluted in the following proportion: (1/4) paint and (3/4) solvent. Domestic solvent 646 is suitable.
First, filter the paint, clearing it of small particles of dust and foreign inclusions. This will eliminate the need to frequently clean the airbrush in the future, which will require its complete disassembly.
We learn to carefully pour such an amount of paint so that when drawing it does not spill over the edge of the container and spoil the drawing.
Interesting! The lesson involves drawing small details, you will need a little paint, so fill the container about 1/6. If necessary, add paint.
Technical part – airbrushing on body parts
Before you start practicing, it is important to master the technical aspects of this process. The airbrush technique requires possession of a special type of painting console. To do this, you need to have an understanding of car painting in general. A novice painter is unlikely to be able to become a professional in designer car painting. You will have to watch a lot of videos and valuable materials to master the following important truths:
- the selection of special paints is important; it is necessary to use only expensive, elite materials;
- Before making any drawing, a layout is made on paper, which is then carefully transferred to the car;
- there are more technical aspects and subtleties in airbrushing than artistic skill and creativity;
- not a single best lesson will be useful if it is not immediately followed by full-fledged practice;
- Before painting a car, it is important to learn from a master who has already mastered all aspects of this art.
A novice airbrush specialist can greatly damage the car body. If the image fails, you will have to wash out the entire layer of paint and varnish materials and repaint the car in its original color. If you decide to provide painting services for car paintwork, remember the demands of modern customers. Moreover, your potential audience is the owners of far from budget VAZs. So it’s better to completely hone your skills using training materials.
Airbrush calligraphy: other training
We begin to draw with our own hands simple sticks tilted in one direction, then horseshoes and circles. We continue in the same spirit, but only the tilt of the sticks and the direction of the horseshoes are now in the opposite direction.
In the process, we learn to correctly calculate the force when pulling the trigger on the airbrush in order to maintain uniform lines. Also at this stage, the ability to correctly determine and maintain the appropriate distance from the airbrush to the working surface is developed. For sticks and circles this distance will be approximately 3-4 cm.
We put the sticks aside, and on another sheet we learn to draw a gradient (smooth color transitions), lightly spraying the paint. We combine the acquired skills - we give volume to each square on the first sheet, making it convex.
We do the same with each stick and circle in these squares. We shade their edges by applying layers of paint of different intensities, carefully adjusting the distance. To get a light shadow, move the airbrush away from the sheet, for the effect of a thick dark shadow - bring it closer.
Solvent selection
Thinners are necessary to obtain the required viscosity of paintwork materials and to wash the spray bottle when changing color.
Acrylic dissolves well in distilled or filtered water.
Urethane compounds should be diluted with the technical fluid recommended by the manufacturer. This will ensure high quality coating and help avoid problems when applying paint and varnish to the surface.
The consistency of the dye should be similar to milk. For nitro enamels, solvent 646 is suitable, for alkyd paints - thinners 645, 650.
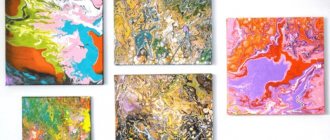
Do it yourself: perfect your paint application technique
We independently come up with other lines and shapes, combine them into an overall drawing in such a way that a certain mood or idea is felt in it. Depending on the intention and emotional content of the future drawing, we select the thickness and clarity of the lines, the sharpness/smoothness of the gradient, and the saturation of the shadow.
Practice creating drawings and adding volume to them on other surfaces, using various paint application techniques. To master the basic fundamentals of the technique of drawing elementary figures in order to teach how to combine them into one impressive image. For those who have successfully mastered all the necessary skills in the initial lessons and in the process of practical training, a real workshop (with an emphasis on the first letter “a”) gradually reveals its secrets ") airbrushing - master classes will help you significantly improve your level, master all the tricks of this craft or art (the definition depends on personal talent and attitude).
They can be group (lessons in small groups) and individual (training in accordance with the “master-to-student” principle).
At the basic courses, you can learn the basics of painting and the art of mixing paints, master an airbrush and “put your hand on”, master the skills of using patterns and stencils, learn how to use a brush and create realistic effects, and be able to complete the work from beginning to final processing (varnishing the surface). At special, proprietary ones, they teach one specific technique using the example of some “guru” who has achieved perfection in this art.
Types of airbrushes
The devices differ in the mixing principle and control mechanism. They come in 2 types: single and double action. In the first case, air is supplied, controlled by one trigger; in the second, paint and varnish material (paint and varnish material) and air are supplied.
Internal and external mixing
Compressed air and paint can be mixed both inside and outside the housing.
The internal mixing airbrush is easy to maintain.
Devices with external mixing are convenient and easy to maintain, but produce a coarse spray, so they are suitable for work that does not require an even layer, fine lines.
Instruments with internal mixing have a more complex design. They ensure uniform application of the dye to the surface.
Gravitational
The tank is located at the top of the structure. This allows the coloring liquid to flow under the influence of gravity and enter the mixer. In most devices of this type, the paint container has a small volume, sufficient for carrying out small jobs. In some models, the reservoir is missing or is an integral part of the structure that cannot be removed or replaced.
Siphon
In the siphon type, the reservoir is located on the side or bottom of the airbrush.
Distinctive properties:
- large capacity container for paints and varnishes;
- the ability to wash and replace one color with another.
The tool is capable of painting bulky surfaces and working with different colors at the same time.
In a siphon airbrush, the container is located at the bottom.
Hybrid
Hybrid type - a combination of siphon and gravity options. Paint containers are placed on top and bottom of the body. There is a switch between them.
Some manufacturers' products have the ability to use 2 tanks at the same time.
Flow-through and lockable
Models differ in the type of starting control.
Flow guns do not have a system for adjusting the amount of air flow. The paint-air mixture is supplied after the operator presses the trigger.
In lockable devices, air escapes to the outside when the trigger is turned on with adjustment of the amount of consumables. The products are more functional and provide the user with comfort and convenience during use.