To protect the tree from various types of insects, as well as to increase resistance to fire, antiseptics are used. You can always find ready-made mixtures on sale, but their cost is high, especially such a purchase hits the wallet when the goal is to saturate large objects. Therefore, you can prepare a wood antiseptic with your own hands. The process is simple, and acquiring the necessary ingredients is not difficult. Details on how to make an antiseptic will be discussed below.
Types of antiseptic compounds
Do-it-yourself antiseptic, or a ready-made one, has the function of protecting against any type of insects; it is advisable to impregnate the wooden material before the construction stage; according to GOST 20022.2, there are 18 types of protective treatment for wood, and antiseptic is one of them.
If necessary, antiseptic agents can get rid of insects that have already settled in the base of the tree. There are 4 types of these solutions:
- With a water base, they are intended for indoor treatment of premises where contact with water is not intended;
- With an oil base, they are used exclusively externally, for example, for impregnating fences and facades. They emit a pungent odor;
- Solvent-soluble, can be used inside and outside the building, petroleum products are used as a base; after impregnating the object with them, a reliable barrier from moisture is obtained;
- Combined, in addition to protecting against insects, they have the function of reducing the flammability of wood.
A do-it-yourself antiseptic, or a ready-made one, has the function of protecting against all types of insects; it is advisable to impregnate the wooden material before the construction stage.
What is tinting
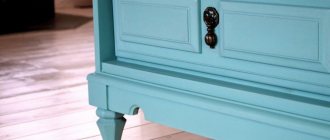
An antiseptic can give wood a specific color. The corresponding effect is called tinting. To give the impregnating substance a specific color, you must use a tint dye (color, toner). Usually it has a liquid state and is diluted in a ready-made antiseptic solution.
To obtain colored impregnation you have to use a little dye. Therefore, purchasing a ready-made color scheme does not portend large expenses.
The main thing is that it is intended specifically for wood. After impregnation with a colored antiseptic, the array gets a noble appearance.
Classification
There is a classification of such means, knowledge of which helps to understand which option should be chosen for a particular situation. The following types of products are distinguished:
- For internal processing, they must be harmless to the body;
- For external coatings, they must be resistant to pests, as well as ultraviolet radiation;
- Water-based, which are most often used for application indoors due to their safety for human health;
- Oil-based, they have an unpleasant odor, so they are applied outside the building, but are environmentally friendly;
- With a wax base;
- Contains solvents.
For external coatings, they must be resistant to pests, as well as ultraviolet radiation.
Antiseptic basis
The composition of wood antiseptic may include different components, but the most popular ingredients used in recipes are those described below:
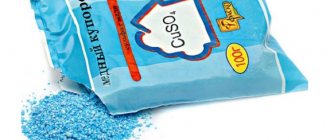
- Copper/iron sulfate;
- Iodine;
- Zelenka;
- Bitumen;
- Silicon/sodium fluoride;
- Pastes with a clay base;
- Pastes with a biocidal base.
The composition of a wood antiseptic may include different components.
Using vitriol as a fertilizer
This chemical contains copper, which is a valuable microelement for plants. Its deficiency is manifested by yellowing of leaves, loss of brightness of flowers, and falling of young shoots. It is necessary to dissolve 5–10 g of vitriol in a bucket of water, then use the product for foliar feeding of tomatoes, cabbage, and potatoes.
Copper sulfate is a cheap but very useful fertilizer and a high-quality antiseptic. It can be used without fear, but in compliance with technology, proportions and protective measures - then the result will be excellent.
Nuances of antiseptic “handicrafts”
The quality of impregnation for wood with your own hands depends on the composition; it is also important to understand the features of the manufacture and use of the resulting substance. Therefore, the important points of this process will be described below.
The quality of do-it-yourself wood impregnation depends on the composition.
Pursued goal
Do-it-yourself wood impregnation must meet a number of requirements in order to fulfill its main purpose. There are several main functions required from it to obtain high-quality surface treatment:
- Creating a protective coating from natural influences if the item is used outdoors;
- When used in a humid environment - moisture resistance;
- Wood that will be transported in open transport;
- Wooden material from biological influences and pests.
Do-it-yourself wood impregnation must meet a number of requirements in order to fulfill its main purpose.
Possible ingredients
The result obtained and how well the solution will fulfill its purpose will directly depend on the chosen composition. For independent production of the mixture, the following components are selected as standard:
- Boric acid;
- Gasoline, diesel fuel;
- Bitumen mixture;
- Iodine/green stuff;
- Vitriol with copper or iron;
- Biocidal or clay pastes;
- Salt, soda.
A good and safe option is to prepare a mixture of water and salt; you can safely treat the surface inside a building with it.
A good and safe option is to prepare a mixture of water and salt; you can safely treat the surface inside a building with it.
How to prepare, apply
It is better to prepare an antiseptic at home from safe ingredients. Then the processing and the cooking process itself will be easier. To work you will need containers and mixing tools. If toxic elements will be used, ensure good ventilation in the room.
If toxic elements will be used, ensure good ventilation in the room.
Surface preparation
The item must be cleaned and degreased in advance (alcohol can be used, vodka will also work, but it is better to choose White Spirit). To clean particularly difficult stains, you can try using hydrogen peroxide; glycerin can also be used.
If the appearance of the item is important, then it is necessary to sand the wood for an even coating. It is also necessary to prime the surface; you can use a prepared antiseptic for this purpose, diluting it with a solvent - White Spirit, which can also be used for the degreasing stage.
If the appearance of the item is important, then it is necessary to sand the wood for an even coating.
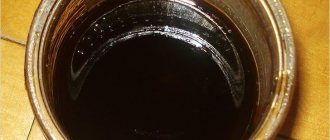
Bitumen antiseptic
In addition to this substance, a solvent should be added to the product. You can use gasoline or diesel fuel. The latter will give the substance a high ability to penetrate into the structure of the material, but the process will take a lot of time. Gasoline does not require long soaking time, but will not penetrate as deeply into the wood.
First, the bitumen is heated over a fire and stirred periodically to remove all lumps. When foam appears, you can remove the solution from the heat, then add solvent to it, usually its amount is 20-30 percent.
The substance must be poured in small portions, and gasoline is added after the solution has cooled.
In addition to this substance, a solvent should be added to the product.
How to apply oil impregnation for wood
Using a brush/roller, apply the impregnation to the wooden surface. At the same time, we do not save money (rejoicing that it did not cost us that much). During the painting process, you may be concerned that the color of the wood will turn out too dark. It won’t work if you remove excess liquid that is not absorbed into the wood in 1-1.5 hours with a rag. And if the surface turns out lighter than you expected, you can apply another layer.
The oil-based wood stain dries in a few days (faster or slower, depending on the ambient temperature).
Aqueous antiseptic solutions
Aqueous antiseptics are prepared quickly and safely. To make the composition, it is necessary to heat the water, where one of the selected elements will then be dissolved. Next we will look at working with different options.
Aqueous antiseptics are prepared quickly and safely.
Sodium fluoride
For this recipe you need to use 10-40 grams of this ingredient per liter of water. More components are used when they are going to cover an object outside the building. To work inside, you can limit yourself to 5 grams. In order to see which area has been treated during application, they resort to treating the wood with potassium permanganate, which is added in small quantities to the mixture; after drying, the color will disappear.
For this recipe you need to use 10-40 grams of this ingredient per liter of water.
Copper sulfate
This substance is used when dealing with an object buried in the ground. Add 1-2 kg of vitriol to 10 liters of water. You should know that a large amount of the substance will make the solution take a long time to dry, but also be more effective. Vitriol also leads to a change in the shade of the surface.
This substance is used when dealing with an object buried in the ground.
inkstone
This material promotes good pest control; it can remove insects from an already infected tree. But its decorative properties are poor.
For 10 liters, add 50 grams of vitriol, as well as 5 grams of potassium permanganate. Instead of potassium permanganate, a water-based pigment is added for visual perception.
This material promotes good pest control; it can remove insects from an already infected tree.
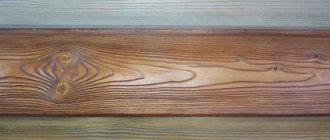
Swedish paint
The Swedes have long been famous for their ability to reliably protect wooden buildings from destruction. They came up with their own recipe for paint that allowed the wood to breathe, made the houses beautiful and lasted a long time, protecting the boards from the influence of the external environment. Swedish paint became famous due to its simple composition and red-brown color, which made wooden houses fabulously beautiful. Her recipe quickly migrated to other Scandinavian countries, where it successfully took root and began to be used everywhere.
Today, red and red-brown houses are associated not only with Sweden, but also with Norway. They are also available in Finland. This is not surprising, because the dynasty of Swedish kings ruled for a long time on Finnish territory. Once upon a time, the entire Scandinavian Peninsula was under Swedish rule. Initially, the red-brown color was a kind of imitation of brick buildings, symbolizing wealth and prosperity. Later, the paint ingredients became available even to ordinary people, so most houses were painted with it.
The first version of the Swedish composition is called “Falun paint”. The name is associated with the city of Falun, where the copper mine is located, which became the source of the pigment. Falun paint is characterized by a dark red color, making houses bright and expressive.
There are many recipes for Swedish paint. Let's look at the three most popular ones.
Important:
- when preparing paints, do not bring the mixture to an active boil (it should be slightly “worried”, as when preparing jellied meat);
- in ancient recipes rye flour is indicated, because it used to be cheaper, but wheat can be used;
- To avoid lumps, it is better to gradually add water to the flour, first kneading thickly, and then gradually diluting;
- If lumps form, the mixture can be strained through a sieve.
Recipe No. 1
The amount of ingredients is indicated for 50 liters of Swedish paint. If you need to get more or less of the finished composition, you need to use this proportion for calculation. So, to obtain 100 liters of coloring matter, you should multiply the amount of each ingredient by 2. If necessary, for 25 liters, you will need to divide by 2. And to prepare 140 liters, multiply the numbers below by a coefficient that reflects how many times more paint there will be. It is calculated simply: by dividing the selected volume by 50 (140 / 50 = 2.8). Using the same principle, you can calculate any required amount of finished paint.
Ingredients:
- clean water – 38 l;
- natural drying oil – 1 l;
- rye flour – 3 kg;
- pigment (iron oxide or red lead) – 3 kg;
- iron sulfate (ferrous sulfate) – 1.5 kg;
- salt – 50 g.
Iron sulfate is sold in garden stores. Iron oxide can be found in construction centers or from paving slab manufacturers. It is used for coloring concrete products.
Tools/aids:
- container (barrel or metal tank);
- wooden stick (0.5-1 m long);
- bucket (10 l);
- firewood.
To prepare the paint you need to light a fire. There should be enough firewood for 2-2.5 hours of burning - this is how long the process of cooking the Swedish composition takes.
Sequencing:
- pour 30 liters of water into the container;
- put on fire and bring to a barely noticeable boil;
- add iron sulfate and stir;
- pour the remaining water (8 l) into the bucket;
- add rye flour and mix thoroughly;
- pour the resulting mixture into a tank of water;
- cook over low heat, stirring occasionally for 2 hours;
- pour the required amount of drying oil and mix;
- add salt;
- boil for 10 minutes;
- pour out the pigment and stir well;
- boil for another 10-15 minutes;
- remove from heat.
You can use the resulting Swedish paint after it has cooled (about 3 hours). Salt acts as a preservative, ensuring long-term storage. If the paint has thickened, you can heat it up and stir it. After this, it will adhere well to the wood.
The color of the wood immediately after painting differs from the final color (obtained after drying). It is brighter and lighter. With the specified combination of ingredients and the correct cooking process, the painted boards will turn dark brown.
Recipe No. 2
Ingredients:
- iron sulfate – 400 g;
- rye or wheat flour – 800 g;
- salt – 250 g;
- pigment (ochre, red lead, umber, mummy) – 500-600 g;
- drying oil – 400-500 g;
- water - approximately 6 liters.
Tools/auxiliaries - the same as in the first recipe.
Sequencing:
- Dissolve salt and iron sulfate in 4 liters of boiling water;
- Dilute flour in 2 liters of cold water;
- pour the resulting paste into a cauldron with bubbling water and cook for 30 minutes, stirring;
- stir the pigment in hot water using a separate small container;
- add drying oil to the cauldron and stir vigorously to obtain an emulsion;
- immediately after the previous one, pour in the pigment mixed with water;
- Stir vigorously again;
- If the consistency is too thick, add the required amount of hot water to the boiler.
The paint can be applied with a brush/brush once it has cooled. If the composition is too thick, you can dilute it with warm water. But it is worth considering that this will make the composition lighter. The paint should be rubbed into the pores. One layer is enough - it will qualitatively protect the wooden surface and give it a rich color. The untreated surface of the boards holds more paint, so one application is enough. The final color is red-brown.
Recipe No. 3
Ingredients:
- rye flour – 600 g;
- natural drying oil – 250 g;
- iron oxide (pigment) – 250 g;
- table salt – 250 g;
- water - about 5 l.
You can change the pigments and their concentration to get different shades.
Tools/auxiliaries – similar to the previous ones.
Sequencing:
- mix flour with 3 liters of water;
- put on low heat and, stirring, achieve a paste consistency;
- add iron sulfate and table salt to the container with the paste;
- stir and cook with slight bubbling until all crystals dissolve;
- add pigment and mix well to obtain a homogeneous mass;
- pour drying oil into the container and stir thoroughly again;
- add the remaining water and boil a little more.
This recipe does not indicate the time required to prepare the coloring composition. Wooden surfaces should be painted after the paint has not cooled completely. This allows you to use it in optimal consistency, without diluting with water. Paint can be applied not only to wood, but also to plaster. The color after drying is red-brown.
Vegetable oils
You can use vegetable oils for impregnation - flaxseed and hemp. It is important to understand that they will change the color of the surface. The wood will “breathe” and retain its properties. To give the composition the best qualities, it is recommended to add burdock, elecampane, galangal or angelica root to flaxseed oil.
The wood will “breathe” and retain its properties.
Wax
The wax coating helps impart a moisture-resistant characteristic to the finish after the oil has been applied. You will need 100 grams of wax, 25 grams of rosin, 50 grams of turpentine.
Turpentine is chosen if you are preparing a wood antiseptic for outdoor use with your own hands. For application inside the room, linseed oil is used.
The wax base is melted in a water bath, rosin is gradually added. Mix the ingredients well and pour in the oil. After boiling, remove the container from the heat. It is important to immediately pour it into a metal container.
The wax coating helps impart a moisture-resistant characteristic to the finish after the oil has been applied.
Other recipes
You can also prepare other types of antiseptic wood impregnations. For example, liquid glass in an amount of 1.4 liters is mixed with chalk and talc (they are taken in 200 grams each). The flammability of the material can be reduced by means of boric acid (take 4 grams), ammonium hydrogen orthophosphate (40 grams), and water - 400 mm.
You can also prepare other types of antiseptic wood impregnations.
General rules for application and processing
To obtain an even distribution of the composition, the application itself should be carried out correctly. Experts recommend adhering to the following operating rules:
- If liquid antiseptics are made, then spray with a spray gun; for thicker ones, choose brushes, rollers, or a sponge;
- For safety, the master must wear a respirator and protective clothing, gloves;
- Good ventilation is created inside the room.
For safety, the master must wear a respirator and protective clothing and gloves.
It is possible to make an antiseptic for wood yourself. The main thing is to decide on the components and carry out the process in compliance with safety measures. This is an economical option if large areas will be impregnated.
Precautionary measures
Despite the low danger, copper sulfate is a chemical substance, and if in direct contact with the skin, mucous membranes, or ingested, it can cause harm to humans. After handling it, you need to rinse your mouth, wash your face and hands. You need to wear gloves and protective clothing when working with the product. If the solution is applied indoors, you must use a respirator.
When the composition penetrates into the body, signs of poisoning appear:
- nausea, vomiting,
- skin itching, allergies,
- pain in the gastrointestinal tract,
- weakness,
- arrhythmia.
If these symptoms develop, you should seek medical help without delay!