Today there is a huge selection of building materials on the market. Therefore, many people are concerned about the question of what liquid plaster for walls is and under what conditions it will be an ideal coating.
Liquid, or Danish, plaster is a specialized composition designed for covering flat surfaces. It forms a relatively thin layer, evenly covering the entire area. Its main components are CMC glue and some natural fiber (cellulose, algae, silk, cotton, etc.). This material is a cross between traditional wallpaper and plaster mixture.
The main advantages of liquid plaster include:
- No noticeable transitions or seams. Unlike wallpaper, the material does not create visible joints after application.
- Heat and sound insulation. Thanks to its composition, Danish plaster is a kind of insulation for walls. Also, its layer partially absorbs sound waves.
- No deformation under significant temperature changes.
- Can be used on surfaces with original finishes.
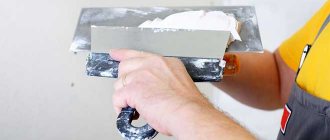
- Easy to apply and further repair. In case of severe contamination or deformation, the coating can be cut off with an ordinary knife, and the place of the cut piece can be covered with fresh solution. If the color palette matches, it will be invisible.
Disadvantages of the material: it absorbs moisture and odors well. Its use is not recommended in rooms with high humidity (bathroom, toilet), in the kitchen, etc. Some apply an additional protective acrylic coating on top of the dried material. This allows us to minimize the mentioned disadvantages.
Introduction to the material and its advantages
Wall decoration
Main! Plaster is also called liquid-based wallpaper - this is due to its packaging. The plaster is sold in bags, and its application can begin immediately after adding a specific amount of water to it.
Liquid plaster
Various additives can be added to the composition of the plaster, which allow it to be used for external processes and, thanks to this, protect the surface from a variety of negative aspects. After completing the work on cladding the external walls, additional heat insulating properties and sound insulation appear. At the moment, a lot of people prefer liquid plaster, and I have identified for myself the following positive qualities of the material:
- Cellulose and silk fibers are considered to be one of the components of plaster - such elements are real and do not cause any harm to human health
- The elements allow you to make the surface smooth and pleasant to the touch. Thanks to this type of plaster, the design of the room becomes as cozy as possible
- If the liquid mixture
is applied correctly, the plaster layer will not peel off. The material has high-quality gluing - After all the work is completed, the surface of the finished walls will be seamless, and this significantly improves the appearance of the entire room.
- The ability to hide small imperfections in the walls indicates the possibility of not carrying out the process of the largest surface leveling
- If both external and internal work is carried out after the completion of the construction of a new house, then there is no need to be afraid of cracks in the plaster - it does not change its initial shape during the shrinkage of the structure
- Along with other positive qualities, the mixture in liquid form also has good thermal and sound insulation properties
- You can make repairs to a specific area without needing demolition of the entire surface. This can also be applied to outdoor work.
Wall decoration in the apartment
We must agree that this is an impressive list of good qualities that a lot of materials do not possess. And this is not all the advantages of using the mixture in liquid form. Cellulose wallpaper can be applied on your own without paying more to the craftsmen, and the process itself is considered quite simple. For wall finishing using liquid plaster, you will need the following tools:
- Spatula - no other application or leveling devices are required. It is very convenient and more profitable
- Water – the mixture is diluted in a specific proportion with warm water. After this, it is applied to the wall surface with a spatula. Exterior finishing work is also carried out
Main! Work must be carried out at a temperature of approximately +20 degrees. the plaster dries
in 3-4 hours, after which you don’t need to cover it with anything, polish it or do anything with it.
Compound
Correct and high-quality building material has a classic composition and does not contain chemical additives. The composition of this material is quite complex, which in itself determines its cost.
The structure of the material under consideration includes, first of all, an adhesive base, presented in the form of cellulose glue for classic-type wallpaper.
An obligatory component is an acrylic filler, which acts as a dye. In addition, a solution stabilizer is also included in the product structure. It should be noted that it is thanks to acrylic that a durable protective film is formed on the surface of the dried plaster.
The composition of the plaster of this type necessarily includes fibers of two different types. The final appearance of the finished coating depends on this component. Moreover, this component plays the role of a link connecting with the filler.
And finally, the fourth type of component is a chemical coagulant. In simpler terms, this component is a drug harmless to the human body that prevents the occurrence of fungi and bacteria of various types.
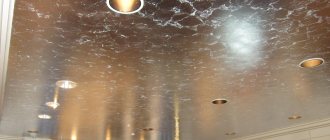
Some manufacturers add opalescent pigments to the liquid plaster, which give the dried wallpaper a mother-of-pearl effect.
Installation and finishing work
Each type of exterior plaster requires different application methods. However, the process sequence is basically the same:
Before applying plaster, the surface requires preparation. Sometimes special beacons are used so that the building acquires the necessary harmony.
If bark beetle is used, then the wall is pre-insulated with foam plastic or other heat-insulating material.
The solution is applied from top to bottom, as it tends to float under its own weight. As it floats, the solution must be pulled up.
Applying facade plaster
At the final stage, the façade is given texture, shaped protrusions are made, a “fur coat” is applied, etc.
It is worth noting that during the application of any solution and the period of its hardening on the facade, it must be protected from external influences. There should not be a break between applying the solution, so all work should be clearly planned.
On what walls can it be used?
The high vapor permeability of the material makes it the most preferred finishing agent for porous or cellular concrete - aerated concrete, gas silicate blocks, etc.
Silicate plaster will not create obstacles to the removal of water vapor from the wall material, while at the same time reliably protecting it from external rain or atmospheric moisture.
In addition, silicate plaster is excellent for forming an external finishing layer on external insulation , in particular on slab mineral wool.
The rigidity and strength of the material are sufficient to protect the insulation from mechanical damage, and water resistance will not allow it to get wet.
NOTE!
To fix the composition on mineral wool, you will need a reinforcing fiberglass mesh , and on polystyrene foam - a silicate primer (preliminary application).
At the same time, there are no contraindications for using silicate plaster on other materials, but you will first need to apply a layer of primer to ensure stronger adhesion of the materials and prevent peeling.
Photo of facade plaster
Vibrant color option
Even if the combination is very bold
When choosing decorative plaster, do not forget about the color combination with the roof of the house
It is better not to use more than 3 colors of plaster in exterior decoration.
Simple exterior decoration can be elegant
Also compatible with clinker tiles
You can play with colors
Different colors can successfully focus attention on corners and windows
Facade decorative plaster goes well with natural stone
Another bright project
Facade plaster for external use is responsible not only for the aesthetic appearance of the house. It also acts as additional protection for walls from various atmospheric conditions, such as water, wind and UF radiation. Today there are a lot of mixture options available for different types of surfaces and conditions of use.
In this article we will talk about cement, silicate, acrylic and silicone working masses. Gypsum plaster is of little use for exterior use, so it will not be mentioned here.
Making a multi-color composition
In order to create a multi-color composition you need:
- Take two plasters of different colors;
- Mark the desired design on the wall;
- Prepare the mixture for application;
- Trace the outline of the element, then fill it with paste, according to the technology;
Important! If errors appear, cut off unnecessary areas with the sharp part of a spatula;
- Gradually fill the composition.
If you carefully follow all recommendations and instructions, you can create a unique design in any room of a residential building.
Types of plaster for facade work
Today there are several types of plaster on the market, which differ in composition and connecting link.
| Mineral | The composition includes a mixture of quartz chips, marble, lime hydrant, light mineral aggregates, plasticizers and Portland cement. The advantage of this material is high strength, moisture resistance, long service life and low price. To decorate the material, pigments or marble chips are often added to the mixture, which allows you to play with the design of the walls. |
| Acrylic | In addition to sand and coarse cement, acrylic resin is added to the composition, which gives elasticity and high strength. This plaster is quite easy to work with, it can be leveled, and has good water-repellent properties. But there is also a serious drawback. Plaster is highly flammable, so it is not recommended to use it near mineral wool insulation. |
| Silicone | The main connecting link here is natural silicone, which gives extraordinary plasticity to the material. Despite the fairly high price, silicone plaster has a number of unique qualities (insensitive to UV rays, plasticity, strength, high adhesion, resistance to mechanical damage and a wide variety of colors). Another advantage is the speed of operation. The composition contains antiseptic substances, so preliminary priming of the walls before application is not required. The only drawback of this mixture, perhaps, is the complexity of finishing. That is, the walls should already be fairly well prepared before application, since silicone plaster is applied in one layer. |
| Silicate | The main connecting link here is liquid glass, which imparts excellent astringent properties. Silicate plaster has a high rate of fire resistance, so it can be used on almost any surface. This is one of the most durable finishing materials, with a service life of more than 50 years. |
| Cement-sand | One of the most common types, which differs from plaster only in grain size. |
| Oily | It can be classified as a very exotic option for a building material that is not often found on sale. The manufacturer here uses drying oil as the basis for the thickener. It is highly resistant to moisture and is excellent for treating walls before painting. |
| Epoxy | The base here is epoxy resin, which makes this building material very versatile in use. It can be applied to concrete, metal, plastic, drywall, wood. It has a very high degree of strength and resistance to external factors. |
| Latex | Latex is excellent for both external wall treatment and interior use. The base is regular latex, which gives the material high elasticity. With this composition it is easy to seal all cracks and potholes on the surface. The plaster sets quickly, dries and does not form cracks. |
Types of liquid wallpaper and their composition
If liquid wallpaper is positioned as plaster, then it can be classified according to several criteria. These mixtures differ from each other in composition and are:
- limestone;
- plaster;
- cement-sand.
When the material is considered from the point of view of the final result, it is divided into:
- structural;
- textured;
- Venetian.
But if liquid decorative plaster is made with the addition of minerals, it bears the name of the same name. It may contain:
- marble;
- granite;
- quartz.
Textured
Typically, such plaster is a viscous white composition that is durable and resistant to external influences. Using this mixture, you can give the surface all kinds of decorative effects with grain and artistic irregularities.
If desired, the finish can have a structural shade that imitates:
- stone;
- straw texture;
- wood;
- papier mache.
This liquid plaster, when additional components are added, can have certain properties, for example, fire resistance, water-repellent characteristics, heat and sound insulation qualities.
Structural
This mixture may be based on heterogeneous dyes, fillers, as well as natural ingredients such as quartz sand and mica. All this allows you to achieve certain effects that look very attractive. May contain:
- grains;
- wood fibers;
- silk threads.
The base of the plaster can be any, depending on this, the following mixtures are obtained in production:
- mineral;
- silicate;
- synthetic.
For external work, it is better to use a mineral-based mixture. But if the operation will be carried out at high humidity, you should prefer a composition with latex additives. You can apply liquid plaster to a newly built house without fear that cracks will appear on the finishing surface due to shrinkage of the building. The main thing is to choose a material with highly elastic characteristics. But silicate bases, after drying, show resistance to ultraviolet radiation and negative natural influences.
Types of plaster
The question of what to plaster the walls with is an integral part of the work process. It is not always possible to immediately determine the appropriate type, since there are many options on the construction market that differ in their characteristics.
Plaster for external use is divided into three categories.
Mineral compositions
This group includes mortars based on cement and gypsum.
The first variety is considered the most popular, due to its excellent characteristics and low price. But it has a number of disadvantages that make it difficult to use on newly built houses.
Decorative mineral compositions based on cement have an optimal price-quality ratio
Gypsum composition is used much less frequently due to its low resistance to precipitation, although mixtures have appeared that include many polymers. This leads to the fact that the vapor permeability of the plastered surface is impaired.
Polymer solutions
The group includes the following types for facade plaster: acrylic, silicate and silicone. Each option has a different base, which affects the properties of the material.
The most popular are acrylic mixtures. They have excellent resistance to environmental influences. Their main disadvantage is considered to be flammability and susceptibility to contamination, which implies loss of appearance.
Acrylic compositions are highly resistant to ultraviolet radiation and have a wide color palette
Polymer solutions have a high cost, so initially finishing is carried out with cheaper materials for leveling.
Homemade mixtures
This includes compositions made on the basis of mineral fillers; modifiers and plasticizers act as additives. Plastering external walls using such materials is complicated by the fact that it is almost impossible to achieve the correct selection of components. This limits the durability of the coating.
The choice of one or another composition largely depends on the purpose of the building, so for outbuildings mineral and even homemade plaster is quite suitable, but for the front part of houses it is better to spend money on polymer
What can be used to create a decorative effect
You can make different drawings on the surface using completely different means. For this purpose, methods with special application of the composition are in the first row. Work with a notched trowel or trowel can be used; they move randomly, or equally in one chosen direction.
Ready-made textured rollers, stencils, which can even be simply cut out of cardboard of different density. From available items you can use paper that is crumpled, plastic bags, a sponge, and unusual objects.
Coloring compounds
If plaster, pre-painted in the desired shade, is applied, it is advisable to protect the surface with a varnish. When finishing facades, it is necessary to carry out painting on a dried base of the plaster layer.
The coloring process consists of the following technology:
- Preliminary priming of the material is carried out.
- For painting, use a roller with long pile, apply one layer of paint, wait until the layer dries completely.
- The application of the 2nd layer should be carried out with a roller with short bristles; it is also necessary that the layer dries well.
- The final layer is applied with a varnish, then the coating will be glossy. If desired, you can also add shiny elements to the varnish base, but then you need to stir frequently so that all the sparkles do not remain at the bottom of the bucket.
Decorative plaster is an option for creating a unique coating on the wall; you can get a variety of patterns on the surface. The master can show his imagination. At the same time, it is possible to significantly reduce repair costs if you prepare the solution yourself; this does not require purchasing a huge amount of ingredients. Also, obtaining the product is not difficult, and the result will look much as beautiful as the finished composition from the manufacturers.
What is the difference between plaster and putty?
Before we move on to the process of creating decorative plaster from ordinary putty, let's understand these two concepts. In general, plaster is usually called a building mixture that is intended for leveling walls. Putty is also commonly called a building mixture for leveling walls, but, unlike ordinary plaster, we are talking about small errors.
What is the difference between putty and plaster?
What is the difference?
- Grinding If we carefully study the composition of both building materials, we will see that the putty uses substances of much smaller fractions, this makes it possible to create a thin coating.
- Price. There will also be a difference in the price of these two materials, which is due to the lower consumption of putty compared to plaster. Coarse filler costs much less for manufacturers.
- Strength. Plaster will be much stronger than putty. That is why it is often used to decorate external walls. If we recall the composition of concrete, we know that crushed stone is added to the composition to impart strength. So it is here. The larger the fraction of substances included in the mixture, the stronger and more durable the material itself will be.
- Compound. Plaster is mainly made from a cement-sand mixture with various additives. It can be clay-lime, clay-cement, gypsum and, less commonly, clay-cement composition. To produce putty, manufacturers use cement with sand, to which various plasticizers are added.
Starting plaster with coarse dispersion
Facade putty
In order to understand the scope of use and performance properties of various types of plaster and putty, let's take a closer look at the composition and types of these two materials.
How to make the right choice
Having understood how these materials differ from each other, you can draw a conclusion for yourself which composition to choose in a particular situation. The decision is made based on preferences, requirements and capabilities. Those who require a practical, durable and high-quality coating that will not have to be replaced in the next 10 years, and whose budget is not too limited, should give preference to decorative plaster. It can be used not only in rooms, but also in bathrooms. For people who love change, have children or animals, and are looking for an inexpensive but aesthetic material for decorating walls in a living space, liquid wallpaper is more suitable: they can be repainted if you want to update the interior, and restored if they are damaged.
Required tools and materials
To decorate the walls with plaster yourself, you will need the following:
- spatulas of different sizes;
- graters and graters;
- trowel;
- containers;
- brushes, rollers and sponges;
- drill with mixer attachment;
- stepladder or scaffolding;
- plastic film, masking tape;
- plaster mixture, wax, paint.
Tools that will be required for working with decorative plaster
For the preparatory stage, the following tools and materials are needed:
- sandpaper, sanding machine;
- rule;
- level and plumb;
- spatulas;
- reinforcing mesh;
- deep penetration primer;
- starting plaster, putty.
Instructions for painting plaster
There are several methods for painting a plastered surface. Each of them has some subtleties.
Plain coloring
This method is considered the simplest. To carry out the work, you can use a paint brush or roller. In addition, you need to prepare the entire volume of paint and varnish material necessary to cover the entire surface. After this, the composition is poured into the tray. It is better to have several rollers of different sizes to achieve uniform coloring of all areas
If it is necessary to apply 2 layers, it is important to wait at least 24 hours so that the first one has time to dry
Several shades
This method is most often used for painting textured surfaces. First, it is coated with paint of a darker tone. Then you need to wait until this layer dries. Next, paint with a light-colored composition and grout the surface. This will help highlight the drawing.
Several shades are used for textured surfaces.
Dry brush
First, apply a solid color
It is important that the layer is dry. After this, prepare a new portion of paint, adding a smaller amount of color to it.
The material should be 1–2 shades lighter. Then apply a second coat using a short-nap roller. A minimum amount of paint is applied to the instrument. In this case, only the protrusions of the texture will be painted.
Wash
This is another fairly simple way to decorate plastered surfaces. To form the background layer, waterproof paint of a lighter tone is used. There should be no untreated areas left on the surface. Then a layer of paint of a darker color is applied. You need to wait for it to dry.
After this, using sandpaper soaked in water or a stiff sponge, carefully treat the surface.
It is important that the first, lighter layer is not damaged during the work. Dark areas should remain only in depressions and depressions
Production of Venetian decorative plaster
Venetian decorative plaster creates an amazing print
Such plasters are classified as textured, but due to the great popularity and diversity of the material they are classified as a separate group. Before you make this type of plaster, you need to find out about its composition. It includes:
Stone dust. Marble is usually used, but to reduce manufacturing costs, fine-grained granite, quartz, malachite and other natural stones are added to it. Since after applying the plaster it is treated with a trowel, it must be uniform, so it is better to use fillers of the finest fraction.
Slaked lime. This substance acts as a binder. Ready-made mixtures in construction stores contain acrylic resins instead of classic lime, but due to their absence on the market, the first option will be considered.
Dyes. Previously, plant juice was used, but now they are being replaced with synthetic substances.
Water
You can use ordinary running water, it is only important to make sure that its temperature is not lower than 10 degrees.
The classic recipe is as follows: stone dust and slaked lime are mixed in equal proportions, then water is added until a homogeneous thick mixture is formed. Optionally, dyes, antiseptic and metallizing components are added.
A special technology for applying “Venetian” requires the presence of fillers in the mixture of the finest fraction
There are two more recipes that involve the use of modern building materials:
- The finishing putty and white marble flour are mixed in proportions of 10:1, after which water and color are added.
- For 7 kg of marble sand add 1.3 kg of flour from a similar material, 700 g of white Portland cement of a grade of at least 400 and 1 kg of lime dough.
The proportions can be changed depending on the desired effect and the characteristics of the surface being treated, but this requires experience in working with plasters. A novice master is strongly recommended to mix the compositions strictly according to the above recipes.
Construction dry mixtures
Often, builders do not want to bother with preparing homemade solutions for plastering walls. It is much easier for them to buy a ready-made mixture based on Portland cement, which is called dry construction mixture and has been actively sold in the markets for many years. This product contains various additives that make the finished plaster plastic, durable, and more sticky relative to the working surface.
Dry mixtures for external plaster
Decorative mineral plaster for exterior use
Advantages of dry construction mixtures:
- they are elastic, which makes them resistant to temperature changes and changes in weather conditions;
- practically not deformed;
- do not need reinforcing mesh;
- economical, as they allow you to prepare the right amount of solution without excess;
- diverse, which makes it possible to select a specific mixture for each type of work;
- “breathe”, allowing air to pass through, and are not destroyed by moisture.
The recipes for these mixtures are developed in special laboratories, thanks to which the proportions of the components included in them are verified very accurately. Due to this, the compositions in a diluted state are as uniform in consistency as possible. Having thinned this plaster, you can immediately begin work.
Preparation of the solution
Material for work both inside and outside the house
Plaster finishing
To enhance the external effect of the plaster, various components are added to the liquid mixture. Some of these are:
- Plant and wool fibers
- Nacre
- Wool threads
- Silk
Plastering walls
Thanks to these additives, you can create amazing interiors and magnificent designs. If the liquid mixture contains silk, then this indicates not only an interesting design, but also good resistance of the plaster to ultraviolet rays. And the main advantage is the ability to do the finishing yourself.
When I was faced with the choice of an additive for liquid material, I chose silk. After completing the cosmetic renovation, the walls of my house shone with new colors, and most importantly, I no longer worried that some areas might fade due to constant exposure to sunlight.
Wall finishing with liquid plaster
But this is not all the advantages of liquid plasters. Thanks to them, you can finish the outer walls of the house and thereby protect them from various factors. The performance qualities of the liquid mixture can be compared with many other finishing materials. It is able to reliably protect the surface from aggressive external weather influences, from sudden temperature changes, and from precipitation that destroy the structure of the walls. Since use is also possible for outdoor work, I will immediately say about resistance to high levels of humidity. The introduction of various additives only improves the properties of the material and allows it to be applied in hard-to-reach places. Another positive quality is the antiseptic effect and resistance to exhaust gases.
Finishing work
And if you add fractions of stone or marble chips to the liquid plaster, the facade will become even more attractive. Everyone knows what a “bark beetle” is and such a surface is formed precisely thanks to this crumb. If you decide to add this component to the plaster, then do not forget to frequently stir the liquid mixture during application - pebble fractions tend to settle.
After studying the material and getting acquainted with this type of finishing, I realized that this is exactly the element that will help me achieve incredible solutions. And the opportunity to do the finishing myself allowed me to save a lot and not use the services of expensive craftsmen.
Liquid wallpaper
Cellulose plaster masses became widespread in the nineties, when the range of finishing materials was somewhat limited. Then, with market saturation, the popularity of liquid wallpaper decreased. However, they are still valued by experts due to their properties.
The main feature of the material is softness with a layer thickness of 3 – 5 mm. It is this that determines the velvety feel and absorption of sounds by the wall covering. No less important is such a point as maintainability. After all, any plaster sooner or later loses its appearance, and cats and dogs are capable of ruining, it seems, even reinforced concrete. Moreover, a scratched “Venetian” cannot be restored so easily, unlike liquid wallpaper.
Stages of work:
- Preparation of the base here consists of creating a flat, uniform and uniform surface. There is no need for special smoothness, but differences from 3 mm to 1 m are advisable to be adjusted. It is preferable to use a special primer - tinting, but PVA glue diluted with white high-performance (high-pressure, acrylic or latex) paint is also suitable. It is applied in two layers, and the drying time is a day.
- While the primer is drying, you can make a mixture following the manufacturer's instructions. As a rule, dry cellulose is poured from a bag into a bucket, 4-5 liters of water are added, and mixed thoroughly. Using a drill with a mixer is not advisable, as the structure of the decor may be damaged. After mixing, the mass is put back into the bag and sealed tightly for a day.
- Ideally, you need to knead the amount of material that is enough for the entire room.
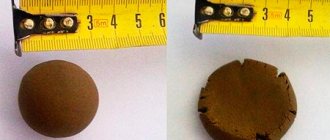
- Apply the solution with a wide (35 cm) facade spatula or a hard trowel, spreading it like putty. The thickness of the layer must be observed as precisely as possible, trying not to increase it unnecessarily.
- After “stretching” the material over the entire intended square, it is additionally smoothed with the same spatula or trowel. In this case, you should periodically change the direction of movement of the tool. Smoothing makes the surface not only more aesthetically pleasing, but also stronger.
Gaining maximum strength sometimes takes a month, but drying takes no more than a week. Only then can you begin the final stage of work - varnishing. Any varnish is suitable for this purpose: matte or glossy, transparent or tinted, acrylic or epoxy, etc. This coating may not add strength, but it will give the “decor” hydrophobicity and protect the colors from fading.
Repair of scratches or other defects is carried out by thoroughly soaking the damaged area with water and smoothing it with a spatula. If the method does not help, the area is cut out with a knife, dismantled with a spatula and a new mass is applied.
Technology of plastering walls with cement mortar
Regardless of the type of cement mortar, the technology for plastering walls does not change. It depends only on the surface on which it is to be applied.
The first stage of work is surface preparation. Regardless of the type of material from which the wall is made, it is cleaned of dirt, dust and old plaster and treated with a special primer. Wooden and plasterboard surfaces are treated twice, and brick and block surfaces - once each. To keep material consumption small in the future, all walls are brought to an acceptable plane.
The next step in plastering the walls is installing the mesh. It can be steel or polypropylene. But in any case, the mesh will simplify the work and increase the strength of the plaster. It is installed vertically using dowels (brick and concrete walls) or self-tapping screws (wooden or plasterboard surface). The mesh panels are joined with an overlap with a small margin. Excess parts are cut off with metal scissors.
Next we move on to installing beacons. This is a very important step when applying cement mortar. Beacons make it possible to better level the surface and apply plaster, so that in the future it will be possible to work as a rule. The distance between the beacons depends on the length of the instrument. The lighthouses themselves are made from special profiles, which are attached to the walls using dowels, gypsum mortar, and so on. Beacons must be located vertically in the same plane. First, the outer beacons are installed, then a lace is pulled between them in several places, and the remaining profiles are attached.
Then they move on to preparing the cement mortar. It can be purchased ready-made, or you can prepare it yourself from cement and sand in a ratio of 1:3. To prepare it, you can use a concrete mixer or any metal container.
Next, they proceed directly to applying the plaster itself. First, spray. It consists of throwing a not too thick solution using a trowel or ladle onto the working surface of the wall. The thickness of the layer must exceed the height of the beacons.
For general alignment of the wall, a rule is used. It is used to remove excess solution. To do this, apply the rule to two adjacent beacons and pull it along the fresh solution from bottom to top. This action is repeated until the plaster layer is completely leveled. In places where there is a lack of solution and grooves are formed, the spray is repeated.
Finally, grout the surface using a trowel or a special board immediately after the solution has set. The grater is moved in a circular motion until a perfectly smooth surface is obtained. If various holes and defects appear, then additional cement mortar is applied.
How to prepare the surface
According to the standard procedure, clean the wall from dirt, possible remnants of the previous coating, and seal the cracks. If you plan to apply the Venetian variety, then an ideal surface and more serious efforts will be required.
Next, you need to make a primer with quartz sand in the composition (since it can guarantee good adhesion to the wall) and then allow it to dry. If not the entire surface will be covered, but only part of it, then you should purchase regular masking tape to separate the working area.
Exterior plaster textures
The structural effects of exterior plaster have a direct bearing on how long the building's façade will last. A smoother surface can withstand stress less easily and cracks are more likely to appear on it. A rough surface is much more stable in this sense.
The surface of the “lamb” type or corrugated bark beetle is of the rough type.
The lamb is formed using a roller or grater, which ensures that the lumps are evenly distributed. The bark beetle contains pebbles, which form horizontal or vertical grooves during the grouting stage.
Decorative “lamb” plaster, the photo of which can be seen above, is an environmentally friendly material. It consists of dolomite, marble, quartz. "Bark beetle" does not require additional processing after application. This type of exterior plaster is environmentally safe and resistant to aggressive environments. It consists of fine marble chips, acrylic dispersions, etc.
Homemade finishing tool
Since many textured options are obtained by rolling with special tools over a surface, it is worth exploring the possibilities of creating them yourself. For the base you will need a regular roller. And then perform the following actions:
- The rubber roller is wrapped on top with a medical tourniquet, and as a result of rolling it, an imitation of a wooden surface is obtained. At the same time, you can wrap it in different ways, you don’t need to adhere to the same thickness, the same pattern, because wood is characterized by a chaotic arrangement of the pattern;
- You can wrap fabrics on a regular roller; they can be selected according to the required texture on the surface. You can also make knots, or use wrappings of different fabric materials.
In fact, you can use almost any available materials; rope, polyethylene, thread, etc. are used. The only limitation for the implementation of an artistic idea is the author’s imagination.
To create a drawing correctly, you do not need to forcefully roll the roller; the movements should be smooth and accurate.
Types of cement mortar for plastering walls
Despite the fact that today a huge variety of different types of plaster have appeared on the building materials market, people still continue to trust cement mortars. They, in turn, are cement-sand and cement-lime.
Cement-sand mortar is not afraid of moisture, temperature changes and has a long shelf life. It consists of cement, sand and additional components. The use of the solution directly depends on the brand of cement from which it was prepared. Cement with a grade of up to 300 is used for interior decoration of walls, and over 300 - in toilets, bathrooms and decoration of external walls and facades. Also, various components are added to the cement-sand mortar, which can affect its plasticity, strength and frost resistance. When making a solution, it is better to use sand of the middle fraction.
Cement-lime plaster is used only for finishing indoor walls. It consists of cement, sand and lime. To prepare the solution with your own hands, you need to quench the lime and let it sit for a couple of weeks. This mixture has good elasticity and quick adhesion to the work surface.
Which is cheaper?
How to choose or prepare cement-lime or cement-sand gypsum plaster for indoor walls with your own hands: recommendations, review
To understand what is cheaper, you need to start not from the price of a unit of material, but from the cost of 1 m2 of wall covered with each type of finish - then you can take into account the consumption of material per unit area and the cost of finishing work.
Liquid wallpaper. The cost of 1 kg starts at 150 rubles. But this is a cellulose-based material. Combined and cotton ones cost 250-550 rubles. For calculations, let’s take the average value - 400 rubles / kg. The mixture consumption per unit area is in practice higher than what manufacturers indicate and is 4 m2 versus 5 m2. Therefore, you need to spend 100 rubles to purchase materials per square meter of wall.
The cost of work starts from 250 rubles/m2. In fact, you can order a master for 300 rubles. Total 1 m2 of wall costs 400 rubles.
You can order a master for 300-1200 rubles/m2. At the same time, the price of 300-350 rubles/m2 applies exclusively to phlox plaster. For other types it starts at a price of 450 rubles/m2. As a result, applying decorative plaster will cost at least 600 rubles/m2, on average 850-950 rubles/m2. The most expensive plaster costs approximately 5.0-6.0 thousand rubles. for 1 m2.
Introduction to the material and its advantages
Wall decoration
Liquid plaster
Various additives can be added to the plaster composition, which allow it to be used for external processes and thereby protect the surface from various negative factors. After completing the finishing work on the external walls, additional thermal insulation and sound insulation properties appear. Now more and more people prefer liquid plaster, and I have highlighted the following advantages of the material for myself:
- One of the components of the plaster is cellulose and silk fibers - these elements are natural and do not pose any harm to human health
- The components make the surface smooth and pleasant to the touch. Thanks to this plaster, the interior of the room becomes very cozy
- If the liquid mixture is applied correctly, the plaster layer will not peel off. The material has good adhesion
- After completion of the work, the surface of the finished walls will be seamless, and this significantly improves the appearance of the entire room.
- The ability to hide small imperfections in the walls indicates the possibility of not carrying out the process of maximizing the surface leveling
- If both internal and external work is carried out after the completion of the construction of a new house, then there is no need to worry about cracking of the plaster - it does not deform when the building shrinks
- Along with other advantages, the liquid mixture also has good sound and heat insulation properties
- You can repair a specific area without requiring dismantling the entire surface. This also applies to outdoor work.
Wall decoration in the apartment
Agree that this is an impressive list of advantages that most materials do not have. And this is not all the advantages of using a liquid mixture. Liquid wallpaper can be applied independently and without overpaying to the craftsmen, and the process itself is quite simple. To finish walls using liquid plaster, you will need the following tools:
- Spatula - no other tools for application or leveling are needed. It is very convenient and profitable
- Water – the mixture is diluted in a certain proportion with warm water. After which it is applied to the walls using a spatula. External finishing work is also carried out.
What tools will you need?
If the repair is carried out independently, it is necessary to prepare the necessary tools in advance.
The most commonly used are the following:
- Trowel (trowel). A metal rectangle with a wooden handle. Allows you to apply the mixture to the surface and level it.
- Putty knife. Steel plate with straight handle. Available in different shapes and sizes, it performs the same functions as a trowel.
- Roller. They can be used to prime the walls and then apply finishing material.
- Grater. Used in cases where it is necessary to obtain bark beetle plaster. The tool is moved along the wall on which the mixture was applied, resulting in the formation of the desired pattern.
- Stencils, stamps and special rollers. This toolkit allows you to make different types of patterns on the walls.
- Gun. It is used in cases where wallpaper needs to be applied to a large surface area. Thanks to the required air pressure, the mixture flows from the funnel to the compressor. During work, you need to ensure that the material does not harden and clog the feed.
Tips for preparing other types of wall finishing solutions
- A solution for plastering walls on a lime base is made as follows: 1 part lime and 2-3 parts sand, depending on the desired consistency. The mixture is used immediately after preparation.
- The clay mixture for plaster retains its qualities for a long time; to obtain the required solution, you need to mix the pre-soaked clay with sand, add the required amount of water and knead to a creamy consistency. This solution is good for coating the external parts of coal stoves and pipes.
- To prepare a lime-gypsum mortar for plastering walls, you must first pour water into a container, then add gypsum and mix thoroughly. All work must be done quickly, and do not knead a large amount of the mixture at once. Composition: one part cement, 1/2 part slaked lime, 5 parts sand and 300 ml of liquid soap.
- Preparation of cement mortar for plaster with the addition of lime will be made by mixing a dry mixture of sand and cement with a watery solution of lime.
Calculation of material quantity
When calculating, it is necessary to know what area will be processed; they also take into account the approximate consumption rate of the main component that will be used. Consumption is affected by layer thickness, temperature, and application tool. In the case of homemade products, the calculation is somewhat difficult, because it is impossible to accurately obtain the average consumption of the resulting solution.
How to choose the right decorative plaster for the facade
Before choosing one option or another, you need to consider the following parameters:
- Flexural compression and strength characteristics. The ability of the decorative material to fight the formation of cracks depends on them. Under heavy loads, the plaster on the surface will not collapse.
- Color of decorative material. There are products on sale that are already painted in a certain shade. This is Ceresit plaster. But, there are basic white compositions that need to be tinted at the mixing stage. This is a better option than painting over an already applied surface after drying. After all, the paint layer is thin and if damaged, the base color of the decorative plaster will be visible. And if you tint it, the shade will be throughout the entire structure of the material.
- Texture. Decorative material has different textures, which creates an imitation of different surfaces and materials (stone, wood), as well as relief (fur coat, mosaic surface, bark beetle). The packaging indicates what decorative texture will be obtained after application.
- The basis. Having compared all the advantages and disadvantages of the types of decorative products, you need to choose the best one for yourself.
- Drying. Depending on the type, from 1 to 3 days.
- Layer thickness (maximum and minimum). For wood, brick or concrete, decorative plaster is needed for exterior finishing of walls of different thicknesses.
- Shelf life of the finished mixture. For beginners, an important indicator is that the longer the period, the longer he can apply the prepared composition.
No less important are consumption, frost resistance, adhesion to the surface and method of application (manual or mechanical).
Price
Liquid plaster on the Russian market costs approximately 150-200 rubles per kilogram. One kilogram is enough for six m2 of wall. There are more expensive materials on sale. Fierce competition forces manufacturers to fight and improve the quality of their product. Therefore, it is very difficult to find low-quality material, which cannot but please the ordinary buyer.
When purchasing, it is better to go to specialized stores where you can get advice. In addition, at these points of sale, the offered product has appropriate certificates that guarantee the quality of the proposed mixtures.
Variety of shades
The palette of silk plaster is represented by a huge number of available colors. The basic tone is white, there are also standard shades - silver, golden, milky, beige, peach, grayish, light blue, pale pink. There are colors in the palette for bright interiors - options of green, burgundy, orange, yellow, turquoise, blue, brick and sand tones. You can choose cool grayish shades or warm mint, coral, caramel and lilac. It all depends on the imagination and sense of taste of the designer.
Blue plaster Source remont-decor.in.ua