Home / Ceiling design / Design solutions / Advantages, disadvantages and applications of linoleum for wall decoration
Many may find the idea of using flooring materials in wall decoration completely unbelievable. However, such design methods exist and the most unsuitable material for this from many points of view is attached to the wall - linoleum. The idea only seems absurd at first, but after understanding all the intricacies of this decor option, you can accept it as one of the possible ones.
Structure Properties
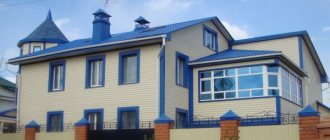
Linoleum, which is attached to the walls, replaces tiles. That is why it is used in those places where tiles are laid - the bathroom, kitchens. The main requirements for this material are strength and moisture resistance. To make wall linoleum, polyurethane fabric is used. Unlike the PVC material from which floor coverings are made, polyurethane is very elastic, so it can easily be used to cover difficult corners or protrusions.
Linoleum for gluing walls
Various designs are applied to the linoleum on the front side. Models with textures like stone, tile, parquet or leather are in demand. The thickness of the finished product ranges from 1 to 1.5 mm. If you choose a thinner fabric, it will not provide the required level of strength, but will only create additional problems.
If you take too thick material for wall decoration, then not every adhesive mixture will withstand it.
This material is produced without additional support. After all, on the wall it will only reduce the adhesion between the linoleum and the surface and reduce the moisture-proof properties. The standard roll width is 20 cm, length - 30 m. This material is enough to decorate the walls of a large room.
When choosing, pay attention to the coating manufacturer. For walls, Aquarelle Wallgard linoleum from Tarkett would be an excellent option. The price of such a product is high, but the quality makes up for this drawback. One of the important positive characteristics of this coating is practicality. The aesthetic side also plays an equally important role. The design of such material is reminiscent of painting, in which air and light are combined. Elegant, delicate designs and light, transparent shades create the impression of purity and freshness.
Various linoleum surfaces
The surface of the material has a barely noticeable relief. The shine is muted, matte, it gives the room coziness and tranquility.
Types of coverage
Modern linoleum is made from various materials on natural and synthetic bases.
According to the degree of wear resistance, it is divided into several classes:
• 21-23, or household (for residential premises);
• 31-34, or semi-commercial (for public places);
• 41-43, or commercial (for the industrial sector).
Depending on the structure, linoleum can be homogeneous or heterogeneous:
- Homogeneous. It is a material with a uniform texture, thickness from 1.5 to 3 mm. It has a simple color, often without a pattern. It is resistant to abrasion and retains its appearance for a long time.
- Heterogeneous. Consists of several layers. Its thickness is from 2 to 6 mm. Available in different colors, designs and patterns.
- Baseless is the best option for finishing bathrooms. It has a thickness of 1.2-1.6 mm and is laid on a leveled base.
For bathrooms, PVC coverings with a synthetic base are used. Also on sale are foam-based linoleums, coatings with improved thermal insulation characteristics, etc.
Positive traits
The main advantages of linoleum for walls:
- Hygiene. Mold and mildew do not appear on the surface of this material. This allows the material to be used for wall decoration in pharmacies, laboratories, operating rooms and those rooms where sterility is required.
- Ease and unpretentiousness in care. Walls that are finished with such linoleum can be washed with products containing aggressive chemicals. But for regular maintenance, it is enough to use a soap solution.
- Strength. Linoleum for walls does not deteriorate from mechanical influences. It is not easy to scratch, much less tear.
- Aesthetics. Walls decorated with linoleum look beautiful and unusual. There are models on the market with various patterns, designs and textures.
- Easy to install, even a beginner in finishing can handle it.
- Excellent performance characteristics.
- Non-toxic, safe for human health.
- When laid on a wall in a room with high humidity, linoleum does not change its original dimensions.
- The coating does not allow or absorb moisture and is not exposed to chemicals.
Advantages and disadvantages
Like any other materials, linoleum has its advantages and disadvantages.
Pros:
- Easy to install . The material lends itself well to installation on different surfaces.
- Large canvas . There will be no need to cover the seams, since you can buy wide linoleum that will immediately cover the entire wall.
- Low price . Compared to floor slabs, you can save a lot on this material.
- Moisture resistance . The material does not allow a single drop of water to pass through. But only on the condition that a large layer of felt was not used in the lining.
- Hygienic . Molds and other bacteria do not form, as the surface is easy to clean.
Minuses:
- Small selection in stores. Unfortunately, many small construction networks have not even heard of wall linoleum.
- Color spectrum . Most of the canvases have the appearance of wood or parquet, which does not look so organic for a bathroom.
Preparing walls for linoleum
Before you start working. It is important to find out how to install wall linoleum on the surface. This process is similar to laying flooring using a special adhesive. How to perform preparatory work one by one:
Preliminary preparation of walls
- remove the coating that was there before;
- take a building level and check the evenness of the walls;
- if any unevenness or depressions are found, correct them with putty;
- after the applied layer of putty has completely dried, cover it with several layers of primer, which will improve adhesion and grip with the adhesive;
- Use a tape measure to measure the height of the walls being treated and cut the purchased linoleum into strips of the required size.
Finishing technology
As with any finishing, the result of the work directly depends on the quality of preparation.
I prefer to work this way:
Algorithm for working with wall linoleum
- First, one hundred walls are completely removed from the old finishing materials, including plaster and putty. It is best to start work with bare concrete - this way we can be completely sure of the reliability of the foundation.
- The surface of the walls is leveled: first, all large defects are knocked down with a puncher, and then the cracks are expanded and filled with a repair compound. Only after this can the wall be leveled using moisture-resistant plaster/putty.
We remove the old finish
The maximum permissible plane difference is 2 mm per 1 m. I try to “out” by 1 mm per 1 m so that the thin coating fits perfectly.
- When the plaster and putty are completely dry, a primer is applied. Since finishing walls with linoleum is usually done in damp rooms, the primer must be taken with a high content of antiseptic components that prevent the development of microorganisms.
- The primer is applied in two steps; after each treatment, a pause of 2–3 hours should be made for complete drying.
Treatment with antiseptic primer
After completing the preparation, you can begin gluing the linoleum:
- We bring the material into the room and leave it for at least 12 hours for final temperature deformation.
- We roll out the roll on the floor (you can put old wallpaper on it so that the front side doesn’t get dirty) and cut strips from it, the length of which corresponds to the height of the wall.
- Apply the adhesive composition (we use only the type of glue specified in the instructions) to the wall using a notched grater. The thickness of the layer should not exceed the thickness of the canvas itself.
Applying glue
- Apply a strip of wall linoleum to the base, level it and smooth it first with your hand and then with a plastic spatula. To completely remove air bubbles, you can roll the coating with a rubber roller.
- We glue the remaining strips in the same way, trying to keep the gaps between them minimal.
- To prevent moisture from getting under the finish, we need to seal the seams. To do this, it is best to use a linoleum soldering iron, which fills all the cracks with material from a molten polyurethane rod.
- If you don’t have a soldering iron, you can use “cold welding,” but this method has a significantly lower level of reliability.
Welding a seam with a soldering iron and polyurethane cord
After completing the welding of the seams, all we have to do is trim the top and bottom edges of the rolls to obtain a perfectly straight line. Our work is complete, and when the glue has completely polymerized, the coating can be subjected to even fairly intense moisture!
Installation Tips
It is recommended to properly prepare the walls for such material to make the adhesive mixture easier to apply. The surfaces are thoroughly sanded and coated with a primer. The size of the covering is such that it allows you to go around all the walls, while creating a minimum number of seams. It is easy to lay the material on internal or external corners, as it is elastic.
To weld the joints of the sheets efficiently and quickly, you will need special cords. They are made from exactly the same color material as linoleum. They are cleaned and soldered into the seam. After this, a smooth and sealed surface is formed.
Sealing cord
It is recommended to lay linoleum not like wallpaper: from top to bottom, but in a horizontal position. Those places where linoleum and floor (ceiling) connect are finished with special borders. They are carefully selected to match the color to create a beautiful appearance. In order for the material to be fixed qualitatively, it is recommended to use the method of heating the linoleum.
If you choose a coating of a dark shade, it will visually make the room smaller, so it is important to make the right decision when purchasing the material.
Protective layer
The surface of linoleum requires bacterial protection. Linoleum made from natural materials, containing flax oil, copes well with this. Oil is a good antiseptic that protects the room from bacteria. The antibacterial effect remains throughout the entire period of its operation.
Protective covering
Manufacturers add a special substance to synthetic linoleum that has antibacterial properties. Thanks to this, microbes do not multiply, protecting residents from many diseases.
There are types of linoleum coating that have additional antifungal protection. True, all protective properties weaken over time.
Seam joining methods
There are two options for how to connect the seams of linoleum on the walls. The first is hot welding. Additionally, in places where it is difficult to do the work using the usual method, silicone sealant is used. This option has its drawback - limited design. If the aesthetic side matters, then it is recommended to carefully select the color scheme of materials.
The adhesive method is a traditional option that involves gluing the canvas using a special adhesive mixture.
Color variety
The overall perception of the interior largely depends on the color of the flooring. Cool gray shades give the rooms a strict, office feel, while warm gray shades warm them with home comfort.
For the bedroom it is recommended to choose light colors and warm shades: beige, cream, milky, coffee. Here you can use a coating in the color of marble and wood, or choose linoleum with a decorative pattern. You should not make the floors in the children's room dark; decorate them with cute patterns and decorative pictures, and leave the dark color for the office. White linoleum is rarely bought because it is soiled, black - because it is gloomy.
A small room is visually enlarged by using a pattern on the flooring. Small tiles, diagonal patterns, abstract elements are an appropriate option in this case.
Installation of linoleum
This option is similar to wallpapering walls. They start working from the door. Professionals recommend that before choosing an adhesive mixture, carefully read the instructions and tips for use.
Adhesive mixture for linoleum
The method of using glue is different. Some cases require pre-heating the mixture and holding it before pasting. Mainly the following actions are carried out:
- the purchased adhesive mixture is applied to the surface of the canvas or cut sheet;
- wait for the time indicated on the package, apply the material to the wall surface and press firmly;
- carry out actions until the entire intended territory has been processed.
In this option, it is important to carefully disguise the joints. Even if the canvases are laid flat, there are still noticeable seams between them. If you leave everything as is, then it will be unsightly, and moisture will get into the seams, especially if the installation is carried out in the bathroom. The ingress of water leads to the appearance of mold and fungi, and subsequently to complete failure of the material. This can be avoided by using the seam welding method.
How to finish correctly
First you need to prepare the walls - clean them of old finishing and protruding parts of the plaster. Then the surface is leveled using cement mortar or putty and a primer is applied
Particular attention must be paid to the corners. If the walls in the bathroom are very crooked, you can use plasterboard sheets attached to profiles to level them
Then they start gluing. The procedure is performed in the following sequence:
- Using a tape measure and a pencil, markings are applied to the wall.
- Then you will need to cut out the finishing material according to the measurements taken.
- Using a notched trowel, glue is applied to the surface of the wall and the prepared piece of linoleum is immediately applied.
- Then the finishing surface is pressed tightly against the wall, smoothing it with a roller or plastic spatula. It is necessary to smooth out in the direction from the center to the edges - this will help expel the air and ensure the tightest possible fit. The edges of the canvases are especially carefully pressed at the joints. If necessary, they are folded back and additionally treated with an adhesive composition.
- For more reliable fixation, a thin strip of sealant is laid in the inner corners of the room, an aluminum corner is applied and secured with self-tapping screws. Excess sealant that protrudes is removed immediately.
- The joints between the sheets are sealed using a welding cord or adhesive.
In the bathroom where the renovation was carried out, close the windows and doors tightly to protect from drafts, and leave the room until the glue has completely dried. The time during which it should dry is indicated by the manufacturer on the packaging.
Another advantage of wall linoleum is its versatility. They can be used to completely cover all walls or make a decorative panel on one or several parts of it. If desired, only the lower surfaces of the walls can be decorated with this material, simulating panels. In a brightly lit room, you can use dark shades of finishing, while for a small bath with insufficient light, it is better to stick light-colored linoleum.
Seam welding
Most often, a special construction hair dryer is used to perform this action. But if the area is small, an iron will do. A cord is placed between the sheets, which is melted using the selected tool. The cord connects the sheets into a single sheet. This work is recommended to be carried out by a person with experience, as the process requires accuracy. Otherwise, uneven and unsightly seams may result.
Hot seam welding
Before you start joining work, practice on scraps so as not to spoil the material that is laid on the wall.
There is another method of joining seams - cold welding, it is considered simple. In this case, a layer of adhesive mass is placed between the sheets.
Answer
Good afternoon The question, at first glance, is controversial. But in fact, the technology has been developed for many years and the correct algorithm for dealing with finishing decorative materials has been developed.
Remember a simple rule: on fully prepared substrates, repairs, or rather finishing, are carried out from top to bottom. That is, the order is like this:
- apply a coating to the ceiling (in some cases, the exception is tension and complex acoustic systems);
- treat the walls;
- make the floor
Thus, it is logical to first glue the wallpaper, wait for the glue to dry, and then lay the laminated covering.
For proof, let's turn to the technical part. The instructions for flooring materials always contain the following clause:
“Due to the hygroscopicity of laminated coatings (90% of the product consists of wood), installation should be carried out after all “wet” work has been completed.”
But wallpapering walls refers specifically to such events. Let us now take a look at the instructions for adhesive compositions for wall roll materials (fiberglass, paper, non-woven, natural, vinyl):
“From the moment work begins until the glue dries completely, the windows and doors must be closed.”
This is necessary in order to prevent premature drying of the adhesive composition, the formation of unglued areas and blisters on the surface of the fixed wallpaper. In a room completely isolated from air exchange, an increased level of humidity is established for several days, reaching 95%. The maximum permissible humidity parameter for laminated coatings is 60–70%, but no more. When exceeded, the slats swell, change geometry, and the floor swells. And there is no guarantee that in a month or two the finishing material will return to normal. Rather, on the contrary, you will be forced to partially or completely replace it with a new one.
Evidence of high humidity is fogged windows.
Arguments like “dust will settle on the wallpaper”, “during installation they can scratch the walls” or the completely original one - “you need a flat surface so that you can spread the rolls” do not stand up to criticism. First, ask the finishing craftsmen to work carefully. It is not difficult and does not in any way infringe on anyone's rights. Secondly, invite workers to carry out all cutting processes in a different room. Thirdly, when the specialists finish laying the floor, simply vacuum the walls with a regular household appliance. And lastly, any base prepared for laying laminate is distinguished by its evenness and strength. Spread plastic film on it and go ahead - measure, adjust, apply adhesive compound, fix.
Another argument in favor of gluing wallpaper first is the impossibility of working with canvases without a stepladder or a special table (the so-called construction trestles). Support feet of accessories can damage the surface of laminate flooring. Of course, many try to protect it from scratches with cardboard overlays, glassine, backing, and thick plastic film. But in practice, hired finishing teams hardly monitor the flooring, so the formation of defects is inevitable.
Do I need to glue it?
There is no definite answer to this question, because you can lay it “dry” (without glue), or you can use glue. The answer to this question depends on the quality of the material, finances, time, effort, desire and quality of work. For people with high-quality installation, un-glued linoleum lies for a long time and smoothly, but for people with poor-quality work, glued linoleum swells. If you live alone, that is, no one runs around or puts much effort on the linoleum, then you can safely lay it without glue. But there is still a chance of deformation of the material. On the other hand, linoleum needs to be replaced every 10-15 years, and with “dry” installation it will be much easier and faster to replace. But it is not always possible to select and lay linoleum without glue. If you need to lay the material in a commercial space, then gluing to the floor is strictly and necessarily required. Still, if possible, stick it. The glue strengthens the material and fixes it. When glued, linoleum can last for 15-20 years. Both have their advantages, but in most opinions it is better to glue. But you also need to be able to crate correctly.
Pasting
The task itself is not particularly difficult - you just need to smear the surface with glue and press the fixed panel tightly against it. However, in reality everything can turn out to be much more complicated.
- First you need to clean the walls with special care. If dust or dirt remains on them, the coating will simply not stick well and may eventually move away from the base.
- Next comes the primer's turn. In this case, it is mandatory, since gluing will be carried out over a large area and increasing adhesion is necessary here.
- After this, the pre-cut elements are smeared with special glue and left to sit for a certain period of time - the required time is usually indicated on the packaging of the adhesive composition.
- All that remains is to press the covering tightly against the wall. It is better to do this with an assistant to avoid the appearance of swelling and peeling.
When the required area of the walls is covered, you need to take care of the tightness. The joints, no matter how few they are, are still there and they can let water through. Therefore, the panels are “welded” together. This is done by two methods - by heating a special cord placed in the seam, which melts and connects the pieces, and by gluing. The second method is much easier to use for a non-professional, and the first is better used by those who already have similar experience.
Fastening with special glue
This method is the most reliable and durable. Gluing the coating ensures reliable fixation and prevents the appearance of bubbles, swelling and unevenness. To obtain a long-lasting result, you must follow a number of rules: level and prime the base, use high-quality adhesive, carefully level the coating to avoid wrinkles and dents. If the room is small, you can limit yourself to gluing only the edges and joints. This will make it easier to dismantle the linoleum in the future. Fixation with glue is a labor-intensive, but the most practical method.
When deciding on the method of fastening the PVC covering to the floor, you should take into account the class and quality of linoleum, the features of the rough base, the area of the room and its traffic. Compliance with installation rules will extend the service life and attractive appearance of the new decorative floor covering.