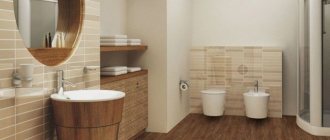
How to quickly and efficiently, but at the same time with minimal waiting time, level the floors in an apartment or house? If the speed of work is very important, and creating a conventional cement screed is impossible, then a DSP board is perfect for this purpose. The use of this building material for flooring allows you to make surfaces smooth very quickly. In this case, the coating will be durable and of high quality.
DSP board - application for flooring
Cement particle boards: application in construction
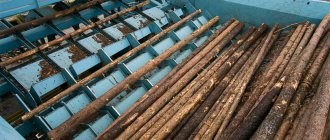
DSP is a cement-bonded particle board, and the name fully reflects the composition of this material. DSPs are made from a mixture whose components are wood shavings and cement compounds.
What are DSP and OSB? What is the difference?
The building materials include:
- wood shavings with fractions of various sizes – 24%;
- water – 8.5%;
- special additives – 2.5%;
- Portland cement – 65%.
DSP boards for external use
The production process is quite simple - DSP is made as follows.
- Special aqueous solutions are loaded into special mixers, which include various salts, liquid glass and aluminum.
- Next, wood shavings with fractions of different sizes are gradually added to these solutions - mineralization of the raw material occurs.
- Cement is mixed into the resulting composition and a little more water is added.
- The mass is thoroughly mixed until smooth and then goes under a powerful press.
GOST 26816-86. Cement particle boards . Technical conditions. Downloadable file (click the link to open the PDF in a new window).
GOST 26816-86
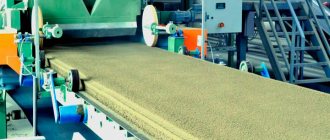
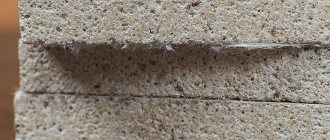
The result of this production chain is a finished cement bonded particle board, which is quite thin and has a smooth surface. A large amount of cement in the composition allows you to create a fairly durable material. By the way, the chips inside the slab are larger in size than outside, due to which the smoothness of the surface of the finished material is achieved. DSP does not need to be further leveled after installation, making the material excellent for creating a rough floor covering for laminate, tile and other types of finishing. Also, no voids are formed inside the DSP during production.
Production of cement particle boards
On a note! Wood shavings are also used as a raw material in the production of chipboard, fiberboard and OSB boards. The technologies for producing these materials are somewhat similar to the technology for producing CBPB boards.
Comparative table of performance characteristics of wood-based materials
Expert opinion
Afanasyev E.V.
Chief editor of the pol-exp.com project Engineer.
DSP boards are widely used in construction. They can be used to decorate the facade walls of houses, and they can be used to create various partitions indoors. The material is suitable for use for restoration purposes and for interior finishing work. Moreover, it is suitable for both apartments and private houses.
DSPs are used in construction for many purposes
The DSP board is characterized by high environmental friendliness, as it is created from natural materials and practically does not contain additional chemical ingredients. That is why the stove is recommended for use both in residential premises and in production.
Cement particle board (CSP)
Using a cement bonded particle board is an opportunity to avoid the labor-intensive pouring of cement screed to create a base. The building material allows you to reduce labor costs and spend less money from the budget planned for leveling floors for laying the finishing coating.
Installation of a DSP board under ceramic tiles
Joint of beams or floor joists with a wooden wall
Beams can be laid together with the base, or after. If after, then when laying logs or beams on beams, grooves for the beams should be cut in them (logs and beams) so that after laying the first row there is no gap between the wooden wall and the base.
If the walls are erected and they are logs, and the distance on the plinth for laying beams or joists is less than 10 cm, then you can cut a circular edge in the beams or joists to connect the walls close to the log. The joint can be fastened from the sides with corner anchors
But if the thickness of the plinth is large, and after the walls are erected, beams or joists can rest on the plinth with an overhang of 10 cm or more, then you don’t have to fit them close to the walls: you can leave a small gap of 2-3 cm, which will then be filled with insulation and allow the beams can expand freely.
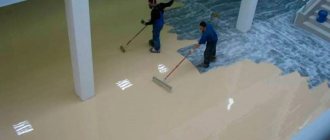
Leveling the subfloor for a decorative finishing coating can be done in more than one way. Cement screed for this case is the most labor-intensive and time-consuming process. Often sheets of particleboard are simply laid on the base.
This material shows its weaknesses both in the process of working with it and in subsequent operation. Chipboard is quite fragile and tends to break at the ends and corners of sheets when cut and fastened. Floors with such a base do not tolerate excess moisture and are therefore not suitable for bathrooms and kitchens.
Due to its strength, density, environmental friendliness, resistance to moisture, fire, rot, and chemicals, fiberboard is considered one of the best sheet building materials and is an excellent basis for a subfloor.
For those who are already familiar with the relatively new construction product - DSP, the question of choosing a material for the rough base disappears by itself.
Characteristics of CBPB boards
DSP is a completely new category of material, characterized by significant strength, long service life, and a certain level of moisture resistance. It also has good soundproofing and heat-saving properties. All these features have allowed CBPB boards to take a strong place in the construction industry - they are used for various purposes.
Of course, this material is far from ideal, but still, thanks to its properties and characteristics, it can be used both outside and inside the building. The DSP board does not lose its qualities in a wide variety of climatic conditions.
DSP
On a note! Compared to chipboard, which is common for many, a board based on cement and shavings is 3 times stronger and has high resistance to various physical influences and loads.
Table. Key parameters of the DSP.
| Length, m | Thickness, mm | Width, m | Area, sq. m. | Number of sheets in 1 cubic meter, pcs. |
| 2,7 | 8 | 1,25 | 3,375 | 37 |
| 2,7 | 10 | 1,25 | 3,375 | 29 |
| 2,7 | 12 | 1,25 | 3,375 | 24 |
| 2,7 | 16 | 1,25 | 3,375 | 18 |
| 2,7 | 20 | 1,25 | 3,375 | 14 |
| 2,7 | 24 | 1,25 | 3,375 | 12 |
| 2,7 | 36 | 1,25 | 3,375 | 8 |
| 3,2 | 8 | 1,25 | 4 | 31 |
| 3,2 | 10 | 1,25 | 4 | 25 |
| 3,2 | 12 | 1,25 | 4 | 20 |
| 3,2 | 16 | 1,25 | 4 | 15 |
| 3,2 | 20 | 1,25 | 4 | 12 |
| 3,2 | 24 | 1,25 | 4 | 10 |
| 3,2 | 36 | 1,25 | 4 | 7 |
The density of one cubic meta CBPB board is quite high - about 1300-1400 kg/m3. The moisture content of the material is 6-12%. By the way, the material is not 100% protected from the effects of water, but swelling upon contact with liquid over a full day should not exceed 2%.
Characteristics of cement bonded particle boards
The slab is rough to the touch, but smooth - often these indicators depend on the grinding method used. Sometimes the DSP does not need the latter - if the roughness level is no more than 80 microns. The plate is selected in accordance with the operating conditions, as well as the requirements for the final results. For example, smooth slabs are usually used indoors, but rougher slabs can be used outside.
On a note! Finishing of DSP boards is simple - any type of floor finishing can be laid on them, and paint, varnish, plaster, etc. can be easily applied to the surface.
Cement particle board - transportation
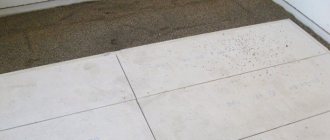
Preparing a linoleum floor for tiling
Before deciding on the suitability of linoleum as a base for laying tiles, you need to examine its reverse side, lifting the edges. If this material was poorly glued, mold and mildew could appear on the back surface. Small formations can be cleaned and treated with oil paint or primed. In case of a large accumulation of dirt and microorganisms, it is recommended to remove the old linoleum and lay the tiles on a concrete base.
https://kuhnyamoya.ru/youtu.be/WeVlg1fqn-g
The coating suitable for further work is processed with a sharp object, applying cross-shaped notches for better adhesion of the slippery surface to the tile. Processing with coarse sandpaper will enhance the effect, giving the material the desired roughness.
Advantages and disadvantages
What are the main advantages and disadvantages of slabs over other similar materials? Let's look at the answer to this question in more detail.
Pros and cons of CBPB boards
Advantages of DSP:
- environmental friendliness of the material, as it is made from natural ingredients. DSP does not contain asbestos and formaldehyde-containing substances;
- fungus and mold do not settle on the slabs
- the material is not hygroscopic - this is its main advantage over chipboard;
- DSP does not suffer from temperature changes and does not lose its performance qualities;
- 100% non-flammability of DSP boards allows them to be used in any room. The material can withstand fire for 50 minutes;
- reasonable price , allowing you to purchase material even if you have a small budget;
- significant strength due to multi-layer material. Excellent performance is observed under pressure both from the end of the plate and from any of the other sides;
- the slab does not require additional leveling of surfaces ;
- the material is not afraid of chemical influences;
- cement particle board perfectly resists rotting processes;
- relative impermeability to water - during the day, DSP is able to absorb a maximum of 16% of liquid;
- high noise insulation and heat insulation qualities;
- ease of installation.
DSP boards have many advantages
On a note! It is recommended to use DSP boards when installing a water heated floor system. In this case, it will be possible to create an additional air gap between the heating and the finishing coating, which will significantly improve the result of the work done.
The disadvantages of plates are as follows:
- large mass of material, which makes working with it difficult;
- During processing, the DSP generates a lot of dust . If you have to cut slabs, you should wear a respirator and safety glasses to avoid harm to your eyesight and respiratory organs.
The easiest way to finish DSP boards is to paint them with acrylic or silicone-based compounds, leaving deformation gaps between adjacent sheets
However, the material has many more advantages than disadvantages, which explains its popularity in construction, including for leveling floors. Typically, CBPB slabs are laid on logs - this is the best option for using the material in this area. More often, DSP is installed under laminate, carpet, linoleum, and ceramic tiles.
In general, it can be noted that in most respects, CBPB boards are superior to plasterboard, chipboard and fiberboard, which makes them one of the best building materials. Also, DSP will save a lot of money if a choice is made in their favor.
Cement particle board for flooring
Arrangement of dry screed
A slightly uneven base can be leveled using cement slabs fixed with special glue. But for a surface where the height difference exceeds 6 centimeters, it is better to use a dry screed. At the same time, the use of DSP instead of OSB will reduce financial costs.
The cement-bonded particle boards are fastened to guide beams, between which granular material is placed. Metal profiles, which are used when installing drywall, or wood blocks can be used as guides. Since self-tapping screws will be required to fix cement sheets, it is better to make guides from wooden materials of the required cross-section.
Depending on the degree of deformation of the base, the optimal height of a dry screed is considered to be 7-10 centimeters. Its main advantage is its light weight and significant heat and sound insulation parameters. The combination of CBPB and filler in the form of granules can improve the performance properties. This method of leveling the surface should be used in buildings where there are old floors in a dilapidated state.
Lay the dry screed in stages:
- First of all, they make a breakdown of the level of final floor finishing on the walls of the room.
- Then insulating material is placed on the base in two layers. Typically, polyethylene film is used.
- A damper tape is fixed along the walls around the perimeter of the room near the floor.
- Then the guide beams are installed at intervals equal to the length of the rule, but not more than 50 centimeters. They are fixed to the base using dowels with self-tapping screws and adjusted according to the level.
- The upper part of the beams is placed below the level of the finished surface to the height of the floor covering.
- Bulk material, for example, expanded clay, is laid out between the guide elements. It is compacted, leveling it along the beams using a rule.
- Next, they begin to install the DSP. Their use makes it possible to improve the heat and sound insulation properties of the floor.
The slabs are fixed with self-tapping screws to the beams, observing a step of 10-15 centimeters. Now you can begin finishing the floor.
DSP in insulation works
Most often, DSP is used in the field of insulation of buildings and structures. Usually the material is sheathed on the outside of the building. Fixation is done using self-tapping screws or nails.
But, since DSP is an environmentally friendly material, wall and floor cladding can also be done from inside the room. The sheathing process is similar to what is done outside: the material is attached to a wooden or metal sheathing using nails or self-tapping screws. Sometimes adhesive mastics can also be used. After installation of the slabs, finishing is carried out.
Sheathing frame structures using cement bonded particle boards is a reasonable solution
Laying tiles on a wooden surface
Scheme for installing tiles on wooden floors.
Installation of a tiled covering on a wooden base is possible only if it maintains its integrity and does not rot. The weight of ceramic tiles, additionally increased due to the adhesive composition, can lead to deformation of the wooden floor, its cracking and destruction. Plank floors that, upon examination, appear unsuitable to withstand heavy loads, are best dismantled. It is more advisable to get rid of a rotten subfloor, which will no longer be helped by any surface preparation. If the wooden boards are of reliable strength, it is enough to make sure that they are well attached to the joists and that there are no too wide gaps between them.
Loose floorboards are secured with self-tapping screws or dowel nails, and the gaps between the boards are puttied, having previously been reinforced with thin wood chips. Preparing a floor made of chipboard or plywood is carried out in the same way. The use of a waterproofing underlay when laying tiles on a wooden surface is mandatory. Wood has the ability to absorb moisture well and change size with temperature changes, and insulating the subfloor will prevent the tile covering from becoming unstable.
https://kuhnyamoya.ru/youtu.be/ukXcbORkvWA
Application for floor
DSP is often used to create a subfloor. Most often, the material is laid with the expectation that in the future ceramic tiles will be glued to it - this is the most demanding coating in terms of the evenness of the base. DSPs are also suitable for pouring three-dimensional floors and for installing soft floor coverings.
Scheme for the implementation of water heated floors using DSP boards
DSP slabs can be mounted on logs, and also laid on a flat concrete or wooden base. The material lasts for many years and is able to withstand significant loads if installed correctly.
DSP slabs for flooring - photo
How is the subfloor constructed in a wooden house (composition)
Installation of a rough wooden floor in a wooden house (on beams or joists):
- Beams (or logs). Placed on the base of the foundation or on supporting brick columns (if the shortest distance between the walls is more than 4 m, and there is a risk of the beam sagging). Skull bars. Nailed at the lower side of the beams (joists). Subfloor boards (chipboard can be used). They are laid on the skull blocks close to each other, but without fastening to beams or bars. Waterproofing. They are laid on the entire structure described above (that is, on beams or joists and on subfloor boards). Thermal insulation. Insulation is laid on subfloor boards floor between the beams (joists). Vapor barrier. Counter batten for the ventilation gap (preferably), laid lengthwise to the beams or joists. Plank floor (with 1-2 cm indentations from the walls to allow expansion of the wood). Soundproofing boards. Floor covering. If the covering is tiles on screed, it is recommended to lay a layer of fiberboard or fiberboard before the screed to enhance the rigidity of the structure and to evenly transfer the weight from the screed to the entire subfloor. Before screeding, it is also advisable to lay a waterproofing film to retain moisture.
A wooden floor on beams (approximate section 15×15 cm) with supporting brick columns is made if the distance between the walls is large and there is a possibility of beams sagging. If the distance between the walls is no more than 3 m, it is enough to make the floor on joists (approximate section 15 ×10 cm).
Beams need to be placed in increments of up to 80 cm (if more, then there are also logs on top), and logs - 60-100 cm.
If the subfloor is on the ground, a compacted bedding under the wood subfloor is required, which includes:
- Sand-gravel mixture (15-20). Clay layer (15-20 cm).
To ensure natural ventilation of the underground in a wooden house, holes (vents) are provided in the base along the perimeter. If in winter there is a lot of snow and it closes the vents, then you need to take the ventilation pipe upstairs and cover it with a canopy. If there is not much snow, then you need to protect yourself from rodents by placing grates on the vents.
Choosing cement sheets for the floor
The choice of DSP boards is carried out in accordance with the conditions in which the material will be used, as well as the technology by which its installation will be carried out. For laying on logs, slabs with a thickness of 20-26 mm are used - they will perfectly cope with their function as a rough base. If installation is carried out directly on the ground, then 24-26 mm slabs are used. In general, almost any DSP board can be used to level floors.
Average market prices for material
On a note! DSP boards can be laid even in cold weather. It doesn’t matter if the air temperature outside the window drops below zero.
Requirements for CBPB slabs used for floor installation:
- humidity – from 6 to 12%;
- density – more than 1300 kg/m3;
- tensile strength – 0.4 MPa;
- surface roughness – 80 microns;
- moisture absorption level – 16%.
For the floor, DSP boards must be used that meet a number of requirements
Laying features
To correctly lay the products, you need to accurately select the thickness of the cement bonded particle boards:
- The optimal value when working with a concrete or plank base is 10–16 mm.
- If installation is carried out on logs with a pitch of 50–60 cm, then elements with a thickness of 20 to 26 mm are selected. On the ground floor, it is recommended to lay products with a thickness of 10–14 mm in two layers.
- Prefabricated floors in domestic and technical premises can be made in sheets with a thickness of 24 to 36 mm.
Preparatory work
To ensure that the installation of DSP floors does not take much time, you need to carry out all the preparatory procedures in advance.
Marking
The area of the room is measured and a detailed diagram is drawn up with the data obtained. It is very important to pay attention to difficult areas. If there are tapering parts or niches in the room, it is necessary to divide such places into several sections in order to get the right result. Temperature gaps are left from the walls, which level out deformations during shrinkage of the building. According to the plan, taking into account the selected size of the slabs, it is determined how the sheets will be attached. The technology of flooring on logs involves laying parts across. Cement particle boards are being prepared
To do this, the dimensions according to the location on the floor covering are transferred to the parts.
Sawing
Further work may cause some difficulties: you need to choose what to cut the CBPB with.
To cut the slab, the following tools are used:
- Bulgarian. This is the most effective option if panels thicker than 12–14 mm are used. The work will require special diamond discs that provide fast and reliable cutting.
- Jigsaw. The use of such a tool is limited: it can only cut thin parts. Thicker elements will require a set of good files, which are selected empirically, and a lot more time and effort.
- Construction knife. You can cut thin slabs with this device in the following way: using a blade resting on the edge of a ruler or slats, a depression is formed along the line, after which the product is moved beyond the edge of the table and broken off.
Installation of slabs
To lay parts on a horizontal base in a private house or apartment, you can use different methods, which depend on the type of surface.
Fastening with glue or self-tapping screws
The fixation method is selected based on the specific situation:
- Screws provide reliable fastening to wooden bases.
- When using self-tapping screws, it is recommended to pre-drill holes with a high-speed tool. They should be slightly larger to prevent shrinkage cracking.
- The parts must be glued with a special compound after preliminary priming of the surface of the slabs and the floor.
In some situations, methods can be combined.
Laying on joists
For the process, a wooden beam with a cross-section of 5*8 cm is selected, which will provide the best reliability and rigidity. Parts must be dried and treated with protective compounds.
- Logs are installed. All elements are aligned with each other and fixed. It is recommended to place under them insulation, cut into strips, which will avoid the appearance of cold bridges. If required, jumpers are installed.
- The empty space is filled with thermal insulation material. Dry screed is created in a similar way.
- DSP slabs are laid according to the drawn up diagram with a gap from the walls. If the house was recently built, it is advisable to leave a small distance between all the parts, sealing it with putty or sealant.
- The panels must be fastened with self-tapping screws in increments of 20 to 35 cm. The cap must be immersed flush.
Mounting on concrete screed
You can place the slabs on such a base as follows:
- The surface is cleaned of all excess, dirt and debris are removed. Work is carried out only when the humidity of the coating is low.
- Priming is carried out with a deep-penetrating compound, and the floor is dried.
- The mixture is being prepared. For installation, you will need a notched trowel, which will ensure uniform application without the formation of voids.
This method is excellent for warm water floors, but all gaps between the tubes are first sealed with a self-leveling mixture.
Preparing for the installation of a DSP coating
Before starting work on arranging a rough surface made of CBPB, the base of the floor must be properly prepared. For example, when laying material on a wooden base, old or rotten boards must be dismantled and replaced with new ones. It is important to seal all the cracks with putty, and the wooden base is primed for better adhesion to the glue on which the slab covering will be mounted.
If installation will be carried out on a concrete base, then it should also be carefully inspected for damage and repaired if necessary. Also, if there are strong horizontal deviations, leveling is done with cement mixtures. When laying CBPB on the ground, it is necessary to first level the surface - this can be done by pouring a 20 cm thick sand-gravel mixture onto the ground and compacting it.
The process of building a gazebo with a DSP floor
The best option is to lay CBPB slabs on logs. In this case, if it is planned to install the foundation directly above the ground, supports for the logs are installed on the ground, and hydro- and thermal insulation is also laid. The distance between the supports can vary from 0.5 to 1 m - this indicator depends on the thickness of the timber used for the logs.
Materials and tools that need to be prepared for working with DSP:
- timber for logs (section 150x100 or 50x100 mm);
- DSP boards in the required quantity;
- antiseptic solution for timber;
- sawing tool (for example, a hacksaw);
- materials for waterproofing and insulation;
- tools for taking measurements (tape measure, pencil);
- fastening material;
- drill.
Fastening floor slabs using self-tapping screws
Useful tips
To achieve better results, you can use some recommendations:
- Installing DSP on the floor is most important when laying tiles: in this case, the highest quality adhesion is achieved.
- Before use, it is better to keep the material indoors for 24 hours. This will eliminate possible errors.
- If work is carried out on a “wet” screed, then you should wait for it to dry completely.
- It is better to carry out the procedures with an assistant, especially when using thick slabs.
If all work is performed correctly, the surface will be more reliable.
Arrangement of the floor using DSP
Let's consider the arrangement of a floor made of cement-bonded fiberboard on joists using the example of a balcony.
Step 1. A layer of insulation is laid under the logs. The logs are installed parallel to the walls at a distance of about 30-40 cm from each other.
The joists are installed on top of the insulation
Step 2. Cross bars are installed and the sheathing is created. The wooden blocks are connected to each other using metal corners and self-tapping screws.
Cross bars installed, sheathing ready
Step 3. The space between the joists is filled with insulating material.
Laying insulation
Step 4. DSP boards of the required sizes are laid across the longitudinal joists. The width of the piece of material should be slightly less than the width of the balcony (by 5-10 mm).
Laying CBPB boards
Step 5. The plates are fastened with self-tapping screws to the joists. The gaps between the DSP boards are sealed with an adhesive composition.
Fixing slabs with self-tapping screws
Video - Laying tiles on DSP
Installation of slabs with glue and self-tapping screws
Laying of DSP is carried out using glue and self-tapping screws.
If you are working with glue, use a construction mixer at low speed to obtain a homogeneous mass. The finished mixture is applied with a notched trowel. Lay and fix the sheets, placing them with an indentation of 5 mm. The gap is needed so that the material does not get damaged when shrinking. These cracks are filled with adhesive.
After complete hardening, the surface is coated with a water-repellent composition and primer.
Installation of DSP
If the DSP is mounted on logs with a pitch of 40-60 cm, then slabs 2-2.6 cm thick are installed with self-tapping screws.
2 layers of slabs are laid on the logs with a gap of 3 mm between them, and 12 mm between the slab and the wall. The joints of the layers should not match. The short edges of the sheets are joined on the support beams - the joints are located in the middle. To improve contact, the surface is treated with assembly adhesive. Self-tapping screws are screwed into the slab to the joists in increments of 150 mm along the edge of each panel.
Attention! Sometimes bumps form at the joints, which should be sanded and individual areas should be puttied.
Cement particle board is considered a strong, durable building material with a smooth surface. Decorative floor coverings fit perfectly on such a base. The material is considered thermal insulation, so its installation saves money on insulation and sound insulation. Anyone can lay slabs in any room, at any time of the year.
Installation of cement slabs:
Average score of ratings is more than 0
Share link
Comments There are no comments yet, but you could be the first...
How to install logs and mount DSP?
Lag installation diagram.
- Initially, you need to start selecting and purchasing lags. Remember that the humidity of the material should not be higher than 25%.
- If you decide to install timber on top of a concrete screed or slab, then a section of 50*50 mm will suit you. There is no point in a timber that is large in thickness. The logs lie on the surface, and additional thickness will simply take away the necessary space. In most cases, logs made from pine, spruce or cedar are purchased.
- After all the above steps, each lag must be properly treated with an antiseptic. This is especially important when laying on the ground. As a recommendation, we can consider that in order to save money, you can use engine oil recycling. Despite its low price, this composition has quite positive qualities and properties.
- The timber is installed exclusively horizontally. Place two bars against opposite walls, level them and then stretch a fishing line between them. These logs will play the role of beacons. It is on them that you need to fill the remaining bars. At the moment, very often thick plywood, OSB or DSP are laid on top of the bars.
- After you have installed the timber and laid, for example, DSP on top of it, you need to install the sheathing with a cross section. The result of this installation will be a lathing consisting of identical squares, on which any floor covering can be laid.
- Do not forget that before installing the logs, you must leave a gap. This can be done using tape or other material. This distance is necessary so that during the expansion of the material there is a reserve.
- After the logs are completely installed, you can begin laying the subfloor.
- The last covering in most cases is plank floors, because wood was, is and remains the most popular material.
- Floor covering should begin from the farthest corner of the room. The boards must be laid staggered. The joints of the boards should lie on the joists.
- If you prefer a non-grooved board, then it must be firmly pressed against the previous row and secured with nails. It is worth saying separately that, of course, it is best to carry out this work using self-tapping screws, but this is much more complicated and problematic.
- You can fix the tongue and groove board in a hidden or open way. The open version is suitable for the subfloor, and the hidden version is suitable for the final coating.
- It is very important that the boards used during the installation process are well dried. If you do not follow this rule, then subsequently the coating may simply lead to the side.
- To make the surface as smooth as possible, DSP can be used as a flooring. If you decide to give preference to this particular option, then lay the slabs in the same random order and secure them to the joists.
- If we talk in more detail about DSP, then it must be said that this material tolerates even high humidity very well. Therefore, you can safely lay tiles or 3D floors, which have become very popular lately, on them.
- Laying heated floors along joists is done in the same way as installing a classic heated floor. The only difference is that if you are laying a heated floor under ceramic tiles, then the rough version of the floor must be mounted from DSP.
Floor on the ground on the ground floor with dry prefabricated screed
Flooring on the ground is an economical solution for a private home.
What is a floor on the ground and what types of floors are there on the ground?
You can find out about this on the previous page:
“What are the types of floors on the ground - design options
.
A concrete floor on the ground lies directly on the wet and cold ground. The floor structure should serve as a barrier that protects rooms in the house from cold and soil moisture.
For residential premises on the first floor of a house, an inexpensive option would be to install a floor on the ground with a dry prefabricated floor screed, Fig. 4.
A floor with a prefabricated screed is afraid of flooding. Therefore, it should not be done in the basement, as well as in wet rooms - bathroom, boiler room.
The ground floor with a prefabricated screed consists of the following elements (positions in Fig. 4):
| Fig.4. Floor on the ground in a private house. |
1 - Flooring - parquet, laminate or linoleum.
2 - Glue for joints of parquet and laminate.
3 - Standard underlay for flooring.
4 - Prefabricated screed made of ready-made elements or gypsum fiber sheets, plywood, particle boards, OSB.
5 - Glue for assembling the screed.
6 - Quartz or expanded clay sand.
7 - Communications pipe (water supply, heating, electrical wiring, etc.).
8 — Insulation of the pipe with porous fiber mats.
9 - Protective metal casing.
10 — Expanding dowel.
11 - Waterproofing - polyethylene film.
12 - Concrete base made of concrete class B22.5.
13 - Foundation soil.
The design of the connection between the floor and the outer wall is shown in Fig. 5.
| Fig.5. Connection to the outer wall of the floor along the ground. |
The positions in Fig. 5 are as follows: 1-2. Varnished parquet, parquet, or laminate or linoleum. 3-4. Parquet adhesive and primer, or standard underlay. 5. Prefabricated dry screed from ready-made factory-made elements with a “groove-tongue” connection of sheets. 6. Water-dispersed adhesive for screed assembly. 7. Moisture insulation - polyethylene film. 8. Quartz sand. 9. Concrete base - concrete screed class B22.5. 10. Separating gasket made of waterproofing roll material. 11. Thermal insulation made of polystyrene foam PSB 35 or extruded polystyrene foam, thickness as calculated. 12. Foundation soil. 13. Plinth. 14. Self-tapping screw. 15. External wall.
The layout of the floor on the ground, waterproofing of the base and walls, in a building with residential premises, is shown in Fig. 6.
| Fig.6. Layout of the floor on the ground and waterproofing in a private house. The arrows indicate the cold bridge. |
Here, in Fig. 6, the positions are as follows:
- Cellular concrete blocks.
- Waterproofing.
- The foundation is combined with the plinth.
- Plaster on mesh.
- Net.
- Blind area.
- Glue, solution.
- Interior decoration.
- Floor on the ground.
Let's take a closer look at some elements of the floor structure.
Why is there a prefabricated screed made of sheets, and not a monolithic one?
Household products
⇆
For floors, there are thermal technical standards for floor heat absorption.
Floor heat absorption
- the property of the floor surface to perceive heat to a greater or lesser extent during periodic fluctuations in heat flow or air temperature.
The heat absorption rate for residential premises is 12 W/m2*deg.S. - no more. Depends on the thermal inertia of the materials in the floor layer. Simply put, stand barefoot with one foot
on a wooden floor and the other on a concrete floor, you will feel the difference in the heat absorption of the floors.
In order to ensure the standard heat absorption of the floor without additional layers of insulation, this design uses a screed made of relatively “warm” slabs in combination with sand backfill.
The prefabricated screed has other advantages. The prefabricated screed is laid on a layer of dry
quartz sand (washed construction sand). This layer also affects the heat absorption of the floor. The thickness of the sand layer in the proposed floor structure must be at least 40 mm. and no more than 100mm.
In this layer of sand you can place pipe distribution with various communications. Then the height of the sand layer should be 15 mm higher than the pipes. (Fig.4). Instead of quartz sand, you can use perlite or expanded clay sand of a fraction of 1.5-5 mm, in a layer up to 100 mm thick.
A sufficiently thick layer of light sand will improve heat absorption and sound insulation of the floor.
A layer of insulation can be placed under the prefabricated screed . The design of such a floor is shown in the figure:
Fig.7. A layer of insulation is placed under the prefabricated screed. 1 and 2 - finished floor; 3 - substrate; 4 - self-tapping screw; 5 - sheets of prefabricated screed; 6 - glue; 7 — edge tape; 8 — thermal insulation slabs; 9 - interlayer; 10 - dry leveling backfill; 11 — moisture insulation; 12 - floor with uneven surface; 13 - plinth; 14 - glue; 15 - wall.
The presence of insulation boards under the prefabricated screed will provide better heat absorption rates for the floor and make the floor energy-saving. Heat leakage into the underlying layers of the floor will be significantly reduced.
Extruded polystyrene foam (EPS) boards or rigid mineral wool boards with a density of at least 125 kg/m3 are used as thermal insulation.
The layer (item 9) serves to uniformly distribute concentrated point loads in the soft layers of the floor. As a layer, moisture-resistant gypsum fiber - GVLV, or glass-magnesite - SML sheets with a thickness of at least 10 mm are used, laid on a backfill layer with a gap at the joints of no more than 1 mm. The joints of the sheets are taped with construction tape. The joints of the interlayer sheets (item 9) should not coincide with the joints of the thermal insulation slabs (item 8).
If you use EPS boards with tongue-and-groove joints for thermal insulation, then you don’t have to make a layer .
Two layers
When installing floors on a hard base (wooden floor, subfloor, concrete slab), it is recommended to lay two layers of sheets. Their total thickness and the thermal insulation materials used (if any) must provide the required level of thermal insulation and noise absorption.
How to lay a CBPB board on a rigid base
In this case, the second row DSP board is laid with offset seams. The displacement of the seams must be at least 50 cm. The layers can be screwed together with self-tapping screws. If you coat them with glue, it will be practically a monolith. This, by the way, is a solution if it is difficult to lift thick slabs to a height. Thinner ones can even be carried up the stairs.
Do not forget to leave a gap around the perimeter of the room for thermal expansion - it is 3-6 mm. In order to leave a gap along the walls when laying the DSP, you can support it with mounting wedges and insert spacers between the wall and the edge of the sheet. The thickness of the insert is 4-6 mm. You can roll out damper tape around the perimeter. It will also improve the heat and sound insulation characteristics. If your budget is limited, you can cut thin foam into strips and lay these strips along the walls.
Heated floor made of CSP slabs for tiles.
Characteristics and features of the material
The dimensions of the CBPB can vary depending on the purpose; most often, standard 2.7x1.2m slabs are used, the thickness varies from 1cm to 4cm. The main properties of cement bonded particle boards are as follows:
- high density, almost complete absence of swelling from water; high degree of strength - the slabs have a hard surface, a homogeneous composition prevents the risk of delamination; resistance to significant temperature changes; fire resistance - the cement-based composition ensures fire safety; frost resistance - this coating is suitable for country houses that are closed for the winter and left without heating; the cement in the composition prevents rotting, the chipboards are not susceptible to mold, mildew, and do not attract insects and rodents; high levels of noise insulation; CSP boards retain heat well; not subject to chemical attack; versatility - suitable for indoor and outdoor use; environmental friendliness - a very small component of chemical elements in the composition makes it safe for human health and the environment; simple production ensures an affordable cost of the material; provide a wide range of options for further design of the room - chipboards are a universal substrate suitable for various types of floor coverings - linoleum, laminate, parquet, wooden and self-leveling floors.
The disadvantages of CBPB include the significant weight of the slabs themselves, especially when they are thick. Also, cement slabs generate a lot of dust during processing - this must be taken into account when grinding the surface or cutting slabs.
Using a floor slab
- Due to its characteristics, DSP replaces concrete screed because it is easier to install.
- Due to its ability to withstand heavy loads, such a canvas will last for many years.
- The product is selected according to thickness, being sure to pay attention to the traffic flow of the room.
- DSP is used for finishing indoors and outdoors, but is especially popular for leveling floors. DSP is used in rooms with high humidity.
Attention! It is most in demand for floors under ceramic tiles, since this material requires a flat base.
- Floors made from CS slabs are used for arranging a three-dimensional floor, since in this case a reliable subfloor is required.
- Used for laying “warm floors”, which combine a flat surface and thermal insulation.
An excellent way to install DSP is on wooden floor joists. To preserve the positive qualities of the material, you must follow the installation rules.
Two layers
When installing floors on a hard base (wooden floor, subfloor, concrete slab), it is recommended to lay two layers of sheets. Their total thickness and the thermal insulation materials used (if any) must provide the required level of thermal insulation and noise absorption.
How to lay a CBPB board on a rigid base
In this case, the second row DSP board is laid with offset seams. The displacement of the seams must be at least 50 cm. The layers can be screwed together with self-tapping screws. If you coat them with glue, it will be practically a monolith. This, by the way, is a solution if it is difficult to lift thick slabs to a height. Thinner ones can even be carried up the stairs.
Do not forget to leave a gap around the perimeter of the room for thermal expansion - it is 3-6 mm. In order to leave a gap along the walls when laying the DSP, you can support it with mounting wedges and insert spacers between the wall and the edge of the sheet. The thickness of the insert is 4-6 mm. You can roll out damper tape around the perimeter. It will also improve the heat and sound insulation characteristics. If your budget is limited, you can cut thin foam into strips and lay these strips along the walls.
Heated floor made of CSP slabs for tiles.
Characteristic features of using DSP
The material has a high degree of strength due to its structure, which includes 4 layers. The outer layer contains finely dispersed shavings - it gives hardness. There is a long sliver inside, which gives the slab bending strength.
The use of DSP in various areas of construction and repairs is justified by absolute safety for people and the environment. As a result of research, it was revealed that the slab, even after prolonged contact with the aquatic environment, does not change its original qualities.