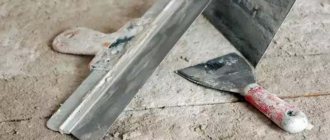
ironers
for plaster
Rating of the best trowels for plaster 2022 in 2022 buy. TOP 10
ironers
for plaster
review of the best reviews. Rating of the best trowels for plaster 2022 in Russia list 2022 - 2022.
ironers
for plaster
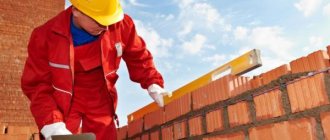
A plaster trowel is a necessary tool for working with walls. It should not be confused with a spatula, leveler and rule. Our rating will help you avoid mistakes when choosing. Read to the end to find out the differences between a trowel and other construction tools, the types depending on the material, how to choose the right one and what to pay attention to.
Scope of application
The plaster trowel is also known by other names - Venetian trowel and glader. Therefore, all these words have the same meaning. The glader is used for plastering work, or rather, it is used to apply solutions to the surfaces of the room. He distributes them evenly across the walls. Evens out even the smallest irregularities on the ceiling that accentuate attention or cast unnecessary shadows.
The trowel copes with unevenness and makes the seams less protruding. Tile adhesive, concrete, plaster can be applied in a thin layer and then smoothed out. The convenient ergonomic design allows you to work with complex compositions that harden quickly. This is true for decorative plaster - in cases where the difference in the final coating is 1 mm.
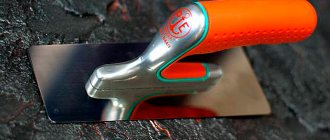
The design consists of 2 parts - a handle and a smoothing blade in the form of a rectangle. It is usually made of stainless steel for durability. Of course, there are models with a different trowel - triangular, diamond-shaped, etc., but it is the rectangular shape that distinguishes the trowel from other tools.
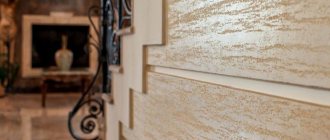
Finishing a wall with Venetian plaster using trowels
Venetian plaster can have relief of different depths and patterns, but in any case its purpose is to make the surface chaotically heterogeneous in color and volume.
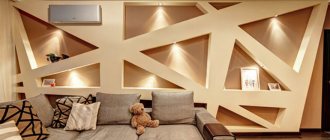
Venetian plaster - an original solution for finishing walls in rooms
Thus, the wall does not simply look “blank”, but acquires a unique spatial effect. A room decorated using the Venetian plaster technique is distinguished by its decorative “richness,” so for such wall cladding you will have to select certain interior accessories that match the style, otherwise the desired effect will simply be lost.
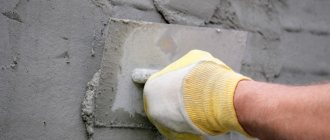
To apply Venetian plaster you will need some tools:
A set of tools - mainly plaster trowels and spatulas of various shapes and sizes
- Plaster trowels of two or three sizes and a spatula with a width of 120÷150 mm.
- Corner trowel.
- Grater with foam attachment.
- Soft fabric.
- Sponge with large pores.
- A roller with a foam or fluffy attachment.
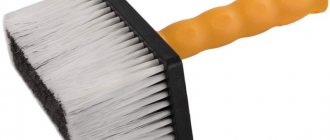
- Soft wide brush.
- Silicone spatula with a long handle.
- Mixer attachment and electric drill.
From the materials you will need to prepare a primer composition, a plaster mixture for Venetian plaster, a coloring pigment, golden or pearlescent enamel and liquid wax.
Finishing work on a pre-carefully leveled wall is carried out in the following order:
| Illustration | Brief description of the operation performed |
| The first step, in order to avoid contamination of the floor covering, it is recommended to cover the area adjacent to the wall to be finished and the place where the mortar and plaster mixture is mixed with plastic film. Next, the primer composition is prepared. It is mixed using a mixer attachment and an electric drill, and water is added to the solution if necessary. | |
| The finished primer is applied using a roller, mounted on a long handle for convenience. In hard-to-reach places, for example in inner corners, surface treatment is carried out with a wide brush. The drying period for walls treated with primer varies from two to three hours under normal conditions (temperature 15÷25 ºС) - this is usually indicated by the manufacturer of the composition. | |
| Next, you need to prepare the plaster mixture, as it should have a uniform consistency of thick sour cream. When you open a bucket of ready-made plaster, quite often liquid appears on top of the thick composition. Since the work requires a thick plastic mass, it is recommended to carefully drain this liquid. | |
| Then the solution is thoroughly mixed with a mixer attachment for 10÷12 minutes. The rotating blades gradually move along the entire perimeter of the bucket, capturing the lowest, bottom layers, since it is necessary to achieve a perfectly uniform consistency of the mass throughout the entire volume. | |
| Next, the coloring composition is prepared. In this case, a bright red-orange pigment was chosen, which is traditional for Venetian plaster. This mixture also needs to be mixed well - a spatula or silicone spatula works well for this purpose. | |
| Then the pigment is added to the plaster mixture, according to certain selected proportions. These ratios will need to be observed with each subsequent mixing, if the prepared one-time volume of plaster is not enough for all the walls of the room. In the example under consideration, a whole package of each of the compositions is used - a bucket of plaster and a whole jar of the painting composition. | |
| The next step is to thoroughly mix the mixture until the color and consistency are uniform. The mass is mixed for at least 10÷12 minutes. During this process, careful checking of color uniformity should be carried out. | |
| This check is carried out using a special silicone spatula on a long handle. It needs to be deepened approximately 150 mm into the plaster composition and carried along the edge of the bucket, lifting the mixture from the depths to the surface. If white unpainted areas or colored stripes are found in the painted composition, the plaster should be mixed well again. | |
| Venetian plaster technology involves applying several layers of the mixture to the wall surface. And the first of these is a layer of unpainted white plaster. For this work you will need a prepared clean spatula with a width of 100÷120 mm and a trowel measuring 200×80 mm. The plaster is grabbed from the container using a spatula and applied to the surface of the trowel. | |
| The size of the spatula was not chosen by chance, since it captures exactly as much mixture as is necessary for application to the wall in one go, that is, no more and no less than is actually required. | |
| The first plaster layer is intended to create a light background, which can give the Venetian plaster a kind of “transparency”, as it will, as it were, shine through the colored layers from the inside. The plaster is applied to the bottom of the wall with a stroke, which is spread by evenly stretching it using a trowel from the bottom to the top of the surface. | |
| The applied layer is leveled. To do this, the trowel is carried out in a diagonal and horizontal direction from right to left in semicircular movements. After completing this layer, the wall surface should be smooth. The consumption of plaster mixture for this stage of work is approximately 500÷600 grams per square meter of wall. | |
| To plaster and level external corners, use a corner trowel, onto which the mixture is applied with the same spatula. Or the required mass is removed from an ordinary trowel, which in this case serves as a plaster falcon. | |
| Using an angled spatula, apply the solution to the junction of two surfaces, starting from the top of the wall, with slight pressure on the tool. In this case, it is important that the joint between the walls is covered perfectly evenly with the mixture. | |
| The marks from the corner trowel remaining on the sides of the plastered surface are leveled with a regular trowel or spatula after the corner has been completely removed. | |
| The trowel is usually taken with both hands, and, starting from the corner area, the solution is distributed deep into the surface of the wall, leveling out the dents and stripes left on it. | |
| The next step, after a day, is to apply the tinted mixture in small portions onto a spatula that has been perfectly cleared of white plaster. The principle of making Venetian plaster is to apply strokes of the solution and distribute it unevenly on the wall. This process is carried out in several stages, with two or three layers of plaster mixture being randomly applied to the surface. | |
| The mixture is applied in a thin, even translucent layer. To do this, the plaster needs to be thoroughly “stretched” over the surface. The consumption of the solution for this plaster layer should be about 200÷300 grams per square meter of area. | |
| The mixture is applied with light strokes, and then stretched over the surface of the wall and leveled until smooth. On the walls, closer to their corner areas, the solution is applied with a smooth trowel, moving from the main surface towards the corner. | |
| After this, the corners are also drawn out using a corner trowel. | |
| When the corner is completely formed, the marks left by the corner trowel are leveled with ordinary grout (trowel), using semicircular movements from the corner towards the main plane of the wall. | |
| The next layer of tinted mortar is applied in short strokes and carefully distributed in a counterclockwise circular motion. However, in this case, such an operation is carried out not until a homogeneous layer is created, but leaving in the area of the smear a thickness 1–2 mm greater than in the rest of the area of the wall onto which the mixture is stretched. In this case, when applying the solution to the surface, the trowel is held with both hands at an angle of 45º in a horizontal position. This stage of work will require 80÷100 grams of mixture per square meter of wall. | |
| Next, continuing to hold the trowel at an angle of 45º, make a surface leveling of the applied plaster using circular movements from right to left, without pressing too actively on it. | |
| Having completed such finishing on one section of the wall, they move on to the adjacent unfinished area. In this case, the application of the composition must be carried out so that no clear boundary is formed between the already set mixture and the newly applied one. The plaster is also applied in short strokes and stretched from greater to minimum thickness. Distribute the newly applied plaster towards the set one, also in a circular motion. External corners are finished using a corner spatula, in the same way as described above, and then removed with a regular flat trowel. | |
| After the last layer has dried after about 48 hours, water-based pearlescent enamel is applied. This operation is carried out using a sponge with large pores. The consumption of the coloring composition is usually on average 30÷50 grams per square meter of area. The enamel is applied in sections of approximately one square meter, and immediately after application it is rubbed until shiny with a soft cloth or a grater with a foam attachment. If the first layer of enamel is absorbed into the plaster and appears stained, then it is best to even out the coating with a second layer. | |
| There should be no bubbles or stains from the enamel on the wall, so the applied layer of paint must be rubbed down very carefully. Instead of enamel, also 48 hours after applying the last layer of plaster, tinted or transparent wax is often used. It can be applied using a trowel or rubber spatula. | |
| The wax applied in a thin layer is left until it sets. - it should not stick to your hands. Then the surface is rubbed with a soft flannel cloth or a sanding machine is used for this, putting a special soft attachment with short pile on it and setting it to low speed. | |
| Sanding is done until the surface becomes uniformly glossy. The result of finishing the walls with Venetian plaster should look something like the one shown in the last illustration. |
Everything is shown very simply and beautifully, but certain “misfires” may well occur the first time. No problem, your hand will get full. But in order for the work to be successful and its result pleasing to the eye, it is necessary to choose only high-quality tools and plaster compounds for finishing. And to help those choosing a good trowel for decorative plaster, see the video below.
Kinds
Plastering trowels are made from different materials - metal, plastic and rubber. Each type is good in a separate case.
A metal trowel is the most reliable option of the three. Compounds almost do not stick to it, which is important, especially for applying quickly hardening building mixtures.
The main selection criterion is the strength of the trowel. If a sheet of metal bends, such a tool will not last long. High anti-corrosion properties are also important. Therefore, you should pay attention to stainless alloys. As for the blade, models with rounded edges do not damage the final layer, so it is better to choose them.
A plastic iron is cheaper, but does not last long. The scope of application is limited - it is recommended to use it for plaster, as well as when working with liquid wallpaper. In these cases, she performs excellently. There are plexiglass options that help control the thickness of the layer.
The rarest wooden and rubber trowels. Wood is a short-lived material that is susceptible to rotting. It is rarely used, and mainly for smoothing concrete and on small surfaces. As a rule, they are disposable. Rubber gladers are used to smooth out seams. Made from abrasion resistant rubber. The working base is soft and suitable for Venetian plaster.
There are also unusual models - with teeth. Their length reaches 4-10 mm. Using a toothed trowel, you can create patterns and waves on the walls. By adjusting the angle of inclination, you can experiment with the relief of the pattern - from barely noticeable to pronounced.
A trowel with an angle is used for only one purpose - for processing internal or external corners. The shape of the trowel follows the bend of the corner, so determining which trowel is needed is not difficult.
Definition of the concept
The main tool with which all the necessary manipulations will take place is a trowel . But it should be noted that in addition to the trowel, other tools are also used, for example, a spatula. These are the two tools most often used when applying Venetian plaster.
A trowel for Venetian finishing is a type of construction tool used by plaster masters when carrying out finishing work that involves applying Venetian plaster to the surface.
Differences
Since the smoother is similar in appearance to a spatula, rule and leveler, a beginner may make the wrong choice - buying the wrong tool for a particular job.
- A spatula is used when you need to remove a layer of wallpaper or paint. It is used to close point defects - cracks and crevices - and also to lay tiles.
- The rule is a flat bar, which is similar in functionality and method of use to a smoothing iron. The difference is that the rule, due to its size, covers more area. Works well when time is short with quick-drying mixtures.
- The leveler is designed to work with internal corners of the room. If they require cleaning of plaster and correction of minor defects, this is the one they choose.
In many cases, a trowel is used instead of a spatula in order to complete the putty faster. Due to the greater coverage, you can save not only time, but also building mixture. But still, the main purpose of the glader is to distribute the solution evenly over the surface.
Advantages
In reviews, buyers note the following advantages of the ironer:
- She is not demanding in care. Mixtures hardly stick to metal models. If part of the mortar has frozen on the trowel, there is no need to remove it mechanically. It is enough to leave the tool in water with citric acid for a day. This method will help clean the surface of glue and plaster.
- Sold in any hardware store at an affordable price. The cost varies depending on the material and quality - from 250 to 1,000 rubles.
- With timely care it has a long service life.
- Cannot be replaced with other tools to maintain the same efficiency and speed.
- Wide range and variety of trowel shapes.
In addition, everyone can choose a convenient ironing iron for their hand in the store.
The best metal trowels for plaster
STAYER PROFI 0802
This is a standard smoothing trowel from the Stayer brand, which specializes in construction products. Size - 28 by 13 cm. The main advantage is the stainless steel trowel. The handle is made of wood coated with a protective layer. The main purpose of STAYER PROFI 0802 is to smooth out mixtures, solutions and glue on the surface of walls. The weight is small - 300 g. This makes the work easier, since the hands get tired more slowly.
Advantages:
- ease of use;
- long service life;
- light weight.
Flaws:
- not detected.
CORTE 0240
The CORTE company sells tile cutting equipment and repair products. Model 0240 is made of stainless steel and is used in finishing work. The rubberized handle is comfortable for long hours of work. And the central location gives balance and greater control of the trowel.
Size - 27 by 13 cm.
Advantages:
- made of alloy steel;
- rubberized handle;
- anti-corrosion properties.
Flaws:
- price.
Biber 35311
The impact-resistant black handle is located near the base. Builders note this location as the most convenient. Under the handle there is a semicircular recess for fingers, which will not allow you to rub calluses. If the design has a right angle without rounding, then working with such a smoother is not so comfortable. When working with Biber 35311, the brushes remain motionless and become less tired. The model can be used for puttying.
Advantages:
- comfortable handle;
- stainless steel base;
- strength.
Flaws:
- not detected.
Top 3 plastic irons
TOPEX 13A340
A plastic trowel is used for sanding and grouting. Made from impact-resistant plastic. This means that despite the material being TOPEX 13A340, it is durable and has a long service life. The surface is without teeth, rectangular in shape.
The smoother is very light - the weight reaches 160 g. It is used for smoothing concrete on small surfaces, for example, in the manufacture of stairs. Due to the smooth surface, you can work with complex types of plaster, such as Venetian. There is a 6 month warranty.
Advantages:
- low price;
- a light weight;
- Suitable for smoothing plaster.
Flaws:
- not detected.
Biber 35331
The model is intended for applying paste and decorative plasters, as well as azures and thin-layer decorative paints. The plastic blade with rounded corners prevents material from sticking to the blade surface. This makes application much easier and prevents marks from forming.
Advantages:
- price;
- a light weight;
- wide handle mount.
Flaws:
- There is no rounding of the corner under the handle.
MATRIX 86721
The smoothing board has a rectangular shape, the edges are not rounded. It is used when applying liquid wallpaper or Venetian plaster, when it is necessary to form veins. Plastic models last less, but are also several times cheaper than their stainless steel counterparts. The design is quite ergonomic, but the handle angle is 90° and has no rounding. Therefore, when working for a long time, calluses may appear. Size - 28 by 13 cm.
Advantages:
- price;
- efficiency;
- light weight.
Flaws:
- handle design.
How does a Venetian trowel differ from a regular one?
The name Venetian does not mean that it is made in Venice or is only suitable for distributing this type of plaster. It can also be used for other solutions.
It differs from standard trowels in that it is made of high-quality stainless steel, which is also polished. The corner areas are rounded and the blade edge is chamfered.
It differs from standard trowels in that it is made of high-quality stainless steel, which is also polished.
Sizes and shapes of Venetian trowels
A trowel is required to distribute compositions with the smallest fractions. The handle is installed in the middle of the rectangle so that the plate is pressed evenly to the surface. The metal material should not blacken the surface, so it must be of high quality. Typically the plate size is 20x8 or 24x10. But there is also a 28x12 option.
The metal material should not blacken the surface, so it must be of high quality.
Top 3 toothed smoothers
Master Color F30-2042
This is an inexpensive mortar trowel made from stainless steel, which makes it resistant to corrosion. There will be no harm from numerous cleanings with water and detergents, while other analogues may rust after just 1 use. It consists of a plastic handle that fits comfortably in your hand and a working blade.
The length and width of the teeth are 6x6 mm. Because of them, the solution consumption is reduced, and smoothing occurs faster. This size is well suited for wall cladding. Can be used as a comb.
The size of the instrument is 27 by 13 cm.
Advantages:
- multifunctionality;
- uses the solution economically;
- comfortable handle.
Flaws:
- plastic handle material.
MOS 05118M
This is a model of a Russian brand with production in China. The trowel material is carbon tool steel. It is plastic and little susceptible to damage - it will not break, even if bent strongly. But care is required - after each use you need to wash and dry thoroughly - otherwise corrosion processes may begin on the first day of use.
MOS 05118M is lightweight at 200 g. Warranty - 6 months.
Advantages:
- price;
- a light weight;
- strength.
Flaws:
- without proper care it is prone to rust.
Harden 620258
This is a notched trowel from Harden, which has been on the market for 20 years and is represented in 50 countries. The blade is made of alloy steel. It has anti-corrosion properties due to its chromium content. This means that even with poor care there will be no rust. The platform itself is rigid and little susceptible to damage.
Harden 620258 has a comfortable orange handle. The rubber coating ensures ideal interaction with the hand - gives good grip.
Size - 28 by 12 cm.
Advantages:
- the trowel is made of stainless steel;
- rubberized handle;
- solid platform.
Flaws:
- not noticed.
Device and characteristics
The main parts of the trowel are a lamellar spatula, a handle securely attached to the base, and a handle mounted on the handle. Each of the parts in various modifications of the tool has its own shape and features. They depend on the type of operations for which the model is intended.
The main shapes of the blades are:
- triangular;
- trapezoidal;
- rectangular;
- diamond-shaped;
- teardrop-shaped;
- oval.
Each shape can have its own characteristics: rounded corners, pointed or rounded edges of the side edges. The traditional blade material is steel. Stainless steel products are popular - service life in contact with raw materials depends on the material’s resistance to corrosion.
Other metals used for blades are brass and titanium. Modern materials used are plexiglass and plastics. The thickness of the plate ranges from 0.5-2 mm.
To ensure that the solution slides off the plate easily, it is polished. The solution comes off especially easily from polished stainless steel.
The handle is in most cases made of metal.
Its connection to the plate can be:
- welded;
- screw;
- riveted;
- cast.
The working plate and the surface of the black iron handle can be covered with an insulating, refining layer. For this purpose, anodizing, painting or galvanizing is used.
The shape of the handle determines the position of the handle in relation to the base. A removable handle is put on its second end, the ends of which are completed by a metal cap (strengthening the junction of the handle and the handle) and a fungus (heel), which is used to tap the brick or laying tile during work. The metal heel protects the handle from impacts.
The handle can be wooden, plastic, rubber, polymer or metal (rubber-coated). It should be firmly fixed to the handle and be comfortable to hold with your hand. The length of the handle is no less than the width of the plasterer’s palm.
The main dimensions of the trowel are the length and maximum width of the blade, the total length of the product. Different modifications have their own parameters. Weight (on average) – 0.3-0.4 kg.
Trowels, like other construction tools, are manufactured by manufacturers in accordance with State Standard 9533-81.
The best Swiss irons
Biber 35301
The main difference between Swiss ironing irons and other types is the long blade. In this way they are similar to a rectifier. However, they do have a handle. Scope of application: smoothing and distribution of building mixtures. Due to the large surface of the trowel, the process goes faster, and alloy steel extends the service life. Blade length - 48 cm.
The edges are sharpened - this feature shows off Biber 35301 well when puttying. Does not draw, does not leave streaks or scratch the plaster. Convenient to work on high areas of the building.
Advantages:
- stainless steel base;
- processed edges;
- durability.
Flaws:
- price.
NEO 50-033
This is a model with a mirror base made of durable steel. Does not bend under strong pressure or when dropped. The handle has a wide slot so you can wrap your palm completely around it. This piece is made of beech wood and has a varnished finish. The edges do not require sanding.
Dimensions - 60 by 13 cm. The ironer weighs 800 g. It may seem that it is difficult to work with such weight and your hands get more tired. But you need to remember that due to the length of the tool, it covers more surface - the speed of work increases. In addition, the load is distributed equally between the two hands.
Advantages:
- stainless steel base;
- comfortable handle;
- professional level tool.
Flaws:
- high price.
STAYER 0803
Model STAYER 0803 is used for applying solutions and distributing adhesives. The canvas is made of stainless steel and has a mirror finish. The blue wooden handle is built into the mount, which makes the design reliable and prolongs the life of the instrument.
Advantages:
- durability;
- strength;
- affordable price.
Flaws:
- not detected.
How to choose the right one: recommendations
Before purchasing, you need to remember a few recommendations that will protect you from defective and unsuitable tools:
- To understand which ironing iron is best to buy, determine for what purpose it is needed. Basically, they are bought for decorative application of solutions or for putty. For example, for Venetian plaster, options with rounded edges are chosen. Of course, it can also be applied with a sharp-edged blade. But in order for a beginner to reduce the number of errors, it is worth sanding the edges or buying a model with this feature. This is not necessary for putty.
- The material of the fry cannot be ignored either. The most reliable and durable is alloy steel or stainless steel. After interacting with liquids and cleaning, it will not rust. The base of the handle—the metal soldered to the base—should also be strong. This is an additional stiffening rib that secures the blade and prevents it from bending.
- If you are afraid of making a mistake and don’t trust yourself, take a closer look at popular models. They usually have a lot of reviews and it's easy to find out the pros and cons. It is impossible to say for sure which company is better to buy. Each brand has both budget and professional lines.
- It is also important to check in the store that the blade is straight. Sometimes it may become bent during transportation or loading. A base with such a defect is not suitable for construction work. Therefore, it is advisable to identify any shortcomings before purchasing.
- Try on the tool handle in the store. It should fit comfortably in the palm of your hand. Pay attention to the distance under the handle - it’s better not to be too large. The smaller, the more convenient it is to work. But still, a small gap is required so that the hand does not rest on the surface of the metal.
- The optimal weight of the structure is 300-400 g. If it is more, then the hands will get tired from long work.
- The angle under the handle should not be sharp. Otherwise, calluses cannot be avoided. Only if the transition is smooth will you be able to work comfortably for many hours.
Of course, this is not a complete list of tips, but these are the points that form the basis of the right choice.
Can I do it myself?
Seeing the prices for professional tools, this question sometimes arises. For a person who wants to apply the “Venetian” on his own in one room, the cost of a tool of 2500 - 3000 rubles may seem unreasonably high.
Of course, you can make a lot of things with your own hands, including a trowel for Venetian plaster.
It will look like this:
- Cut a sheet from a stainless steel sheet according to a template, for example, medium size 240 x 100 mm. Round the corners.
- Then weld a metal handle ending in a threaded rod to it.
- Place a wooden handle on the rod and secure it with a nut.
- Smooth the edges of the canvas with sandpaper and polish the entire metal sheet.
But this raises several difficulties: where can I get sheet metal and welding? Do you even need to bother yourself with such crafts?
Our advice! There is no need to waste time making a trowel yourself. Buy a ready-made tool. If you do not need it for professional work on an ongoing basis, then an inexpensive model for 350 - 700 rubles will be more than enough for you.