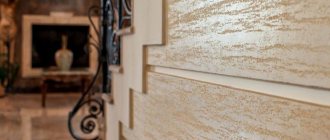
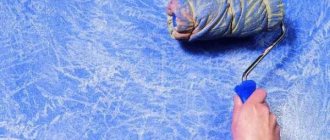
Volumetric patterns of decorative plaster on the walls and ceiling make the interior of an apartment or house original and sophisticated. If you stock up on the necessary materials and tools, as well as patience, you can master the technology of applying plaster using a stencil and decorate the room yourself. I'll show you how you can quickly and cheaply make a stencil yourself using a template.
What are stencils for decorative plaster
You can create a beautiful pattern using special forms with removed parts that form the outline of the future bas-relief.
The use of stencils allows you to create almost any decorative pattern on a flat or slightly curved surface.
And the simplicity of this method allows you to not involve either designers or plasterers in the work.
The advantage of using stencils
- You can either buy stencils or make your own.
- If template solutions are not suitable, then you can come up with a design yourself.
- Despite the fact that many patterns seem difficult to make, they can be made using the stencil method by a person who has no experience in this matter.
- Stencils allow you to create almost any ornament.
- Bas-relief can be created on almost any surface.
- This method will help hide imperfections on the surface.
The bas-relief can be made even more beautiful if you choose the right lighting. This will also provide the ornament with elegant spatial depth.
Using the Sprayer
To paint a complex and large image on wallpaper, in which there is a gradation from color to color, you cannot do without a special sprayer. Before using it, care should be taken to protect the entire room and the furniture located in it. Anything that is not to be painted should be covered with newspaper or film. In addition, you need to open the windows to provide fresh air. You need to use the sprayer while wearing a protective mask and goggles.
Spray painting
Using a spray, you can paint a beautiful sunset with an amazingly beautiful sky on your wallpaper. To do this, you need to stock up on orange, yellow and dark red paint. First, dark red paint is applied, and in a fairly thick layer. You should move from the corners of the wall to its center. Gradually, the layer of paint should be made thinner towards the center. After this, orange paint is poured into the sprayer with the addition of a small amount of dark red. This way you can gently mix the colors. At the end you can pour and spray yellow paint. When the base is ready, you can move on to painting small elements of the picture. Using a thin brush, you need to paint over the lines drawn in pencil. Over the sunset, you can draw black palm trees, somewhere in the distance, if the ocean is depicted, a surfer or a couple of lovers walking along the shore.
Types of stencils
As a rule, stencils sold in construction or design stores are made of PVC. However, in addition to them, there are templates made from other materials.
- Plastic. Such templates will last longer than others, and depending on the thickness, they will allow you to make a pattern that protrudes above the plane to varying degrees.
- Rubber or silicone. They are also quite durable, but unlike plastic analogues, they are easier to remove from the surface.
- Paper. The cheapest and most short-lived (disposable) stencils. It makes sense to use it if you do not plan to make many repeating parts.
About the advantages and disadvantages
Thanks to its numerous advantages, liquid wallpaper is considered a real boon. These, according to reviews on the Internet, include:
- environmental friendliness;
- fire safety;
- ease of application (experience in this case is not required);
- the fact that any of the compositions is very pleasant to the touch;
Liquid wallpaper is pleasant to the touch
- absence of unpleasant odors during application;
- the ability to create applications, patterns, panels;
For a designer, liquid wallpaper is a real find
- convenience in finishing arches, corners, niches, door/window openings, etc.;
- waste-free, which cannot be said about classic roll wallpaper;
- effective hiding of small defects and microcracks;
- antistatic (wallpaper repels dust);
Figuring out how to apply liquid wallpaper to a wall is quite simple.
- absorption/release of excess moisture;
- long service life (the coating does not fade for 10 years);
- the ability to replace damaged fragments if necessary;
- no joints, seams, air bubbles.
Liquid wallpaper in a children's roomModern industry provides a variety of decorative materials that can satisfy the most sophisticated needs. One of the latest trends in room decoration is the use of different colors on the walls
Liquid wallpaper takes 48 hours to dry, some consider this a disadvantage. However, it also takes about the same time for rolled wallpaper to dry completely. As for use in wet areas, this issue still remains controversial. Although there are many examples of the use of such compositions in kitchens and bathrooms.
Liquid wallpaper in the bathroom
Also, there should be no deep flaws on the walls - they will be noticeable after the composition dries. The base must also match, otherwise it may show through the wallpaper. Finally, another disadvantage, and a serious one, is the cost of liquid wallpaper - it’s about 1,000 rubles. per package (enough to finish about 3 sq. m).
How to make it yourself
Stencils can be bought or ordered in a store. But if you don’t want to spend extra money or couldn’t find a template with the desired pattern on sale, then you’ll have to prepare the basis for decorative plaster with your own hands from materials you can find at home:
- Plastic plates (even old X-rays will do)
- Whatman paper or cardboard
- Silicone (both silicone sheets and special hot-melt adhesive are used)
- Scotch tape for painting (to create a pattern similar to brickwork)
The key characteristic when selecting a material is its density. However, if you do not have suitable materials at hand, it is possible, although not recommended, to use softer materials.
Made of plastic
To create a template, almost any plastic with a thickness of 0.2 millimeters is suitable, for example, the cover of a stationery folder. To transfer a drawing printed on paper onto a plastic base, place the image under the plastic and trace around the outline with a thin felt-tip pen. Then carefully cut and process the edges from irregularities and burrs.
Made from silicone
To make a silicone stencil, a sheet of thin paper is placed over the printed image and secured. The top layer is treated with vegetable oil to make the paper translucent. After this, silicone glue is applied along the translucent contours of the design. When the silicone stencil dries, it can be easily separated from the paper base.
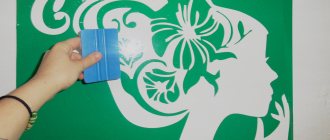
From paper
A paper stencil, as already mentioned, does not combine well with water, so you can only use such a template once. Because of this, this method will not be effective in cases where it is planned to create a pattern from a large number of identical elements. To create a paper stencil, whatman paper is best suited. Creating a stencil begins with placing a sheet of paper with a printed design on glass, and placing a sheet of Whatman paper on top of it. Then a lamp is placed under the glass. After this, the drawing is outlined and cut out.
Removing ballpoint pen marks
Before you start cleaning the wallpaper from ink, you need to pay attention to what material it is made of. It is better not to rub the paper canvas and try to wet it as little as possible
Effective methods:
- Melamine sponge. If you carefully rub the wallpaper, not a trace will remain of the pen. However, this product is only suitable for vinyl wallpaper that is resistant to abrasive materials.
- Temperature effect. If the stain is fresh, you can apply a clean sheet of paper to it and iron it with a hot iron without the steam mode turned on.
- Milk. The product should be warmed up slightly and then applied to the ink. Over time, the wallpaper will dry out and the stain will discolor.
- Hard-boiled chicken egg. It should be cut in half, remove the yolk, then apply the cut to the stain for 1-2 minutes.
- Redecorating. If it was not possible to remove traces of a ballpoint pen using any of the methods, you need to re-glue the entire canvas or make a small patch, replacing the dirty fragment with a clean one.
Tools you will need for work
Almost everyone has most of the tools that may be needed in their work in their home. However, the missing part will still have to be purchased. Fortunately, you only need the simplest tool, which is sold in any hardware store and is usually not very expensive. Tools you will need:
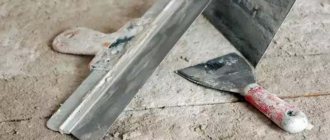
- A spatula, or preferably two different sizes.
- Roller.
- Palette knife.
- Office scalpel.
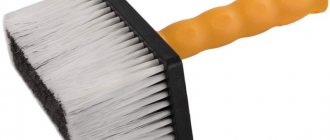
- Brush.
- Sandpaper.
- Any empty, clean container of sufficient volume.
- Marker or felt-tip pen.
- Stencils.
As already mentioned, stencils can either be bought, for example, in the same hardware store where the rest of the tools are, or you can make them yourself.
Design tips
In order for the intended relief decor to become an interesting design solution, and not a big disappointment, before starting work you need to take into account the recommendations of specialists:
- a bas-relief made in several colors harmonizes perfectly with plain walls - it cannot be combined with other figured patterns;
- the decor should be combined with the overall color scheme of the room, including furniture and curtains;
- stencil decoration should be done in one theme - do not combine, for example, oriental ornaments with images of nature;
- before applying a symbol, hieroglyph or inscription in a foreign language to the wall, first find out what they mean;
- large, complex patterns are suitable for a spacious room; for a small space it is better if a separate zone in light, calm colors is highlighted.
Anyone can create an original work in which all stages will be completed with their own hands - to do this, you need to stock up on the necessary materials and tools, choose a drawing, make a stencil and bring your project to life with high quality.
How to use a stencil for bas-relief. Step-by-step instruction
To obtain a bas-relief on a plane, you will need one or more stencils, a set of the required tools and consumables.
In addition, you should understand that creating a pattern using stencils for decorative plaster will require a lot of time and patience.
And in order to complete the job accurately and without mistakes the first time, it is recommended to study all the intricacies of the process before starting work.
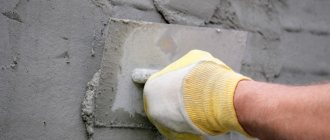
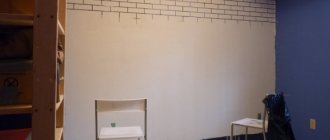
Preparing the base
Before starting work, you will need to level the area where the pattern will be applied. To do this, it is primed and puttied. However, if the area is already flat, then you can immediately proceed to marking - mark the landmarks and centers of the repeating parts.
Any dust or dirt should be removed from the wall so that it does not interfere with the application of the design.
Primer
The primer is used to cover all cavities and uneven areas that will appear under the pattern. After application, the wall must be allowed to dry.
When selecting a primer, it is recommended to pay attention to its compatibility with the ingredients included in the putty and plaster for walls.
Fixing the stencil
In order not to spoil the design, the stencil must be firmly attached to the surface. To do this, you can use masking tape to tape the template around the edges. This method is preferable, since in this case a minimum of traces will remain on the surface. However, if you don't have masking tape on hand, spray adhesive or double-sided adhesive tape will do.
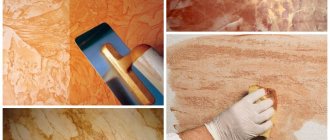
Applying a stencil layer
When choosing plaster for bas-relief, you should give preference to the one that contains fine sand. Such plaster, as a rule, is more flexible and penetrates better into small parts of the pattern. Also for these purposes it is worth taking a closer look at plasters with a gypsum base.
When preparing the plaster, it is worth achieving a viscous consistency, since otherwise the bas-relief may be deformed when the stencil is separated from it.
It is also worth paying attention to having time to use the entire solution before it begins to crystallize. Therefore, even if you plan to complete a large amount of work at a time, it is better to prepare the plaster in small portions, which will definitely be used up in a timely manner.
Removing the template
Once the plaster has set and crystallized, the template can be slowly and carefully removed. After removal, there will most likely be small “stretches” left on the bas-relief - protruding formations on the plaster. To prevent the ornament from looking sloppy, they must be sanded with sandpaper after the plaster has completely dried.
Note! After separating the stencil for decorative plaster from the bas-relief, it often turns out that the plaster did not get into some places of the pattern or did not get into it, but in insufficient quantities. Therefore, if such defects are nevertheless discovered, they must be corrected using a palette knife.
Formation of small parts
To make the pattern even more beautiful, you can add additional details to it. For example, on a bas-relief in the form of plants, veins will look beautiful, and cracks and small chips will give the “brick wall” a more appropriate image. If you need to add larger elements, it is recommended to use a palette knife.
Forming parts with a pastry syringe
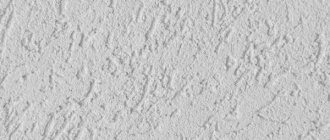
Create an invoice if necessary
Sometimes, to create a certain effect on a bas-relief, it is necessary to give its elements an original texture. Almost any means that you can always find at home will be suitable for this task: hard-bristled brushes, sponges, concrete stamps, etc. For example, to make the surface look like fish scales, you can use a regular kitchen spoon. It is worth noting that this stage of work, if necessary, is carried out before the mixture begins to dry.
Giving relief to the petals using a tablespoon
Idea 2. Painting checkered walls (+ master class)
As you know, check is the most versatile print that never goes out of style. It fits perfectly into both classic and modern interiors, both into the interior of the kitchen and children's bedroom. You can decorate one or more walls with a cage using wallpaper or painting.
Painting checkered walls with your own hands is somewhat more difficult than gluing checkered wallpaper, but painting gives a better result: the painted surface can be washed, repainted, and most importantly, it does not have seams that risk peeling off.
The easiest way is to paint walls in a large Vichy checkered pattern, as in this collection of photos.
Painting walls in Scottish tartan requires a little more effort, but still, it is accessible even to beginners - after all, the accuracy of the markings, rather than painting skills, is what is important here.
And now we suggest you familiarize yourself with the step-by-step instructions for painting walls with your own hands in tartan, as in the photo below.
What you will need: 4 paints of the same color, but in different tones (in this project we used light olive for the background, a slightly more saturated marsh shade for vertical and horizontal stripes, an even darker one for the intersections of stripes, as well as two paints of contrasting colors), brushes , roller, masking tape and laser level, stepladder and other basic painting supplies.
It is best to use blue masking tape for painting walls, which can be removed without leaving a trace, without damaging the wall covering, and is marked “for clean lines.”
Instructions:
Step 1: Prepare the wall for painting, then paint it with the background color using a roller. In this master class, the background is a light olive tone of paint. Allow the background layer to dry before moving on to the next step.
Step 2. Mark vertical stripes of equal width on the wall using a laser level and masking tape. Then paint them with a paint darker than the background and let dry.
To ensure that the lines are smooth and clear, and the paint does not flow under the masking tape, use a small brush to paint along the tape and a larger brush to paint the main body of the strip.
It is important to ensure that there is no excess paint on the brush. The movement of the brush should not be up and down along the tape, but left and right (across the tape)
Step 3. Now mark the horizontal stripes in the same way, paint over them and leave to dry.
Step 4. Paint the intersections of the stripes in an even more saturated shade to create the effect of layering threads of the same color in the checkered fabric (as if that made the cells darker than the stripes).
By the way, if you want to paint the walls in a Vichy checkered pattern, then at this stage the work can be considered completed.
Step 5. It's time to draw the contrasting thin stripes that are required for the tartan check.
To do this, again use the laser level and masking tape, mark a line along and in the center of the vertical stripes. Next, paint over them and let dry. Then use the same paint to draw lines along the horizontal thick stripes.
Step 6. Finally, we draw cells of a different contrasting color (in this master class it is blue). The technology is still the same, but the cell becomes larger, since the stripes are drawn along the lines of the first background layer.
Step 7. All that remains is to coat the painted wall(s) with matte varnish to enhance its moisture resistance and strength.
Options for beautiful designs for different rooms
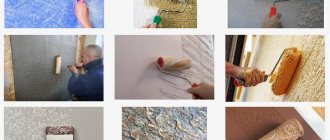
There are a huge number of both popular “classic” and more extravagant solutions for decorating rooms with bas-relief. Therefore, if you already have a clear idea of how and with what patterns you want to decorate the interior space of the room, you can draw them yourself or find them on the Internet. And in order to understand how and what combinations of patterns go together best, we bring to your attention a small selection of ready-made design solutions.
Tyutyunnikov Dmitry
Article verified by a decorative finishing specialist
Decorating a bedroom interior with liquid wallpaper
A bedroom is a room designed for relaxation and rest, so the atmosphere in the room should be appropriate.
How can liquid wallpaper be useful when decorating a relaxation room?
Hypoallergenic material that does not collect dust is ideal for the bedroom.
Liquid wallpaper is ideal for decorating a bedroom
It is also recommended to select the type of coating, taking into account the style of the room:
Baroque, Rococo, Empire, Renaissance, Antique. To decorate the interior in the listed styles, you will have to spend money: furniture, decor and textiles that recreate the historical style are quite expensive. But for the walls there is no need to use exclusive finishing materials - liquid wallpaper with additives (gold for empire style and baroque) or without them (for antique) will do the job perfectly.
The classic style is very flexible, thanks to this property it is possible to introduce something new, unconventional into the design. Liquid wallpaper will refresh a classic interior.
Liquid wallpaper in the bedroom in ethnic style
The determining factor in the color of the finishing material for the walls in the bedroom is the style used to decorate the room, however, there are several rules that are recommended to be taken into account:
purple walls in the bedroom are undesirable - they can create an uncomfortable environment and cause anxiety;
light shades are a good choice for those who cannot sleep for a long time.
When choosing a suitable color, it is important to take into account the preferences of both spouses; if a compromise cannot be found, you can combine shades. If you look at photographs of finished interiors in which liquid wallpaper is used, you will notice that the coating is similar to textiles - it seems that the walls are covered with silk fabric. This solution is perfect for the bedroom - it creates a cozy and calm environment
This solution is perfect for the bedroom - it creates a cozy and calm environment
If you look at photographs of finished interiors in which liquid wallpaper is used, you will notice that the coating is similar to textiles - it seems that the walls are covered with silk fabric. This solution is perfect for the bedroom - it creates a cozy and calm environment.
Liquid wallpaper will create a cozy atmosphere in the bedroom
If you choose wallpaper that contains sparkles, in the evening, with the lights on, the walls will look especially interesting and unusual.
To create an original interior, you can use a popular technique: cover three walls with material of the same color, and focus on the fourth by using liquid wallpaper of a different shade to decorate it. The main thing in this is to choose colors that will combine or create an effective contrast.
Combining liquid wallpaper in contrasting colors