Finishing work or repairs in premises is carried out to achieve certain results:
- elimination of defects that may arise during construction: cracks, irregularities, sinkholes, etc.;
- obtaining a horizontal ceiling and vertical walls;
- leveling the surface into a single plane;
- preparation for wallpapering or painting.
Modern methods provide two main methods of work:
- “wet”, with this method special solutions are prepared and applied to the surface to be treated. After hardening, the final appearance of the interior is formed;
- “dry”, most of the work is carried out without preparing wet solutions; they are needed only at the final stage to hide the joints between the facing panels.
There is no completely “dry” method. You will definitely need to work with mixtures of a certain humidity. The amount of work with mortars using the “dry” method is much less, which attracts many customers and contractors to use ready-made finishing panels.
With the “wet” method, walls and ceilings are monolithic structures, since when applying plaster solutions, they diffuse continuously into the base.
What tool is needed for puttying?
To putty the walls yourself, prepare a minimum set of tools. What tools can you not do without?
1. Drill equipped with a special attachment - a mixer. As a rule, putty is sold in the form of a dry mixture. Water is added to this mixture in a certain proportion. Only with a special mixer can you mix the putty mixture perfectly. The output should be a homogeneous putty without lumps.
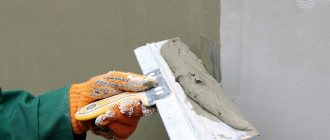
2. Set of spatulas . Be sure to choose a spatula of different sizes. In your work you will have to use both large spatulas (40-50 cm) and very small ones. After all, in problem, hard-to-reach places, it will not be possible to properly putty the wall with a large spatula. This is exactly what small spatulas are used for.
3. Rollers and brushes for priming walls . It is not advisable to skip the priming stage. After priming, the wall is covered with a thin film. This not only further increases its strength, but also ensures excellent adhesion of the treated wall to any facing materials (adhesion).
4. Rule . It will be needed in case of uneven walls when you have to apply putty in a thick layer. To level thick layers of putty, it is convenient to use a long metal rule.
5. Alcohol or laser level . Often the wall surface is very uneven. Before starting the initial puttying, test beacons are installed using an alcohol or laser level to check.
6. Sandpaper . If you want to get a beautiful surface that is pleasant to look at, use fine sandpaper for rubbing. For example, grouting with 240-grit sandpaper will allow you to get the perfect result. Use the finest sandpaper only when performing finishing putty. And at the stage of the initial initial putty, it is correct to rub the wall with coarse coarse sandpaper.
7. Manual skinner . Sanding will become much more convenient if you use a manual sander. This is a tool with special clamps on the handle for securing the skin.
8. And, of course, you can’t do without a container in which the putty is mixed.
List of tools that you may need when plastering walls. Photo — srbu.ru
Selecting the right spatula or set
When planning to buy a spatula, take into account several varieties - for facade work and painting spatulas. It is not difficult to distinguish them; the latter have a thinner blade thickness and greater elasticity. The first ones are distinguished by their larger width, since they carry out a large scope of work.
Pay attention to the handle. To purchase high-quality tools, make sure that the blade is made of high-quality material, otherwise the tool is disposable and cannot be used in the future. It will simply get damaged during the first task. Choose a spatula with a comfortable rubberized handle with a comfortable surface that is tightly attached to the working part. In this case, it is guaranteed that it is convenient when applying the mixture to the walls.
Types of spatulas
When purchasing painting spatulas, keep in mind that due to their flexibility, these tools are not durable. Intensive use will quickly make them unsuitable for subsequent work.
Spatulas are also available with different working blade widths. Options for performing main work are offered with a width of 40-60 cm, and “auxiliary” ones, used for working in hard-to-reach places, offer a width of 6 to 15 cm.
When planning to purchase spatulas, buy a set. It is useful in the current situation and in the future. An excellent choice is to purchase tools with widths of 50, 150, 400 and 600 mm. As for wide spatulas, they are purchased when they are convenient for the room where the work is taking place. For a small room to putty its walls, a spatula with a working surface width of 40 cm is sufficient.
If you do not install special corners in the corners of the room, then purchase a corner spatula. Only a specialist can work with it. This tool creates even 90-degree angles, but since this requires experience and skills, it is better to make the angle using perforated elements, which are then puttied.
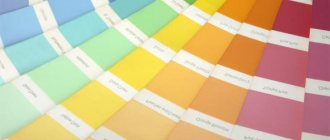
Which putty is better to putty on walls and how to choose it
Classification of putties by composition: gypsum, polymer (acrylic) and cement.
Let's consider their disadvantages and advantages.
1. Gypsum putties are attractive at an inexpensive price, are easy to level, and do not shrink. The only drawback is poor resistance to moisture. Only this limits the scope of their use.
2. Cement putties have excellent moisture resistance, but have a significant drawback - a high degree of shrinkage.
3. Polymer putties . Undoubted advantages: excellent moisture resistance, do not shrink at all. Using polymer putty, high quality treated wall surfaces are obtained. The only drawback is the high price.
According to their purpose, putties can be divided into starting (leveling), decorative (finishing) and universal.
1. Characteristics of leveling (starting) mixtures: high strength, excellent adhesion, large grain size. Recommended: for leveling walls after applying plaster. Application thickness: 3 -20 mm.
2. For high-quality decorative finishing, it is advisable to apply finishing putties to the surface to be treated. With their help, you can get a perfectly smooth, even surface, hiding small flaws. The strength of the finishing putty is less than the starting putty, its processing is not difficult. Apply in a small layer up to 4 mm.
3. Universal putties combine the properties of decorative and leveling mixtures. They cost more, although their properties are slightly inferior to finishing and starting coatings. We recommend using it when treating walls without large flaws.
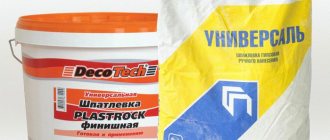
The modern market offers dry and ready-to-use putties. The low cost of dry putty and the possibility of its long-term storage are attractive.
Dry in bags and ready to use in a bucket of putty.
Ready-made putties are convenient to use. You don't have to use a mixer to prepare a homogeneous putty mixture. This saves time and virtually eliminates dust. But ready-made putties are much more expensive than dry ones.
Please note: ready-made putties shrink significantly. If a layer less than 2 mm thick is applied, ready-made putties cannot be used. They also do not boast a long shelf life. It is significantly less than dry construction mixtures.
Materials
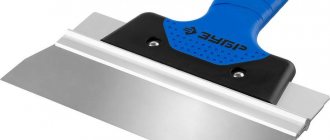
The most popular and convenient tool for puttying is one with a metal blade, removable (for example, from Storch) and stationary. With proper use and storage, spatulas from these companies can be used for several years.
This is what Storch spatulas look like
A plastic tool is more suitable for short-term use. They are inexpensive, but professionals rarely use them.
Small rubber spatulas are more suitable for sealing gypsum board joints, screw heads, and individual small flaws.
Glass instruments appeared on the market. They go through a period of adaptation to the construction market.
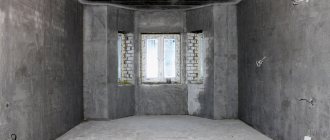
Preparing the wall surface for putty
The main thing is to make sure that the surface of the walls is absolutely clean. Be sure to remove stains of grease, paint or soot. Of course, there should be no falling layers of plaster, residues of scale, wax or parts of the formwork. Don’t even start puttingty on frozen ceilings and walls. This is strictly not recommended.
Before applying putty, coat the walls with a primer. This will ensure good adhesion (connection) of the putty solution to the walls. Prime the surface using a special roller. Try to apply the primer solution evenly, avoiding gaps. One layer is enough.
There are the following types of putty: finishing, lighthouse, starting. Let's look at the properties and scope of application in detail.
Starting surface putty
Putty is performed using coarse starting material. It's not difficult to find. When purchased, it is called “starting putty.” To remove large differences in walls, to hide grooves and holes, this putty is convenient to use. The thickness of a layer of such putty applied at a time can reach 1.5 cm. Allow the previous layers to dry completely. Only then proceed to applying the next layer of putty.
In order to obtain the highest possible quality of putty surfaces, a special painting mesh is installed on the wall, and the putty is distributed evenly over the entire surface. In this case, the walls are completely covered with putty.
The advantage of this technology is that when using a painting mesh, the putty fits perfectly onto the surface of the walls. And the surface itself becomes stronger and smoother. Moreover, the coarser the painting mesh, the smoother the treated wall surface.
Starting wall putty.
Trusted manufacturers
German is known to Russian consumers as a seller of repair products such as rollers, brushes, glue guns, paint containers and spatulas.
This entire tool has proven itself to be unpretentious and reliable among professional builders. Biber spatulas are produced for different types of work and are made of various materials - stainless steel, plastic and polyvinyl chloride, with wooden and plastic handles. The FIT-Tool company is an official dealer of the Canadian company, producing electric and hand tools for household and professional use. It has a large network of branches throughout Russia. One of the niches in hand tools for every day is occupied by painting and plastering and finishing models. The advantage of FIT spatulas is their affordable price, quality, ergonomics and variety of models and types.
Today the Russian market is developing dynamically. It specializes in the production and sale of hand-held construction tools. The company is constantly increasing the output of finished products and assortment, and regularly modernizes production. High-quality raw materials are used in the manufacture of spatulas. The combination of price and quality makes them affordable for consumers and makes them in demand for professionals.
A participant in the global market for quality goods is the well-known Russian one. The company regularly increases its range and improves its finished products. It has its own testing laboratory where, before reaching consumers' shelves, products undergo multiple tests. Spatulas from this company are presented in two-component and plastic variations. A quality service created specifically for this purpose is responsible for their quality.
This is not the entire list of manufacturers of quality spatulas in the middle and budget price categories.
Lighthouse wall putty
The materials are no different from the starting putty. The only difference is that beacons are used. A lighthouse is a wooden, plaster or metal strip that is set strictly vertically, checking the verticality with a level. The beacons are attached to the walls using some kind of gypsum mixture; it dries quickly, after which you can proceed directly to puttying.
The same applies to alignment along horizontal lines. In this case, a rule will come in handy for leveling the putty layer. By following these recommendations, after starting work, a flat surface is obtained. To ensure the quality of the work, you can check it with a level. This type of finishing is used quite rarely. Reason: its cost is significantly higher than the starting putty, although visually they are almost the same.
Puttying walls along beacons. Photo — vipconstruction.kiev.ua
Final wall putty
After completing the starting or lighthouse putty, proceed to the finishing putty. It is done with finishing putty mixtures. It is this putty that gives the wall surfaces perfect smoothness. The smallest cracks or pores are eliminated. It is important that the finishing putty completely coincides in plane with the previously prepared surface, so it must be applied in a very small layer.
If the starting or final putty is done poorly, you will not be able to correct the situation with the finishing putty. Therefore, first try to make the surfaces of the walls perfectly smooth. Only then proceed with the finishing putty. Its main goal is a beautiful smooth wall surface.
The finishing putty is carried out under special lighting, this allows you to see the smallest irregularities. Photo — vipconstruction.kiev.ua
Main stages
The methods of applying putty depend on its type - starting, finishing, lighthouse. When working with starting putty, you will need to stretch a construction mesh onto the wall. This will allow you to apply the mixture in a thin layer. The walls must be covered completely, evenly distributing the material over the surface. This will help achieve perfect smoothness. Experienced craftsmen give this advice: ideal evenness can be achieved only with the help of a coarse mesh.
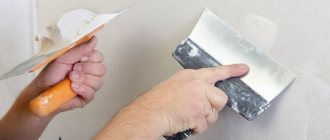
Two spatulas are often used in work Source remontdoma24.ru
Puttying cracks in walls
To hide cracks in the walls, we recommend using gypsum mixtures for putty. The material santegypsum is much more elastic in work, but hardens much longer. Advice from competent specialists: at first it is recommended to slightly widen the crack, slightly increase its depth and thickness. To increase the roughness, you can scratch it with a knife or other sharp object along its entire length. Then carefully treat it with a primer. Only after this should you begin to putty.
Repairing cracks for putty.
FAQ
1 Can Polyfilla finishing putty be used on a ceiling?
Yes, Polyfilla self-leveling finishing putty can be used on ceilings. We recommend using the Polyfilla tool set for these purposes.
Available in online stores
alt="Quick-drying putty" width="" height="" />Quick-drying putty Polyfilla Difficulty two stars alt="Set of tools for wall putty" width="" height="" />Set of tools for finishing putty Polyfilla Difficulty three stars alt=”Ultra-light putty for interior and exterior work” width=”” height=”” />Ultra-light putty Polyfilla for interior and exterior work Difficulty two stars View all products
Still have questions?
Find your nearest store
Polyfilla products are available in most hardware stores throughout Russia. We advise you to find your nearest store before purchasing and check the availability of the product you are interested in.
AkzoNobel uses cookies to enable this website to function properly, to tailor content on social media and to collect anonymous user statistics through Google Analytics to improve the usability of our website. We process personal data in accordance with the EU General Data Processing Regulation (GDPR). More information is available in the Privacy Statement.
Please indicate whether this website may use functional, analytical, tracking and/or advertising cookies.
- Functional cookies
These files are necessary for the website to function properly.
Using these files, we can analyze the use of the website in order to evaluate and improve its performance.
These cookies are used to tailor the display of advertising to your interests, both on AkzoNobel and other websites.
How to apply putty on walls
1. If you use dry putty, you need to properly prepare the putty mixture.
Cooking sequence:
- pour a small amount of water into the container;
- add putty;
- mix with a simple spatula;
- To obtain a homogeneous mixture, use a drill with a mixer, gradually adding water if necessary.
Please note: the readiness of the putty should be determined by consistency. It should become elastic and stick slightly to the spatula. If the putty mixture flows, it means it is runny. Add dry mixture little by little to correct the situation. If there are clumps in the putty, it means the putty is too dry. Add water little by little, stirring thoroughly to achieve perfect homogeneity.
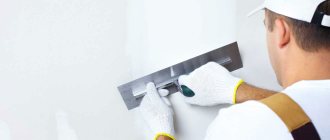
2. Apply starting putty. It is convenient to use a large spatula. Apply the putty in medium portions, spreading evenly over the surface. Hold the spatula at an angle of about 30 degrees. The putty is applied diagonally in one motion. Recommendation: to avoid transitions and bumps, each subsequent layer should be applied overlapping.
Attention: when making the starting layer, mix the putty in small portions. This will avoid the appearance of dried-out dry particles, which will reduce the quality of work. Don't be too alarmed by unsightly stripes from the spatula. The stripes are perfectly hidden with finishing putty.
3. To process smooth corners, we recommend using a corner spatula. Working technology: first, using a small spatula, apply a small layer of putty along the entire height of the corner or slope. Then carefully level the surface with an angle spatula. The putty layer should dry well within 24 hours.
To putty corners you will need a special corner spatula.
4. Once the starting putty has completely dried, proceed to the finishing putty. A large and a small spatula are used for work. Using a small spatula, apply putty in small portions onto a large spatula. Then apply the putty mixture evenly to the surface. The layer thickness is about 1.5 - 2 mm.
5. Before you putty on a wall for painting or wallpaper, wait until the previous layers have completely dried. The starting and first layers of finishing putty must be completely dry. This approximately takes about 12 hours. Then you can apply the finishing putty.
6. Once completely dry, proceed to final sanding with sandpaper.
Attention: before applying each next layer of putty, it is advisable to treat the previous one with a primer.
Workflow Description
We will consider the manual method of carrying out the work. This option is best suited for novice craftsmen, since it is difficult to ruin the finish when working by hand. Another advantage of this method is the ideal result, which cannot be achieved when using a power tool.
Power tools require certain handling skills
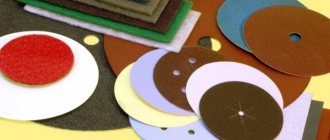
Stage 1 - collecting the necessary tools and materials
Sanding the walls after puttying is done using a standard set of devices. All of them are sold in construction stores and cost little, which makes the sanding process even more affordable.
For work we will use the following:
The sanding block (also called a manual skinner) can be made in two versions. The first option is a classic design with a handle and metal clamps, the second is in the form of a bar with grooves for fingers in the upper part and semi-automatic clamps. Width varies from 85 to 105 mm, length from 165 to 230 mm, price ranges from 170 to 300 rubles;
This is what the simplest device looks like
A more modern version with semi-automatic abrasive clamping
To accurately mark the corners, a special abrasive sponge with a beveled end is used. Use options with a grain size of no more than P120. The cost is about 80 rubles;
This sponge makes it easy to work on corners.
- Sandpaper or abrasive mesh. I will discuss all aspects of grit selection in detail below;
- Spotlight or carrying lamp. Necessary not only for general lighting, but also for control of the work process;
The lamp must be mobile
- A stepladder or table from which you will reach all the surfaces to be leveled;
- A putty spatula, it will be used to cut off all the sagging mortar to make sanding easier;
- Sanding putty is a very dusty process. For work, be sure to stock up on a respirator, safety glasses and a cap. It’s better to wear a special protective overall so as not to spoil all your clothes.
These two elements are required, the rest are optional
Now let's figure out what kind of sandpaper to sand the putty for painting. The technology involves the use of several abrasive options. All necessary information is presented in the table.
| Type of work | Materials used |
| Sanding the rough layer | For work, it is best to use sandpaper or mesh with a grit of P100-P120. Don't listen to those who advise something rougher, you'll just ruin the finish |
| Initial sanding of the finishing layer | Personally, I use the P150 option, it is almost scratch-free and quickly removes noticeable irregularities. If the surface has many flaws, then try P120; if the surface is not very scratched, then use it |
| Final sanding | What kind of sandpaper should I use to sand the finishing putty to perfect condition? The roughest option is P220, try it, if there are small scratches on the surface, then take P240 or even P280. That is, you need to try a couple of options on the spot to choose the best one |
The abrasive mesh is produced in pieces for a specific grater size
Sandpaper is sold by the meter, you simply tear off a piece of the desired size before use.
Finally, let’s look at another common question: which is better – mesh or sandpaper? The good thing about the mesh is that it becomes much less clogged with dust during operation and therefore lasts longer. And the good thing about paper is that it is sold everywhere and costs noticeably less than mesh.
Stage 2 – primary surface grinding
When preparing walls and ceilings for painting, they are puttied at least twice, and between these stages it is advisable to sand the surface.
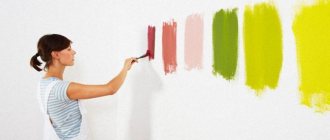
How to putty walls for painting and wallpaper
The walls are first leveled using several layers of putty. If the wallpaper is thick, it is advisable to apply putty in two layers. When using thin wallpaper, we recommend applying three leveling layers of putty. This will allow you to paste the wallpaper on a flat surface without wrinkles or bubbles.
Video. Puttying walls under wallpaper
Painting walls requires more careful preparation. The paint does not hide even the slightest unevenness. Therefore, to level the walls, it is necessary to use finishing putty.
The puttying procedure is carried out in five stages:
- apply the first thin layer of leveling putty with a spatula;
- for large unevenness, use another 2-3 layers;
- allow the putty to dry;
- perform finishing putty to eliminate minor defects;
- After complete drying, rub the wall with sandpaper to obtain a perfectly smooth surface.