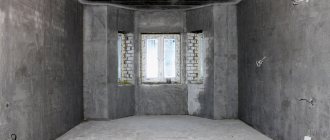
The quality of finishing work directly depends on the preparation of the wall surface. This process can be roughly divided into three working stages:
- rough leveling with plaster;
- thin coating with putty;
- sanding or polishing.
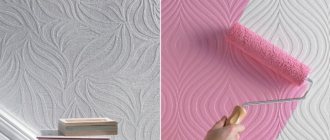
If rough leveling is enough for laying tiles, and putty and primer are enough for wallpapering, then for high-quality painting the surface of the walls must be perfectly prepared.
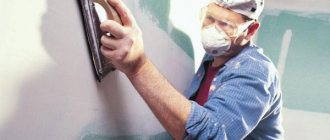
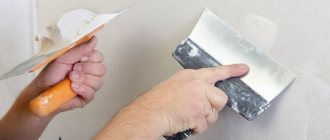
It is possible to achieve an absolutely flat plane and remove the most minor defects only by grinding. Lumps, scratches, roughness and unevenness are formed on the putty as a result of movements of the sharp edges of the spatula and at the junction of adjacent treated areas.
Why sand the walls?
Not all walls need to be sanded. For example, walls prepared for thick wallpaper, tiles, and panels do not need to be sanded. Of course, there is no prohibition here, but there is no point either. If the wall is covered with thin wallpaper or painted, small irregularities will appear. Other wallpapers hide imperfections, such as liquid ones.
There are masters who plaster well, the surface becomes smooth, without flaws, especially after applying putty. Even they have scratches and small transitions that are visible, for example, after painting.
Nuances of work
To grind a concrete surface using an angle grinder, not ordinary wheels are used, but so-called diamond bowls of various designs. Besides:
- Before sanding, the floor is treated with special strengthening compounds. These substances, entering into a chemical reaction with calcium derivatives in the concrete, create a durable film that closes the pores of the coating and gives the material high resistance to moisture penetration.
- Processing a concrete floor with a grinder with diamond bowls is carried out in stages, starting from the corner of the site, gradually moving throughout the room.
- When grinding, you need to check the evenness of the process with a level or large ruler.
By using bowls with different grits you can achieve exceptional smoothness. This may be the final stage of work. But to achieve greater gloss, the floors are polished with the same UGM with special attachments. To preserve the polish for a long period of time, the concrete is cleaned of dust and painted with several layers of polyurethane varnish using any painting tool. When varnishing or painting, it is important to dry each layer before applying the next.
Sanding is a great option to turn an unattractive concrete subfloor into a real work of art. When grinding, you should handle the grinder very carefully and carefully, especially if the procedure is performed by a master for the first time. Today we’ll talk about how to grind with a grinder using various methods.
Dry method
This method is preferred in most cases when grinding a concrete floor, since it is simpler and produces significantly less dust, making it much easier to regulate the level of coating treatment during the work. The maximum depth of the removed layer reaches 0.2 cm. In contrast, during the wet method there is a significant likelihood of scratching the surface, but grinding is much faster.
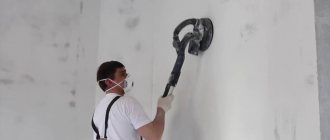
During dry grinding, a fairly significant amount of cement dust is also formed, which rises into the air, but also settles quite quickly, allowing you to fully evaluate the result and, if necessary, eliminate the remaining flaws. In view of this, it is imperative to use protective equipment (respirator and goggles) and it is advisable to use a vacuum cleaner.
Wet method
During its use, nozzles with different levels of abrasiveness are used. At first, softer elements are used with gradual increase. Due to the large number of required attachments, this method requires significant costs, unlike the dry method.
The permissible thickness of the layer to be removed reaches 0.5 cm, which is why during the initial treatment, 3-5 days after pouring the screed, a significant amount of wet dust rises into the air. Grinding in this way is much more difficult due to dirty splashes, which increases the time of work.
To eliminate them, you need to resort to using a water pump, through which it is still not always possible to fully control the resulting inaccuracies and shortcomings. This method is optimal when processing a concrete floor with mineral chips or mosaics, as well as before laying tiles on it.
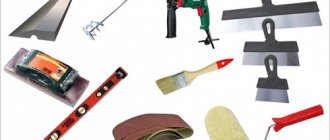
Necessary tools, materials
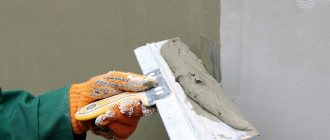
Sanding after puttying is done with abrasive materials:
- sandpaper;
- abrasive stones;
- diamond mesh.
Grinding is done manually with a block or grater. Sandpaper and mesh are attached to the sole. The work can be automated with a grinding machine. Particularly difficult areas are in the corners, a device will help.
Abrasive material
Required:
- plastic corner;
- stationery knife;
- Double-sided tape;
- sandpaper of different grits.
The corner can be taken from the leftovers after installing a plastic window, or bought in a store. You can use flexible thin plastic about 5 cm wide. The corner is cut in half, resulting in two plates. The plates are cut into pieces of 20 cm. One surface of each piece is cleaned of dirt and degreased. Double-sided tape is glued along the entire length. Softness doesn't matter.
Sandpaper is cut to size. The protective layer of tape glued to the workpiece is removed and sandpaper is glued on. The result was a flexible tape with sandpaper. However, it is inconvenient to work with tape; one edge of the segment is cut in the form of an angle. A cut corner is good for sanding plaster in hard-to-reach places. As it is erased, the paper is cut off and continued to be used fresh.
It is convenient to use two sandpapers of different grain sizes on one plate: for rough grouting, fine. Fine-grained erases faster; the length should be twice as long as coarse-grained.
Manufacturing:
Is it possible to putty plywood under wallpaper?
Putty for plywood can protect the material from corrosion, give it an aesthetic appearance and prepare it for further processing with paints and varnishes. Therefore, to the question - is it possible to putty plywood, there is a clear answer: it is possible. The main thing is to choose the right composition, designed specifically for application to various types of plywood sheets.
Types of plywood
Although plywood needs to be puttied, not all types of this material are designed for applying a putty mixture to them. When planning finishing work, indicators such as hygroscopicity, mechanical strength, and degree of elasticity should be taken into account. To provide information about the properties of plywood, manufacturers mark their products with the following markings:
- Domestic construction stores sell plywood sheets with an area of 1525x1525 mm, 1220x2440 mm, 2440x1220 mm, 1250x2500 mm, 2500x1250 mm, 1500x3000 mm, 3000x1500 mm, 1525x3050 mm and 3050x1525 mm . Their thickness can reach from 3 to 30 mm;
- plywood is made from wood veneer; it is glued together perpendicularly in the direction of the fibers;
- in the documents for the material you can see the following abbreviations: FBA, FSF, FSF-TV, FC, FB, BS and BV. Of these, only FSF, FSF-TV, FK, FB and BS, which have increased moisture resistance, are subject to puttying;
- surface lamination is another important indicator; For further processing with putty, you should choose only non-laminated plywood, otherwise the layer of material will not have adhesion to the surface.
Plywood is an inexpensive and easy-to-use material, but due to its characteristics it requires mandatory treatment with primer and putty before wallpapering.
Plywood, which has hygroscopic properties, is not intended for further processing with primer or putty mixtures, otherwise the base may be significantly deformed or completely destroyed.
The better to skin
There are not many materials for sanding walls; available ones are used. Sanding the walls is carried out in at least two stages:
- rough, rough grout;
- final sanding.
At the first stage, you can use any material, use it manually or automatically. If defects appear during grouting, they are eliminated with additional putty. When finishing grouting, it is better to use a hand trowel.
If a sandpaper is installed on the grinder, plaster accumulates in the central part of the circle, where the fastening nut is. As it accumulates, it compacts and acts as a polishing material. There are shiny spots on the surface that will stand out when painted.