- What you will need
- Wet screed What is needed for this
- What is needed for this
- For wooden floor
The attractiveness, durability and practicality of floors depend on how well the base has been prepared. Even the smallest irregularities and flaws will affect the performance parameters of tiles, parquet or linoleum in the apartment. Therefore, first you need to eliminate all the shortcomings - height discrepancies, potholes, cracks, roughness.
Let's look at how to level floors in an apartment, what secrets exist and how to do everything correctly. And how costly this work can be.
Is it acceptable to use gypsum plaster for the floor?
The basis of a durable floor is a screed - an intermediate layer between the floor slab and the finishing coating of tiles, laminate, parquet, linoleum or other material.
It is performed with the aim of leveling the surface, giving it rigidity or a certain slope, improving thermal insulation and sound insulation. The choice and service life of the finishing coating depends on the quality of the screed. Today, some craftsmen practice leveling the floor with gypsum plaster. But if you want to independently prepare the surface for laying flooring, you need to weigh the pros and cons of using this material. Is screeding a floor with plaster always a profitable and rational solution, or is it better to give preference to other materials?
Types of screeds
There are two ways to level the floor surface:
- Wet screeds - cement-sand mortars, self-leveling floors or levelers and gypsum plasters. To create a layer up to 35 mm thick, it is necessary to install beacons.
- Dry or prefabricated - using chipboard, plasterboard or thick plywood. They are laid on a dry layer of fine expanded clay or wooden logs.
The choice of screed type depends on the floor material, the number of storeys in the building, the condition of the floor, the purpose and location of the premises.
Gypsum plaster for floors: features and disadvantages
Based on the main binding component, dry mixtures are divided into cement and gypsum or anhydrite. Cement mortars are universal; they can be used in any premises and for outdoor work. Self-leveling floors are easy to use, easy to apply and have an affordable price. Leveling with gypsum plaster is only suitable for dry rooms.
Gypsum-based mixtures are environmentally friendly, more plastic and harden faster than cement ones, but have the following disadvantages:
- absorb moisture - cannot be used in damp areas;
- their strength is much less than that of cement-based compositions;
- over a large area can cause significant shrinkage;
- when exposed to heavy loads, they crack and crumble;
- generate dust during operation.
How to make the right choice?
Can you be 100% sure that your upstairs neighbors won’t flood you, a pipe won’t burst in your house or apartment, a radiator won’t leak, or a child won’t turn over a bucket of water on the floor while cleaning? Surely all the answers will be negative! This means that leveling the floor with gypsum plaster is not an acceptable option for you.
To create a strong and durable screed 2 - 3 centimeters thick, we recommend using a traditional cement-sand mortar. And to eliminate small level differences and unevenness, self-leveling self-leveling floors are perfect. Gypsum plaster for the floor is not the best solution, but it is great for finishing walls and ceilings! Its use makes it possible to mask all unevenness and create perfectly smooth and even surfaces.
Gypsum plaster for ceilings and walls absorbs excess moisture, and releases it when the temperature rises, thereby maintaining a favorable microclimate in the premises. Don't forget about the advantages of this material when you make repairs!
Added: 01/21/2019 16:39:00
Construction portal No. 1
11/13/2018 admin Comments No comments
The concept of “finishing work” includes a list of related operations from painting walls to laying tiles. All of them are carried out only on a carefully leveled wall surface.
Modern methods of leveling walls are divided into two groups. Depending on the technology and materials, a distinction is made between dry (using plasterboard structures) and wet (correction of the surface with a building mixture) methods, each of which has its own characteristics. In order to choose the most suitable method, it is necessary to measure the unevenness with a laser level, a plumb line or a regular level. Potholes and depressions ranging within five millimeters can also be eliminated using putty. Irregularities of about 3-5 centimeters? Then you should purchase a building mixture. Differences of more than 5 centimeters are best leveled using drywall.
Content:
How to level walls with plaster?
Immediately before leveling the walls, it is necessary to carry out a number of preparatory work:
evaluate the surface that needs to be plastered.
The wall should not crumble or delaminate. Often, when working on old plaster, after the first layer has completely dried, defects are discovered that were previously invisible.
The key to success is compliance with three conditions:
- thorough surface preparation;
- correct choice of building mixture;
- presence of accurate beacons.
To level the brickwork, it is recommended to use a cement mixture. The cost of this plaster mixture is relatively low. It is possible to apply a fairly thick layer of material, which is important when finishing brick walls. It should be noted that when applying a layer of more than 2 centimeters, it is necessary to use a plaster mesh to reinforce the composition.
To plaster a smooth concrete wall, you will need gypsum-based wall leveling mixtures. Quartz microparticles included in the material make the wall a little rough. But first, be sure to prime the surface. Reinforcement is performed with a polymer mesh with a cell size of 5×5 mm.
Many people are interested in what mortar to use to level concrete walls. To plaster concrete with a rough surface, gypsum or cement compositions are used. A primer is also required, but without adding quartz.
When processing foam concrete surfaces, predominantly gypsum mixtures are used. Preliminary deep penetration primer is required.
Tongue-and-groove slabs, which are used for the construction of partitions, should be plastered with a gypsum mixture over a regular primer.
The next step after assessing the surface and preparing it for applying the plaster mixture will be the location of the beacons.
Installation of beacons
In construction, beacons are usually called a kind of guides for controlling the leveling of a surface using liquid mixtures. As beacons for plaster, a perforated profile is used, the width of which depends on the volume of the mixture applied. For beginners, it is better to use purchased beacons, the beauty of which is that they do not need to be removed after work and to mask the recesses left after removal.
Beacons are installed on vertical strips of quick-hardening mortar or mixture that will be used for plastering. The distance between the beacons is determined taking into account the size of the rule (it should rest on the edges of two beacons and not slide off).
Plaster application technology
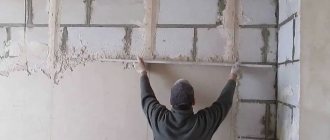
In the gap between the beacons, with a trowel and the “falcon”, a “target” is thrown - an excess amount of the mixture. A falcon is a tool with a handle that vaguely resembles a trowel, but with a base size significantly larger than the base of the trowel. Specialists use a trowel to scoop up the mixture from the “falcon” and dump it between the lighthouses. The use of this tool can significantly increase labor productivity, because there is no need to return to the container with the solution every time. This means that the time spent on leveling is also reduced.
Then, as a rule, the solution is evenly distributed from bottom to top. In order to immediately apply a thicker layer of plaster, make a rough outline without leveling it. After the rough layer has dried, they begin to apply the finishing mark. The finishing mark is also leveled using the rule.
How to level walls with putty?
The surface is also primed before leveling with putty. Puttying the surface with your own hands is not a difficult task. It should be taken into account that this method is not always suitable, since it is possible to level the walls for painting with putty only with small differences in “heights”. In other cases, putty will be the final stage of a multi-step process.
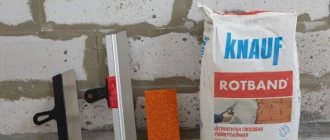
To carry out puttying, you will need wide and narrow spatulas, as well as a cuvette with a flat bottom. The consistency of the mixture should be such that the cone formed by stirring with a stick retains its shape. Over time, the putty thickens, so it should be periodically diluted with water or primer. The mixture of the required consistency holds well in a vertical position without slipping off the spatula.
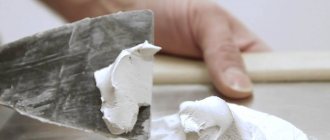
Properly prepared putty is placed in a cuvette and covered so that it does not dry out. A small amount of the mixture is applied to the wall surface using a spatula in strokes. Next, using measured horizontal and vertical movements, level the applied putty to a thickness of one or two millimeters, holding the spatula at an angle. It should be noted that the greater the angle of inclination of the spatula to the surface, the smaller the thickness of the mixture layer remaining on the surface will be. For convenience, the spatula blade is fixed with the other hand.
After the mixture “sets,” it must be lightly washed using a primer. This is done in order to remove sagging and various irregularities. The first layer, after complete drying (at least 24 hours after washing), is treated with sandpaper to smooth out roughness. If necessary, you can apply a second layer, but before that you need to prime the previously putty surface. Applying a second coat without primer may result in cracking as moisture is absorbed into the previously applied filler. After a day, the surface is sanded again with sandpaper wound on a board or small block.
How to level walls with rotband?
Rotband starting putty is a gypsum mixture manufactured by Knauf, a well-known brand in the construction industry. Used for interior work. Sometimes Rotband putty is called plaster. This mixture should not be used for finishing facades, since Rotband contains gypsum, which is susceptible to the harmful effects of the environment. The characteristics of this material far exceed those of conventional putty. It is much more flexible and dries more slowly, so it is extremely convenient to use. These benefits make leveling to a final finish with Rotband much faster. The work is carried out in several stages, as with the use of conventional putty, but both the starting and finishing finishing are carried out with one mixture.
It is better to mix the putty using a construction mixer. This way it will turn out without dry lumps. When leveling significant unevenness, a special putty mesh is used. The application technique with beacons can also be performed with a rotband.
Frame method of leveling walls with plasterboard
How can you level walls with large potholes? Drywall is suitable for these purposes. Correcting unevenness with plasterboard is the most effective and low-budget option of all. It is carried out using frame or frameless methods.
When installing using the frame method, a frame is first created, onto which sheets of drywall are attached. The frame is constructed from timber or metal profiles of two types - guide and rack. A frame made of timber is not so durable (subject to the influence of microorganisms, moisture, and prone to deformation). It is also much more difficult to install. Therefore, builders often use a metal profile as a base.
First you need to build a frame. To do this, you need to screw the guide profiles parallel to each other to the ceiling. Then, every 40-60 cm, we install guides taking into account the width of the drywall sheet (120 cm). At this stage, if necessary, the walls are insulated with mineral wool or polystyrene foam.
After assembling the frame, they begin to fasten the plasterboard sheets to the metal profile. This is done using self-tapping screws made of oxidized metal. Installation of plasterboard sheets is carried out in increments of 40-60 cm (depending on the distance between the guide profiles). The screw head is slightly “hidden” in the sheet.
The frameless method is slightly different. In this case, the sheets are glued directly to the surface that needs finishing. A significant drawback of the frameless method is that it is not possible to level walls with serious defects using this method.
There are other ways to level walls with your own hands. For example, plywood or plastic panels. The technology is similar to leveling with plasterboard, but instead of profiles, wooden blocks are used to fasten plywood or plastic panels. This method is quite economical, so it is used in finishing country houses, garages, bathrooms, etc. It also allows you to hide communications.
To make your walls smooth, carefully assess their condition and determine which method will be most appropriate. Smooth walls are the first step towards finishing materials that will truly decorate your interior.
Where is Rotband used?
According to the technical documentation of the KNAUF company, namely, it is the manufacturer of Rotband in Russia, this plaster mixture can be used:
- Without a protective layer, only for interior work, in rooms with normal humidity;
- When protecting the plaster layer with tiles or other water-repellent material, in bathrooms and kitchens.
Simply put, if you decide to level and paint the wall, then you can use Rotband only in dry areas of the apartment. If you decide to level the wall and cover it with ceramic tiles or plastic, you can use Rotband everywhere.
Thanks to the polymers included in this mixture, it can be applied to the following surfaces of the walls and ceiling of the apartment:
- Concrete;
- Brick;
- Pre-plastered with cement mortar;
- DSP boards;
- Expanded polystyrene (!).
According to Rotband practice, plaster is applied to any durable surface coated with a primer such as concrete contact, including:
- On plasterboard for local leveling of differences in plasterboard surfaces;
- On ceramic tiles;
- On OSB, chipboard boards.
Rotband is NOT used for leveling floors. Can be used to seal cracks and holes in the floor for subsequent installation of screed or self-leveling floor.
Microcement and microconcrete - what is it, what is the difference
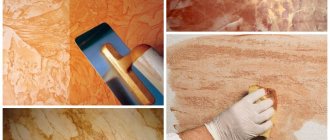
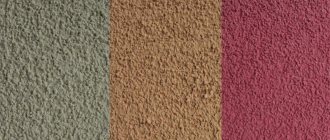
Microcement is a cement decorative plaster, which contains ultra-fine cement, resins and special plasticizers. Visually reminiscent of concrete, but with a finer and more attractive texture to the eye. The finished surface is durable; varnish is applied to protect the finish from moisture. Microconcrete is a combination of microcement and quartz sand. The texture of the finished coating is larger; in appearance, the coating resembles concrete even more. Professionals will use micro-concrete to create the “base”, and micro-cement for further finishing of the coating. In this case, microcement is rubbed into the main layer of microconcrete and enhances the texture.
In most cases, the terms “microconcrete” and “microcement” mean the same type of finishing material, namely decorative plaster.
Microcement or microconcrete - two different names for the same material
Due to its high strength and wear-resistant characteristics, the material is classified as premium.
Manufacturers supply dry compositions of white color. To give the desired shade, colors are added to the composition.
Features of the composition require knowledge and experience in applying the mixture. The success and quality of the finishing layer depends on your work skills.
Where to start leveling?
Preparing the walls
Leveling walls with a rotband invariably begins with their preparation. To do this, it is necessary to remove all previous finishing from the walls. Rip off the wallpaper, wash away the paint, chip off the old plaster, and also remove all the old nails and screws. It is better to cut off the protruding mounds, otherwise you will have to use a large amount of plaster and this will significantly complicate the work. Then you need to sweep away all the dust from the wall. This kind of work is quite labor-intensive and not always safe, so I advise you to be extremely careful and attentive. This is especially true when using tools such as a hammer, chisel, or spatula. It is also better to use a respirator and a hat.
Leveling floors under laminate
How can I level a concrete floor under a laminate? In this case, it is best to resort to grinding the base surface. This method is the most inexpensive and simplest. Processing with a grinding machine can only be done if the difference in height is no more than 5 millimeters. After sanding, the surface is cleaned with a vacuum cleaner and primed.
How can you level a laminate floor if the differences in height are large? It is best to resort to using a cement-sand screed. It is poured onto the previous screed or directly onto the ceiling. When using this leveling method, it is necessary to clean the base surface and lay a waterproofing layer. A reinforcing mesh can be installed on top. Also, when using a cement-sand screed, beacons are placed, which are fixed using alabaster mortars.
Is it possible to level the floor with underlayment? It is believed that a substrate can be used if the difference in height is no more than 7-8 millimeters. This leveling method is also used in cases where the laminate is laid on top of linoleum.
Important! It is customary to lay the substrate perpendicular to the laminated panels. This way you can best compensate for unevenness of the base surface and achieve high sound insulation rates in the room.
As a substrate you can use:
Scheme of laying the substrate under the laminate
- Foamed polyethylene. This material is often used because it is inexpensive and has high thermal insulation properties.
- Polystyrene. This substrate consists of two layers. The first is polystyrene itself, and the second is aluminum foil. The substrate must be laid so that the foil is on top.
- Cork materials. They are available in rolls. When using cork substrates, you must resort to additional application of moisture-resistant materials. For example, you can use rubber, bitumen mastic or ordinary polyethylene.
Is it possible to level the floor with tile adhesive? In construction practice, adhesive compositions are widely used, as they are inexpensive and easy to apply. In addition, tile adhesive can be used to repair cracks on the base surface. Remember that you can use adhesives only if the differences are insignificant. The material must be applied on top of the concrete screed.
Using tile adhesive you can eliminate cracks on the base surface
Why is this necessary?
Leveling the concrete floor under linoleum must be done. Linoleum is a universal material with a porous rubber structure reinforced with a backing. If you lay it on an unprepared surface with differences in the level of the base, bumps and depressions, then very soon it will simply tear in places of deformation, unable to withstand the force.
Linoleum does not react well to changes, even if we are talking about smooth unevenness, it will still be deformed due to poor fit. And sharp irregularities can immediately tear a material that cannot withstand tensile loads concentrated at one point.
Two main advantages of Rotband
The first advantage is a thick layer at a time. Rotband plaster can be applied to the surface in a thick layer of up to 50 mm without the spraying stage. That is, if you need to level the wall by 4-5 cm, place beacons on the wall and plaster it with Rotband mixture in one pass.
The second advantage is that no puttying is required. With high-quality mixing and repeated tightening, you will usually get a smooth wall, which, after covering and simple grinding, does not need to be puttied.
Note: The gypsum mixture can be applied in several layers, waiting for the previous layer to dry completely. This allows you to level walls (ceilings) with unevenness of more than 50 mm.
First steps. Slab countertops
Sano published a blog entry in Furniture made from slabs, solids, and various differences, October 6, 2022, blog entry
The first attempts to make something from the brought slabs. Although there may be some attempts, the material costs money and the right to make mistakes is as much as there is money in your pocket. Train at your own expense, as they say.
Therefore, each board is carefully inspected and tried on; the proverb about measure seven times is in action.
The work itself is not tricky, creative, there are several boards and they need to be selected so that they look beautiful and there is no overspending. All sizing and trimming is done with the minimum possible removal of material, simply sawed off a little here, cut a little there with a chisel.
Leveling the surface at the same time as installing the tiles
In this case, laying the finishing floor covering is carried out together with leveling the base.
- Surface preparation.
- The level marks the lowest and highest points on the concrete floor. In a small room (toilet, bathroom), the building level and rule are used.
- The tile material is laid out so that the entire tile lies near the free wall and entrance.
- The laying must begin from the maximum mark, and the direction is set by a stretched cord.
- Water is added to the solution and mixed.
- To ensure uniform coverage, the adhesive composition is applied in a thick layer to the facing element using a comb.
- The first tile is placed taking into account level control and fixation with a special clamp (SVP).
- The actions are repeated.
Leveling mixtures - self-leveling floors ↑
In the case of a small difference in floor levels of no more than 3 cm, floor leveling mixtures are used, which are divided into two types. Some are able to spread over the surface of the base on their own, which is why they are called self-leveling mixtures. Another type of mixture requires human intervention, who manually spreads it on the floor using a spatula.
Self-leveling mixtures intended for finishing floors are otherwise called self-leveling floors, floor levelers, self-leveling mixtures, etc. The main purpose of these mixtures is to prepare floors made of various building materials (concrete, wood, gypsum) for finishing with floor coverings such as :
- linoleum;
- carpet;
- PVC materials;
- cork;
- ceramic tile.
They produce dry self-leveling mixtures on a cement base containing special modifying additives that increase the plasticity and fluidity of the mixed mortar. Some compositions contain fibrous reinforcing additives that inhibit the development of microcracks. After drying, self-leveling floors form a fairly dense and durable layer. However, they are not intended for use without a floor covering, since an unprotected surface can become dusty and absorb moisture, oil, etc.
Thin-layer self-leveling mixtures are available for sale, which are intended for finishing. You can also buy special mixtures suitable for rough leveling of bases that have significant unevenness. These mixtures are applied in a layer, the thickness of which can reach 30-40 mm. At the same time, polypropylene foam tape is laid around the perimeter of the room, which relieves the stress created by the self-leveling floor. Since these mixtures have reduced fluidity, it is not possible to obtain a perfectly flat surface. Therefore, a thin layer finish is usually applied on top.
Pouring a self-leveling floor ↑
1. Work begins with preparing the base, which must be dry and durable. In the room where the floor will be poured, it is necessary to exclude the occurrence of drafts and air drafts. There are also requirements for the floor temperature, which should not be lower than 5-10 degrees Celsius. The base is cleaned of various types of contaminants that can reduce adhesion. Weak and flaking areas of the old coating are removed. All cracks and holes through which the mixture could leak are sealed. Dust is removed with a vacuum cleaner; sweeping the surface alone is not enough.
2. Next, the cleaned base is treated with a primer, otherwise called a primer, which is applied in a thin layer with a brush, roller or spray. The use of a primer is mandatory, as it increases the adhesion of the leveling compound to the subfloor. The primer also prevents the formation of bubbles by limiting the adsorption of water from the mixed mixture during its hardening. It is advisable to choose those primer compositions that are recommended by the manufacturer of the leveling mixture.
3. At the next stage, begin preparing the mixture. This operation is carried out in strict accordance with the instructions, without allowing any amateur activity. For intensive stirring, use an electric drill with an attachment, which allows you to achieve a homogeneous mass, free of lumps and clots. The mixture is prepared in portions, as its qualities are preserved for 10-20 minutes. The exact time is indicated on the original packaging.
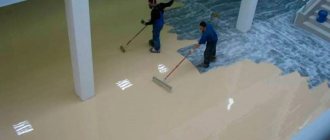
4. Immediately after preparation, the leveling mixture is applied to the floor in the form of strips, the width of which reaches 30-50 cm. Using a wide steel spatula mounted on a rod, distribute the solution over the surface of the base. You should not hesitate when pouring, because you should not allow the edge of the previously applied strip to dry out. It is advisable to pour the floor into the room in one step. If its area is large, then the filling is carried out in strips, and professionals who have experience working with self-leveling floors can achieve a perfectly flat floor surface. Many companies involved in installing self-leveling floors have special pumping equipment that allows them to apply self-leveling mixtures with greater productivity.
We choose the best option in terms of cost and timing
| Comparison table of different alignment methods | ||||
| Characteristics | The screed is wet | Semi-dry screed | Dry screed | Self-leveling mixtures |
| Maximum laying area per day by a team of workers, sq. m. | 50 | 250 | 100 | 50 |
| Costs for workers, rub. sq. m. | From 500 | From 400 | From 650 | From 1000 |
| Drying and shrinkage, days | 14–28 | 1 (on average up to 8 hours) | Not required | Up to 30 |
| Load resolution, after how many hours | 72 hours | 12 | Immediately after installation | 24–72 |
| Where can it be used? | Any premises | Any premises | Rooms with humidity up to 60% | Due to the high cost and characteristics of the material, they are recommended only for rooms up to 10 m2 |
Wondering how to level the floor in an apartment? As a comparative analysis of methods shows, semi-dry screed is a universal, technically correct and easy-to-implement option. It forms smooth surfaces with minimal deviations, made with your own hands quickly and with little investment. This is confirmed by the popularity of this method of eliminating base floor defects among professional builders. But they know very well how long it takes and how much it costs to level the floor in an apartment using each solution.
Laying tiles on Rotband gypsum plaster
The use of a layer of tile adhesive will not cancel the waterproofing of wet areas. The complete, correct cycle of preparing gypsum plaster for laying tiles looks like this:
- Prime the layer of gypsum plaster, not rubbed, generously with a deep penetration primer for wet rooms twice. The interval between priming cycles is 5-6 hours.
- Coating the surface of wet areas (preferably the entire bathroom) with coating polymer waterproofing such as Knauf Flachendicht or weber.tec 822.
- Tightening (applying a thin layer of glue) the surface of the walls with tile adhesive intended for wet rooms;
- After gluing the tiles, it is mandatory to seal the seams with good quality grout solutions.
The history of the creation of this plaster
Rotband is translated from German as “red ribbon”.
Before its production, the brands “Green Ribbon”, “Golden Ribbon”, “Blue Ribbon” were announced on the market. This is where the concept of “cigar bands” came from, which went on sale back in 1854. This made it possible to accurately identify the manufacturer and rely on his reputation. The first products of the brand were manufactured in West Germany in 1962 . The company itself was originally located in the German town of Perl. The first mine for the extraction of gypsum stone was commissioned back in 1938. In 1972, for the first time in the German provinces, plasterboard sheets began to be produced. After World War II, it was decided to move the head enterprise to the American zone of occupation.
How much does it cost to level walls with Rotband?
Scheme for plastering a wall.
Before carrying out repair work, you will need to calculate the cost of leveling the walls with Rotband. The average cost of a 30 kg package in Russia is 380 rubles. This package is enough to plaster 3.5 m² of base. As an example, we will consider a room with an area of 16 m². The ceiling height is 2.5 m, length – 6 m, width – 2.7 m. The area of all walls in the room will be 43.5 m². Therefore, to plaster a room with a layer of 1 cm, taking into account the average packaging consumption per 3.5 m², you will need 12 packages of this building mixture. It is worth noting that the manufacturer packages the material not only in large packages, and therefore it will be possible to purchase 5 or 10 kg if such a need arises. The cost for a room of 16 m² will be approximately 4,560 rubles. In this case, the price includes only plaster, excluding tools, primer and additional materials.
It is worth noting that recently counterfeits of a similar plaster mixture have often been found on sale. The manufacturer has put a lot of effort into identifying and eliminating them. Each original package contains a holographic sticker. When choosing, be sure to pay attention to the production date, which indicates not only the day/month/year, but also the hours/minutes/seconds of production. New packages appear approximately every 5 seconds.
Scheme of plastering a wall using beacons.
Therefore, if there are several packages on sale with the same date, this means that the mixture is counterfeit.
To plaster walls with Rotband, you will need to prepare the following elements:
- brush for applying primer;
- building level or plumb line;
- metal profiles;
- rule;
- wide spatula;
- mixer;
- metal rail;
- hard sponge or metal grater.
Late 50s
At the end of the 50s of the last century in Germany, the plaster mixture was prepared individually at the construction site.
Each batch was different from the previous one, which negatively affected the quality of the finish. Possessing unquestioned authority among gypsum specialists, engineer Winkler promised to erect a monument to someone who could stop the flow of complaints about multi-layer plaster, replacing it with single-layer plaster.
Then the KNAUF company developed the composition of a plaster mixture for interior work and launched it on the market in 1962 under the name “Rotband”. Over the past 55 years, many good gypsum plasters have appeared on the world market. The Rotband recipe was improved over time, and gradually it became the most popular material of its kind.
Not so long ago, in the early 90s, there were no ready-made modified mixtures for rough finishing on construction sites in Russia. Workers on site prepared plaster compositions, just like their German colleagues in the middle of the last century. Despite the fact that each master, as a rule, had his own secrets, it was difficult to obtain a guaranteed high-quality result using such technology.
