DIY repair
Agree, it is quite tedious to decorate walls with plastic over a pre-constructed metal and wooden frame. In addition, this method of wall decoration reduces the volume of the room. And although we are talking about some 3-4 cm on each side, they still make the room significantly smaller. There are other disadvantages of the frame method of covering walls with plastic - PVC panels are not able to transmit moisture and its vapor, as a result of which dampness, rotting and, as a result, the appearance of fungus form behind such a false wall. An alternative to the frame technology of wall cladding with plastic is to install panels with glue - this method is free from almost all the disadvantages described above. We will deal with it in the most detailed way.
Conditions under which it is possible to cover walls with plastic using glue
Yes, you heard right. Not every wall can be covered with plastic PVC panels. There are not so many conditions under which plastic can adhere well to the surface being coated, but failure to comply with them will lead to a waste of money and time.
Firstly, this is the evenness of the walls. We are not talking about an ideal surface that does not have the slightest curvature - permissible differences, holes and bumps should not exceed 5mm. If there are more, the plastic will either not stick or will break in places with large depressions.
Secondly, surface quality. It's no secret that not a single glue will stick to a dusty, dirty and greasy surface. Therefore, before you start gluing plastic panels, the walls must be thoroughly cleaned - wash off the whitewash with water, remove dust with a primer, and remove grease using detergents.
Which glue to choose for plastic PVC panels
In principle, wall cladding with plastic can be carried out using different adhesive compositions - some craftsmen use hot-melt adhesive for these purposes, which is applied with a special gun, others resort to contact adhesive such as “liquid nails”, and still others use polyurethane foam, devoid of ability to expand.
In principle, all of the above adhesive compositions cope with the tasks assigned to them almost 100%, but some of them have their drawbacks. In particular, we are talking about hot melt adhesive. The fact is that plastic has a considerable coefficient of thermal expansion - the use of rigidly fixing glue, which deprives the panels of a small free movement, leads to a gradual lag of the panels from the walls. This does not happen immediately, but in the next couple of years hot-melt adhesive will show its inability to hold panels in place for a long time and reliably.
It is for this reason that it is better to install plastic on walls using liquid nails or non-expanding polyurethane sealant.
This type of glue has sufficient plasticity so that it does not come off the surface during the cooling and heating cycles of the plastic. It is this glue for PVC panels that most craftsmen who value their reputation use.
Technology for installing PVC panels with glue
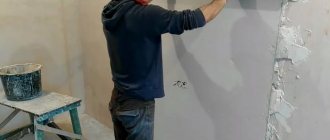
The process of covering walls with plastic using glue, as in principle all finishing work, begins with high-quality surface preparation. As described above, it is cleaned of dust, dirt and grease, after which it is generously primed. This approach to business is a truism for every master who respects his work.
Additional work may need to be done before cleaning and priming the walls. It's all about the approach of the builders of the past era to their work - most of the corners of rooms such as the bathroom and toilet were made rounded. They will have to be trimmed a little using a hammer drill. If this is impossible for some reason, then you will have to repeat the turns of the walls with millimeter accuracy.
Do you know how to bend a plastic panel along its entire length without breaking it? You certainly don’t need to heat it with a powerful hairdryer - the back side of the panel is cut between the stiffening ribs and neatly bent. This way you can make almost any internal and even external corner. When forming external corners, one slot will not be enough - you will have to cut an oblique segment one and a half to two stiffening ribs wide. In principle, if the walls and corners are smooth, then you can abandon this idea, giving preference to factory corner joints. In the case of wall angles greater than 90˚, you can’t imagine anything better than bending the panel.
Okay, now let’s get down to business, and first we’ll prepare a starting strip that will cultivate the connection between the plastic and the floor. You can do without it, but only if your plans include installing skirting boards. The same applies to the ceiling - if you plan to install a plastic suspension system, then you can refuse to install the starting profile under the ceiling.
Now the panel itself. It is cut according to the height of the room, its back side is cleaned of dust with a damp cloth. Only after this can glue be applied to it. Depending on the curvature of the walls, the glue can be applied in several ways. If the walls can be called ideal, then the adhesive composition is applied in strips along the perimeter and in the middle of the strip, but if the walls have curvatures, then it is better to apply the adhesive pointwise, in large drops. This approach to business will guarantee that even in depressions the panel will adhere well to the wall surface.
The greased panel is applied to the wall. If we are talking about using liquid nails, then it taps and comes off - such glue needs to air out a little (5-7 minutes), this will make it more rigid and will not allow the panel to pull away from the wall until the glue has completely dried. Such numbers do not work with polyurethane sealant - during the hardening process of this glue, a strip of plastic will have to be periodically pressed against the surface to be coated. So whatever one may say, it’s hard to find anything better than liquid nails for gluing plastic PVC panels.
Here is the answer to the question of how to attach plastic to the wall with glue. It is in this way that their adhesive installation is carried out. And finally, a little advice regarding the formation of external and internal corners. To be honest, there is no point in bothering with them and using factory connections. The best option is to line them with ordinary plastic corners, which do not have grooves for inserting panels into them. They are simply glued onto transparent silicone, and the excess is removed with a damp cloth. Depending on the curvature of the corners, the width of such inserts can be selected from 20 to 50 mm.
Functions of plastic arches in rooms
First, let's talk in more detail about why arches that came in our time from the palaces of Ancient Rome and the Ancient East still do not lose their relevance.
The word "arch" in Latin means "arc" or "curved." Traditionally, the arch has been used in construction and architecture to decorate buildings, since smoothing out sharp corners brings softer and more refined shapes to the appearance. In the decoration of palaces and temples, both the spaces between the columns and the doorways were crowned with arches. Arches were used in both external and internal decoration.
Plastic arches in the interior of an apartment
Fashion and architecture do not stand still. The dynamism of life and construction, ultra-modern materials (glass, metal) dictate a departure from smooth rounded shapes, which often do not fit into modern types of interiors and are hardly achieved through popular types of finishing. People consciously or unconsciously try to “smooth out the rough edges” of the surrounding reality by purchasing rounded interior items, albeit small, but pleasing to the eye - armchairs, paintings, tables, vases. Sharp corners are dictated by modern fashion, but smooth rounded shapes in the design of your home will bring calm, tranquility and a spirit of freedom from modern construction stereotypes.
So, speaking about the exclusive purpose of plastic arches in a room, we can say that in addition to the main functions that traditional arches perform, which is visual separation of rooms while maintaining the integrity of the space, decoration of door and window openings, plastic arches are designed to bring originality to your home account of rounded shapes of a non-standard, possibly asymmetrical configuration.
Functional purpose
The presented photos are excellent proof that PVC today is a popular material for creating high-quality and ornate arches. This design has been used since ancient times to smooth out and dull anything sharp. Thus, the interior turns out to be softer, with a pleasant atmosphere. Although, it must be said, arches were used not only inside, but also outside. And this helped create very original facades.
Therefore, the arch is designed to smooth out sharp corners, as well as decorate the space. At the same time, it is also realized in a functional sense - it can become a boundary between two different rooms, but at the same time maintaining the integrity of the space, which doors cannot provide. And thanks to the implementation of arches of non-standard shapes, the design becomes an extraordinary addition to the interior.
Types of plastic arches
Of course, an arch is a purely individual piece of furniture. Within the framework of this article, it makes no sense to talk about buying a standard wooden arch, which, in the best possible way, demonstrates the utilitarian approach to the design of the corridors of standard apartments with a standard layout, standard decoration and standard interior items, which together can turn your home into an abode of bad taste. Arches, a favorite technique for preserving the integrity of a space and adding “zest” to the interior of many designers and architects, must be designed and manufactured to order, taking into account all the requirements for size, shape, thickness, texture, color and strength. Only in this case, plastic arches serve as a worthy addition to the overall stylistic idea of your interior.
When selecting the size and shape of an arch, it is important to take into account such a parameter as the height of the ceiling, since some forms of arches significantly “lower” the doorway, and such an effect from an arched structure is completely undesirable.
The shape of the plastic arch is a matter of taste. You can resort to traditional design options, such as “classic” - regular arc radius, “modern” - truncated arc radius, “romance” - straight arch surfaces with rounded corners, “ellipse” - an arch in the shape of a regular or irregular ellipse, “portal” " - a rectangular arch, "trapezoid" - an arch in the shape of a trapezoid. But when it comes to a plastic arch, whose main advantage is to take any given shape, we recommend choosing more complex asymmetrical rounded shapes that match the spirit of your home.
As a rule, the size, placement and shape of a plastic arched structure are planned together with the designer or representative of the company that will produce the arch according to your individual order. Some manufacturers also provide installation services and, if necessary, instructions for self-assembly.
Arched doorways - types of design
Arched openings are designed in different ways
What is the role of arches in an apartment? They are not only needed in order to maintain the integrity of the space, there are other tasks here as well. It's simple: if there is an arch in the room, it becomes a kind of “feature” that immediately catches the eye.
You can make your arch a completely unique design, for which there are no analogues. It's not that difficult. There are simply many parameters that can be changed (however, they all depend on the specific room in which the work is being done).
Arches may vary depending on:
- Its texture;
- Size of the structure;
- Its thickness;
- The chosen form;
- The colors of the material (plastic) that it was decided to use.
If you select all of the above parameters successfully, finishing the arch with plastic for your interior will be a really good addition to any stylistic ideas that have already been implemented in the room.
Why are plastic arches needed?
You can make an arch from plasterboard or make a rectangular opening, making do with plaster of the passage. But in both cases, the arched structure is not finished. Therefore, it is lined, emphasizing the curves and shapes of the opening. It is made from various materials:
Plastic products are common and popular. Plastic moldings are characterized by a wide range of colors and a choice of shapes. Products made of wood and metal are difficult to install, including the difficulty of choosing a shape for the arch configuration.
Decorating is only one purpose, although it is the main one. Plastic linings on the arched structure ensure reliability in case of mechanical damage. The edges of the opening are susceptible to abrasion, which can subsequently cause mechanical damage.
Plastic products have a number of advantages.
- Moisture resistance. Resistance to moisture allows the use of plastic products to decorate rooms of varying degrees of humidity.
- Practicality. They will not require frequent and thorough care.
- Durability. During the period of operation, plastic products retain their original appearance. So, the average service life is 15-20 years. With gentle handling of the material, the service life can reach 30 or 40 years.
- Resistance to strong temperature changes. Both relatively low and high temperatures will not affect the quality of the material.
- Fire resistant. Plastic does not burn, but melts when exposed to open flame. Even with strong heating, it will not ignite due to the special structure of the chemical elements.
These simple advantages of using plastic arches suggest that they can be used to decorate a house beautifully and reliably.
How are plastic arches made?
The manufacture of the arch itself is carried out according to a pre-drawn template of the future design. Work on the production of arches takes from 1 to 3 days and can be carried out using several types of equipment: profile bending machines using glycerin, IR heaters or a stream of hot air. Despite the different equipment, the stages of manufacturing plastic arches are approximately the same. Plastic arches are made of polyvinyl chloride (PVC) in various colors. Production begins with cutting PVC, then bending is done - that is, giving the arch a certain shape according to a pre-prepared template; finally, to give strength, the PVC arch is reinforced with a special profile.
Nuances of creating a design
Creating a PVC arch with your own hands can involve different stages. If panels are used for these purposes, then you can create the simplest form, but it will look great - a portal.
To create the design you will need:
- sharp stationery knife;
- roulette;
- building level;
- mounting foam or liquid nails;
- PVC material.
So, first we prepare the opening. You need to remove the old door with the frame, and the resulting surface needs to be cleaned of dirt and leveled. Next, we take measurements to create an interior portal arch. We do not consider bending PVC arches, although due to the plasticity of the material this is well implemented. You just need to take care of temporarily securing the material so that it is securely fixed while the glue or foam dries.
We cut out the panels and profile to size, which will help join the vertical and horizontal panels, as well as hide the edges. A U- and L-shaped plastic profile of the corresponding color is suitable for this.
Which material to choose?
Not so long ago, wood was the most popular material for such purposes. But recently the construction industry has gone far ahead, thanks to which it is possible to embody the most daring design ideas. For these purposes, plasterboard, MDF, and plastic are often used.
It’s the latter that is worth considering in more detail. The main distinguishing feature of plastic for arches is its plastic properties. This allowed it to be widely used for the construction of structures of the most ornate shapes and colors.
PVC arch
How to trim an arch with plastic quickly and efficiently
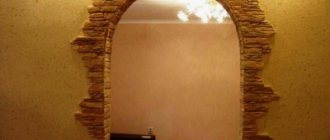
Arched structures in a room can be anywhere. Quite often they are built in studio rooms or between the living room and the corridor. Arches are most often finished with plastic. Especially if the finishing is seamless with the walls of the room.
Original design of the arch with plastic
Types of plastic finishing materials
At the moment, there are two options for plastic materials: lining and panels.
In addition to the main finishing, they also use plastic:
- Skirting boards.
- Corners.
- Decorative overlays.
All these materials are made from high-quality raw materials and have their own characteristics and properties. They are different in their external design.
Note. Installation of any of these materials can be easily done with your own hands using special tools.
Characteristics and advantages of plastic in finishing
What are the advantages of plastic material?
The material has been used in room decoration for many years.
Material Features:
- Plastic lining was the first to be used.
- At that time, it had only one shade - white.
- Despite this, the practicality of the material was at a high level.
- For the first time, manufacturers used a tongue-and-groove fastening system for plastic strips.
- At the same time, the finishing surface was sealed.
- Over time, plastic panels began to appear.
- They came in whole sheets.
- The size of these sheets from the very beginning to this day ranges from 1x1.25 m to 2x2.5 m.
- The shades of this material are quite varied.
Note. With the development of new technologies, the color range of plastic began to expand. At the moment there is a huge selection of shades of this material.
- Also, drawings and ornaments began to appear on the surface, imitations of various finishing materials.
- The price of raw materials among the rest of the finishing is affordable.
Plastic:
- Moisture resistant. For this reason, it is often used in the design of wet rooms.
- Practical. It does not require special care for its surface. Not able to absorb dirt.
- Long lasting. Plastic can be used for 10-25 years. It all depends on the conditions of use.
- Resistant to temperature changes and can withstand both high and low temperatures.
- Fire-resistant and frost-resistant. The material does not burn, but can only melt, without emitting harmful substances into the atmosphere. Can be used in cold rooms.
Note. Skirting boards and other decorative plastic materials have similar properties and characteristics.
What surfaces can be finished with plastic?
At the moment there are no instructions for using plastic.
- This material can be used on any surface.
- It can be mounted on a wooden or profile sheathing, or without it.
- In addition, decorative structures, such as arches, can be made from plastic panels.
But, despite this, the material is most often used not for the manufacture of the structure, but rather the arch is finished with plastic. With plastic you get an original design for any room.
How to finish an arch using plastic
Carrying out finishing work on an arched structure using plastic
Many, when choosing such a material, ask themselves the question of how to finish an arch with plastic.
Let's consider the working points:
- Initially, you will need to understand the required type of material and finishing plane.
Note. You can finish the arch at the end or corners. Depending on this, the choice of material is based.
- Then you need to calculate the required amount.
- After this, the plastic is installed.
Recommendations for finishing work:
- Since finishing the arch with plastic can be done at the end of the structure, panels or lining are used for this.
- If you need to trim the corners of the structure, then the choice is made of plastic corners and other similar decorative elements.
Advice. It is possible to carry out not only plastic finishing of the arched structure, but also the surfaces in contact with it.
Installation of plastic lining and panels at the end of the arch
How to install the material
As mentioned above, lining and panels have two types of installation: on a frame and without it.
Recommendations:
- Installation of plastic on the frame is possible if additional insulation of the surface is performed.
- It is also carried out when leveling the surface.
- Without a frame, this is the simplest and easiest way to install the material.
- If panels are used, the dimensions of the arched structure are cut out from them using a stencil.
- If lining is used, then the material is trimmed after it is installed on the surface using a hacksaw.
Installation of plastic on the frame is carried out as follows:
- Initially, a wooden sheathing of planks of the same diameter is made on the surface.
- They are attached to the surface using dowels that can withstand the load of the finish.
Note. Although plastic has a small mass, in total it can give a load.
- After manufacturing the frame, it is necessary to install starting strips for mounting the plastic.
- They are screwed to the sheathing with self-tapping screws or secured with a construction stapler.
- After this, the installation of plastic lining or panels is carried out.
Advice. It is better to treat all lining joints with sealant.
- If the plastic finishing of the arch is carried out using lining, then the first strip is fastened with self-tapping screws.
- After that, other strips are attached to it and joined until the locking system clicks.
- If panels are used, they are simply attached to the sheathing with self-tapping screws or a stapler.
Advice. All contacts of the plastic trim with the ceiling or wall are covered with skirting boards or corners made of a similar material. Install them with liquid nails or white sealant.
To install the plastic on the frame you will need:
- Wooden planks and dowels.
- Self-tapping screws and a construction stapler.
- Screwdriver and hammer drill.
- Building level.
- Jigsaw or grinder.
- Sealant and other available tools.
Note. You can use a rubber mallet to secure the plastic strips tightly together. They tap the panels from the end so that they fit well into the groove.
Frameless installation of plastic is simpler
Photo of installing the material without the help of a frame
If finishing an arch in a corridor is required, then using a frame to install the material will become impossible. It is for this reason that a different finishing method with plastic is used.
For work you will need:
- Special glue or liquid nails.
- Construction level and sealant.
- Stationery knife or hacksaw, grinder.
- Pencil and tape measure.
- A rag for wiping off excess glue.
Note. If you are finishing a corridor with an arch, you can also use a frame fastening. Initially, a sheathing is constructed along the entire perimeter at the same height from the surface, and only then the material is secured to it.
Work process:
- Glue is immediately applied to the strips or panels.
- To be more confident in the strength of the finish, you can also coat the surface with glue.
- Then the material is leveled using a level and securely fixed.
Installation of decorative corners
Any apartment will look much more impressive if the edging of existing arches is decorated with plastic corners. Therefore, let's look at how to glue a plastic corner to an interior arch and make the frame durable and reliable.
There are two needs to use a PVC part: to glue and remove a right angle, or to paste over an arc. Condition for creating right angles:
- Surface treatment with a penetrating primer solution.
- Use a square to mark, mark and cut to the required size with a grinder.
- Apply the adhesive mixture to two inner planes of the element.
- Apply the strip, gently pressing it along its entire length.
First, you should level the surface of the opening.
The flexible corner for the arcuate arch is fixed in a slightly different way. Photos and videos will help beginners understand the differences and features of installation. Installing such an element yourself will be no more difficult than the previous option, but pay attention to the following nuances:
- The width of the sides of the corner when finishing the arc varies. The wide side is laid on the end corner of the arch, and the narrow side is pressed against the wall.
- Silicone sealant or adhesive solution is applied to the element, as in the first case.
- You need to fasten it with several nails - a necessary measure, since the hot solution must completely set.
- Instead of nails, it is allowed to use masking tape - it secures the edge of the plastic corner.
Gluing a decorative corner
Important! It is prohibited to use a home or construction hair dryer to speed up drying, especially if photo wallpaper or paint is used for the walls.
Corners for interior arches are easy to glue onto wallpaper. The finishing material quickly sets with glue and allows you to test your strength the very next day. But if you want to cover an arch with an MDF corner, then use these tips:
- This type does not require additional fixation, but after applying glue to the corner and pressing it to the surface, wait a couple of seconds and then peel off the element again.
- After waiting for the glue to thicken, you can safely return it to its place. Usually 1-2 minutes is enough.
It is better to use a wooden corner for arched openings made of the same material. It is difficult to bend, so you can glue it on straight planes. Ideal use is rectangular portals where there is no round element.
Glue the plastic corner to the arch
Interesting! Among the abundance of finishing elements, you can choose cork, rubberized, rubber corners. A rolled and flexible rubber corner is simply necessary in places where water hitting the surface makes it slippery. These can be glued to tiles and concrete if necessary.
It is also possible to cover the arch using ordinary plastic corners, but in this case the elastic threshold will be much smaller. In order to bend the product to the desired size without damaging the product, you should heat the material with a hair dryer.
For the decorative design of arches and walls, polyurethane and polyurethane foam are used - in this case, all surfaces must be smooth. If there are small differences, then you need to glue the elements together by gently pressing and increasing the amount of glue in these places.
Decor options for plastic arches
Plastic arches can look quite unusual not only due to the non-standard shape and color of PVC, but also due to various decorative elements, such as textiles, stucco, decorative adhesive panels imitating leather, gold leaf, metal surface, mosaic, etc. Plastic arches can be supplemented with stained glass windows in the transom located above the arched opening.
Important function of arched corners
Arched decorative corners
Finishing corners have been used for many years to simplify renovation work. It allows you to form corners and also protect the doorway. The main advantage of arched corners is the possibility of extending the service life of the finish, since with them the wallpaper will not break off at the corners and the paint will not be erased.
And if during the installation of an interior arch you need to plaster a corner made of chipboard or plasterboard, then an aluminum corner will allow you to display 90 degrees. Any home corner is subject to external influence, especially for arched openings - rearranging furniture or regular Saturday cleaning can damage it. There is a solution - glue a decorative corner.
Important! A perforated corner provides a smooth edge for a curved design. At the same time, the consumption of putties is reduced.
Thanks to perforation, the corner can not only be framed with clear lines, it can be bent and drawn into various shapes. The soft curved element makes it possible to design not only square or rounded arches in a classic style, but also to create semi-arches, as well as openings with non-standard bends. Arch corners have the following advantages:
- Affordable price.
- Practical - can be used in most interior solutions.
- Finish – produced in a wide range of colors.
- Installing decorative elements is not difficult.
Types of arches by shape
On this page you see arches of different shapes and types. Each of them has its own name and application:
- Classic. This is an arch with a vault in the shape of a regular semicircle and perfectly balanced proportions. The most popular type of arches, which is suitable for interiors in any style. There are many examples on the page: models Hellas, Oscar, Carnelio and others.
- Romance. This is the name for arches with a rectangular arch and slightly rounded corners. More often these are wide arches. An example in our catalog is the Orpheus arch.
- Portal. This is a rectangular arch without roundings. It is very easy to install because you do not need to additionally process the corners. This is a laconic and bold option that will be appropriate only in a modern interior: minimalism, loft, hi-tech. An example is the Parallel arch.
- Modern. A middle option between portal, romance and classic. The arch of such an arch is rounded, but is located at an angle to the pillars. The rounding radius of such an arch is always much larger than the width of the opening. This design looks especially good in rooms with low ceilings. An example of such an arch is Britain.
- Pointed arch. It is distinguished by a pointed arch (for us these are Olympus arches). Suitable for Gothic or Oriental style.
- Ellipse. An arch with a vault that seems to be stretched upward due to its larger radius. Examples of such a design are the Alexandria or Fantasy models.
There is another type: arches with decorative lining. The design of such models itself is rectangular in shape, but its corners are filled and imitate a traditional arch of any other type. Such arches are convenient to install in a traditional doorway without wasting time on processing it. There are a lot of similar examples from MDF in our assortment: these are the arches of Greece, Verona, Lily, Sofia and many others.
Arch cladding - main stages of work
You can decorate the arch with plastic like this - you get a very functional element of the interior
When choosing the shapes and optimal dimensions for an arch, it is important to remember one significant parameter - the height of the ceilings in the room. Many forms of arches may simply not be suitable for a specific height, therefore, the entire effect of such an arched structure, the impression from it can be not only unexpected, but also generally negative.
Before taking on the work of building an arch, as well as finishing it with plastic, it is important to perform certain calculations and preparatory steps. For example, in order to decorate the desired doorway with plastic, it is important to resolve all issues with its cost and advantages.
Such arched openings are also common today
It is quite possible that another option will be more profitable for you - this cannot be denied.
If this is the case, you should immediately evaluate the positive aspects of plastic as a finishing material. First of all, it is very easy to care for. And secondly, it is not expensive at all.
Moreover, if you purchase plastic, you will be able to choose almost any color of the coating. Installation work requires very little time, the work is simple - even alone you can do it without problems.
The following materials are usually used for finishing doorways:
- Plastic panels;
- Plaster;
- Special slats made of wood;
- Adhesive compositions.
What shape should you choose for arches that are installed in doorways? It all depends entirely on what the owner’s tastes are. Of course, it is best when the arch is a kind of decoration.
The classic style of arch design is an arch of the correct shape. But you don’t have to stop there: there is also design in the Art Nouveau style, semi-arches, even a portal arch.
More information about the types of arches:
- If the arc has a slightly truncated radius, you have a modern-style arch;
- Arch in a romantic style - when the corners are rounded;
- Elliptical arches (both irregular and regular) are common;
- You can’t write off trapezoids (the arch has the appropriate shape).
However, when the master begins to design the vault, plastic is absolutely irreplaceable in this case. After all, the main advantage of this material is known to everyone - it can take any shape, including the one you want.
That is, you always have the opportunity to trim the arch with plastic and get a complex asymmetrical vault shape - if this does not harm the overall style and concept of your home.
conclusions
You can decorate the arch with plastic yourself
We talked about how to decorate an arch with plastic - in a corridor or other room. To make the doorway modern and beautiful. Indeed, it is difficult to choose a better solution to connect two rooms.
We also figured out why it is best to use plastic for cladding such a structure; if we briefly recall, the reasons are as follows (the material is pliable, is not expensive, and it is very easy to care for it in the future).
We looked at what the work looks like (step-by-step instructions for finishing an arch with plastic are provided). That is, if you take on such work yourself, everything will probably work out. And if you have any additional questions, just watch the video: do-it-yourself cladding of an arch with plastic, which we offer below.
As you can see, everything is really very simple. Try it, and very soon you will be proud of the result of your own work. A doorway lined with plastic looks fresh, original, and is an excellent decoration for the existing interior.
How to order
You can order the desired model online at any time of the day: for this you do not have to call us or come to the store. If you need the services of a measurer, the master will arrive free of charge with all the necessary tools. Along with the arch, you can order delivery throughout Moscow and Moscow Region.
At the moment, there are two options for plastic materials: lining and panels.
In addition to the main finishing, they also use plastic:
- Skirting boards.
- Corners.
- Decorative overlays.
All these materials are made from high-quality raw materials and have their own characteristics and properties. They are different in their external design.
Note. Installation of any of these materials can be easily done with your own hands using special tools.
Arch as a functional element of the interior
Interior arches allow you to combine the space of two rooms made in the same style. The living room looks more impressive if it is not separated from the hallway by a door. The arch will allow you to combine these two rooms with different purposes and create a visual effect of expanding the space.
It is appropriate to install an arch in the doorway connecting the kitchen and dining room. In this case, the door will be superfluous: it will create unnecessary obstacles on the way from the stove to the table. Then, if the kitchen and dining room are made in different styles, a ready-made interior arch will help ensure a smooth transition from one style to another.
Arch as a decorative element
The arched design can be made in a variety of styles. Depending on the style, the shape, size and decor of the arches changes. You can buy interior arches of oval or trapezoidal shape in the style of minimalism, modern or classic. Wooden or veneered arched structures can also be an interesting decorative solution for your apartment.
How to decorate an arch with plastic - detailed instructions, recommendations, examples
Decorating the interior of your home can take a lot of time. Of course, you will have to spend effort and money on this matter, as well as money - without this you can’t go anywhere. However, this process is still very exciting and interesting. You have a chance to show your creativity and turn your design ideas into reality.
In the interiors of modern apartments, arches are often used
That is why many people try to carry out finishing work inside a house or apartment on their own - if there is such an opportunity. For example, any good owner is interested in how to decorate an arch with plastic. Such decorative structures are becoming more and more common, therefore, they require high-quality, aesthetic cladding.

