Photo: smalldesignideas.com
Tree
Quite a capricious material that requires proper installation and proper care. In order for a wooden arch to serve you for a long time, do not install it in rooms with high humidity. Treat the wood with a special solution to prevent it from cracking or becoming covered with fungus.
If you follow the simple recommendations, you will get a noble arch that will become a real decoration of the room.
Photo: smalldesignideas.com
Advantages
Doorways without a door have the following advantages:
- Saving space due to the lack of free space along the opening path of the door leaf. For normal operation of a swing door, a minimum of 1 m2 of space is required, which should be left free, without cluttering it with furniture and other interior items;
- More light, this is especially true for adjacent rooms, one of which does not have a window or is equipped with a small window. An open doorway will allow natural light to enter a dark room;
- Air circulation, relevant for small rooms with insufficient ventilation, for example, due to the lack of a window;
- Combining space through two rooms, decorated in the same style, between which there will be a conventional demarcation in the form of an open opening;
- Visual expansion of space by connecting small rooms to the main one, for example, a balcony or loggia to a room;
- Zoning. A similar effect is used when dividing one large room into two smaller ones, while maintaining the freedom and lightness of the space due to the open door portal;
- Easy to maintain, as there is no need to regularly wipe the sashes, the glass inside them, or lubricate the locks and hinges;
- In addition, a stylishly designed doorway without a door allows you to give the room an original and unique look due to its shape, texture or shade.
Interior decoration ideas
Decorating a doorway with a portal is a creative and unusual way to complement your interior.
Doors in portals can be of three types:
Mounted - the most common option, mounted on hinges.
The variety of models allows you to creatively design various door mechanisms in the room. Indeed, in addition to the door itself, the portal also contains a capital - a load-bearing decoration. This canvas can be of different shapes: square, rectangular, triangular, with decorative half-columns, etc. It is decorated with drawings or paintings, carvings, mosaics or gilding. Depending on the budget and interior style, the appropriate design is selected.
Tile and stone
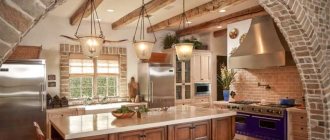
A bright and memorable solution in the decor of the arch will be the use of sandstone and acrylic tiles in combination. For example, the external sides facing the premises are lined with sandstone, and the opening itself is tiled. There are tile mosaic techniques that add originality and uniqueness to the style. Using a combination of sandstone and tiles looks great and is suitable for creating decorative structures.
Arch in the interior
Living room design with an arch
Beautiful arch in the interior
See also: Arch design: choice of shapes and materials
Dimensions
The height is limited only by the ceiling level - there must be a margin. The parameter is also coordinated with other doorways so as not to violate the integrity and organic nature of the design. For round and curly shapes, an exception is actually possible, since this is a prominent element. The width is selected in connection with the main idea of the interior decoration, its message. We are talking about the expression of interior space and openings between rooms. As for the exact parameters, the height of the top of the arch (lifting boom) should end at no higher than 2.9 m for a room with a height of 3.2-3.3 m and up to 2.2 m for a room with a height of 2.5 m For an ordinary arch, the ratio of height and width is considered harmonious: 2:1 or 3:1. For design ideas, the indicator does not matter. If it was not possible to choose an individual option, then it is better to settle on the proportion of 1.6:1 - a ratio calculated back in the Middle Ages.
Advantages of the arch
The best solution is a plasterboard arch, since this building material is very popular, you can find it in any store and even choose the one that will be more suitable in your case based on its basic characteristics. In addition, it is easy to process, bends and does not require special tools for cutting.
To make an arch, you will need drywall of different thicknesses - the one that will be on top may be slightly thinner than the one that will be placed below. In addition to the facing material, you will need two types of metal profile - guide and rack.
The profile frame will make your arch more durable and reliable, which is important when it comes to a frequently used room. You will also need self-tapping screws designed for working with wood and large dowels.
Design ideas
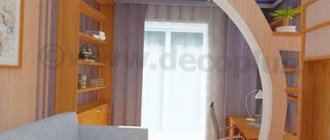
The practice of a “built-in” doorway, or rather its illusion, is widely used. A similar solution is relevant for apartments where there is nowhere to put books. The home library is placed on open shelving that surrounds the doorway. In the nearest corner there is a place for reading: a cozy table with an armchair or a miniature sofa. In modern interiors, designers often experiment, and the shape of the doorway becomes the subject of design experiments. They can follow the contours of keyholes, vases, be completely round or have asymmetrical curved edges.
The original openings are complemented with decorative “windows” on the sides, illuminated voids that highlight the features of the contour, or shelves on one of the sides. An original solution would be to install forged elements with floral patterns above the vault. They will stretch the metal “stems” all the way to the floor. Forged “vines” are provided with special holders to which family photographs of equal size are attached.
Standard design
Standard design is usually made of plastic or MDF. These materials are available and have affordable prices. It is recommended to purchase a kit, which already includes platbands and accessories. All the owner has to do is install it.
A classic doorway may seem too conservative and a little boring to many. Typically, such options are chosen by adherents of traditions who do not like dramatic changes either in life or in the interior. However, a primitive open doorway is also used in a very “live”, colorful setting. It plays the role of a discreet element that unloads the space.
Arched design
Arches magically expand space. They create the effect of “freedom” and fill both rooms with light and air. In most cases (except for Thai versions), arched structures are symmetrical. They are designed accordingly, as if in a mirror image. In classical styles, arches are decorated with stucco, bas-reliefs and pilasters on the sides. An interior with a similar design will look elegant and expensive.
The arches with transoms are decorated with glass and thin slats that create a geometric pattern. Asymmetrical options are complemented by niches, shelves for decoration, and lighting. Arched structures connect any rooms; there are no restrictions in this regard. Although more often such openings are found between a cramped hallway and an adjacent room (usually a hall).
Accent design option
Open doorways themselves already attract attention, since there is no standard partition in their design. To enhance the emphasis, choose one of the design techniques and highlight the element using:
- Colors. The opening can have a bright shade and echo other accent details in the interior.
- Sveta. In arched structures of complex shapes, places are usually provided for the placement of spotlights.
- Invoices. Against the background of a “flat” wall covering (paint, wallpaper, plaster), the doorway can effectively stand out with the relief of stone, brick or stucco.
- Forms. The most common option, because you can think out the outline of the opening yourself. Then translate them into plasterboard or plywood and, as a result, get an original decoration.
Naturally, you can combine the above techniques to enhance the effect. An accent doorway is usually used to break up the decor, decorated in strict, restrained styles.
Shapes of arched openings
Interior door arches are selected not only based on taste preferences, but also depending on certain parameters: ceiling height and opening width. The structures are made of plasterboard, wood, MDF, PVC. The easiest way to work is with drywall, as it is the most flexible material.
Currently, there are a large number of different types of arches, which differ in shape. The most common are:
- Arches made in classical style. Such designs have a regular semicircular shape and are suitable for rooms over three meters high.
A semicircular arch is a classic design for an interior opening. - Romance. The design of this form fits perfectly into a low opening from the living room or hall to the corridor. It is an arc, the rounded corners of which are connected to each other in the center by a straight insert.
Low openings are decorated with an arch with a direct insert in the center - Modern. This option is well suited for decorating a balcony or kitchen opening. In this case, the corners of the structure can be either sharp or rounded.
To decorate a balcony or kitchen opening, use a Modern arch - The portal is a U-shaped structure. It is customary to install it in rooms where horizontal and vertical lines dominate. An arched device of this type is well suited for the design of houses made of logs or timber. The portal arch in the interior opening can be of various configurations: wavy, polygonal. The choice is determined by the available materials and the owner’s imagination.
The portal arch is a U-shaped structure - A straight arch looks good in combination with interior styles such as hi-tech and modern.
A straight arch emphasizes the graphic nature of the space - Semi-arches are used for zoning areas.
You can divide the room into zones using semi-arches
Arched openings also have different designs and on this basis are divided into several varieties:
- Radial. This is one of the most inexpensive technologies that goes with any style.
- Multi-level. This option is used to decorate a specific interior.
- Openwork arches. Such designs are not suitable only if the vertical surfaces are made in a non-standard form. An openwork arch is often used for wedding ceremonies
- Dome-shaped arches are suitable for classic-type structures. Classic interiors can be decorated using a domed arch
Having looked closely at your interior and selected the desired arch model, you can begin the step-by-step work.
Arch sizes
An important step in choosing an interior arch is to correctly determine the size of the interior arches. This parameter depends directly on the characteristics of the rooms. The width of the opening can be chosen arbitrarily, but the height is always limited by the ceiling. With a ceiling height of 2500 mm, the arch should be no higher than 2200 mm, and for a ceiling height of 3200 mm, an arch of 2600 mm is suitable.
When producing arches, the dimensions of the product are usually indicated with information about what sizes there are in the form of intervals. The height of the interior arch can reach 2400 mm with a width range of 790-1500 mm. In this case, the thickness of the arched opening in the house can be 185 mm.
An individual order of an arch cannot protect the consumer from possible discrepancies during installation
Therefore, before choosing an arch according to its size a priori, it is very important to correctly measure the dimensions (height, width, thickness) of the interior opening. If discrepancies have been identified and the thickness of the walls exceeds the corresponding indicator of the arch, then the difference is compensated with laminated hardboard with a selection of the desired tone
Shrewd manufacturers usually include plates of different widths in the same color scheme.
Step-by-step instructions for making your own
In order not to spend extra money on finished products, you can do the finishing of the arched opening yourself. To do this, you need to follow a clearly established scheme.
(function(w, d, n, s, t) { w[n] = w[n] || []; w[n].push(function() { Ya.Context.AdvManager.render({ blockId: "RA-510923-1", renderTo: "yandex_rtb_R-A-510923-1", async: true }); }); t = d.getElementsByTagName("script")[0]; s = d.createElement(" script"); s.type = "text/javascript"; s.src = "//an.yandex.ru/system/context.js"; s.async = true; t.parentNode.insertBefore(s, t) ; })(this, this.document, "yandexContextAsyncCallbacks");
Carrying out the necessary measurements
Any construction process requires precision, which is achieved by taking preliminary measurements. You need to start from the opening itself, so first measure its width and height. The size of the span between the walls of the opening is equal to the width of the arch. In order to make a semicircle as accurately as possible, this indicator must be divided by two.
Before making an arch, you need to decide on its future configuration. If you are going to do it in a classic style, then first level the walls. Otherwise, the design will look ugly. You can remove all defects from a vertical surface with putty or plaster using beacons.
Creating a load-bearing frame
To install the frame, you should perform a series of sequential steps:
- A contour made of a metal profile is screwed along the lines of the opening with dowels. Vertical guides are installed indented from the surface of the interior wall. The size of the indentation is equal to the thickness of the drywall sheet and the plaster layer (about 0.2 cm).
- We install two such profiles parallel to each other on each side.
To construct the frame, two profiles are installed in parallel - Having finished working with the profiles, we begin installing the first sheet of drywall. If its thickness is 1.25 cm, then it is recommended to screw it with 3.5x35 self-tapping screws. If the thickness of the gypsum board is no more than 0.95 cm, use smaller screws.
Drywall is secured using self-tapping screws - Cover the second side of the frame with plasterboard.
Covering the opening with plasterboard - Make a metal profile in the shape of an arc. To do this, cut the side walls of the profile every 7 centimeters with special scissors. As a result of these actions, it is easier to give it the required shape. For an arched structure, two such blanks will be required.
An arched arc is made from the profile - Install and secure the arched profiles to the main part of the frame. The arcuate profile is attached to the main part of the frame
- To ensure that the arches are securely fixed, they are attached with hangers to a straight guide located on top. The number of hangers depends on the width of the opening. Usually three pairs are enough.
Arch frame installation diagram - In increments of 0.4-0.6 m, attach reinforcing crossbars around the perimeter of the frame, fixing them on the guides of two contours.
- As a result of the above actions, a reliable metal structure in the form of an arch from the profile emerges. In the future, it will be covered with plasterboard or plywood.
If it is assumed that the columns of the arches will not be too thick in thickness, then 2 arches can be replaced with a wide profile. Cutting and bending is done in exactly the same way. Only in this case the installation of crossbars is not required.
Sometimes wooden slats are used instead of a metal profile. The frame installation technology does not change significantly.
Bending plasterboard sheet
After installing the frame, they take on the bending of the gypsum board. Experts recommend using drywall designed specifically for arched structures. It easily takes the desired shape if the material is kneaded in the longitudinal direction.
If you decide to use regular drywall, you will have to tinker with it. The installation element is cut out to the required size in the form of a rectangle. They bend it in two ways: wet and dry.
Bend manufacturing diagram
The wet method takes a lot of time and cannot be rushed. To prevent the material from cracking when bent, it is moistened with water and punctures are made. In this form, the sheet of drywall is left to lie for some time, and then it is bent onto a template of the desired configuration.
The dry method refers to the application of cuts parallel to each other on the back side of the plasterboard. The cut goes deep into the sheet, affecting the outer cardboard layer and plaster. The cardboard layer on the front side remains intact.
With the dry method, the bend of the installation element takes the correct shape. It is important to know that cutting through gypsum boards is best done with a jigsaw rather than a hacksaw. Then the edges will not be torn.
Rough sheathing of the frame
If the bending was done using the wet method, then first of all you need to wait until the sheet of drywall is completely dry. The material is fixed first with adhesive tape and then with self-tapping screws. The minimum step between them should be from 5 to 6 centimeters.
Perforated corner prevents edge chipping
After fastening the sheathing, the edges of the plasterboard sheet are cleaned. And in order to prevent chipping of the curved edge, a perforated plastic corner is installed on it.
Leveling with putty
To make the surface smooth, you need to finish the arched structure. First, apply a primer, and after it dries, putty. To reinforce the second layer and strengthen the corners, fiberglass mesh is used.
Fiberglass mesh reinforces the corners of the arch
The last third layer of putty is applied to the mesh. After about 10 hours, it dries, after which you can begin sanding the uneven areas. If the work is done well, the surface will be free of roughness and unevenness, and the heads of the screws will not be visible in it.
Beautiful design ideas in the apartment
The asymmetry in the room looks interesting and unusual, forming a single space together with the hallway and a further wider room.
Ornate patterns immediately attract attention, and if you add a play of light and shadow to them, you can get an absolutely incredible design
Asymmetry can also be functionally justified. In this interior, the arch is complemented by shelves made in the general style. The stylistic solution looks both original and not devoid of meaning, and you can also save on cabinets.
There may be more than one arch. This option is suitable exclusively for large rooms, since the desired effect will be achieved only if there is no feeling of crowding.
You can use beautiful stained glass inserts as decoration. A fairly simple black rectangular arch can be transformed into a work of art with the help of glass inserts, playing with different colors from different angles.
The arched doorway can be continued on the ceiling: with the help of a suspended multi-level ceiling, you can create interesting structures that are intertwined with each other. Only a real master can make them yourself, so if you want to achieve an amazing effect that looks at a professional level, it’s better to immediately contact the masters.
Mix of images and volumetric structures. Sometimes mixing techniques can produce interesting results. In this example, the contrasting color of the walls plays an important role, once again proving that the spectacular appearance of the arch depends not only on the structure itself, but also on the surroundings, which can decorate the rustic decor.
Use fabric for decoration. This example uses beautiful drapery, a large amount of the canvas itself and a dense texture. Everything together gives a feeling of incredible comfort; if desired, it can be easily removed or changed to a different style or color. It’s convenient, and most importantly, you can design such an insert yourself.
Look again at all the possible options, scroll through them in your head, look through magazines that present different interiors and feel free to start acting. Renovating can be a very fun and creative endeavor, especially when the results exceed expectations.
The main thing is that you need a careful approach, adherence to style and correctly selected material.
Decorative panels and stucco molding
Common materials for arch cladding are panels and stucco.
- MDF panels and overlays are perfect for the classic style.
- The use of such elements creates a visual imitation of wood, which is very important in modern design.
- Such panels are mounted using glue and nails without heads.
- Initially, it is necessary to frame the inner space of the arch, and only after that install the panels.
- This process is similar to installing a door frame.
- Finishing with stucco is a common decorative technique, as it is quite simple.
- It is attached with liquid nails or glue.
- Perfect for structures in hotels or rooms with an antique style.
Large arch in the interior
Wall arch in the interior
See alsoRules of true masculine garage design
Advantages and disadvantages of open passage
An open opening between adjacent rooms has many advantages:
- Possibility of connecting two rooms into one spacious and integral area. This idea is good, for example, for the kitchen and dining room, library and living room.
- Bringing originality into the interior. The design options for an open doorway are very diverse due to the possibility of using unusual finishing materials.
- Possibility of obtaining original results for a small amount. With a creative approach, decorate it beautifully and unusually.
- A convenient option for small studio apartments. In such spaces, an open opening will save useful living space.
However, maintaining an open passage between rooms also results in a number of disadvantages:
- There is no clear demarcation of space. The impression remains that neighboring rooms are just parts, zones of common space. This is appropriate between the dining room and kitchen, bedroom and dressing room. But it is inappropriate in the case of the kitchen and bedroom, bathroom and corridor.
- Impossibility of arrangement between any premises. For example, an open doorway is completely unsuitable for a restroom.
- Lack of privacy. Open openings are good for houses where 1-2 people live. But they are not suitable for apartments where large families live.
Possibilities of decorative arches
The construction of an arch can have many functions, purposes and possibilities.
- In a small room, an arch can visually enlarge the space (if it replaces the door, the room will seem larger).
- A large space can be divided into zones, which will add coziness and eliminate the feeling of emptiness (dividing into an area for eating and cooking, a transition between the corridor and the living room is popular).
- It may contain a stylistic component that will give the apartment a certain direction (an imitation of an arch is often found, performing only an aesthetic function).
Interior of a corridor with an arch
Beautiful arch in the winter interior
See also: Stucco molding in the interior
What are folding doors made of?
The bulk of folding systems in stores are made of MDF or plastic. The plastic is light and practical, but it lacks soundproofing properties, and the design itself is noisy and gives the impression of laxity.
The assembled plastic structure is lightweight, so the technician will not need outside help for installation. The plastic itself is easy to cut, and modern movable interlocking panels allow you to assemble and install the structure yourself in a few hours. In addition, guide profiles in plastic structures are attached via clips, which simplify the installation process.
Systems with MDF slats look solid, but they are more difficult to install. They look organically in an arched opening. Due to the weight of the structure, the guides are attached to the opening using self-tapping screws.
The standard folding design kit includes the following elements:
- Narrow panels. In addition to several identical panels from which the canvas is assembled, there are two half-panels that are installed at the edges, a starting and a locking strip.
- Guides. All kits have a top and two side guides. In systems for wide openings or with flexible slats, there is also a lower guide.
- Rollers, stoppers. In some designs, regular hinges may be used to connect sections.
What materials can the corner be made of?
To decorate arched openings, corners made of the following materials are used:
- plastic;
- metal;
- tree;
- MDF;
- polyvinyl chloride;
- duralumin;
- and others.
Such building materials are very durable and have a long service life. With their help, you can hide the imperfections of the arch - cracks and protrusions. Corners are great for both rectangular openings and more non-standard designs; they can be bent without any problems.
When choosing corners for finishing an arch, keep in mind that they can be solid or folded. Corners are also intended to strengthen the structure (relevant if you are installing an arch yourself). This type requires more reliable fastening, using screws or plaster, for example.
The most popular are profiles made of plastic - it is easy to glue, the material is quite flexible, it is easy to bend and can be given the desired shape.
The most common option for finishing arched openings is framing with a plastic corner
Peculiarities
The doorways themselves have virtually no distinctive features. They are only a place for installing an interior door, and perform a transit function at the border of rooms in the room. However, the nature of the housing structure directly affects the features of doorways.
In an apartment, the appearance and functional load on the openings depend on the type of construction:
The old fund and the “Stalin” ones. These are apartments from pre-revolutionary construction and the Soviet period of the 30-50s of the last century. Their distinctive features are good quality, large dimensions, high ceilings, wide openings. They require non-standard size door leaves and high-quality decorative finishing. A common drawback in the interior of such an apartment is that the doorway is too low in relation to the height of the ceiling. It can be leveled using a transom. This is an artificial increase in the height of the door and opening by installing a wooden panel above the opening in the color of the door or glass window;
In a private house, the doorway has more functions. The arch of the opening is subject to significant load from static structural elements (ceiling, second floor, roof).
It literally helps to hold up the floor of the upper floor or the ceiling of the house, so the following methods of decorating and strengthening doorways are often used:
- An important element is the lintel (top beam). It provides reinforcement and strengthening of the arch, creates the opening itself (the upper part), and serves as the basis for the ceiling;
- The doorway is built as part of the wall, therefore it is made of the same materials as it, but can also be made of others. For example, in a wooden house it can be brick or block, and vice versa;
- Doors of different types are installed in the opening, which make it possible to isolate functional areas from each other and some traumatic areas from small children.
The opening is considered “ideal” if:
- the length from one slope to another remains the same at any point;
- two slopes form strictly parallel straight lines;
- the thickness is uniform along the entire perimeter of the arch;
- the distance from the floor to the lintel is the same at any measurement location;
- there is no angle of inclination of the floor surface under the opening.
Plywood arch
Making a plywood opening with your own hands is quick and easy. Plywood is a very durable and flexible material. And here it must be bent to fit the chosen shape of the opening. Make a complete sketch of the product with precise measurements of width and depth. Purchase the necessary accessories and varnishes for coating the wood in advance.
Cut to the size of the desired arc, soak a strip of plywood in water. Place it on the spacers in the opening and secure it. Once completely dry, it will take on a solid arc shape.
The following actions are possible:
- reinforced with inserts made of wooden beams;
- the surface is covered with plasterboard;
- Open areas are filled with polyurethane foam. The swollen and dried chemical is cut off evenly.
If the opening is more than one door in width, then metal fittings are mounted on it, supported by bricks on the sides. From below, lowering it a couple of centimeters from the reinforcement, install the arc. Fill it with thick gypsum, lime or even cement-sand mortar. Finish according to your idea and sketch.
Sound insulation of arches made of wood and plasterboard is carried out with construction foam until it completely sets and hardens.
Arch design and objectives
The element performs the following functions:
- Aesthetic: masking imperfections, visually expanding space, improving the interior.
- Practical: strengthening walls, storing things (shaped compositions), dividing zones, combining rooms.
Vaulted passages are usually incised and shaped. The second subtype includes options with side columns, original ceilings, additional figured holes, and a sectional structure. Intrados and racks are decorated with decorative relief. Without beautiful arches it is difficult to imagine a classic interior with 18th-century motifs, which remains relevant for large private estates. You can use a vault to strengthen the partition or organize new passages/corridors between rooms at a convenient angle. Arched compositions become a new storage place: the surfaces of the room can be freed from excess load, for example, from unnecessary decorative items. The arch system will combine several rooms into one thoughtful composition. In large studios, these structures are used as space delimiters.
Room zoning element
The object performs the zoning function in two senses: as a way to unite space and as a separator. Apartments with a modern layout have many combined rooms and short hallways. Therefore, their space should be divided into segments for relaxation, lunch, cooking, working at the computer, and watching TV. In addition to such ideas for application, the arch will come in handy in vestibules, which are increasingly “appearing” next to living rooms. Vaulted structures easily solve the problem of inefficient use of space near doors: just remove them and make a free passage or hang curtains. Arches also regulate the level of isolation. A narrow arch in the wall gives a high indicator, and a wide one reduces it. An opening of more than half a wall will connect two rooms into one, removing the feeling of a boundary.
Arch as a bright accent in the interior
The arch is made part of the architecture, but given time, desire and funds, it can be formed into one of the pillars of design. Something like this can be created using improvised things. A place for shelves is chosen next to the arch or a built-in option is made. The sections are then filled with colorful books. The passage can be designed as a continuation of the wall painting, or rather, as its missing part. Artificial neon lighting is becoming increasingly popular, because it turns the simplest room into an unusual place. The solution will turn out to be quite normal for arched structures. Climbing plants are added to the eco-style, and it is better to make an arch with open posts to entwine them with stems. The most expressive will be a figured arch with slots. This is how abstract combinations are created, which, however, will take a long time to choose: if the decision is unsuccessful, the situation can become ridiculous.
Elimination of defects
A cracked or broken ceiling above a door can be turned into an arched arc or some kind of decorative entablature. If the problem is large, and it occurs in the middle of the wall, then adding an arched opening almost to the ceiling will be justified. Non-standard arches often appear against the background of significant wall deficiencies, which are easier to eliminate with the help of an arch, rather than layers of different materials. Ventilation pipes and old beams spoil the design, so they are often sheathed with materials such as plasterboard. An opening with a vault will highlight the covered object, turning it all into a meaningful composition. Excess joints and other defects of the arches themselves are hidden with the help of decorative locks. It also happens that the door frame has a serious curvature. The door frame can be disassembled and a portal can be made instead.
Utilitarian purpose
If the opening is in a thick wall, then several niches can be arranged next to it for practical use. First you need to clarify whether the wall is load-bearing. If yes, then get information about the limitations, and if not, determine how strong it is. If the data is positive, then a cascade of small windows is organized in the surfaces - for better lighting, ventilation and storage of things. Frequently used items are placed in niches, whether blind or through. In private houses, the arched passages themselves sometimes reach 3 meters in thickness, and a small sofa and poufs would not be superfluous. Racks with shelves are installed in the portals next to the kitchen. In cramped studio apartments, arches with a narrow passage and a countertop are made between the living room and kitchen. Vaulted openings without doors are a place for additional artificial lighting.
Application of stucco
Today, stucco molding made from polyurethane has found application. Unlike gypsum options, it is light in weight. It can be installed without using additional accessories. It can also be processed further: it can be painted in various colors.
There is a special scheme according to which you can decorate a doorway with your own hands using the specified material:
- The adhesive composition and a set of necessary parts are kept in the room where installation will be carried out for 24 hours. Due to this, it will be possible to achieve a kind of adaptation of the elements to the existing microclimate.
- Used areas must be coated with primer. It is better to take compounds that have an enhanced penetrating effect. We must remember that the stucco molding is glued first. Only after this can you proceed to general finishing work.
- The surface of the products is treated with sandpaper, after which glue is applied to them. It is distributed evenly along the wrong side. Apply the stucco molding to a certain area and press it properly. To prevent the components from slipping, small screws are screwed under them.
- If excess glue appears, it is removed in a timely manner. If you cannot do this right away, you can use acetone.
- The joining of elements is an important step. You can do it at a right angle or trim at an angle of 45 degrees.
Joints appear after cladding. They can be hidden using putty, which is rubbed with sandpaper after drying. The finishing between rooms requires a special approach, because it is necessary to provide for the placement of parts on both sides.
Decorating a doorway with stucco is most suitable for rooms with high ceilings. If you have to work with small rooms, it is better to think through the position of the elements in advance. If you do not pay enough attention to this, the room will be overloaded and the interior will lose its attractiveness.
https://youtube.com/watch?v=cidi6pWksnI
Do-it-yourself arch finishing
To create a stone structure in a house, you will need step-by-step instructions, a list of materials, the availability of which will be taken care of in advance.
Tools and materials
- Construction mixer for thoroughly mixing glue. In absence, they adapt a drill.
- Level, tape measure, mallet.
- A cutting machine is required.
- Glue container.
- Paint brushes.
- Pencil, sandpaper.
- Metal brush.
- Grout syringe, grout.
- Spatula or spatula, sponge.
- Wedges made of wood or plastic.
- Water repellent. Unlike waterproofing, it will allow the stone to “breathe”.
- Primer, glue, the stone itself.
Preparing the surface
This stage is carried out traditionally: the remnants of the previous coating are removed, the unevenness is smoothed out using sandpaper, then they are puttied using a primer. The primer is selected in accordance with the wall material.
If the walls are concrete, monolithic, a special adhesive primer is used. When working in a hot or humid environment, the back of the tiles should be wetted. Moisture-resistant plasterboard is dried well after priming.
Preparing stone for laying
The installation material is being reviewed again. In accordance with the markings, the finishing stone is cut correctly. When developing a sketch, take into account the installation method: end-to-end or with a seam formed. Trimming is done using a machine, giving the products an arched appearance. If necessary, clean the reverse side with a wire brush.
When using a hand saw you need to be careful. Excessive force when cutting leads to the fact that the stone breaks along unexpected lines.
Preparation of adhesive solution
The material is attached to the wall using silicone tile adhesive. Liquid nails, as well as cement-sand mortar, are suitable. The best option is a specialized composition, which is prepared in a bucket using a mixer. The composition is thoroughly mixed until completely homogeneous.
You should buy glue after purchasing the tiles and prepare according to the instructions. They don’t make a large supply, because... the solution sets quickly.
Laying stone
The design of the arch starts from the bottom. First, using a spatula, glue is applied to the wall, then to the back side of the stone. On both surfaces its thickness should be 5-10 mm.
An overly thick layer will cause the stone to slide and the cavity will lead to the formation of condensation. During the procedure, the horizontal positioning is periodically checked.
To finish the corners, use special shaped elements or lay the stone so that its edge protrudes to the thickness of the tile. The fragments on the other side of the corner will level the ledge.
The tile is applied to the selected location and pressed lightly. Using a level and a mallet, level and achieve a complete fit. When tapping, having determined the voids inside, the elements are dismantled, the glue is cleaned off, and the process is repeated again. The glue protruding along the edges is removed with a spatula. At the ends of the elements, the glue is not removed; it will contribute to their better adhesion to each other.
With the seamless method, the tiles fit tightly together. Provided that the material has been previously prepared, the process occurs quickly. By laying from top to bottom, clear boundary lines are obtained.
For masonry with jointing, special wedges of the required thickness are used. You can use plasterboard strips of different thicknesses or tile crosses. The beauty of the arch in the future depends on competent and careful execution of the work. If the thickness of the fragments used exceeds 15 mm, the technology requires a pause after laying 3-4 rows, giving them the opportunity to set.
Grouting and final stages
After the solution hardens, about two days later, the auxiliary elements are removed. Excess solution is also cleaned off. Prepare a grouting compound that fills all the seams. A construction syringe is used to fill the cracks. After half an hour, the seam is smoothed out with a special spatula or spatula. You can use a dish sponge to remove excess grout. In accordance with the design, grout of different colors and shades is used.
How to finish an arch
There are many options for how to finish an arch; the choice is limited only by flights of fancy and budget.
- The easiest way to cover it is wallpaper. The process will not take much time and money, and the arched opening will visually seem like an extension of the room. The downside is the fragility of the finish. The slightest snag can damage the integrity of the cover; over time, the color will fade and turn yellow.
- Painting. Highlighting an arched space using contrasting colors is an excellent solution for small rooms. Stucco molding or decorative stone would look out of place in this case. You should choose the right paint: only water-dispersed paint is suitable for a matte surface.
- Plastic is also easy to install and has a low cost. But a low-quality product breaks quickly, and aesthetically it is not as attractive as other types.
- Polyurethane stucco. Easy to use, it will give the room a majestic and solemn look. Due to its atmosphere, it is not used in modern and dynamic styles.
Required Tools
To give drywall an arched shape using the “wet” method, you will need:
- Water.
- Roller, water spray, brush or sponge (take what is more convenient).
- Screws for fastening.
For the “dry” method you will need:
- Self-tapping screws.
- Pencil.
- Ruler.
- Square.
- Knife.
To bend a metal profile you will need:
- Metal scissors.
- Screwdriver.
- Self-tapping screws.
- Gloves.
Subtleties of drywall installation
For arches with shallow depth, for example, modern, you can use the dry method of bending drywall. This can be done right in the opening. If the structure has a depth of more than 25 cm, then the workpiece must be bent according to a pre-made template.
The use of the wet method is relevant when there is a small bending radius of the arch.
After installing the structure, the question arises of how best to finish the arch with your own hands. Fortunately, there are now many ways and materials for this. Wallpaper, decorative stone, plastic, polyurethane baguettes, etc. are perfect for this.
But before you start finishing, you need to use putty. You need to putty a plasterboard arch if you plan to paint or glue the surface.
Video description
In this video you can see in more detail how the work of finishing the arches with stucco is carried out:
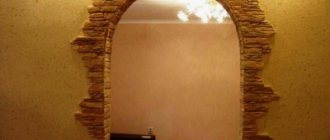
Stone finishing. An original method of cladding, it guarantees durability and fits almost all styles. In addition, the stone is easy to care for, so it can be used in the kitchen. Artificial stone is much easier to install than natural stone and does not require much experience. The result is practically no different.
Finishing with artificial stone in the corridorSource mtdata.ru
- Tile. It has the same characteristics as stone, the only difference is in appearance and the effect created.
- Cork cladding is quite popular. This is an environmentally friendly material that will not only provide comfort, but also retain heat well. The downside is the high price.
- Decorative plaster has become one of the traditional ways of finishing not only walls, but also arches. It allows you to create a unique ornament, which, moreover, is durable. The downside is that such convex surfaces need to be carefully looked after and the integrity of the cover must be monitored.
- Artistic painting is popular among creative, extraordinary individuals. However, you don’t have to be an artist; you can brightly and beautifully paint an arched space using stencils.
Artistic painting on an arched doorwaySource freska66.ru
Stained glass, mosaic, mirror inserts. It looks very impressive, instantly attracts the eye. But in order to install them correctly, an experienced technician is needed.
Features of arches in different rooms of the house
Below we will look at how to make an arch in a doorway not only beautiful, neat, but also durable. For the kitchen, it is desirable that the arch is not cramped. Especially if there are many residents in the house, or holiday feasts involve noisy companies.
The cladding is made mainly with decorative stone, mosaic, colored glass, and ceramic elements. These materials prevent dirt from sticking and are easy to clean. For durability, you can additionally coat the cladding with varnish.
Video description
In this video you will learn a little more about the features of using arches in the kitchen:
The arched opening in the living room is a decorative element. It gives the interior a solemn, formal look. To achieve this goal, complex designs with niches, inserts of additional lighting, stucco molding, and even built-in decorative columns are used.
Spectacular and majestic columns in the arched doorway in the living roomSource www.freelancejob.ru
The hallway and corridor always need more space. Therefore, the arched opening should be as wide and high as possible. In addition to the practicality of this design, this will visually enlarge the room.
Features of rooms with arches
Rooms with arches are often left without doors, but given the practical inconvenience of such a layout, residents have to use alternatives. In places with high traffic, structures with an empty door are designed, and doors are installed for private rooms. In large houses, the arches of the guest rooms are decorated with curtains. The side racks are made of improved materials, ideally from rounded logs. A simple, flat box doesn’t look the best. The vaults are made more decorative against the background of other elements. All these features do not apply to the arched entrances to the kitchen or the passages in the Brezhnevka corridors. They can be simple and fit harmoniously into the decor. At the same time, the vast majority of structures are characterized by the absence of a threshold, although theoretically it can even improve the appearance of the arch. Vaulted openings can be active, that is, connecting several rooms, and passive, opening views of several rooms at once.
Briefly about the main thing
A plasterboard arch is an alternative solution for decorating a doorway. Even a beginner will not have any problems with the question of how to install an arch: the technology is simple and the costs are minimal.
Arches look equally impressive in both small and large rooms. An arched opening visually increases the height of the room; it helps to free up space around the door, which can be used rationally. They fill the room with light and a feeling of “merity” of two adjacent rooms.
How to transfer?
The same universal drywall is used in a more complex procedure - moving a doorway from one place to another. The transfer means that in the old place the opening needs to be sealed, and in the new place it needs to be punched and decorated.
If the technical side of the issue is clear, and you can hire a team of workers to carry it out, which will save you from headaches during the repair process, then from a legal point of view everything is a little more complicated.
Mandatory preparation procedures:
- Carrying out technical inspection by design specialists. If the operational condition of the premises allows for a new opening to be made in the supporting structure, an appropriate technical report is issued. Permission to make changes to a non-structural structure is much easier to obtain;
- An organization accredited for this type of activity carries out the project and work plan. The project takes into account the standards for the size of the future opening, materials, and deadlines for completing the work. Then the project is submitted for approval to the housing inspection;
- When the work is completed, it is necessary to approve the changes made by the housing inspectorate. If the opening meets all the standards and requirements of GOST and SNiP, changes are made to the technical passport of the room.
Technical work consists of two stages. The first step is to sew up the old opening. To do this, the door, frame, threshold, and slopes are dismantled. A frame for sheathing is mounted in the vacated doorway. Its design must take into account that it is not the walls that are sheathed, but the opening that is completely closed.
Then all the cracks and irregularities are puttied, the putty is sanded, and the surface is ready for decorative finishing. The inside of the opening can be filled with insulation, which will also improve sound insulation.
The second stage is more complex and is performed sequentially:
- Marking the doorway. It must correspond exactly to the numbers in the project, taking into account the thickness of the finish;
- Drilling or punching a doorway. The first option is for thin walls. Performed with a concrete drill to avoid unnecessary cracks from jackhammers or concrete breakers. The second is for thick walls that cannot be drilled through. It is recommended not to break out the entire piece of the wall at once, but to cut it into small fragments and take it out onto the floor. This way the coating will not be damaged, the opening will be as smooth as possible, and there will be no damage to the wall;
- Installation of a metal frame to strengthen the opening. This is not a required step;
- Rough finishing, from preparatory primer to final primer;
- Installation of a frame for sheathing, if necessary;
- Decorative finishing.
How to bend drywall
One important detail: standard wall plasterboard does not bend well. For curved surfaces, they specially came up with thin ones - 6 and 6 mm thick. This bent part is easier to make from it. With a slight curvature, such a thin sheet can bend easily and without tricks. If you don’t want to buy thin GVL, there are two ways to bend the standard one.
The first is to take a needle roller and roll the cut section well on one side. You need to roll with force so that the plaster breaks. Then the leaf is soaked in water and left for two to three hours. After such procedures, it should bend quite well. You take it, fix it on one side, and gradually press it against the arch frame, bend it, gradually screwing it along the edges with self-tapping screws. The method is not bad, but if there is a lack of experience and insufficient processing of the gypsum, the sheet may burst. You will either have to mask the gap later, or start over.
Roll the strip with a roller with needles
The second way to bend drywall: on one side, make notches with a knife approximately every 4-5 cm. The notches should cut the paper. This strip is also gradually fixed, breaking the plaster as necessary. It bursts along the cut lines with light pressure.
Notches on one side make it easy to break the plaster
Materials used for manufacturing and finishing
Unlike traditional designs, there are not many materials for making arched doors.
- Metal. It is used quite rarely, as a rule, for outdoor use. Only utilitarian structures are made of metal. A common option is . Metal frame covered with boards.
- Plastic. Common material. It is based on . The design is borrowed from metal-plastic windows. Thanks to precision manufacturing, the doors have good performance properties. The tightness and strength are no worse than those of rectangular canvases. They can be used both as interior and entrance panels.
- Tree. Traditional and most common material. The quality of the canvas directly depends on the strength of the wood. The array must be well dried before production. The slightest distortion after assembly will make the door impossible to use. Both economy class options and exclusive masterpieces with individual designs are made from wood.
