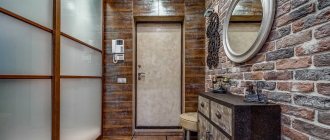
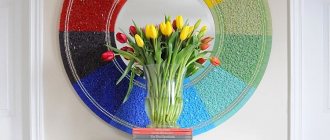
The mirror has been an indispensable attribute of human life for several centuries. It is difficult to imagine an apartment in which it is not present - such a room will be strange, lifeless, devoid of the usual comfort. Mirror decor adds personality to any interior, especially if it is made by hand and not at a glass factory. This item is decorated in a variety of ways, designed in many styles; more details can be found in our master classes on individual DIY techniques.
Types of decor
- Sea style;
- Mirror mosaic;
- Painting;
- Rhinestone decoration;
- Decoration with natural materials (stone, wood, sand);
- Jewelry decoration;
- Decor can be made from disks, leftover finishing materials and much more.
It is basically impossible to give a complete list since it is limited only by the imagination of the person doing the decor.
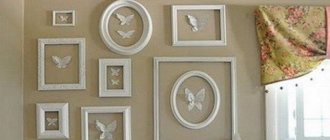
The photo of mirror decor shows various examples of how you can decorate your home yourself. You don’t need to spend fabulous sums on buying a beautiful mirror, just imagination and a little money, most often we make do with what we already have.
Let's look at some methods and instructions for decorating mirrors.
What can be used for crafts
Sometimes novice craftsmen ask the question of where to buy decor for a mirror and how to decorate the canvas. First of all, it depends on the method, the chosen material, and the complexity of the craft.
Absolutely any material is suitable to create a unique composition:
- Matches,
- Plastic bottles and broken glassware,
- New Year's balls,
- tubes,
- Textile,
- Natural material (shells, cones, twigs, flowers, eggshells),
- Pasta,
- Wire,
- Beads,
- Beads,
- Buttons,
- Rhinestones,
- Paints,
- Leg-split,
- Colored paper.
- For fixation and reliable fastening, use a glue gun, PVA, silicone, or superglue.
To give a glossy look, the product is coated with varnish with different effects (glitter, matte, tinted).
You can purchase the material at any hardware store, stationery, handicraft and creative shops, or find it yourself while on vacation at sea, in the park, or outside the city.
If there is a need for industrial decoration, engraving, etching, or enamel application, then you should contact a company providing such services.
Sea style
A marine-style mirror will not only be a beautiful accessory for your home, but also a reminder of your vacation, the blue sea and the hot southern sun. It creates an atmosphere different from all others, lighter with the aroma of the sea breeze.
Tools:
- Mirror;
- Seashells, river pebbles, pearls, starfish;
- Sand (cleaned, sifted);
- Super glue;
- Bandage or adhesive paper;
- Scissors, tweezers, cotton pads, alcohol-containing solution.
Step-by-step strategy:
- Degrease the mirror. This is a mandatory procedure and in order not to be repeated it will be indicated once.
- Using a bandage or paper, we make an interesting frame on the mirror. This is so that you can clearly see the boundaries of the frame, but you can do without it.
- Glue the large shells as symmetrically as possible. Before gluing, we lay it out the way we need it and go look from the side, this is done so that you can immediately correct any violations in their harmonious arrangement. We apply glue only to the shells.
- Between the big ones we glue small ones and river pebbles. Everything must be washed first.
- We glue starfish. They are very fragile and space must be left for them in advance.
- We fill the remaining spaces with the smallest shells, pebbles and pearls (they can be replaced with beads). When working with small objects, we use tweezers to avoid damaging the structure.
- We fill the remaining voids with glue and pour clean sand.
- After drying, clean the mirror and shells from any adhesive residue.
We hang a mirror with original decor made by ourselves in the place that you have prepared for it.
Design options
You can change the appearance of any mirror in two main ways - by decorating the glass sheet itself or by creating an unusual and original frame for it. Most often, of course, craftsmen and needlewomen choose the second option - it is much easier to think of a new frame format and insert a mirror into it, or glue a new frame directly onto the canvas.
On a note! In the case of creating a frame, the decor can be located both outside the mirror and directly on it.
How to beautifully decorate a mirror
However, do not be afraid to decorate the mirror itself. Now there are a lot of different materials and tools that will allow you to make unique applications and even matte the mirror in the right places.
On a note! Matting a mirror and creating all kinds of patterns on it has recently become very popular. It turns out that you can do this yourself, without resorting to the services of craftsmen.
Artistic matting
Mosaic decor
This is a wonderful decor that can fill your room with light from the sun's rays, with dozens of bunnies scattering around it. Various highlights add variety to even a sparse design.
Here is a list of the necessary tools to create it:
- Three types of mirror mosaics:
- Facet;
- Polished;
- Polished.
- Adhesive paper;
- Super glue;
- Grout.
How it's done:
- We cover the mirror with paper to create a frame.
- We draw a drawing with a pencil so that we can understand where to glue which type of mosaic.
- Using super glue, glue the mosaics as close to each other as possible.
- When the glue has dried, we rub the cracks with putty and remove the residue with a damp cloth.
- We hang the finished mirror on the wall.
Material selection
Polyurethane
The properties of this sealant are quite varied. Some even call it the material of the future. It is based on polyol and isocyanate. Thanks to them, polyurethane takes its previous shape after stretching. It is produced in several states:
- in the form of a viscous liquid;
- soft rubber;
- hard plastic.
To make a polyurethane mirror frame, it is best to use the latter option.
Metal
To make a metal frame, you need certain skills in working with iron. Professionals in this field can work with hard materials. But for beginners, it is best to use aluminum, as it is thinner and bends better .
Mirror glass
Mirror glass with a special coating is often used not only for paintings, but also for framing mirrors. It is sold in different sizes and shapes. Using a special glue, the purchased parts are connected to each other, creating a beautiful frame. You can save money by repurposing ordinary small mirrors that women keep after using powder compacts or other cosmetics.
Leather
Leather is often used for interior decoration . Its main advantage is that it can be chosen in color for almost any design. But it is best to use natural leather for crafts, since artificial leather can crack over time.
When making a frame, you need:
- pre-cut out its details on paper;
- carefully transfer them to the material and cut them out;
- then connect them;
- In order for the frame to be voluminous, it must be filled with padding polyester.
Rope
Rope rope is perfect for making a frame . It is quite durable and voluminous. Using the macrame technique, you can make various shaped strands from it that will tightly fit the mirror. But such a product cannot be used in rooms with high humidity.
Polyurethane foam
A budget option for making a frame base. When the polyurethane foam hardens, it will retain its shape, allowing you to attach decorative elements to it. But if there are few decorations, then it is better to paint it in advance. You can even open it with varnish. This will make her look more attractive.
Tree
You can make a wonderful carved product from wood for a bathhouse, which will not even need additional decoration. A wooden frame can be painted, varnished, or antique patterns can be made on the frame using a special tool.
Gypsum
The advantage of plaster is that it can be used to make a frame of any shape , even large and round. But it hardens quite quickly, so you need to make a mold out of plastic or rubber in advance. And it is important to remember that products made from this material break easily, so the product may not last long.
Painting with paints
Everyone has seen beautiful stained glass windows made of multi-colored glass; this method of decoration is for those who dream of such a mirror. Here the choice of pattern is also limited by taste and imagination.
Tools.
- Circuit;
- Stained glass paints;
- Brushes and acrylic varnish;
All this can be purchased at a stationery store.
Pattern application method:
- First, draw a drawing with a marker. You must have a ready-made, thoughtful sketch;
- We draw the outline next to the lines of the drawing; if it covers the marker, the pattern will be untidy. It is impossible to wash off the marker from under the outline;
- We erase the marker after applying and drying the outline. After drying, if necessary, remove unnecessary parts with a blade;
- Fill the stained glass paints, diluting them with a solvent for transparency, according to the sketch;
- After drying, we open it with purchased varnish. The decor is ready.
Benefits of DIY
Standard furniture and other similar interior items deprive the room of its individuality, making it boring. To create comfort and make a home unlike any other, many are inspired by the ideas of handmade craftswomen. Numerous decor variations allow you to decorate a floor mirror in the hallway, a wall mirror in the bathroom or bedroom, or a small portable product for personal use. The advantages of this solution are obvious:
- exclusivity - the unique design of the mirror will exist in a single copy;
- the realization of your own ideas about beauty - the opportunity to realize any design ideas;
- originality - you can decorate the frame so that it harmonizes as organically as possible with the interior of the room;
- freedom of choice - the owner of the mirror decides what to make the product from, so only environmentally friendly materials can be used.
It is much more pleasant to use a beautiful object that was created with soul. This is easy to achieve if you make the frame yourself. The process will not require much time and effort.
Exclusivity
Implementation of your own ideas
Originality
Wide range of materials
Rhinestone decoration
A mirror decorated with rhinestones will delight your eye with the play of light on the edges of the crystals. The frame can be decorated with both stripes and more complex patterns.
What is needed for this?
- Of course a mirror;
- Whatever rhinestones you like;
- Good quality glue.
Further actions:
- Option one: You can apply a wide layer of glue along the contour of the entire mirror and cover it with various rhinestones.
- Option two: You can apply a thin design on the mirror with a pencil, and then use glue and rhinestones to assemble the composition.
Do not forget that the decor of the mirror must be done taking into account the interior, as well as the room (bedroom, bathroom, living room, etc.) in which it will be located. This is so that it is not pretentious. Incorrectly chosen decor can ruin the overall picture.
Anyone can create original mirror decor with their own hands, and therefore there is no need to rush. You need to think about what type of decoration is suitable for this particular case and only after that begin to create the chosen image.
There are countless different compositions that can be performed on a mirror. From the above master classes on decorating a mirror, you can see how easy it is to create an original home accessory from a mirror.
The created composition will pleasantly surprise guests and update the interior. At the same time, everyone will be able to show their friends who want the same mirror how to decorate it at home.
How and from what to make a frame yourself at home?
When making a stylish and beautiful frame for a large wall or small table mirror, you need to stock up on time, patience and use your imagination. An undoubted advantage in decorating this accessory for a room is that everyone can choose a material for decoration that matches their budget. For decoration, you can use both expensive metals and stones, and cheap ropes, remnants of fabric or leather. Paper, cardboard and paints are suitable for the frame .
When making a frame, you should not rush, as one careless movement can ruin all the work done. Before starting work, you need to carefully think through the details and decide what shape it will be. It's best to first draw a sketch of it on paper. Let's take a closer look at some of the available materials that can be used and how to work with them.
Photo of mirror decor
Frame Decorating Tools
A complete set of available tools for creating mirror frame decor can be different and depends on the chosen technique. But for the most common methods you need to prepare:
- Acrylic paints, clear acrylic varnish.
- PVA glue.
- Sharp stationery knife, scissors.
- A textured cord and several leather belts that the owner will no longer need (as a rule, a technique is used to decorate a round mirror). It would be great if you can prepare belts with preserved buckles.
- Wine bottle corks. You will also need a container and brushes to clean the plugs.
- Remains of ceramic or metlakh tiles may come in handy. For such work methods, it is necessary to prepare special tile adhesive.
Simpler decorative options can be made using various natural materials (cones, fir branches, seashells).
DIY porcelain
To be absolutely budget-friendly, make the modeling mixture yourself. This modification is suitable for beginners and children. If you don’t want to make the modeling mass yourself, you can replace it with polymer clay or ready-made cold porcelain.
An interesting solution is to mold parts from airy plasticine. The kids will definitely love it.
IMPORTANT! Use glue with a plasticizer. It is indicated on the packaging or in the composition. Without a plasticizer, the mass will not work.
To prepare the mass:
- Mix cornstarch and PVA glue in a 2:1 ratio. When you cook, wet your hands with vegetable oil or Vaseline. Knead until smooth and elastic.
- Store the mixture in a bag so it doesn't start to dry out. Before sculpting, add the desired paint to the porcelain. You can use acrylic, gouache or food coloring.
IMPORTANT! If you plan to make white flowers, add white paint to the mixture. If you skip this step, the dry product will turn out to be an off-white color with a translucent texture.
