Plastering is a complex of construction works that is considered one of the most difficult. They include many nuances known to professionals, but incomprehensible to beginners. Therefore, to properly perform plastering work, it is recommended to use step-by-step instructions for each stage of interior and exterior finishing.
Choosing gypsum plaster and learning how to apply it
Basic qualities of materials
Finishing coatings made on the basis of gypsum are successfully used for rough and fine finishing of interior walls in rooms with normal and low humidity. New modifiers with different fraction sizes, special additives: polymer, mineral and improved production technologies have significantly influenced the variability of finishing materials. Now gypsum plasters can be used in bathrooms and when performing external work.
Universal additives used in the manufacture of plaster intensively form new qualities:
- high plasticity;
- increased adhesive properties;
- uncomplicated method of restoration;
- reduced weight.
In addition to the listed improvements, the finishing coating is environmentally friendly, safe, vapor permeable, and has a low level of shrinkage. These and other advantages actively attract supporters of finishing building facades with gypsum plasters.
The benefits of making tiles yourself
Gypsum tiles can be used to finish:
- Slopes. After installing the windows, during repair work, the slopes on plasterboard windows are decorated with gypsum tiles.
- Fireplace. A plasterboard fireplace is covered with gypsum tiles to give naturalness and originality.
- A flight of plasterboard stairs is lined with gypsum tiles to create the interior of the house.
- Doorways are decorated with gypsum tiles.
- Walls in a room, in a living room, in a hall. Laying gypsum tiles under the brick, highlighting significant places, for example, the wall on which the TV is installed.
- Columns and niches made of plasterboard. Finishing occurs to accent the background of the overall interior.
Benefits of making tiles yourself:
- to make tiles you will not need a lot of space, as well as drywall tools;
- it is possible to produce tiles without using a vibrating table;
- The manufacturing technique is easy. It will be understood by a person making tiles for the first time;
- painting the tiles is done independently;
- All materials for tiles do not have a high cost, which makes the manufacturing process enjoyable.
Components used in the manufacture of mixtures
Natural alabaster remains the base material for the production of gypsum plasters. Aqueous sodium sulfate is fired, crushed and then, during the production of the mixture, additives are added:
- Gypsum component - affects astringent properties;
- Whitewash (zinc, titanium) - forms the color;
- Polymer additives - increase viscosity and strength;
- Modifiers, plasticizers - reduce the rate of hardening;
- Foam glass, vermiculite, perlite, expanded polystyrene - used to reduce weight.
Lime fillers also modify the characteristics of the solution. In particular, after half an hour the applied layer hardens, and setting occurs after 5 minutes. The quality and cost of the product depend on the degree of grain size.
Polymer and mineral fillers give the materials lightness and elasticity. Unique properties allow the product to be used on most surfaces. Gypsum cement plaster is durable, and perlite plaster will provide an opportunity to save on costs and achieve thermal insulation qualities.
Tools and materials for the production of gypsum tiles
To produce gypsum tiles with your own hands, you will need a room in which there will be an optimal air temperature (+15, +20 degrees), as well as minimal humidity (dry room). To produce tiles at home you need:
- Form. It can be silicone or polyurethane.
- Ingredients for gypsum mixture.
- Perfectly flat table. This should be done using a building level.
- Plastic container for mixing ingredients.
- Special paint of the desired tile color.
- Acrylic based varnish, matt.
- Brush. It can be a small construction one for painting the entire surface of the tile. Art brush size 3 or 4 for fine sketching.
- An ordinary spatula.
Materials you should purchase are G10 gypsum and slaked lime or citric acid.
Separation of mixtures by category
The big advantage of finishing coatings is the possibility of use on virtually any substrate:
- Blocks made of cellular concrete;
- Reinforced concrete;
- Plasterboard;
- Wooden;
- Brick.
Solutions with additives of fine fractions can be used as decorative finishing.
Gypsum plasters are divided according to the main criteria:
- Performing finishing touches. The layer is formed on the order of 2 mm, where fine-grained fractions up to 0.63 mm are present;
- Rough coating. The composition with the addition of coarse sand is applied in a thick layer and used as a base for facing work, under decorative plaster;
- Mode of application. High-strength mortars (applied to surfaces, screeds), universal (ceiling, wall);
- Operational factors. Mixtures for rooms with normal and high humidity;
- Area of use. External and internal decoration of bases.
We can make an intermediate conclusion that the information provided will help you choose gypsum plaster for certain operating conditions.
Rotgypsum plastering technology
The technology for carrying out plastering work using a solution prepared from the dry Rotgypsum plaster mixture does not differ from the work performed with other gypsum-based materials. To create favorable conditions for work, it is necessary to provide a solid foundation. To do this, before applying the plaster, the surface to be treated must be cleaned, removing all spilled areas. After this, treat with a primer to remove dust and improve adhesion.
There are some practical techniques for plastering with Rotgypsum that allow you to achieve excellent results:
- Application of a plaster layer of increased thickness. The minimum thickness of the plaster layer created by Rotgypsum is 6 mm. Maximum thickness – up to 50 mm. If it is necessary to apply thicker layers, the material is applied in several stages. To apply the next layer, it is necessary to make notches on the previous layer to create better adhesion. This can be done using a comb - a notched spatula. Before applying the second layer, the surface should also be coated with a primer.
- Possibility of using plaster for gluing wallpaper without additional putty. Most often, the surface leveled with plaster is puttied with a thin layer of putty before applying decorative coatings. But when plastered with Rotgypsum, you can prepare the walls for wallpapering and painting without additional puttying. This allows you to significantly save on the purchase of materials - you do not need to purchase finishing putty, as well as on payment for work.
To do this, 20 minutes after trimming the irregularities remaining from the rule, moisten the surface generously with water and rub it in with a sponge grater. After this, finally smooth the resulting plaster milk using a metal trowel. The resulting surface is sufficiently even for gluing wallpaper without applying finishing putty.
- Painting over the plaster layer. If painting is chosen as a decorative coating, then the smoothed surface obtained in the manner described above is once again moistened with a large amount of water, and again smoothed with a metal spatula - trowel. This method allows you to obtain a perfectly smooth, glossy surface suitable for high-quality painting.
- Using plaster as a decorative coating. In addition to creating a basis for the subsequent application of decorative coatings, Rotgips plaster itself can also be successfully used as a decorative coating - creating a textured textured surface. To do this, before the surface hardens, it must be processed using special tools that create texture.
Is it worth choosing Rotgyps?
The choice of material for plastering work depends on the preferences of the master. You should not rely on reviews from other users, because they are both positive and negative. Some craftsmen complain that it is necessary to eliminate cracks using Rotgypsum. After plastering with Rotgypsum, surface microcracks may actually occur. But they are not “living” - they do not penetrate into the depth of the layer and do not affect the strength of the plaster layer. For gluing tiles and wallpaper, the presence of microcracks does not affect the quality of finishing work.
"Rotgypsum" (plaster). Description, types, application
Advantages of gypsum plaster
It is necessary to list the main advantages:
- High rate of adhesion with solutions, adhesives, paints and varnishes;
- A quick, easy way to sand a surface;
- Sufficient porosity of the finished layer, up to 60%, has a positive effect on the overall weight of the coating;
- Decoration options when the finisher will be able to apply different paints and varnishes;
- Improving the indoor microclimate due to vapor permeability;
- The consumption of the mixture is low compared to the use of other claddings;
- Low thermal conductivity will provide the opportunity to pay less for heating;
- Good hardening of the applied composition will improve working conditions;
- Minimum percentage of shrinkage;
- Increased degree of versatility, when plaster can be used on any substrate;
- Providing sound insulation due to the porosity, softness, and plasticity of the material;
- Resistance to temperature changes, frost from -50 to +70°C;
- Application to the base manually or mechanized;
- Environmental safety factor.
In addition to these advantages, you can add the characteristic of sufficient strength of the formed formation.
Gypsum plasters actually do not increase the load on the foundation, bases, reduce labor costs during the work process, and are easily spread on vertical and horizontal planes. The fire safety of materials is another plus in the collection of advantages. A high degree of resistance to the formation of fungus and mold is also considered a big advantage.
Which is better - cement or gypsum?
The question often arises: which plaster to choose? Let's try to figure this out.
Cement mixture is more often used for outdoor work . Its main component is lime, which acts as a plasticizer. It makes the solution more plastic and prevents cracks from appearing on the frozen surface.
The cement mixture, unlike gypsum, has increased resistance to moisture and low temperatures, and can be used for a longer time.
However, gypsum plaster is superior to cement plaster in terms of environmental friendliness . When using a gypsum mortar, the finished surface has a smooth structure, while a cement coating requires finishing procedures.
Among the main distinctive properties of both mixtures are the following:
- cement plaster has a lower price;
- the main advantages of gypsum mortar are high adhesion and plasticity, this greatly facilitates plastering work;
- The main disadvantage of cement mortar is the need to apply a minimum layer with a thickness of 20 mm. In the case of a gypsum mixture, this figure is 5-10 mm, depending on the manufacturer.
Comparing gypsum and cement taking into account the nature of the finishing work , we can say that for external plastering the more suitable option is cement mortar, while for interior finishing it is better to choose a gypsum mixture.
Disadvantages of using the material
There are few disadvantages of gypsum plaster:
- The underlying steel structures are susceptible to corrosion;
- Under strong mechanical stress, the surface may become deformed;
- Insufficient resistance to high humidity does not allow the use of any solutions when finishing facades, that is, when purchasing, you must read about the water resistance of the plaster.
Another disadvantage relates to the cost. Cement mixtures can be purchased much cheaper.
It is advisable to dilute gypsum plasters according to the instructions indicated on the packaging in order to achieve the desired consistency and then a highly decorative base. Before carrying out interior work, it is necessary that the room temperature is 7-28 degrees. To avoid cracks, the factor of exposure to direct sunlight on the wet layer should be excluded.
Features of applying plaster to different surfaces
On a brick wall
Like the preparation of various surfaces, application requires an individual approach.
If you want to finish a concrete wall, then you need to know that plastering occurs in several stages. The first layer is liquid plaster. It is designed to secure and better grip the surface.
Next, you need to prime the surface for better compatibility of the layers. And finally, the last step is the finishing layer. Its thickness should be no more than 10 mm. To avoid reaction of the solutions, the concrete wall must be treated with lime rather than gypsum mortar.
For brick walls, you need to pay attention to a cement-based mortar. It will not allow moisture to pass through, which is especially important for such surfaces. Minimum thickness 20 mm.
Aerated concrete walls have good waterproofing, so the permissible layer is 5-10 mm.
Question about surface thickness
During work, it is advisable to exclude drafts. During the plastering process, the material consumption per square meter reaches 10 kg with a layer thickness of up to 1 cm. After application to the wall, the solution hardens in approximately 3 hours. After 10-15 days it acquires strength characteristics.
It must be remembered that the thickness of the applied layer depends on the grain size:
- Thick coatings are formed from coarse-grained plasters;
- In medium-grained ones, the thickness can reach 5 cm;
- Fine-grained ones are applied in a thin layer of 7-8 mm.
Dry mixtures must be diluted with water without adding auxiliary components. Consistency density is achieved by mixing different amounts of water. A more liquid solution is well suited for use on prepared walls and finishing. The thick mixture is used to seal base defects, as a rough lining.
Why prime walls before plastering?
This question has several answers:
- During the priming process, dust and grains of sand are removed from the surface. In addition, the primer fills small cracks.
- The adhesion of the surface to the plaster solution improves.
- The likelihood that the walls will become damp in the future is reduced.
- Correctly selected and applied primer will increase the service life of the plaster coating.
- When choosing a primer with antifungal properties, the treated surface will be protected from the formation of mold and bacteria.
Powder and viscous mixtures
When purchasing powdered formulations or liquid solutions, you must pay attention to the date of manufacture and the integrity of the bag or bucket. The shelf life of the topcoat is 6 months. It is not advisable to purchase expired gypsum plaster in damaged packaging. Mixtures may spread poorly over the wall area, lose adhesive properties, take a long time to dry and cause other inconveniences in work.
The production of gypsum plasters has been successfully established at domestic and foreign enterprises. Every connoisseur of exquisite interiors will be able to buy powdered compositions in 15-30 kg bags or purchase ready-to-use solutions. They are sold in 20 liter plastic buckets and have a paste-like consistency.
Conclusion
Now you can select a high-quality gypsum composition for facade plaster and properly prepare it for use. The video in the article will reveal some aspects in even more detail, and if you have questions, you can ask them in the comments.
Did you like the article? Subscribe to our Yandex.Zen channel
May 15, 2022
Materials for finishing facades, Plaster and putty of walls
If you want to express gratitude, add a clarification or objection, or ask the author something, add a comment or say thank you!
Manufacturers of gypsum plasters
The choice of dry mixtures on the building materials market is most widely represented, but working with powdered mixtures is not easy, especially for beginners in the field of repairs. Therefore, inexperienced connoisseurs of attractive interiors and exteriors are recommended to purchase ready-made solutions. To start using this gypsum plaster, just open the jar and pick up a plastering tool. There is no need to dilute with water or add any additives.
Below are the most popular powder mixtures and the criteria for use:
- Timmaxplastt 25. For rooms with a normal microclimate;
- Rotband Krauf. For rooms with high humidity;
- Volma Plast. There are mineral and chemical additives;
- Axolit A1. Premium plaster;
- EK TG 40 WHITE. It is considered ideal for wallpapering;
- Founds Gipswell T-25. Economical, environmentally friendly;
- Prospectors. After hardening, you can grout and create a gloss effect;
- Unix Ecolayer. The finished solution will have good plasticity;
- Ascolit M 35. Application with the condition of a mechanized application method.
It is recommended to apply thick compounds exclusively to the prepared base, and during the work use a spatula and building rules.
Features of the compositions and their varieties
First, let's figure out what gypsum plaster is. The mixture is prepared on the basis of gypsum, a natural material that provides high strength coatings and very fast hardening of the finish. The composition is strong and durable, but unlike cement mixtures, gypsum does not resist moisture well, and this is the main difference between these options.
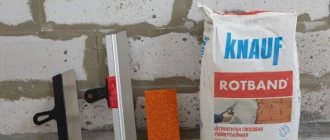
The popular Rotband plaster is used exclusively for interior work; other compounds are used externally
Previously, gypsum plasters were used exclusively in dry rooms with a stable microclimate. But modern additives provide the necessary level of resistance to moisture, which makes it possible to use this option for exterior finishing. It is in no way inferior to cement; moreover, due to its high elasticity, it is much easier to apply and the surface is smoother and neater.
Advantages and disadvantages
Let's start with the main advantages:
| Illustration | Description |
| Ease of use . Gypsum-based compositions are applied using hand tools, which cost little and are sold in all specialized stores. You can save significant money by doing the work yourself, since the services of finishers are often more expensive than the materials themselves. | |
| High elasticity of the finished solution . This is the main advantage over cement options, thanks to which it is much more convenient to work with gypsum mixtures. Another important plus is excellent adhesion to substrates if they are properly prepared. | |
Surfaces rub easily. You can easily remove minor blemishes and level the façade using a grater. Gypsum is easier to process than cement, and this is also an important advantage, because the work takes much less time and effort.
| |
| Resistance to cracking . If the finishing is done correctly, the walls will retain an attractive appearance for many years and will not crack due to changes in humidity and temperature. This is ensured by the properties of gypsum and special additives that make the coating even more reliable and durable. | |
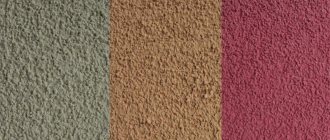
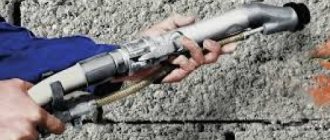
| Different texture options . You can make either a perfectly smooth surface or give it a structure; this is achieved through different application methods. For example, when machine distributed on the wall, a so-called fur coat is formed, which is what is shown in the photo. There are other options, there are many of them, so it makes no sense to list them all. | |
| No shrinkage . Another very important aspect to achieve perfect finishing quality. The layer practically does not change its parameters when drying, which simplifies the work and eliminates the formation of unevenness and cracks. |
Let's look at the main disadvantages:
- High price . The mixture itself is inexpensive, but when compared with cement options, the difference is noticeable;
- Demanding adherence to technology . To get a good result, you need to properly and properly prepare the surface, prepare the composition as prescribed in the instructions on the package, and apply it within half an hour while it is plastic.
Types of plasters
You can find different formulation options on sale, but they are all divided into three main groups:
- Fine grain plaster . It consists of crushed sand and gypsum of the smallest fractions, resulting in a perfectly smooth surface during finishing. This option is suitable for finishing leveling, since it can only be applied in a layer of no more than 8 mm; if you apply more mortar, it will simply crack. But if you need to perfectly level previously plastered walls, then this is exactly what you need;
- Medium grain compounds . The most popular and sought-after solution, which is distinguished by its versatility of use and ease of application. The composition can be distributed in a layer of up to 5 cm, and it will not crack. The result is a fairly flat surface with minimal errors, so you can use this option for finishing facades without additional putty;
Universal compositions have a medium-grained structure
- Coarse mixtures . This option is most often used in industrial facilities and is applied by machine; it can be distributed in a layer of up to 8 cm, which is very convenient on uneven surfaces. The composition contains fairly large inclusions, so a leveling layer is most often applied on top of the base layer to achieve an ideal result.
Also, gypsum facade plasters differ in the method of application; there are only two options:
- Hand applied compositions . This is the most common type of plaster, specifically designed to be prepared and spread on the wall using hand tools. Many special additives increase plasticity and improve adhesion to different surfaces. Setting time usually ranges from 40 to 60 minutes, so you should cook only as much as you can use in that time;
- Machine applied plasters . This option is used on an industrial scale and is excellent for external walls, because it allows you to very quickly apply the composition to large areas. The composition contains additives that simplify its application with special equipment, and the setting time is about two hours, so that after application the master has time to level the surface.
With a mechanized method, it is best if one person does the application and another does the leveling.
How to choose a mixture
When choosing a specific option, consider several aspects:
- Purposes of use . The packaging must indicate that the composition is suitable for outdoor use; the plaster must be frost-resistant and impervious to moisture. If decorative finishing is carried out indoors with high humidity, then it is also recommended to use mixtures for exterior work so that the finishing is not damaged by moisture;
- Application layer thickness . The volume of composition that needs to be purchased directly depends on this. Gypsum options have much lower consumption than cement ones, so when choosing a specific solution, carefully read the information on the packaging to make the necessary calculations.
As for specific brands, the products of three manufacturers are most often found on the market:
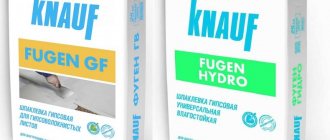
- Knauf. The company, present on the market for more than 20 years, has a wide range of products that have proven themselves well among customers. The compositions are more expensive than their analogues, but the quality is appropriate, so most professionals choose this option;
- Volma. A domestic brand that produces lightweight compounds with reduced consumption and increased plasticity. It has an affordable price and can be considered the optimal solution in terms of price-quality ratio;
Volma compositions have good quality at low cost
There are options for Volma compositions that do not even require preliminary priming of the surface. This simplifies the workflow and reduces material costs.
- Berghauf is a brand that has a large range of plasters for external and internal use. The compositions are of high quality and are characterized by plasticity and good adhesion, making them easy to apply even for inexperienced people. The line includes compositions of different price categories, so each buyer will choose an option within their means.
Excellent composition with increased plasticity for ease of application
Which option to choose is up to you, it all depends on how much money you are willing to spend. But it’s better not to save money; if you have the opportunity to purchase a higher-class composition, then take it, since external plaster must be of high quality and resistant to adverse influences.
How to prepare and apply plaster
Now let's look at the main aspects of using the composition:
| Illustration | Description |
To prepare the solution you need the following:
| |
| The required amount of water is poured into the container . Usually it is taken at the rate of 0.5 liters per kilogram of dry mixture, but the proportions may vary, so it is better to read the information on the packaging. The required amount of dry composition is poured into the water in small portions. | |
| The composition is thoroughly mixed . You need to try to go through the entire volume of the bucket so that there are no dry layers left at the bottom. The solution is left for 5 minutes, then mixed again, after which it can be used. | |
Application can be done in different ways:
|
Surface decoration options
Mostly mixtures are made: white, gray, but you can find solutions of beige, pink, and blue shades. The color is influenced by the properties of the gypsum, production technology, and the addition of special pigments. To achieve the most aesthetically pleasing surfaces, you can try applying Venetian plaster. It is created by applying several layers of different tones, wax, and imitates marble and granite.
Various fillers are added to gypsum plaster: sand, mica, crushed brick, wood fibers, small pebbles, etc. The components provide a unique texture at the finishing stage. Thanks to all kinds of additives, a professional finisher can easily create interesting patterns and effects:
- silks;
- stone;
- skin;
- velvet.
When creating imitations, tools are used: brushes, rollers, grouts, trowels, spatulas, etc.
What does consumption depend on?
In order to stock up on the amount of SGShS required for plastering work, measurements and calculations are made. The packages indicate the approximate consumption when applying a layer of gypsum plaster 10 mm thick per 1 square meter. Therefore, you need to calculate the arithmetic mean thickness of the layer for the surface that is going to be plastered. If the walls of the new home are almost perfectly smooth, then any given value (for example, the minimum) can be taken into account. Then the areas of the ceiling, walls, columns, etc. are simply summed up. and multiplied by the minimum layer value, taken in cm (0.5 cm), and by the consumption rate of gypsum plaster per 1 m2 of wall, specified by the manufacturer. The resulting value is multiplied by 10-15% to make a margin for error and for the fact that part of the solution falls on the floor.
If the walls are uneven, then the middle layer is calculated for each of the walls (as well as other surfaces), for which the consumption is calculated (also by multiplying the area by the average thickness (in cm) and by the consumption of gypsum plaster per 1 square meter.
The average layer thickness is determined by measurements along the lighthouses. Along them, at 3-4 points (per 1 beacon), measure the distance from the surface of the beacon strip to the wall (perpendicular to its surface). Having measured the distances for all wall beacons, the sum of the distances is divided by the number of measurement points. The average layer thickness is obtained.
You can also calculate the volume of gypsum-based plaster and, multiplying it by the density of the mixture, obtain the required quantity (weight) in kg.
The first thing that determines the consumption of SGHS is the degree of unevenness of the walls. The second factor is the technical characteristics of the mixture itself. The third is the degree of skill of the plasterer (less mixture ends up in waste).
SGHS are usually sold in paper containers of 30 kg. When calculating the number of bags, divide the calculated weight by 30 kg, the resulting figure is rounded up to a whole number.
Figures and facts
The basic requirements for the quality of gypsum plasters are outlined in GOSTs. Approved SNiP 3.04.01-87 regulates compliance with treated surfaces. In particular:
- The number of irregularities per 4 m² should not exceed 2, 3 at a depth of 2-5 mm;
- Deviations vertically and horizontally per meter are within 1-3 mm, and across the entire height 5-15 millimeters;
- Maximum base humidity up to 8%.
After finishing the finishing, the following requirements are imposed on the walls:
- Thermal conductivity 0.25-0.3 W (m °C);
- Vapor permeability 0.11-0.14 mg (mh*Pa);
- Density per m³ 950 kg;
- Adhesion 0.3 MPa;
- Strength 2.5 MPa.
It is not recommended to use gypsum plasters that do not meet the necessary criteria for rooms with high humidity.
Spray
Spraying is necessary to better fill voids and irregularities on the wall. The solution is simply thrown onto the wall in an arbitrary manner. The consistency of the solution should be creamy. To create a colored spray layer, the solution is tinted.
The composition can also be applied using this method through the cells of a metal mesh. It must be stretched onto a wooden frame and placed close to the wall being treated. You can add fine gravel or sand to the mixture.
Applying the base layer
The base layer will also require a creamy consistency. Throwing plaster is carried out in the gap between the beacons. The layer should not exceed 5 mm in thickness. If there is excess mass on the surface, we cut it off. Otherwise, add the required amount of solution.
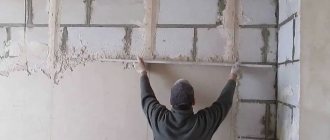
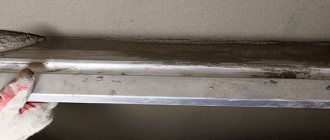
We distribute the mass along the wall using the rule. Movements should be both horizontal and vertical (from bottom to top). Since we are doing work inside the beacons, it is necessary to ensure that they do not move from their original position.
Grout
Once the mixture has dried, you can begin grouting. A wooden float is usually used for the cement mixture. Using this procedure, we smooth out minor defects and prevent the appearance of cracks. Movements should be smooth and spiral. Do not overdo it! Too much pressure can negate your efforts in applying the plaster.
By following all the rules and precautions, you can independently finish your house with façade decorative plaster. This is not such a labor-intensive and cunning task, but it requires precision and diligence. When choosing a solution, consider the surface on which you are going to apply the solution. Do not neglect the manufacturer's instructions, and your home will be the most beautiful!
Preparatory work
Before applying gypsum plaster, you should prepare the base:
- Remove previous decor;
- Get rid of debris and dust;
- Fill defects with mortar: chips, cracks, potholes;
- Apply primer;
- Install beacons to control the thickness of the layer.
Perforated slats are used as beacons. Metal fixtures are installed using waterlass. The size of the step depends on the length of the building code and should be wider.
When working with gypsum plaster, you will need the following tools:
- construction mixer with attachment;
- set of spatulas;
- trowels;
- steel lighthouses;
- building code;
- graters, graters;
- ironers;
- plaster corner.
You need to prepare buckets of different capacities, rags to mix the solution and wash the plastering tools from the mixture.
Storage conditions
SGHS have an expiration date. Usually this is 6 months, after which the structure of the SS deteriorates (for Vetonit LR+ the shelf life is 1 year). This happens even when the correct storage conditions are created, which are as follows:
- storage in undamaged manufacturer's packaging (partially protects from moisture);
- The storage room is dry, the air humidity is no more than ???
- compliance with the temperature regime, to which some additives are especially sensitive (there should be no sharp fluctuations and subzero temperatures, since SGHS freeze);
- Kraft bags with mixtures are stored on wooden pallets.
If the age of the SGHS is greater than the expiration date, then it can be used. Make a test batch and determine which characteristics of the mixture have changed. For example, setting time has been reduced. In this case, the batches are made in a smaller volume and used either as a starting solution, or where the strength of the coating is not so important. When setting time decreases, SS can be diluted with water with the addition of ½-1 cup of PVA (or wallpaper glue) per bucket of water.
Gypsum behaves like cement. Its shelf life is ~6 months.
The article provides answers to questions about how to apply, how to level and how to trowel plaster, whether it needs to be primed and many others. Plastering walls with gypsum plaster with your own hands is quite an exciting activity, requiring ingenuity, mobility and observation. In return - the daily pleasure of realizing oneself as a creator, contemplating smooth walls and living in a favorable microclimate.
Preparation of plaster mortar
The quality of the finished coating is affected by the correct mixing of dry mixtures. In order not to be disappointed in the work done, it is recommended to carefully read the instructions on the packaging, in particular the point where the ratio of water and composition is indicated. It is better to prepare the solution using a construction mixer with an attachment. One person gradually pours the powder into the bucket, and the other stirs it by turning on the electrical appliance at low speed.
Before secondary mixing, the solution is allowed to sit for 5-10 minutes. It is advisable to apply the finished mixture to the base within an hour. Then it will begin to lose its plasticity and harden. The hardened composition cannot be diluted with water. The material will have to be thrown away and the bucket washed. That is, the mass must be prepared in such a way that it can be used immediately.
Technological process
Before plastering the wall surface, its preliminary preparation is carried out. The base is cleaned of dirt, dust accumulations and grease, the old finishing layer is removed, and coated with a primer that improves adhesion.
Then eighteen liters of heated water are poured onto thirty kilograms of the dry mixture, and the contents of the container are stirred with a construction mixer. Considering the speed of setting of the finished mixture, it is recommended to proportionally reduce the volumes of the components, which is especially important if you have to work alone.
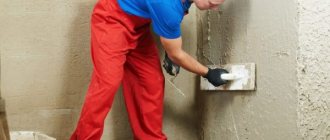
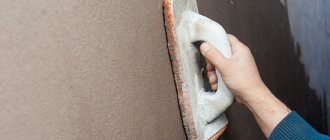
The plaster solution is distributed over a previously cleaned and primed surface, the work is carried out with a spatula, it is best to move from the bottom edge of the wall to the top.
It is recommended to level the plastered surface after each completed section, the area of which does not exceed one square meter.
As a rule, the wet plaster solution floats down and is periodically “pulled out” with a spatula. After fifteen to twenty minutes, the plastered area is smoothed with a grater. Later, the façade can be moistened and treated with a smoothing iron to eliminate smudges, scuffs and sagging.
How to apply gypsum plaster
The solution can be made according to instructions from folk craftsmen, but in this case the user takes responsibility for the final result. In particular, in the process of mixing the composition they use: gypsum, tile adhesive, PVA, chalk, plasticizers and other ingredients. The components are added in different proportions and a thick mass is achieved.
Basic rules for applying gypsum plaster.
- The prepared solution is applied from top to bottom.
- It is advisable to take the thick mass onto the instrument in large portions and overlap it.
- To avoid bubbles, a grater is used.
- The construction rule is to spread the mixture. Lighthouses serve as landmarks.
- Wavy lines are made with the sharp edge of a trowel along the entire length. All stripes are processed this way.
- Allow time for the first layer to harden.
- Then the actions are repeated, but with the condition that the walls will be treated in sections.
- The surface must also be smoothed between installed beacons.
- Then the gypsum plaster is given a period of time for adhesion and after 45 minutes the finishing touch is performed.
- The beacons are removed and the holes are covered with material.
At the last stage, the seams are trimmed and other defects are removed.
Advantages and disadvantages
Why are more and more people thinking about decorating their home with this particular material?
The first thing you pay attention to when choosing facade plaster is the variety of colors and textures. If the desired shade is not available in the finished version, it can be easily obtained by tinting. In this case, there will be no difficulty in choosing if you want to choose several color options. You can choose either a texture in the form of sand dunes or a stone grotto, or marble
The versatility of the material should also be noted. It is perfect for both wooden, stone and concrete surfaces.
With the help of facade plaster you can not only “decorate” a building, but also hide minor imperfections. Be it small pits or depressions, bumps, chips. Under a layer of this substance they will not be noticeable.
Plaster also acts as a waterproofing, vapor barrier and insulating layer. Of course, if the issue of insulation is particularly acute, then you can add another layer of heat insulation. But if there are no significant problems, then you can get by with just this layer. The problem of vapor barrier is especially relevant for wooden houses - they must “breathe”. If this is not possible, the tree will quickly decay.
The advantage is the price of the material and the total cost of the work. As of 2014, for large cities, the average price for 1 sq.m. including work is 1,780 rubles . This figure is almost 3 times less than with brick cladding. Even if you want to finish it with inexpensive siding, it will be much more expensive than decorative plaster.
If over time you decide to update the appearance of your home, then doing this with plastered walls is much easier. You can simply repaint the surface. Partial repairs are also possible, which is completely incompatible with other types of finishing.
We have highlighted the advantages. To make the picture complete, we will also describe the difficulties that may arise during implementation.
In order for the appearance of the structure to please the eye, the work of plastering the walls should be carried out by people who have experience in this. Otherwise, cracks and peeling cannot be avoided. You need to know the correct proportions of the solution and consistency.
You can't handle the finishing touches alone. In any case, you will need an assistant. Someone must mix the solution while you apply the layer and hand it to you to work with.
Application of reinforcement
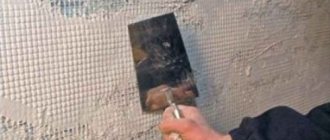
In certain cases, metal or plastic mesh is used. Reinforcement is necessary when large defects are clearly visible on the surfaces and there is a need to increase the layer to 8 cm. To install the mesh, you will first need to mark with a marker every 35-45 cm. Holes are drilled at the marked points and plastic rods are inserted. The mesh fabric is cut into pieces, overlapped and secured with self-tapping screws.
In the process of decorating the bases, the working tool must be periodically cleaned of the adhering layer and washed in water. When the prepared material is finished, before mixing the next batch, the bucket should be thoroughly washed so that the remnants of the previous mass do not get into the new solution. Unwanted mixing will negatively affect the quality of the final work.
The final stage
After completing the gypsum plaster work, it is important to ensure that the mixture hardens properly. You cannot open windows or create drafts to speed up the process. Artificially created air circulation will cause the top layer to harden too quickly. But inside the solution will remain damp, which will create favorable conditions for the formation of fungus, mold, and cracking of the applied material.
If you have to plaster a large number of surfaces, it makes sense to use special equipment. The machine method of applying gypsum plaster will significantly simplify manual labor and speed up repair time. The cost of plastering stations is high and it is not practical to buy a device for one use. It is more economical to rent it for a few days.
FAQ
- Is it possible to glue wallpaper directly onto gypsum plaster? – To apply wallpaper, the surface of the coating must be primed and, if the surface is grainy, it must be puttied. A glossy white finish will not show through the wallpaper. It is enough to prime it so that the plaster does not draw water out of the wallpaper glue.
- Why does gypsum plaster harden so quickly? – This can happen for several reasons. For example, if you use warm water for a solution, the rate of chemical reactions increases. A sharp acceleration of crystallization causes ready-made crystals formed in the previous batch or even a piece of old gypsum wall plaster to enter the solution. Therefore, it is necessary to thoroughly rinse the tools and wash the containers more often (after each completed batch); you should not throw the solution that has fallen on the floor into the container, etc. Acceleration of setting is also caused by long-term storage of SGHS and storage in opened packaging. SGShS is a counterfeit.
- Do I need to putty the wall after gypsum plaster? – Yes, if it wasn’t shiny.
- Is it possible to lay brick directly on gypsum plaster? - No. For a number of reasons, it cannot be used as masonry. Brick is a porous material, it will draw moisture from the fresh mortar. As a result, the coating does not gain the required strength. And no one will prime every brick.
- Gypsum plaster hardens too quickly, what should I do? – You can mix a small volume of solution with the addition of retarders for testing. If retarders do not help, make smaller batches in order to have time to work them out.
- Is it possible to apply a gypsum plaster screed to a cement screed? - Yes. To do this, the cement surface is primed.
- How to lay a cement plaster screed on existing gypsum plaster? – This cannot be done, since cement is a shrinking material. It will tear the less durable coating.
- How can you make homemade gypsum plaster? – Above are the recipes. However, you need to be prepared for the fact that economically or in terms of time it will not be worth the candle.
- How can you definitely distinguish fake gypsum plaster? – You can distinguish a fake only by directly comparing the behavior of mixtures during dilution and during operation. Therefore, it is easier for non-specialists to be attentive to the packaging details (paint quality, packaging material and other details).
Use of automatic devices
To operate a plastering station, you must have special knowledge and experience. It consists of a mixture supply system, mixer, control unit, receiving hopper, compressor and other components. The advantages of using the unit are very obvious:
- Increased speed of processing areas;
- Automation of manual labor;
- Environmental Safety;
- Saving materials;
- Impeccable quality of plastered surfaces.
The equipment has two main disadvantages: high cost and considerable dimensions.
When using the unit, the operator regulates the mixing and supply of the mixture. The solution lies on the wall in an even layer, evenly, but you still have to level the treated areas manually. Material consumption depends on several factors:
- Equipment models;
- Plaster brands;
- Coating thickness.
Those who do not have the opportunity to use plastering stations, but are eager to simplify hard work, can be advised to order plastering pumps. Modern industry produces devices specifically for working in small spaces.
Preparing the base
First of all, the surface is cleaned of dust and stains. If there are oil traces and stains, it is better to cut them out, as they may appear again. Further progress of work depends on the surface.
If the surface is made of stone or concrete, then notches are made on it for better adhesion of the layers. The most labor-intensive preparation involves wooden surfaces. To keep the plaster in place, shingles are used. They consist of slats of coniferous wood. They are nailed to the base using nails. The cell size for walls should not exceed 45 mm by 45 mm.
Instead of such shields, you can use a metal mesh, but wooden “mats” are still considered a better option. All metal parts should be treated with an anti-corrosion solution to prevent rust.
Common Mistakes
The finished coating can be prepared for the use of decorative materials. Before painting, the surface is treated with a brush with soft metal bristles and a characteristic roughness is achieved. Texture is necessary to create adhesion when applying primer in 2-3 layers. But first you need to find out the moisture content of gypsum plaster. It should not exceed 1%. A moisture meter is used for measurements.
Inexperienced finishers often ignore the basic rules for using gypsum plaster. The following are common mistakes that will negatively affect the quality of work:
- Applying a thick layer instead of 2 small layers. In this case, the solution will dry unevenly or slide off;
- Mixing with additives not specified in the instructions or preparing the mixture according to recommendations from a friend. Such amateurism often leads to sad results when the service life of the plastered surface is noticeably reduced;
- Adding a new portion to the remnants of the previous composition. In this example, a violation of the adhesive properties of the material and further crumbling and shedding are possible;
- Temperature violation. It is advisable to carry out finishing work at temperatures from 5 to 25°C. Otherwise, the gypsum plaster will begin to harden, lose its unique properties and will not fit well on the wall, which will inevitably lead to cracking.
- In extreme heat, it is also better to postpone plastering the surfaces. Too rapid evaporation of moisture from the solution will lead to disruption of the crystal lattice and the formation of a characteristic cobweb.
- Applying the mixture to a dry or too wet surface. If an inexperienced finisher does exactly this, there is no talk of reliable adhesion. The material will begin to swell and gradually fall off.
A smooth base should be made matte, and a too rough base should be coated with 2 layers of primer.
Clearing the form
After the completed procedures, when the tiles are completely ready, you should clean the work area yourself and clean the mold. To do this, you can use a dry cloth or sponge. Carefully wipe all corners and place the mold in a dry, dark place. It is not allowed for the uniform to be in sub-zero temperatures or in the sun.
If there are white traces left in the form after the tiles, then you can pour concrete into it and leave it to harden. When the concrete pebble is removed, all the white residue is left behind.
The process of removing finished gypsum tiles from the mold. Following the sequence, you can make individual gypsum tiles, which will subsequently decorate the interior of the house and create the desired atmosphere. Creating tiles is a simple process. Making a mold yourself sometimes saves money, because silicone with additives for the mold costs significantly less than the mold itself. Installing gypsum tiles on the wall will be quick and simple. The final work will delight not only the owners of the house, but also the guests. But, if there is a desire to produce a certain decorative stone, then the form is purchased on the market.
