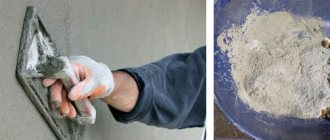
Lime plaster is a popular and simple surface finishing material. The main component is lime, which does not dry quickly; both a master and a beginner can handle it. Lime mortars are universal plasters (for indoor and outdoor use, as a starting and finishing coating). She handles outdoor and exterior work. After all, lime has a number of advantages: easy to use, available to buy, low price, reliable. The only negative is that the finished walls are afraid of moisture.
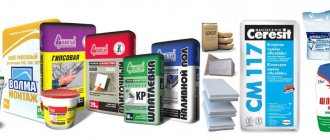
Therefore, use is not recommended for rooms such as a bathroom, kitchen, balcony, basement. If necessary, I make a combination for these rooms: lime is mixed with cement, the result is a complex solution that dries faster, but is waterproof and heat-resistant. Manufacturers basis, ilmax, knauf, rotband, baumit, vetonit, produce the mixture in bags of different weights, from 5 to 50
Features and composition of lime plaster
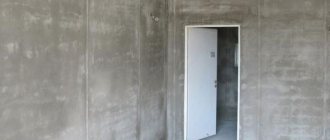
The purpose of such mixtures is simple: to level the surface and prepare it for subsequent finishing work. This will help protect the wall from negative influences, and the process of applying a decorative layer will be simplified significantly.
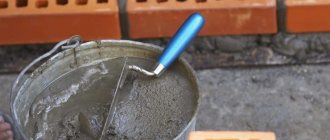
Lime mortar for plaster must be prepared immediately before finishing. There is an option to buy ready-made plaster and dilute it according to the instructions on the package. For example, a good and proven option is cement-lime plaster Knauf UP 210. The proportion of components is indicated.
If you want to save money and make the composition yourself, then you need to know the composition. The solution consists of the following components:
- Lime;
- Sand;
- Water.
Added lime to the composition makes the plaster more flexible and protected from cracks. It is easier for beginners to work with; it goes well with wooden surfaces. However, lime plaster is intended for interior work, as it does not withstand moisture.
Cement-lime plaster, technical characteristics:
- The color of the mixture is light gray.
- Consumption is approximately 1.5 kg/m2 with a layer thickness of 1 mm. Consumption depends on the type of surfaces and their curvature. The thickness of the starting plaster layer is not less than 5 mm.
- Water consumption is from 0.17 to 0.2 liters of water per kilogram of mixture.
- For 2–3 hours, the prepared plaster will not lose its suitability. This is a plus for beginners.
- Adhesion to the surface after a day is 0.3 MPa, after a month – 0.5 MPa no less.
- Optimal conditions for application are from 5 to 30 degrees above zero.
- Vapor permeability indicators from 0.1 mg/mchPa.
- The number of freezing and thawing cycles (frost resistance) is 50 cycles.
- Compressive strength 7 MPa.
- Sold in paper bags. Average weight – 25 kg.
The characteristics of the prepared mixture are excellent. That’s why I use it so often when leveling walls.
Finishing
The ideal finish largely depends on the accompanying criteria, where one of the first places is occupied by surface preparation and step-by-step execution of work. The first and main stage is preparing the work area, clearing it of old finishes.
Wall cleaning
If the base is loose, at least two layers of primer .
Primer
Concrete or brick surfaces only need to be primed once. The solution is then mixed with a low-speed drill to obtain a homogeneous mass.
Preparing the mixture
It is advisable to do only two stirrings. Plaster is applied in two ways:
- machine;
Machine method
- manually , but massive potholes are pre-filled.
Manual method
For this, a solution is used that is thicker and more viscous, and it only needs to be dry before applying the main ball. The material described in the article is applied with a spatula or a rule, and it is important to work within the permitted temperature range, which is indicated by the manufacturer on the packaging.
Advantages and disadvantages
List of advantages that the mixture has:
- Versatile, can be applied to concrete, brick, plasterboard and wood.
- It is light in weight and will not load the structure like cement plaster.
- Plastic, easy to work with, long shelf life after mixing.
- It is vapor permeable, moisture passes through the walls, and the optimal microclimate inside is not disturbed.
- Lime mortar has good thermal insulation characteristics.
- If the application technology is followed, there will be no cracks.
- Alkali prevents the development of fungus and mold on the surface.
- Does not burn and does not support combustion.
As for the disadvantages, they are:
- Insufficient strength.
- Before making a lime mortar for plaster, it is important to know the proportions and slak the lime in advance. This is a long process, taking approximately two weeks.
- The material is afraid of moisture.
- It takes quite a long time to dry.
Why are plasticizers needed?
Plasticizer is a special compound added to the solution to increase its plasticity and elasticity.
Beneficial effect of using a plasticizer:
- Reducing the amount of water that impairs the hardening of the solution.
- Increasing the moisture resistance of the seam.
- Increased frost resistance.
Plasticizers have different purposes:
- Catalysts. Serve to speed up and increase the strength of the hardening of the solution.
- Modifiers. Allows you to obtain additional capabilities of seams - greater resistance to mechanical stress, moisture resistance, etc.
In addition, plasticizers make it possible to obtain a more elastic seam that compensates for thermal expansion of the cladding. This ability helps maintain the strength of connections with the load-bearing wall and prevents the appearance of cracks in the seams that can accumulate moisture.
Area of use
Depending on the type and composition of the lime mortar for plaster, it is used for finishing surfaces inside and outside. These are agricultural buildings, industrial buildings, residential and public premises.
However, when working with lime, you need to take into account several nuances:
- A layer of plaster will not work if you plan to fix furniture or household appliances to the wall.
- It is not recommended to use mixtures for rooms with high humidity levels: kitchen, bathroom, basement.
Video description
Watch the video on how to make clay plaster:
Lime-cement mortar
Lime-cement mortar is considered universal for external and internal work.
Where is lime-cement mortar used?
It is used:
- for finishing the facades of private buildings;
- utility buildings;
- production workshops;
- balconies and loggias;
- residential premises.
Limitations for the use of lime-cement complex:
- In climate zones with high humidity, use on building facades is not recommended.
- In damp basements.
- In wet production workshops.
- For any external and internal work, if the humidity level exceeds 65%.
The material is intended for rough finishing of walls. It is durable and has a fairly long service life.
Proportions and preparation of cement-lime mixture
First, choose a brand of cement. The M400 grade is suitable for processing internal surfaces, and the M500 is suitable for external work. It is better not to take cement that has expired, because the consumption will have to increase, and the quality will be low. For example, brand M500, after a month of storage becomes brand M450, and after six months it loses about a quarter of its astringent and fastening properties.
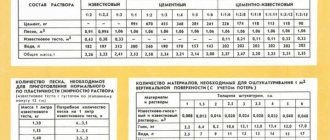
The proportions of the solution for plastering walls made of cement and sand are shown in the table.
| Cement brand | Cement | Sand | Lime |
| M400 | 1 bucket | 4 buckets | 0.2 buckets |
| M500 | 1 bucket | 5 buckets | 0.2 buckets |
Proportions for lime-cement plaster Source multiurok.ru
Types of mixtures, depending on additional components
Lime mortar can be strengthened and given better characteristics by adding sand, cement, gypsum and clay to the composition. Each of the plaster options has its own characteristics.
Lime-sand mixture
Typically used for treating garages and utility rooms where appearance is not so important. Inexpensive analogue of cement mixture. Lime-sand plaster can be prepared in different proportions:
- To make a soil solution, use a 1:2 ratio (lime/sand).
- To make the spray mixture, the proportion is the same - 1:2.
- The limestone-sand covering layer is made with a ratio of 1:5.
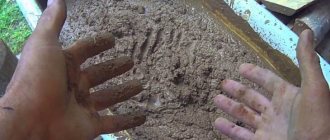
Preparation features: the components are mixed dry, after which water is gradually added to them. Ideally, use clean river sand. It is sifted through a sieve to avoid lumps and impurities. Hardening occurs slowly, so the layer can be covered with plastic wrap and work continued the next day. Properties will not be lost.
Limestone-cement mixture
The advantages are its strength and protection from moisture. Scope of application: facades and indoor spaces. Cement-lime plaster is made according to different proportions, it all depends on the type of solution:
- Spraying is carried out with a solution with proportions of 1: 0.4: 4, where 1 is cement, 0.4 is lime, 4 is sand.
- The primer is mixed in a ratio of 1:1:4.
- For covering, cement-lime plaster has a proportion of 1:1.5:1.5.
To simplify the task, you can buy a ready-made dry mixture. For example, Knauf UP 210 30 kg plaster. With its help you can create a water-repellent layer on any surface. Can be applied manually or mechanically. Color grey. The consumption will be 23.1 kg/m2 with a layer thickness of 15 mm.
Lime-gypsum mixture
The advantage of using gypsum is that it allows you to create a more flexible and smooth structure. It is smooth, durable and dries faster. Ideal for stone and wooden surfaces.
Such decorative lime plaster can be prepared with the following proportions:
- Spraying – 1:0.5:2, where 1 is lime, 0.5 is sand, 2 is gypsum.
- Primer – 1:1:2.
- As a decorative covering layer – 1:1.5:2.
It is more difficult for beginners to work with such plaster, as it dries faster and loses its shelf life. Therefore, the batch is made small. Also, gypsum is afraid of moisture, so it is used for dry rooms.
Lime-clay
Less popular option. The scope of use is limited to finishing mud huts, fireplaces and stoves. After all, the mixture is stable at high temperatures, does not crack or fall off. Options for how much lime to add to the plaster solution:
- To make a primer layer, the proportion is 2:1.5:2, where 2 is lime, 1.5 is clay, 2 is sand.
- Plaster for spraying is prepared in a ratio of 2:1:3.
- The coating has a ratio of 2:1:3.5.
Requirements for clay: medium fat content, no impurities. If you take thin clay, the plaster will not stick to the trowel, so its quantity needs to be increased. If you choose clay that is too oily, you will have to increase the sand content.
Requirements for masonry mixture
The requirements for masonry mortars are described in detail in GOST 28013-98. According to this document, the following requirements apply to mortar mixtures:
- the composition must have a high degree of adhesion to brick and other substrates;
- withstand large amounts of freezing and defrosting;
- to ensure that the masonry does not collapse under the influence of atmospheric influences and temperature changes, the masonry mixtures must have high water resistance;
- due to the plasticity of the mortar, during the laying process, it becomes possible to timely adjust the position of the masonry material, which significantly increases the quality and productivity of the work;
- water-retaining properties prevent decomposition of the mixture and precipitation of heavy fractions;
- the strength characteristics of the composition are decisive in the calculation of building structures. This parameter shows what maximum loads the material can withstand. The brand of the solution reflects its strength in kgf/cm2.
Failure to comply with these requirements leads to the formation of cracks in the brickwork, increased consumption of the mortar mixture, increased thickness of the joints and reduces work productivity.
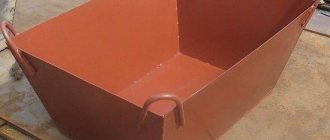
Making your own solution
First you need to slak the lime for the plaster so that it is suitable for work. This requires a metal container, since the reaction is accompanied by a large release of heat and an increase in volume by 3 times. The lime packaging indicates the slaking speed: slow (25 minutes or less), fast (8 to 10 minutes), medium, 15 to 20 minutes. It is better to mix the mixture with a shovel or oar. Slaking is carried out for at least a day, however, ideally use lime that has been standing for a month.
The note ! The sand also needs to be prepared before preparing the plaster: remove impurities, clean it by passing it through a sieve.
Instructions for creating a limestone-sand mortar:
- Sand is mixed with lime paste in the selected proportion. This is done dry and mixed thoroughly.
- After which water is gradually added to the container. There is no need to pour in the entire volume at once; it is poured in in a thin stream, and the solution is constantly stirred.
Now that the preparation is complete, you can begin plastering the surface.
Installation of plaster beacons
Plaster beacons are needed to simplify the process of leveling walls. These are perforated metal strips of different thicknesses that are easily installed on walls. Installation begins from the edge of the wall (approximately 30 cm from the corner). Using a level, draw a vertical line, apply several portions of the mixture along it and place the first beacon.
They act in a similar way at the other end of the wall. The beacons are screwed into the beacons from top and bottom using self-tapping screws, and nylon threads are pulled between them. Below them, the remaining beacons are placed on the solution every 1-1.5 meters.
Application instructions
All work is done gradually. You need to create three layers, each of which has its own functional purpose. This is the only way to achieve optimal results.
The technology is as follows:
- Creating the first layer, spraying. Its purpose is to improve the adhesion of the first layer to the wall, as well as to fill all the voids and cracks to avoid the formation of voids. The optimal consistency is creamy, not too thick. The plaster is spread over the entire wall with a trowel. There is no need to level the layer. This process can be mechanized with a special spraying device. The layer thickness is small.
- The second layer is soil. He's the main one. Its thickness is up to 50 mm. The solution is doughy, thicker than for spraying. Application occurs using trowels or trowels. Excess solution will be removed by the rule. They also check the evenness of the surface.
- The final layer is the covering. It eliminates all defects, chips and creates a smoother and more uniform surface. The thickness of the mixture resembles a spray solution. Application occurs on a damp wall, the layer thickness is several millimeters. At the end, you need to treat the layer with a float to remove defects and make the wall smoother.
This was a technical process of applying limestone plaster. If you practice, you can do work inside or outside quickly and efficiently. This mixture has many advantages, including versatility, vapor permeability, plasticity and ease of application. And if everything is done correctly, the finish will last for decades.
Plastering walls
The finished finishing solution is applied to the surface. During hardening, the layer contracts (shrinkage). As a result, cracks appear and the plaster layer lags behind the base. To avoid this situation, metal reinforcing mesh is traditionally used. This technology is proven and reliable. At the same time, it has a number of disadvantages, including the labor intensity and complexity of the production process.
Modern methods include preliminary priming with an adhesive composition to ensure high-quality fixation of the mass on a vertical plane. With this technique, reinforcing mesh is not required. The plaster mixture is applied immediately, preventing the primer from drying out.
Automatic wall plastering Source static.ex-in.online
Enamel paints
Let's consider whether it is possible to mix water-based paint with lime mortar. Enamel paints are colorful compositions prepared from a mixture of pigments and varnishes by grinding in paint grinders. For enamel paints, the pigment is diluted in oil varnishes.
The shelf life of enamel paints is from six months to a year. Their compositions may thicken over time, so before starting work it is recommended to dilute the paints with some kind of solvent. Different solvents are suitable for different enamel paints, and only white spirit (universal solvent) is suitable for all types of enamel.
White spirit is a purified solvent for thinning oil and alkyd paints.
Dyeing technology
You can paint the walls from the outside inside with Tikkurila Finngard dye.
- A 25 kg can of paint is diluted with 16 liters of clean liquid.
Important : undiluted composition cannot be used.
- While working with CM, you need to stir it so that the mixture is homogeneous in consistency.
- The area to be painted is moistened before applying limestone. This procedure is repeated as many times as the paint is applied.
- The dye is applied to the surface in 3 layers. Use a brush or brush. Each subsequent layer is applied after the previous one has dried. On average, a time interval of 24 hours is maintained.
- The surface is moistened after each layer.
Important : it is recommended to paint the surface with one portion of the lime composition. If two portions are used, then a mixture consisting of one portion of one composition and one portion of a second composition is applied to the boundaries of the joining strips. It is important to place connecting boundaries in places that are not immediately noticeable.
- It is recommended to paint from corner to corner, continuously. To ensure that limestone paint looks even on the wall, small areas should not be repainted. The shade of the painted surface changes depending on the humidity and temperature in the room. Each subsequent layer of CM that is placed on the wall darkens if the previous already applied layer is moistened.
Interesting video on the topic:
DIY technology
The most common recipe for making 10 kg of limestone:
- dry lime pigment – 1500 g;
- combined drying oil – 100 g;
- kitchen salt – 100 g;
- liquid – 8.5 l;
- bucket or basin made of plastic.
Dry lime is poured into a container, liquid is added, and mixed thoroughly so that no lumps remain. Drying oil is added to the mixture. The addition of table salt is done in the form of a saline solution. It pours in last. Everything is stirred until smooth. The mixture will turn white if blue is added to it. Before use, the resulting mixture is filtered.
Interesting video on the topic:
The second recipe for preparing 10 liters of coloring material:
- quicklime – 1500 g;
- liquid – 5 l+4 l;
- natural drying oil – 0.5-1.0 kg;
- dye.
The lime is diluted with 5 liters of water, drying oil is poured in, and everything is stirred. The mixture is filtered and 4 liters of water are added. As a result, 10 liters of lime CM are ready and dye is added.
Third recipe for 10 liters of KM:
- limestone dough – 3000 g;
- liquid – 5 l+5 l;
- salt – 100 g;
- pigment – 400 g.
The first 5 liters of water with added salt are poured into the dough. Everything is thoroughly mixed and filtered. A fine-grained sieve is used. Liquid is added until 10 liters of paint are formed. A pigment substance is added to it.
Conditions for work
Working with limestone is not difficult. The material is applied with a roller, brush, or spray gun. Preparatory work is carried out on the surface before applying paint. Uneven surfaces are removed, dirt and dust are removed. Unevenness cannot be leveled with cement compounds. The surface is not primed. Be sure to remove moss, mold, and grease stains. Organic paint is removed before painting with lime material. The old lime coating is removed with a copper brush in places where it does not adhere well. After this, the surface can be sprayed with a stream of water.
Painting indoors is carried out at temperatures from +5°C to +20°C. Outdoors in warm and windy weather, the surface should be moistened before painting. The same procedure is done after applying CM. Cloudy weather is more suitable for work, when the sun's rays do not fall on the areas where paint is applied. At the same time, rainy weather is not suitable for work.