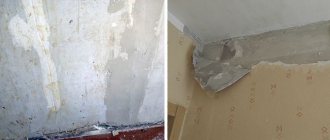
The puttying process, no matter how well it is performed, does not allow obtaining a perfectly flat surface. There are traces left on the wall from the spatula, transitions between layers, small irregularities, bumps and depressions are visible.
You can't do it without sanding the surface. Sanding is the final process that prepares the surface for final finishing.
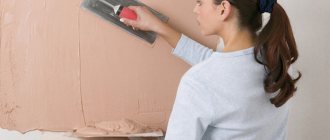
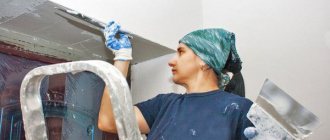
Any person with the desire, patience and perseverance can perform sanding after puttying. The main thing is to choose the right tools, consumables and accessories, and know the technology for doing the work.
Sanding is performed dry or wet. Wet sanding is advisable on plasterboard, normally plastered walls. The main advantage of wet grinding is the relative purity of the process. You will not be bothered by the dust that is necessarily present during dry sanding. The subsequent cleaning process is forgiven.
Dry sanding is more commonly used in home renovations.
Rule 1 Sanding after puttying is carried out no earlier than 24 hours after applying the putty layer.
What should you use to sand walls?
Sanding walls should be done using hand tools specifically designed for this purpose.
These include:
- Sanding block. This tool has a smooth surface with a sandpaper of 5x20 cm. It also has a handle. Typically, such a handle is made of wood, plastic or metal;
- Abrasive sponge with round edges. This tool makes it very easy to go around corners;
- Sander. It is understood as the same grinding block, sometimes more advanced. It is very convenient to use during major repairs;
- Sandpaper. The size of such paper should be such that the piece of wood fits perfectly in your hand.
Don't forget about safety precautions. While working, always wear thick rubber gloves and safety glasses to prevent fine sandpaper crumbs from getting into a person’s eyes. It is best to wear a respirator to protect your respiratory tract.
Why do you need an angle grinder: cutting metal, stone, tiles, grinding and much more
Bulgarian - aka angle grinder, aka FLEX (this is often how people call it outside the former Union). This tool, along with drills and hammer drills, is rightfully part of the “gentleman’s kit” of almost any builder. In fact, the angle grinder is so practical and versatile that it is purchased by representatives of a wide variety of professions, as well as those who are passionate about handmade products and ordinary home craftsmen.
Perhaps it would be useful to figure out what kind of work can be done with the help of an angle grinder. Then it will be easier for doubting people to understand whether it is worth buying an angle grinder “for the farm” or for the workshop.
Cutting rolled metal
Despite the fact that even the name of this class of tools places emphasis on grinding, the grinder has proven itself best when cutting rolled metal. If you need to cut off reinforcement, adjust a channel to size, shorten a threaded rod, or cut a metal sheet, an angle grinder with a cutting abrasive disc will come in handy.
DIY instructions for sanding walls
To process ceiling areas as well as walls, you need to prepare a stepladder. This will make it more convenient to reach hard-to-reach areas. For thorough lighting, you need to install lamps under which the ceiling and walls will be clearly visible.
The main thing is that the rays of light are directed obliquely. Direct sunlight will illuminate every imperfection of the wall.
- When working with sandpaper, they use sheets of unequal sizes.
- For finishing, use high-grain paper.
- While working, you should never put too much pressure on the tool to avoid leaving a large dent on the wall.
- If too large depressions have formed in the wall, they need to be leveled while the wall is dry.
- In the corners, the surface should be treated with a soft sponge like a trapezoid. The main thing is that such a sponge is very easy to clean.
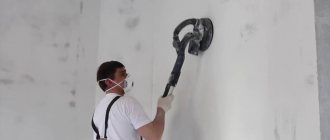
When grouting joints between sheets of drywall, it is best to use a wet tool. For such purposes, grinding machines with an electric pump and a dust collector have long been used.
This device does a great job of removing excess debris. But naturally, small particles will still hang in the air. To avoid the appearance of particles in the air, it is best to use the sanding method. There are various sanding methods.
The main differences between the presented methods
For those who want to know how to sand walls after puttying without dust, the wet sanding method is ideal. The main feature is that wet sanding of putty requires that the well-dried plastered surface be thoroughly re-moistened. Dry the treated wall for a day and then wet it again? At first glance, it is illogical. But it is re-wetting that will increase the adhesive properties of the plaster material, as well as carefully remove unevenness. And the most important thing is to really reduce the amount of dust.
Wet sanding produces much less dust
After this method of surface treatment, it is enough to wet clean the floor.
Dry sanding of putty does not involve re-wetting the wall. Here the work is carried out specifically on a dried section of the wall or ceiling. The disadvantage of this method is the abundant appearance of dust, which floats in the air and settles on everything not only within the room. To clean the room from dust accumulations and layers of plaster removed from the wall, it will not be enough to simply wash the floor. Here you need high-quality ventilation, air irrigation from a spray bottle, and dust removal throughout the apartment.
The disadvantage of dry sanding is the strong appearance of dust.
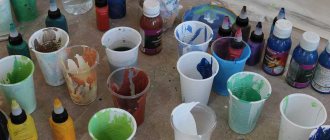
Material selection
In order to get rid of imperfections on the surface, you need to use a universal putty.
It can be laid directly on the plaster. These putties differ in their composition.
They can be:
- Polymer. They have a high degree of strength and ductility. Polymer composites are very easy to process with sandpaper, but over time the coating will never lose its qualities. Acrylic is always used as a base;
- Water-dispersive. Such plasters are easily held on the wall. They are elastic and easy to sand. They are easier to process as they are considered a more elastic material;
- Oil-adhesive. Such compositions are made on the basis of drying oil. They have excellent adhesive properties;
- Cement. Such solutions shrink significantly when they dry out. Due to this, strength indicators are significantly reduced. To get rid of such features, manufacturers introduce plasticizing components into the solution, due to which cement compositions increase in cost.
How to properly lay the mixture
So that the work does not have to be redone several times, it is necessary to do it well right away. Sanding a surface is a labor-intensive task. In addition, dust that settles on the floor and on the worker complicates the process. For this reason, it is best to devote significant effort to high-quality installation of the composite mixture.
- It is important to choose the right tools. Professionals often use a spatula, the blade of which will be 30 cm or more.
- It is very difficult to hold such a tool for a long time.
- Unexpected efforts will cause the mixture to be laid unevenly and one of the edges may also leave a deep groove on the wall.
- This will significantly save time and resources.
The spatula must be directed from bottom to top, laying strips up to one meter wide. In this case, each overlap should be 5 cm larger than the previous one.
To increase the elasticity of the layers, it is necessary to lay each of them on a thin reinforced plastic mesh. All errors must be corrected immediately during work. After work, the layer must dry completely.
Grout options
Manual method
About 90% of the work is done manually when rubbing the putty layer on the ceiling, walls or floor. The advantage of the manual method is simplicity and accessibility.
Material selection
The speed and quality of work depend on the choice of abrasive material. Recommended for use:
- Sandpaper.
- Abrasive mesh.
All abrasives differ in the degree of grain size. The larger it is, the rougher the surface of the sandpaper. The less, the finer the processing. An indicator can be selected by knowing its designation. Marked with the symbol “P” with a number. For example, P80 is rougher than P180.
Sandpaper is popularly called sandpaper. The surface finished with putty has a fine grain. It is better to carry out primary processing with P120 paper. For significant unevenness, you can take the P100, but not larger ones.
A lower-grain abrasive can scratch the surface, but with a thin layer of putty it will simply come off. Option P180 is used as finishing treatment. It polishes perfectly and leaves no marks.
An excellent option for preparing surfaces for painting. This sanding paper achieves remarkable results. There are no marks left on the surface, perfect smoothness appears. It's even better to use the P240 option. Finer should not be used, as the sandpaper will become very clogged.
The choice of abrasive mesh grain size is similar to that of sandpaper. The main thing is to have a sufficient amount of abrasive so that it is enough for the entire amount of work and you don’t have to stop the process and go buy more.
Tools for work
In addition to the mesh, you will need to have an additional tool with you for the main work. You must have the following tools:
- Sanding block. This is a device on which sandpaper or mesh is attached. There are two options to choose from - tool width 85 mm or 105 mm. Both differ only in price. The working surface of the block should be elastic, but not hard.
- A block of soft material coated with abrasive. Smooth corners are obtained when processed with a block. They also ideally handle many difficult areas.
- Flashlight, light bulb or spotlight. The light source must be bright and clearly shine in the required direction. It is better to use a portable lamp to install it in convenient places. All surface irregularities should be visible.
Algorithm of actions
Before grouting the putty on the walls or ceiling, wait until the surface is completely dry. You can determine the degree of readiness by careful inspection: darker areas indicate poor drying, you need to wait some more time before grouting.
Algorithm of actions:
- The surface is cleaned of dust that has settled during puttying. To do this, use a vacuum cleaner for the floor covering, and wet cleaning with a brush or broom for the walls and ceiling. Cleaning begins only after color uniformity appears.
- Sandpaper or mesh is installed on the block. This is done easily: first, lower the clamps, which are located on both sides of the tool, then install the element and fasten it securely. With ready-made pieces everything is simple, but the tape requires different actions.
First, the required piece is measured so that it fits the size of the clamps, and then it is cut. The mesh or paper must be under a certain tension so as not to wrinkle during operation.
- You can use a piece of board or block if the amount of work is not so large. It is necessary to wrap the element with sandpaper and at the same time hold it with your fingers and work with the tool in this position. Can be fixed with self-tapping screws.
- Work should begin from any edge of the surface. But you cannot retreat from the selected area, leading carefully to the rest, choosing small sections for convenience. Rub in a circular motion without pressing, so as not to spoil the surface. First, the selected area is treated and all visible defects are removed from it.
- A light source is directed to the surface and the work is carried out sequentially, moving the lighting along the axis of its movement.
- Work stops only when the work is completely completed and all areas of the surface have been rubbed. You must constantly monitor the plane to prevent differences in levels between individual sections.
- Corners are not always polished thoroughly using standard blocks. To process them you will need a block with a beveled edge. They quickly create the desired joint and achieve plane alignment.
When you don't need to level walls
The foundation does not always have to be ideal. There is no need for this. For example, if a sheet of plasterboard is laid on top of it, then the wall does not necessarily have to be smooth.
The foundation can also be flawless in the following cases:
- The finishing coating can follow the contour of some unevenness. Such irregularities are clearly visible when painting from the side, and especially when the lighting is slanted;
- All fabrics must fit very tightly. Vinyl wallpaper always hides all small holes and bumps. And such defects will still make themselves felt. A massive canvas with a large thickness will never be able to completely fill them. As a result, air bubbles will always form;
- It is not always necessary to finish walls with high quality. For example, in cellars, this is completely useless. It is not necessary to do this in attics and closets.
Sometimes the walls are not leveled in order to preserve some of the design solutions of the room. Of course, such points are always strictly discussed in projects.