Sometimes color alone can significantly improve the appearance of a product. Wenge color has a similar ability, which can give furniture or doors a noble style. Wenge paint for wood is a budget-friendly way to change the interior of a room than purchasing a product made from a real type of wood with this name. More details about the features of creating wenge-colored paint will be discussed below.
Mixing acrylic paints features and working with a table
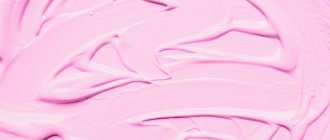
It’s cheaper and easier to go to a hardware store; there are samples of all shades of paint on the stand, choose the one that’s suitable for you, and a sales consultant will prepare it for you. For this purpose there is a special apparatus where paints are mixed. I don’t know what to call it correctly, but I’ve used this method several times to select the right shade of paint.
To get the desired Wenge color, gradually, drop by drop, add black paint to the yellow, red, orange paint, just mix well, only then add more black paint if the shade does not suit you, and so on until you get the desired one.
Or carefully mix red, yellow, blue paint and, to get the desired shade, add black or white, whatever you need, a darker or lighter shade.
Wenge colored doors:
Wenge wood has different shades and it is impossible to say how to get them, and there are no such universal recipes for obtaining this color. Most likely you will end up with something of your own, but not 100% wenge.
It’s better not to worry and mix anything, but just go to the store and buy - many companies have a similar color
Shades of yellow
Manufacturers of large sets of gouaches or watercolors call yellow shades with their own “trademark” names - for example, “Inca gold”, “golden palm”. They achieve interesting combinations by combining colors. In production there are tables and standards with precise indications of proportions. At home, you will have to select the necessary combinations experimentally. Here are the characteristics of the main shades of yellow:
Before mixing paints on a large scale, it is necessary to conduct a number of trial experiments. To do this, combine a little yellow and a tiny amount of other tones on the palette and achieve the desired result by thoroughly mixing the material. Usually, for 50 ml of the main color, 1-3 ml of another paint is enough, no more.
Acid
Experts call this tone lemon. It is “caustic”, acidic, well suited for signal designs. The procedure for creating lemon color is as follows:
Golden
It is much easier to achieve a golden hue if the base paint has a slight pearlescent sheen. You just need to add a drop of red pigment to it; if you don’t have it, brown will do. If there is too much additive, the material will look dirty. You can try to correct the situation by introducing whitewash, although this is not always possible.
Dark yellow and other shades
Dark yellow is created in an interesting way. You should mix approximately equal parts of orange and green. Then a small amount of this color is introduced into the finished yellow paint. The result will be the desired dark shade. It can be made even easier by mixing yellow and brown pigment, but the finished color will be different than in the first option. To add brightness to the shade, a little red paint is dripped into it.
To obtain yellow-green, these two colors are combined equally. The finished paint will be incredibly rich and cheerful, which is why it is often used in interior design. The finished color is also called light green; it fits perfectly into the avant-garde style and a number of other style solutions. The tone contrasts well with blue-green, resulting in a pleasing effect to the eye of a combination of cold and warm shades.
You can also make other interesting yellow tones yourself:
The gentle yellowish color looks interesting in the interior. It is obtained by mixing the base with pink and diluting it with white to the desired softness of the pigment. This color goes well with wood, especially oak, as well as purple and brass.
Saturated color
You can also make the richest shades of sunny colors yourself. First, the main yellow is diluted with white, but in a small volume - this will add lightness. Next, red or orange is introduced little by little to provide depth and intensity to the tone. Usually, only ½ drop of red is enough for 50 ml of paint. Having received the desired color scheme, you can start creating masterpieces on paper with your own hands!
How to restore veneer
Veneered furniture requires a special approach. The means are basically the same, the methods are different. For example, if after getting hit the veneer is swollen, fill a disposable syringe with PVA glue, pierce the bubble, and inject glue into the cavity. Place a piece of thick fabric on top and place a weight. If the surface is uneven (convex or concave), use a thick fabric bag with heated sand as a load.
Such veneer damage is restored in two stages. First, the swelling is eliminated, then the scratch is painted over and the coating is restored.
If the veneer is glued with alcohol glue, you can return the swollen part to its place by ironing it through a rag with a hot iron. But do not overheat the iron: the veneer may stretch. Heating level is medium.
If ironing with a dry cloth does not help, try repeating the operation with a damp cloth (wet it and wring it out well). There is a chance that the wood will swell and become more elastic. To reliably fix the swelling, you can introduce PVA there and then heat it with an iron.
If the swelling is cracked, you can also try to seal it with heating (through a rag). If it doesn’t work, tear off the peeled piece. You don’t cut it, but rather break it off: on veneer, breaks after restoration are less noticeable than cuts. Therefore, you break off the lagging piece. Remove the old glue from the damaged area and the piece of veneer (with sandpaper or a nail file, depending on the size). Next, the repair of veneer on furniture is standard: spread it with PVA glue, lay it down, aligning the fault lines, lay a thick fabric on top and place a weight until it dries.
Such veneer peeling can most likely be eliminated simply by ironing it with an iron.
Scratches and traces of restoration on veneer are removed in the same way as on wood: they are painted over with a furniture marker of a suitable shade. If the scratch is deep, a little melted furniture restoration wax is applied to it (with a spatula). After drying, the wax is ground, and if necessary, fine-grain sandpaper is used, but after this treatment, the restored piece is covered with a layer of varnish.
Do-it-yourself furniture restoration requires patience and accuracy. You have to act gradually and methodically: smear it, wait for it to dry, level it, smear it again, etc. Sometimes you have to try several methods: damage varies, as do the materials used in production (glue, varnish, etc.). But as a result, the furniture will look much better.
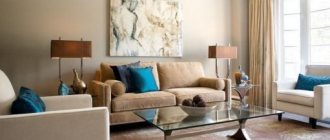
Combination with other colors
Before moving on to the question of how to paint a wooden door in wenge color, you should figure out what colors in the interior it will go well with. The following possibilities for combining items by color can be distinguished:
- Using red and orange shades will help give the room a bright design, so that there is no overload of brightness, white shades are added;
- Green and wenge will create a calm combination;
- The golden tone looks great with wenge, this is an option to create a luxurious design;
- White and dark colors are classics, so that the interior is not too boring; elements of any other colors are added.
Of course, you can combine it with other colors, the main thing is to calculate in advance how the elements will be combined with each other.
Green and wenge will create a calm combination.
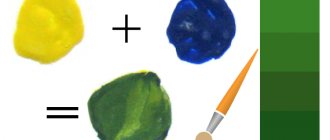
Variety of green
The original green is usually presented in all sets; if the required dye is not available, there are no problems obtaining it. Pairing yellow with blue gives the desired green background. But any direction of creativity, be it painting, interior design or another option for decorating objects, requires a wide palette of green. The basic principle of all experiments is to change the proportions of the base colors; white or black dye is used to lighten or darken the background.
Next we will talk about mixing options and the results of the experiment:
- The combination of blue and yellow with a small addition of brown represents khaki. Green with a small amount of yellow forms olive.
- Traditional light green is the result of mixing green and white. Adding yellow or blue will help regulate warmth.
The circle demonstrates a variety of green colors. The base dye is located in the center, followed by the additional component, and then the result of mixing. The last circle is experiments of the resulting tone with the addition of white and black dye.
The next table will become an assistant when conducting experiments.
Options for using paints and varnishes
Children's room. Paint and varnish materials can be used to decorate a nursery, but for this they must be selected correctly. It is worth remembering that the child should not inhale the unpleasant odors of repairs. This means that, adhering to this condition, you should choose water-based paint with the addition of tint to add color. But before that, you first need to level the wall for subsequent coating with paint. In this case, there is no need to use enamel, since its unpleasant odor will irritate. Varnishes are used with a transparent structure and without foreign odors. Varnish is an excellent material for coating aged furniture. For these purposes, you can also use oil paints with rich textures and bright colors. Naturally, the choice should be made towards natural materials.
Kitchen. Kitchen finishing can also be done using paints and varnishes. In addition to primer, indoors you also need tiles, foam for installation, varnish and maybe wallpaper. But the use of the latter is limited by the constant release of soot and fat during the cooking process. Water-based paint can be diluted with a wide range of colors using the tinting method. In this case, it is also recommended to use enamel or oil paint.
Wood oils
Benefits of oils:
- Capable of nourishing wood.
- Beneficially emphasizes the naturalness of the structure.
- The surface becomes matte.
- Has water-repellent qualities.
- Perfectly protects against pollution and does not clog pores.
General properties of coatings for wooden walls and floors Colored varnish for walls and floors gives a spectacular gloss, oil preserves the original texture of the wooden coating, and wax makes it velvety and pleasant. The tree undoubtedly requires protection from aggressive influences, high humidity, temperature differences and precipitation.
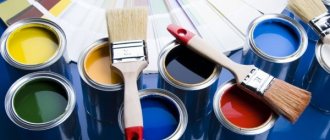
Our catalog offers more than 90 types of paints and varnishes used on wood. Paintwork materials are designed to produce a durable, transparent protective film. They differ in purpose, characteristics, release form, consistency (ready-made or diluted), degree of gloss, color tone, price.
Product Features
Our store offers a wide range of universal and special varnishes (for parquet, walls, ceilings, furniture, stone, yachts, baths, saunas). The products are made on a water basis and organic solvents. Product Features and Benefits:
- . Good adhesion to the base material.
- . Strength, wear resistance, moisture resistance, durability of the varnish film.
- . Aesthetic appearance of the painted surface.
Order goods and use the services provided by OBI hypermarkets.
Payment and delivery methods
- Buy goods online with delivery
- . You can pay for your order in cash or by bank transfer.
- . You will agree on the date and time of delivery with the operator by phone when confirming the order.
- . The conditions for the free provision of the service depend on the city, amount and weight of the product.
- . Unloading of goods, lifting and carrying are considered additional services and may be paid separately, check with the store operator.
Detailed information about intervals and zones by city, conditions for unloading and picking up orders is available, where you can independently calculate the cost of your delivery in advance, indicating the postal address and parameters for unloading.
- Order and pick up where you want
- . When filling out the order form, indicate the date and time convenient for you to visit the hypermarket.
- . You can pay for your purchase in cash or by bank transfer at the store's cash desks.
Purchased goods can be picked up independently at any of the OBI stores in Moscow, St. Petersburg, Ryazan, Volgograd, Nizhny Novgorod, Saratov, Kazan, Yekaterinburg, Omsk, Krasnodar, Surgut, Bryansk, Tula and Volzhsky.
Any wooden surface needs protection. Constant exposure to moisture and other negative factors causes swelling of the fibers, deformation of the product, and the development of rot and fungi. Acrylic varnish for wood from TM VGT is intended for deep impregnation and protection of wooden surfaces (except floors) from rotting.
It is also used for decorative finishing and protection of brick, concrete and other mineral bases, as well as natural and artificial stone from fungi, algae, and mold. The varnish can be used for external and internal woodwork in all types of buildings and structures (A-B), including those for which a wet disinfection mode is provided.
The main advantages of wood varnish
- Forms a transparent, elastic, durable film. The varnish is resistant to cracking even with slight deformations of the base.
- It has a greater depth of penetration into the wood structure, which provides longer protection against rotting.
- It is universal for external and internal work.
- Preserves the richness of the color of the decorative coating or the wood itself. The composition is made with a UV filter.
- Available in a wide range of colors. Wood varnishes are offered in 12 colors.
- Excellent steam permeability, preventing moisture from being retained in the fibers. A “breathable” coating is formed, which helps maintain a comfortable indoor microclimate.
Application of tinted impregnating varnish for exterior and interior use provides maximum decorative and protective effect.
Varnishes from TM VGT - any surface looks like new!
Mixing experiments: what you need to know in advance
The world around us is filled with a wide color palette, but all the colorful splendor is based on three primary colors: blue, red and yellow. It is by mixing them that the desired halftone is achieved.
To get a new shade, use base colors in different proportions. The simplest example of how to get green. The answer is extremely simple: mixing yellow dye with blue. A visual table of primary, secondary and transition colors obtained by mixing is presented below:
Purpose of tinting
Tinting is the process of mixing coloring compounds and paintwork materials to obtain specified colors.
Construction companies often order this service from professional companies. However, if this is not possible or if you do the finishing work yourself, you can do the tinting yourself. The process of selecting and mixing colors is indispensable in the following cases:
- obtaining a color to match the furniture or decoration of the room;
- repairing a small area of a wall or ceiling when it is necessary to obtain an exact shade for spot restoration of the damaged area;
- If there is a shortage of a rare type of paint, it is difficult to purchase a few more jars of the material; it will be easier to do the tinting yourself or order the paint from a special company;
- selection of an individual palette for the interior.
Tinting is indispensable for cosmetic repairs. It allows you to reduce the scope of work many times over. When selecting the desired shade, it is enough to restore minor scuffs and defects.
Kinds
Depending on the type, you can divide the material obtained from young or more mature trees. Young and light-colored wenge materials are used to produce veneer and furniture panels. More mature and older trees are already used to create luxury furniture, billiard tables and other interior items.
More mature and older trees are used to create luxury furniture, billiard tables and other interior items.
Required Tools
To prepare the surface of an item for painting with your own hands, you need the following set of tools:
- screwdrivers (you will need these to unscrew removable parts that do not need to be painted, such as door handles or a car dashboard);
- “skins” of various grain sizes;
- sponges and brushes for cleaning the surface.
List of basic tools for painting To create “wooden decor” with your own hands you will need:
- any painting tool (brush, roller or spray gun), you can also use decorative paints in cans;
- primer;
- a special rubber grater for decorative work (some of the decoration methods listed below allow you to do without this tool);
- enamel of two colors;
- colorless varnish for additional fixation of the pattern.
When all the tools, as well as the enamels and varnish necessary for decoration, have been purchased, you can begin the preparatory work.
Making a door in wenge color with your own hands
To create the effect of this rare type of wood, you do not always have to paint the surface of the product. There is another way; all the possibilities for creating this effect will be discussed in more detail below.
To create the effect of this rare type of wood, you do not always have to paint the surface of the product.
Burning
Firing to effect an external change in the appearance of other wood, chipboard and other wooden materials was invented a long time ago. It is worth understanding that the work requires some skill and compliance with safety rules. When working, good ventilation is ensured, or the canvas is burned outside. The tool is a gas burner with a nozzle.
The first treatment of wood leads to its blackening; the next treatment should remove the top layer. To understand whether the surface has been burned sufficiently, watch for the appearance of cracks, this is a signal to complete work with this area. It is important here not to overheat the surface, otherwise the material may burn out. It is advisable to practice in advance.
Next, the surface is cleaned, resulting in a natural pattern and color that is practically indistinguishable from the real thing. Next, a special impregnation is used, it will create a matte effect and complete the production of a noble shade. It is also necessary to coat the surface with wenge varnish.
When working, good ventilation is ensured, or the canvas is burned outside.
Coloring
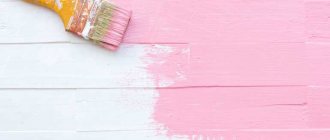
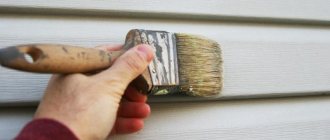
Painting a door is easier, because it does not require the purchase of special equipment, and the process itself is simple. On sale you can find a huge number of paints and varnishes that are suitable for the purpose.
Due to the dark tone, the paint will easily cover minor surface imperfections; for this reason, it is possible to paint the old door to fit it into the new design.
Due to the dark tone, the paint will easily cover minor surface imperfections.
Paint selection
You should choose a product based on your preferences. If there is a need to emphasize the natural pattern of wood, then wenge wood varnish, stain, and impregnation are used.
If you are going to completely cover the color without leaving the natural pattern of the material, then paint. You can choose among polyurethane, alkyd, acrylic, oil or nitro enamel. It is convenient to choose paints in spray cans.
Alkyd and oil products have a strong odor. Acrylic and alkyd are considered quick-drying, and nitro enamel is the most resistant.
Some people wonder: how to get wenge color when mixing paints? Of course, you can work hard and mix different colors to get the desired tone, but you will need to purchase several paints, which will cost much more than buying the desired color right away.
If there is a need to emphasize the natural pattern of wood, then wenge wood varnish, stain, and impregnation are used.
Preparing for coloring
The preparatory stage is important; the quality of the result depends on it. You should remove the door from its hinges, then painting all areas will be more effective, avoiding uneven painting. Further:
- The old layer of paint, if any, is removed.
- If the old door has already acquired a darkened texture, then it is necessary to use bleaching with chlorine, otherwise it will not be possible to obtain the desired color. Water and bleach are mixed in a ratio of 1 to 3.
- If flaws are found, they are puttied.
- The surface is sanded and dust is removed.
You should remove the door from its hinges, then painting all areas will be more effective.
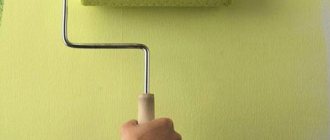
Painting process
The dye is applied in two layers. The first serves as a primer; after the surface has dried, it is sanded again and the dust is removed. Afterwards you can apply the final layer; you can use rollers, a spray bottle and a brush. If you choose aerosol paint, you will not need to purchase a tool. When the drying process, which usually takes 2-3 days, is completed, the door is varnished.
The dye is applied in two layers.
Wenge is a noble color that can give a product a pleasant appearance and cover minor defects in the old surface. You can handle the painting yourself, and in the end the transformation will be inexpensive. It is important to pay attention to the choice of paint so that the coating lasts a long time.
Color spectrum
Usually, when experts talk about wenge color, they mean a dark color with elements of black and a burgundy tint. It is obtained, as mentioned earlier, from old trees, so the cost of such material is high. It is easier to paint another material in a similar color.
But due to the characteristics of the breed, other shades are also called wenge. The color palette is wide, starting from a light cold tone and ending with a rich dark one. There are also warmer options in tones.
The color palette is wide, starting from a light cold tone and ending with a rich dark one.
Computer operation
There is color selection using a special computer program. In this case, you can use tinting machines (varnishes and enamels are most often used) or a special catalog from the manufacturer of the pigment liquid.
Computer color tinting has become widespread due to a number of advantages:
- obtaining the desired color in the shortest possible period of time;
- the desired shades can be re-created if you save the desired tone in the computer;
- There is a huge palette of colors and shades.
The main disadvantage of carrying out such work is the impossibility of creating the desired color at the work site.
What to consider
Painting a wall using a color scheme uses a special device that can be purchased at a special hardware store. Tinting with acrylic paint must comply with certain requirements:
- Color paint is created directly inside the room that will be painted. This is necessary to evaluate the resulting tone in both artificial and daylight;
- color shades for water-based paint should be added in small parts or drops so that the dye does not damage the main tones;
- You should also take into account that the paint on a large area looks a little different than on a small section of the wall.
It is quite difficult to obtain a black color, since even one drop of it can completely change the color, and it will be much more difficult to lighten it. Very often the result is a dull gray color. That is why you should stock up on small jars and do everything carefully and consistently, using the product drop by drop.
It is also important to remember that on a wall using water-based paints, the resulting color will look much brighter than in a container
To obtain a good result for mixing, you should choose white paint of the desired base and without any yellowish admixture. Color for acrylic paint will give the desired color only when using a snow-white base. If you plan to paint the walls, then the colors should be chosen specifically for them, and not for the ceiling, which plays an important role. These types of compositions for acrylic paints have some differences in terms of wear resistance, elasticity and soiling.
If you need to re-tint water-based paint, it is very important to purchase the compositions from the same manufacturer, since one tone can vary greatly between different brands. When buying latex paint, you need to remember that it has a rather thick consistency, so it requires high-quality and long-term mixing
The solvent in this case will be water, which is carefully poured in until the desired mixture is formed. After adding water, the main dyes are carefully added dropwise to the composition.
When purchasing latex paint, you need to remember that it has a rather thick consistency, so it requires high-quality and long-term mixing. The solvent in this case will be water, which is carefully poured in until the desired mixture is formed. After adding water, the main dyes are carefully added dropwise to the composition.