The process of installing a slope made of wooden paneling Probably, many have encountered the problem that after replacing windows and doors, installers leave behind “torn-up” slopes. Naturally, they need to be brought into proper condition so that they are not porticoes of the overall picture of the interior and are not subject to drafts.
The average person has two options: call a team of repairmen, who, by the way, charge a lot of money for such work, or try to deal with the problem on their own. In this article we will talk about how to make slopes from lining. Go!
Getting ready for finishing
Before you begin installing window slopes, you need to check that the window blocks are installed correctly. If there are deviations horizontally or vertically, or if there is a curvature of the profile, the errors must be reduced as much as possible so that the subsequent finishing of the windows does not highlight the shortcomings. To do this, you can use plumb lines, placing them in the next order above the vertical profile of the window frame. Then you need to measure the sides with a tape measure and, if the indicators match each other, you can move on.
Check that there are no scratches or chips on the profiles. The window block must have a smooth surface that is free of bubbles and cracks. The slopes are installed after complete dismantling of the previous parts. Necessary:
- remove old slopes;
- remove excess foam;
- remove the protective film;
- seal through holes.
Recommendations from experts
As practice shows, it is best to use shalevka for covering windows. It is not afraid of ultraviolet radiation, moisture and other factors. Experts share a similar opinion.
It is worth noting that finishing window slopes with clapboard has several undeniable advantages:
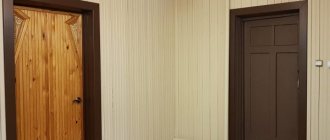
- speed of installation. As a rule, all work is completed in one day. Unlike puttying, the lining does not need to be leveled, rubbed, dried and painted, because after covering the window will immediately acquire a completed appearance, an example of which is shown in the photo;
- if the window is sheathed with shalevka, this provides additional thermal insulation protection, preventing cold air from entering the house;
- the versatility of this type of material saves the owner from periodic repairs. The only thing that may be required after a dozen years is cleaning the surface and coating it with varnish (if wooden lining is used);
- if moisture accidentally gets on the skin, you don’t have to worry that the shalevka will lose its attractiveness and require replacement, which cannot be said about plaster or putty;
- The use of shalevka will not only give the window a finished and attractive look, but also achieve maximum compliance with modern style and design.
Types of installation
Installation of wooden slopes on windows in a wooden house can be done in several ways, so you need to decide and think through the nuances in advance. Wooden slopes can be installed 12 hours after installing the window frame . The construction foam has time to dry out during this time, forming the strength of the form. Since polyurethane foam is subject to rapid destruction, window finishing should not be delayed for long. Thanks to prompt work, the installation of wooden slopes will show the highest quality results.
You can install slopes on windows yourself in the following ways:
- In the first method, foam is used to fill the voids. First, all panels are measured and adjusted to the required dimensions using trimming. Pay attention to the corners: it is important that they are perfectly even. Next, the panels are secured with self-tapping screws in the area of the corner joint. The slopes must be laid in the frame grooves, after which the free spaces are filled with polyurethane foam. Foam, taking into account that the sealant will increase its volume by 3 times by the time it dries completely.
Polyurethane foam can be used as a material for fastening - The second method uses mineral wool. We adjust the panels to the required dimensions in the same way. We attach mineral wool insulation to them, cutting the material into strips of the required sizes. After fixing, cover with a layer of polyethylene glued with tape. We fasten the panels to each other with self-tapping screws. The finished frame structure can now be installed in the grooves.
Plastic panel or lining
There is no need to confuse these materials. They differ both in appearance and purpose.
Unlike PVC panels, lining is suitable for outdoor and indoor use. Externally, it is partly similar to lining made of wood and polycarbonate. They are similar to the lamellas of their wood in terms of aesthetics and installation method, and with polycarbonate they have a “honeycomb” structure. Indoors, the material is installed using a tongue-and-groove system, and outside, a suture connection is always used. The latter is due to the large coefficient of linear expansion that plastic has. This allows the mounted lamellas to “play” with temperature changes.
During the production of the material, the color pigment is added directly to the raw material, while on the panels the paint is applied only to the front side. Thus, the lining does not wear out and does not fade for a long time.
Installing slopes in a wooden house
To make high-quality external slopes for windows, the material must be very resistant to moisture. For interior decoration, you can omit the requirements and choose any desired material. Window frames can be finished with plastic, wood or clapboard. Slopes made of lining are considered to be the most universal of the listed materials, since the material is perfect for finishing a house both inside and outside .
Moisture-resistant material is used for exterior finishing
To install window slopes you will need:
- wood panels;
- corners;
- set of self-tapping screws;
- polyurethane foam;
- screwdriver
Work area:
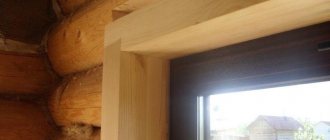
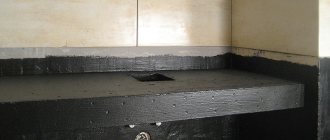
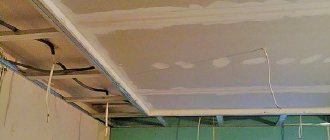
- If the walls in the house are not even, it is necessary to install lathing, the slats for which must be selected in proportion to the thickness of the panel for finishing. When preparing the bars, consider not only the size of the slopes, but also the installation method. The sheathing should be attached with self-tapping screws around the perimeter of the window frame using a screwdriver or drill. Carefully fill the vacated space with material with a thermal insulation function. If the walls in the house are smooth and beautiful, you can safely skip the first step of lathing and go straight to the slopes of the window frame.
For interior finishing work, lining is most often used - Next, we fasten the paneling with a screwdriver onto the screws. When installing vertically, we fix the slopes on windows from the outside or inside according to the area of the frame where the grooves should lie. Using fasteners, secure the panel to the body. When installing horizontally, start work from the bottom side, having previously mounted the starting strip on the frame. We fix the window slopes first in the strip openings, then with each other.
When installing the lining horizontally, installation begins from the bottom side - We provide installed slopes with corners that will help hide minor errors and defects, and also contribute to high tightness.
Varieties of finishing elements
Slopes are the side parts of the window opening, external or internal. They cover unsightly installation seams that remain after installing windows. In addition, they protect the structure from freezing, and the room from wind and drafts. If the frames and window sills are wooden, usually choose a material similar to the one from which they are made. This is explained by the fact that the pattern and natural color of wood of different species may differ. Parts made of different types of wood look ugly.
But if it is not possible to select elements from one type, they take one type of varnish. The shade, of course, will differ, but not much. You can trim the opening with solid wood boards. True, it is difficult to work with them, and such cladding turns out to be quite expensive. A good alternative is a laminated board panel. Outwardly, it does not differ from an array, but is cheaper and easier to work with. You can choose the set option. In this case, lining is installed as cladding. Any model will do.
It is important not only to choose wood by color, but also to take into account its performance characteristics. Let's consider suitable options.
Suitable wood types
- Pine or spruce. They are easy to work with. Provided proper and regular treatment, they resist temperature changes, humidity and UV radiation well. Pine and spruce are placed on both internal and external slopes.
- Larch. This is coniferous wood, it is characterized by increased resistance to weathering and moisture, and a long service life. Mold and fungi appear less often on larch than on other species. Used for finishing outside and inside.
- Oak. A beautiful and durable material that does not withstand ultraviolet radiation and all atmospheric phenomena. In such conditions, it becomes covered with cracks over time. Therefore it is installed only inside.
ShutterStock
- Window
How to repair a plastic window yourself
We make slopes for plastic windows
Installation of wooden slopes on plastic windows is no longer a rarity and is often used to improve home space. Let's look at how to do the job correctly below.
- We install starting guides along the perimeter of the window frame along the contour of the future slopes. We fasten them with self-tapping screws using a screwdriver. To place the screws, we make holes in advance with a drill or hammer drill. We set the guides with maximum evenness, tracking the vertical using a level.
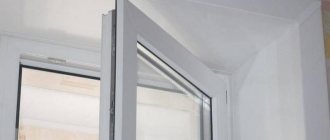
- Then we adjust the slopes to the required dimensions and insert the panels.
- We fill the free space between the wall and the panel with sealant. Apply masking tape to the compacted area. Allow the material to dry completely for 12 hours.
- We install a wooden corner in the joint area, covering the remnants of the sealant with it. Excess foam is carefully removed from the surface of the panels.
The joints between the slopes and the wall are covered with a wooden corner.
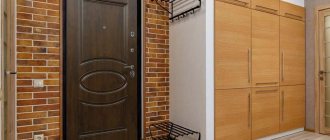
Slopes outside or inside a room with a plastic window will create an interesting contrast, giving the appearance of the house an original design. In addition to the general appearance, you can design wooden slopes on the door.
We figure out how to clapboard the external and internal walls of a house
Often, in order to find the answer to the question of how to cover walls with clapboard with your own hands, you have to hire specialists, which, in turn, leads to the need for additional expenses.
Thus, the costs become double - for the material and the work itself. However, it is quite possible to cladding walls, both external and internal, with your own hands. Plus it will save money.
The photo shows how to properly line a room with clapboard.
Which fixation option should I choose?
It is important to decide on the method of fixing the board materials. You can sheathe a wall using several methods:
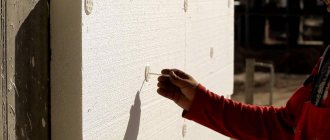
- Through view of fasteners. This is the simplest solution that does not require much effort. The idea is that the screws are screwed directly through the front side. This method involves applying markings so that the fastening points are located on the same line. In addition, holes are drilled on the carriage board in advance, which will prevent the wood from deteriorating and cracking. When screwing in the screws, make sure that their heads are completely recessed into the wood. This can be easily achieved if you pre-drill out a place for the head with a large-caliber drill. The resulting holes are masked with special eraser plugs or filled with putty. Among the disadvantages, this method significantly disrupts the external aesthetic appeal of the coating.
- The lining can be attached to the wall using decorative nails. Their hats were initially decorated to match the color of the material.
- Hidden nails without heads would be an excellent option. The peculiarity is that such nails can only be driven at an angle of 80 degrees. This will make it possible to hide those areas that have been violated.
- If you have a professional stapler on your farm, you can use staples for fastening.
Important! You should not buy a manual tool for driving staples, which is sold on every corner, since its use does not provide reliable fixation.
- For the smallest thickness of the carriage board, clamps are used. The main advantage is that the fastenings are invisible.
The method of attaching the lining to the wall is selected individually, based on the specific situation. But we note that recently it is the clamps that have become the most popular.