Mesh for plaster is a common material that is used to strengthen the plaster composition. If the finishing coating is applied directly to the surface of the ceiling or wall, then after a certain time cracks will form on the base of the material. After which the coating will disappear completely. To avoid such consequences and maximize the service life of the finishing material, a special mesh is used as a base. It takes on most of the load and thus prevents cracks from appearing. In addition, the use of mesh makes the adhesion of the plaster coating to the surface stronger.
What is the function of the grid?
When plastering walls without using a reinforcing layer, there is a high risk that the applied solution will simply fall off the base. And when finishing brick and wooden surfaces, the plaster may begin to peel off and crumble even after repairs have been completed. This usually occurs due to insufficient adhesion of the materials indicated above. The mesh allows you to form a monolithic slab that is not afraid of any loads. Different meshes are designed for a specific load, and the type of material used depends on the thickness of the plaster layer.
To work with a metal mesh you will need self-tapping screws, construction dowels and metal mounting tape.
- Before installing the canvas, it is necessary to cut off the required piece, having previously measured the area on which the plaster will be applied in the future. To cut thin material, metal scissors will be sufficient. If the product is made of wire with a diameter of 2 mm or more, you will need a grinder. The cut fabric must be degreased by wiping it with a rag moistened with a solvent.
- Attaching the mesh under the plaster should begin from the ceiling. The top of the material is secured along its entire length with self-tapping screws, under the heads of which cut pieces of mounting tape are placed. Wide washers can also be used as spacers, but they are much more expensive than tape.
- When installing on a concrete or brick surface, you need to drill holes in the wall and insert plastic dowels into them.
- The distance between the screws depends on the size of the cells and the thickness of the mesh itself. But in any case, it is desirable that the fastening step be no more than 40-50 cm. In places of fixation, the canvas may come into contact with the wall, and in the spaces between fasteners it should not contact the surface, since in this case the quality of the plaster layer will deteriorate.
- At the joints, the material is installed with an overlap of 8-10 cm.
- A properly secured fabric should be well tensioned. If the material does not vibrate in places where there are no fasteners, then everything is in order. Otherwise, voids may form under the mesh, which will negatively affect the quality of the finish.
Mesh for applying plaster to walls: types and scope of application
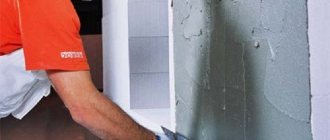
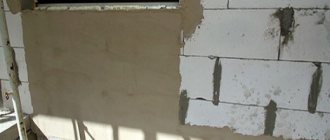
Leveling various surfaces with plaster is one of the popular ways to prepare walls and ceilings for painting or wallpapering. However, the plaster does not always lie smoothly without defects. Some surfaces have low adhesion, so the solution applied to them begins to crumble and peel off. The destruction of the protective and decorative layer is especially rapid on the facades of buildings that are exposed to the negative effects of climate and moisture. Using a mesh for plastering walls, you can ensure strong fixation of the mortar to the surface and improve the quality of the finish.
Application
The mesh is used for external and internal work, and helps to achieve the following results:
- Increase the durability of decorative finishes by properly distributing the load and reducing its impact per 1 m2. The mesh is point-fixed to the base, and with its help the weight of the solution is supported.
- Avoid cracking of the plaster by reinforcing the surface layer. Walls and partitions made of blocks and bricks are prone to shrinkage and deformation. The reinforcing fabric gives the finish plasticity and prevents the appearance of cracks and other defects on the surface.
Types of mesh
For the manufacture of mesh, different materials are used, which, along with other parameters, determine its type, characteristics and scope of application.
If the thickness of the plaster on the surface should be 30 mm or more, then it is advisable to choose a metal mesh. It is used for rough finishing of walls with compositions containing cement or clay, and ensures the strength of their connection to the surface thanks to additional fasteners:
- to a metal base ─ by welding;
- to wood ─ with self-tapping screws;
- to a wall made of brick or concrete blocks ─ with dowels and a large washer.
Depending on the manufacturing method and design features, metal mesh can be:
- Woven. It has a cell size of 1×1 cm2 and is produced using a woven method from thin and strong wire with different cross-sections, most often galvanized. It is produced in the form of rolls and is used as a reinforcing layer for plastering external walls.
- Chainlink. It is made of low-carbon steel wire by weaving and is a fabric with square or diamond-shaped cells and a size of 20x20 mm2. To protect against moisture and aggressive substances, the mesh is coated with a layer of zinc or polymer. Chain-link is used for working on large surfaces, including wood or brick.
- Welded. It is made from steel wire, which is laid at right angles to each other, and then fixed at the joints using spot welding. The result is a strong mesh with square cells of different sizes. It is used to strengthen plaster in case of strong shrinkage of walls, which is important for finishing new buildings or houses located on unstable soil.
- Expanded metal. It is a sheet material with diamond-shaped cells and is intended for reinforcing walls with low plaster consumption. Expanded metal is made by cutting holes of the same shape and size into a sheet of metal, which is then stretched and formed into a mesh for plaster.
If it is necessary to apply the solution in as thin a layer as possible, it is advisable to use a plastic or fiberglass mesh.
- Fiberglass. Indispensable for finishing ceilings, facades and walls if there are depressions, grooves and depressions on their surface. It is lightweight, durable and resistant to temperature changes, and can be used for facades. Fiberglass mesh is not susceptible to moisture, so it is used to reinforce roofs and plaster bathrooms and swimming pools.
- Polymer mesh. It is produced by extrusion from polymer raw materials, which is most often polypropylene. Using molding machines, the plastic melt is converted into a mesh fabric, the cell size of which is determined by the modification of the material. Plastic mesh is used for plastering work on the surface of facades and internal partitions. Since over time, a mixture of sand and cement destroys the polymer canvas, it is advisable to use gypsum-based mixtures for finishing. A mesh with 2×2 mm2 cells is indispensable for applying finishing putty.
Mesh laying technology
For finishing work, several types of plaster mixtures are used, which differ in composition, nuances of application and the degree of impact on various materials. In addition, when choosing a grid you should consider:
- thickness of the applied layer;
- base material;
- conditions for finishing and operating the coating.
Metal
When choosing a metal mesh for reinforcement, you should give preference to galvanized mesh: it prevents corrosion and prevents rust stains from appearing on the walls. In addition, it is easy to cut and quite simple to attach to the surface. Before work, the metal mesh should be degreased, and the galvanized mesh should simply be washed with water. The formation of the reinforcing layer occurs as follows:
Advantages and disadvantages
The minimal weight of the mesh eliminates the need to install supports made of reinforced metal pipes. There is simply no need to dig pillars to great depths, since there are practically no forces acting on the fence that could lead to its deformation. A simple mesh installation technology with some skill allows you to erect a long fence in a very short time.
Of course, such a fence also has its disadvantages. Firstly, there is a lack of visual protection of the site from prying eyes. For a small garden in an area where everyone knows each other, this disadvantage is practically not felt, but in some cases this feature of a chain-link fence becomes critical. The transparency of the structure can be partially eliminated by installing an additional facade mesh in 2 layers, but this procedure significantly increases the cost and complicates the entire undertaking. More details about it at the end of the article.
It is also necessary to take into account that there are many examples where the decision to do all the work yourself leads to disastrous consequences. The instructions below take into account all possible errors that could cause deformation of the fence in the future. If, after familiarizing yourself with the technology, you realize that the work is beyond your capabilities, contact a specialist. The price of a chain-link fence from an experienced team will be higher than the cost of all materials, but in this case you receive a guarantee on the result.
Possible mistakes
Novice craftsmen often encounter mistakes that can lead to peeling of the solution and reduced surface quality:
- No primer. The primer increases the adhesion of the material. It must be used to ensure that the mortar adheres securely to the wall.
- Violation of proportions. Lack of water leads to increased density. Such plaster slides under its own weight and cracks.
- Adjustment of consistency with powder. The consistency of the working mixture should only be changed with water. To do this, it is administered in small portions, bringing it to the required volume.
- Refusal to reinforce joints and walls in new buildings. Joints made of different materials have different technical characteristics. They differ in behavior under changes in temperature and humidity. Therefore, cracks often appear at the joints. Reinforcement helps to avoid them.
- Incorrect position and fastening of the mesh. It is enough to secure the lightweight fabric around the perimeter. When using metal sheathing, fasteners are made over the entire area.
- Attaching beacons to a continuous layer. To install beacons, straps with a given pitch are used.
- Failure to comply with drying conditions. It is unacceptable to dry walls in direct sunlight, with a heat gun or at elevated temperatures. This leads to uneven drying of the mixture and cracking.
Drying the wall with a heat gun leads to uneven drying of the mixture and cracking. Frequent mistakes also include too thick a mixture, an excessively thick or thin application layer, and the use of low-quality materials.
Plastering the surface
After installing the beacons, you can proceed to the plastering process. Plastering walls on a grid is carried out in several stages, at each of which one layer of mortar is applied.
First stage. Plastering is usually carried out in 2 or 3 layers, depending on the material of the walls. The initial layer is applied by “spraying”. To do this, prepare a solution whose consistency should resemble sour cream. The finished mixture is poured over with a trowel or ladle in any order. The solution can be spread, but the first option is easier and faster. The applied mixture is leveled with a spatula. The thickness of the “spray” layer should be about 10 mm.
Knowing how plastering is done on a grid allows you to act skillfully when there is a risk of the mortar slipping. To prevent this from happening, the wall is reinforced with reinforced material. Is mesh needed when plastering? It is simply necessary as a reinforcing layer.
The solution on the walls is retained in the cells of the canvas and does not flow down. After the applied mixture hardens on the surface of the walls, a durable, durable coating is formed. A layer of plaster 10 mm thick can be dispensed with without reinforcement. For thicker coatings, installation of reinforcement is required.
The final stage of work
After the plaster has completely dried, it must be prepared for fixing finishing materials. To paint and wallpaper, just sand the surface with sandpaper. If there are noticeable unevenness on the wall, you need to start using the largest brand of paper. For ease of work, a piece of product is clamped on a grater. Grinding is done in a circular motion with little effort so as not to create new defects on the surface.
When the wall becomes uniform, you need to change the brand and continue grouting. If the surface will be painted, you need to take P120 paper. During the entire process, you should use goggles and a respirator to protect yourself from dust.
Since it is quite difficult to sand the surface in the corners, it is worth working either without a grater or using bars with sharp corners. If you want to make the work process easier and faster, you can purchase an electric grater. But to treat the walls of one apartment, it is not profitable to buy such a product. After sanding, you need to sweep away the dust with a brush.
Opaque fence
Finally, I would like to consider an interesting option for creating a continuous opaque fence based on a chain-link mesh. To do this, you will need to additionally stretch a Jamaica-type shading mesh on the supports in 2 layers. This method can be considered a budget option for creating a continuous soft fence.
You need to tension such a structure with an assistant or two. One will pull the chain-link mesh, the second will pull the Jamaica mesh, and the third will fix both meshes with wire to the posts. If you come very close and look closely, then, of course, through such a fence you can see what is happening on the site. But, as a rule, this is quite enough to protect yourself from 90% of all prying eyes.
Knowing the methodology for making such a fence, you can now make an informed decision whether to do all the work yourself or order the installation of a chain-link fence on a turnkey basis. If the budget is very limited and you are confident in your abilities, then feel free to get to work. If you are more interested in the quality and durability of the structure and the price of a chain-link fence with installation from professionals does not scare you, contact a company with a good reputation.
Grout
At first glance, grouting is one of the simplest tasks facing a qualified or novice craftsman. Incorrect movements, increased thickness of the plaster layer, refusal to use tools moistened with water are factors that can lead to extra layers of coating created in the previous stages.
Grout
There is no grout (covering), which means that the surface finishing will remain unfinished. A very liquid plaster solution is applied to the wall in small portions and a rapid, fast, but high-quality distribution of the solution over the entire treated area begins immediately. Work is carried out only on moistened but already established plaster. By making circular movements in a counterclockwise direction, experienced and novice craftsmen achieve complete alignment and eliminate all possible shortcomings of the work done.
High-quality multi-layer priming will help prevent excessive absorption of moisture from the solution. For such treatment, you will need to use a ready-made solution containing various additives that prevent the appearance and development of fungus and mold. In addition, strict compliance with all the requirements of the technological process will help achieve the goal.
Types of reinforcing mesh
Modern mesh plastering technologies use several types of reinforcing materials:
- fiberglass;
- polymer;
- metal.
Fiberglass
Fiberglass mesh for plaster is a thin, fine-mesh fabric.
Wall plaster using a grid of this type is applied to indoor walls. Fiberglass sheets are attached to surfaces that do not require special leveling.
Typically, such a mesh is covered with a thin layer of gypsum plaster.
How to get rid of rust on plaster
Rust stains that appear as a result of wet plaster (as a result of leaks) are difficult to remove.
There are several ways:
- decolorization of dyes with hydrogen peroxide or sodium hypochlorite (the latter is not used for gypsum plaster);
- treatment with orthophosphoric acid (solution) converts rust into insoluble compounds;
- the stains are covered with hydrophobic putty, which allows steam and air to pass through, but does not allow liquid water to pass through;
- at the finishing stage, spot insulators (spot-insulating primers) are used;
- For painting, you can use special water-based primers with an acrylic base with a modifier - air-curing epoxy resin. Such primers create a membrane that allows steam and air to pass through, but prevents capillary seepage. The primer has good adhesion to water-based paints.
Plastering metal is not as difficult as one might think. The main thing is to ensure adhesion, coordinated operation of the coating and the base, and protect the finish from rust. Then the plaster coating will not sag, fall off in pieces and become covered with rusty spots.
Installation of grids
Each type of reinforcement is attached taking into account the characteristics of the material. For more information about the types of construction meshes, watch this video:
Reinforcement of walls with fiberglass cloth
Lightweight plaster mesh does not require special fixation.
Fiberglass mesh for plaster is secured around the perimeter with a mortar rubbed in with a spatula.
The strips are connected to each other with an overlap of 150-200 mm, for which, before starting work, the mesh is cut into strips taking into account this overlap.
In case of a particularly complex configuration of the wall surface, the canvas is additionally secured with dowels. If the strips are placed on wooden surfaces, it is convenient to fasten them with a stapler.
Coating with polymer sheets
In some cases, plastic sheets are attached in the same way as fiberglass. In other fastening options, they resort to the use of dowels and self-tapping screws. The material is attached with an overlap, placing one strip over the other by 150-200 mm.
Metal coatings
Metal plaster mesh can withstand fairly thick layers of finishing. Due to the fact that such reinforcement has a significant specific gravity, the fastening of metal reinforcement must be especially reliable. Installation of metal wall coverings is carried out as follows:
Preparation
Before you start work, you must prepare the surface. If the building is new, then a layer of primer is applied to the wall, which will increase the level of adhesion, and then the plaster will adhere firmly to the base.
If the building was built a long time ago, then first you need to remove the old finish, clean it well, you can even wash the surface of the walls. In cases where traces of mold or fungi are found, these places must be specially treated with an antifungal compound so that stains do not appear on the new coating. And only after this can the primer be applied.
Installation of a frame with cellular fabric on Z-shaped brackets
The metal clamps with their profile resemble the Latin letter Z. The height of the lower overlays is 2.5 cm, and the upper elements are 4 cm. This is necessary so that the frame can first be inserted into the upper openings of the brackets, and then lowered into the lower grooves.
Type and position of Z-brackets
Step-by-step instructions for installing MS on Z-brackets
Attaching curved brackets to the outside of your home will require some skill. If the window openings are located above the 1st floor, then it is better to entrust this work to specialists. Installation of the mosquito net on the brackets occurs in a certain order.
- First, fasten the clamps at the bottom of the window frame with self-tapping screws.
- From the shelves of the lower brackets, measure the height of the frame vertically on both sides of the block and make marks.
- 20 mm above the marks mark the position of the shelves of the upper brackets.
- The fasteners are screwed in with self-tapping screws.
- The mesh is taken by the handles with both hands and taken out of the opening, unfolded and inserted into the upper brackets. Then strictly vertically lower the MS down until it stops at the lower shelves of the brackets.
- When dismantling the mesh, proceed in the reverse order.
Popular manufacturers
In the market of construction and finishing materials, domestic manufacturers occupy leading positions:
- — has been working in this segment for 20 years, producing 50 thousand types of goods. It produces “VERTEX” mesh for reinforcing polystyrene insulation, and “Valmiera” fiberglass mesh.
- produces all types of metal mesh from wire BP 1, BP 2, steel, surfacing, spring. He is a representative of Cherepovetsky.
- - the main supplier of reinforcing fiberglass mesh CCI-160 (density 160 g/m²) in the West Siberian region. It produces “TG-Textilglas” - a mesh for working over a layer of insulation.
- (Izhevsk) offers not only metal and fiberglass reinforcing mesh, but also glue for their fastening.
- - German representative on the market of specialized fiberglass mesh. The main production of plaster mesh is located in Sonthofen.
Plaster mesh 1 meter wide is delivered to commercial enterprises in rolls 30-80 meters long (roll weight 80 kg) with fasteners and additional elements. In retail trade, goods may be sold by the meter.
Plastering walls
Fences with mesh are plastered in 2-3 layers.
The walls are plastered in several layers
The work is carried out in the following order:
- The first layer is applied using the cape method. The mortar collected on a trowel is thrown onto the fence with a sharp movement of the hand. To do this, use a mixture with a consistency reminiscent of liquid sour cream. This method of applying the solution allows you to obtain a dense, durable layer of plaster.
- After the first layer has “set”, the next layer of plaster is applied. The second layer is made from a denser mixture - a dough-like consistency.
- Plastering is done from bottom to top. The thrown solution from below is picked up with a rule and brought up. As the rule moves, it is slightly alternately shifted from side to side. This helps to distribute the mixture evenly over the wall surface.
- After the plaster has dried, the beacons are removed. The remaining clearings are sealed with mortar.
- At the end of the work, the surface of the walls must be grouted. To do this, take a liquid mixture. Using circular movements of a wooden grout or trowel, the liquid solution is rubbed onto the plastered wall, thereby finally forming the finished surface of the wall.
Selecting a mesh for plastering indoors and for facade work. What kind of mesh is available on the construction market. Correct fastening of various types of mesh to the surface.
How to plaster walls with your own hands: instructions for beginners
How to plaster walls with your own hands
Sooner or later, every home owner is faced with the problem of wall alignment. Unfortunately, the quality of their finishing is often such that it is impossible to wallpaper or paint without preliminary work. The best solution in most cases is plastering. We offer detailed, complete instructions for plastering walls with your own hands. It will help even a novice master to cope with difficult work.
Types of plaster mixtures
Two types of materials are used to level surfaces. Their main difference lies in the base on which all the characteristics of the solution depend. It could be:
Quartz sand of different grain sizes, plasticizers and other fillers are added to the base, which determine the purpose of the plaster paste. Thus, coarse sand allows you to level out significant differences, while fine sand is used only for applying the last layer, covering small roughnesses.
Let's look at the pros and cons of each type of material.
Cement compositions
They are particularly durable and resistant to mechanical stress. They are not afraid of moisture and can be used in rooms with special conditions: bathrooms, toilets, kitchens and outdoors. They are not destroyed by temperature changes, are durable, have a low cost and can be made by hand. Even significant differences are well leveled. If a layer thicker than 20 mm is applied, a reinforcing mesh must be used.
Lime, clay, and gypsum can be used as fillers, imparting plasticity and antiseptic properties. Among the disadvantages, it is necessary to note the large mass of cement mortars. They place a significant load on the base, which must be taken into account. Low ductility leads to shrinkage and possible cracking. For the same reason, it is quite difficult to apply such paste. Moreover, it does not fall on all bases. Cement takes a long time to dry and completely hardens only after a month.
Gypsum mixtures
The main advantage is plasticity and ease of application. The paste fits well on any base and adheres firmly to it. Gypsum is lightweight. Even a thick layer of such mass will not weigh down the structure. It never shrinks and practically does not crack. Dries much faster than its cement counterpart. The finishing compound levels the surface so well that subsequent filling is often not necessary.
The most significant disadvantage of the material is hygroscopicity. Plaster easily absorbs water, gets wet and breaks down. Therefore, it is prohibited to use gypsum varieties for outdoors or rooms with high humidity. Moisture-resistant mixtures for interior installation are available, but they should also be used with caution. The disadvantages include the high cost of the material and the inability to make it yourself.
How to plaster walls correctly: choosing tools and material
To make it clear to a novice master what is required to carry out the work, we will list everything necessary.
- Plaster, gypsum or cement. We choose depending on the purpose of the room and our own skills. It is easier for a beginner to work with plaster, but it is more expensive and can only be used for dry rooms.
- Suitable primer. It is necessary to prepare the base.
- Beacons. Installed in case of large differences and the presence of significant unevenness on the surface.
- Long rule. If you plan to install beacons, choose a length of 250 cm; 200 cm will be enough to pull out the solution.
- Bubble level 200 cm long and plumb.
- Wide spatula and trowel for applying the mixture.
- A special construction float and a metal iron to remove roughness.
- Bucket and hammer drill with a special attachment for mixing plaster paste.
In addition, you may need screws, dowels, a screwdriver to secure the beacons, and a tape measure for precise markings.
Plastering walls with your own hands: complete detailed instructions for beginners
The quality of the finished coating largely depends on how correctly it was laid. Let's look at all the intricacies of this process.
Preparatory work
The main task of the process is to prepare the surface for laying the plaster mass. First, we carefully inspect the base and study its condition. If there is any coating on it, carefully remove it. We clean the surface from dirt and dust. Detected cracks, regardless of their size, should be repaired. Otherwise, the coating applied over them may also crack.
Be sure to embroider deep cracks at an angle. That is, we expand it so that we can get to its very base. After this, we clean the area from dust and prime it generously, thereby improving the adhesion of the material. After drying, we fill the defect with putty flush with the surface level. Shallow narrow cracks can be filled with silicone or sealant using a thin nozzle tube. Wide defects are removed using polyurethane foam.
Further steps will vary depending on the material you are working with.
Concrete
This base is quite smooth; to improve its adhesion to the solution, it is recommended to make notches. They are performed at a short distance from each other, deepening by 10-15 mm. Then cover everything with primer. Given the hardness of concrete, the work will be very labor-intensive. Therefore, you can do it differently: prime it with a special primer. Select an adhesive primer with deep penetration.
It contains sand, which should remain on the base after drying. Sometimes this technique does not work well, so it is recommended to carry out a test application of primer before plastering. They treat a small area with it and wait until it is completely dry. Then they carry it out with their hand. If the roughness is clearly felt and the sand does not crumble, treat the entire surface. Otherwise, notches are made.
Brick
Despite the fact that the brick itself is quite rough, it is recommended to go over the cleaned material with a grinder or wire brush. The seams between the bricks must be opened so that the mixture can get into them, which will improve the adhesion of the plaster. Then the dust is removed, first with a brush and then with a damp cloth. Finally, two layers of primer are applied.
Tree
In order for the plaster mass to be firmly attached to the wooden base, it is necessary to equip the lathing. It is made from slats, which are also called shingles. The elements are nailed diagonally. It is important to use only high-quality shingles, additionally treated with an antiseptic. Otherwise, it will quickly rot and destroy the coating.
To make the task easier, you can use a chain-link mesh instead. It is nailed onto slats, which are laid between the base and the mesh. They, like shingles, can serve as beacons during the leveling process. In this case, the elements are set strictly according to level. All wooden parts are treated with an antiseptic and dried well, only after this can the sheathing be plastered.
Technology of applying the solution using beacons
Used to level out significant differences. Metal guides are used as guidelines to show how to plaster walls. You shouldn't skimp on buying them. High-quality metal can subsequently be left inside the base, and it will not become rusty over time. It is better to remove parts of questionable quality, which is quite labor-intensive.
The guides are installed along the entire length of the wall at a distance of about 150 cm from one another. This distance is chosen so that during the alignment process the rule moves along two adjacent profiles. They are set strictly according to the level and securely fastened to the base. The easiest way to do this is to use a gypsum solution, which sets quickly and holds the elements securely. You can attach it with self-tapping screws, but this is more difficult.
Then the plaster solution is prepared. This must be done in strict accordance with the manufacturer's instructions. Next, proceed to plastering:
- Sketch. Pour the mixture onto the base. You can do this manually, with a trowel or with a special device if mechanized installation is intended. Thick paste is poured onto the instrument and, with some effort, “spreads” onto the base. A layer about 5 mm thick is placed on concrete and brick, and 8-9 mm on wood. We put the rule on the beacons and pull the coating from the bottom up, leveling it. Leave for at least 2 hours to dry.
- Priming. Prepare the dough-like mixture. We apply it with a wide spatula, performing movements in any direction, but with some effort. Using the rule, we check the quality of the alignment. Remove all protruding areas with a grater soaked in water. Gently rub a small amount of solution into the depressions. Leave to dry for at least 3 hours.
- Covering. Prepare a solution with a creamy consistency. You can apply it with a spatula or scoop it into a ladle and pour a small amount of liquid paste onto the wall from top to bottom. We smooth it out using the rule, completely leveling the base. Let it dry for 8 hours, then lightly moisten it and clean it with a construction float.
To make everything clear, we suggest watching a video of how a beginner can plaster walls with his own hands.
Alignment without beacons
Used to level surfaces with minor differences. Beacon landmarks are not set, so the quality of work must be controlled using a level. All stages are performed in the same sequence, except that during sketching the mixture is leveled not with a rule, but with a grater. The technology is shown in more detail and fully in the video, which we suggest watching.
Plastering the walls yourself is not so difficult, even if a novice master takes on the task. Skills are developed on the job. Before you start finishing, it is advisable to practice on a small area. This way you can identify all the “weak” points, work with them, gain the necessary skills and a little experience.
Rolled (roller) design of a mosquito protection device
Mosquito roller blinds are complex mechanical devices that use cellular fabric instead of curtain fabric. They are purchased ready-made, designed for a height of up to 2.5 m and a window width of up to 2 m. We wrote about the types of mosquito nets here.
Mosquito roller shutter
Roller shutters are installed on the outside of window blocks, provided that the windows swing inside the room. These are some of the most expensive anti-mosquito devices. Their advantage is quick installation, beautiful appearance and ease of handling. They are usually painted white or steel.
Shingles
Shreds are knocked out of a row of plaster mesh. It's not a mesh at all. But without it it is impossible to plaster wooden walls, be they logs, beams or boards. Sometimes they try to use welded metal mesh, but only on interior partitions.
On load-bearing walls, especially in new buildings, there is a high risk of metal deformation due to the “breathing” of wood - linear dimensions change greatly under the influence of humidity. Deformed reinforcement will tear the plaster. But in old wooden houses, where the wood has dried well, everything can be reinforced with welded mesh. The drani does not have this problem - it breathes synchronously with the wall.
Shingles are narrow planks from 1 to 2 m long, 15-20 mm wide and 3 to 5 mm thick. Sold in packs of 50 or 100 pcs. in each. They are quite expensive.
Advantages and disadvantages
Among the strengths of drani:
- environmental friendliness - natural wood cannot be an allergen or emit harmful substances;
- is not afraid of changes in temperature and humidity - can be used in unheated rooms, on balconies and loggias;
- improves the heat and sound insulation properties of the wall;
- light weight;
- simple installation technology - the whole process can be done with your own hands.
Flaws:
- burns well - requires treatment with fire retardants. In practice, such a procedure is not carried out, the explanation is simple - in case of a fire it still won’t help, and money is never superfluous;
- susceptible to rotting - protective impregnation is needed, but without oil elements (it is not friendly with solutions). Experienced plasterers prefer good drying instead of treating with special compounds;
- high price, as already mentioned above.
In addition to the plaster mesh, there is also a painting mesh, which has several varieties:
- putty mesh. Made from fiberglass. Looks like textiles. Cells 2x2 mm. Thickness - 0.8-1.2 mm. Density up to 60 g/cm3. Used to increase the strength of putty when painting walls. Not applicable for other types of finishing;
- fiberglass - glass fibers pressed into a thin sheet. Sometimes called a spider web. The purpose is the same as that of the putty net;
- serpyanka - putty mesh cut into strips. For ease of use, many manufacturers apply glue on one side. The main purpose is to reinforce cracks, joints, and seams between sheet materials.
Necessity
Previously, shingles were used to ensure surface strength and long-lasting plaster. It was made from wooden slats nailed to the base. Now on the construction market there is mesh for plastering. They vary in color and material. They serve for better adhesion to the surface, there is no peeling of the applied layer from the rough base for a long time, there are no cracks after the solution dries. After applying the material under the plaster and drying the solution, decorative finishing is applied without fear that defects will appear underneath.
Insulation materials
The thermal insulation layer made of polystyrene foam needs reliable protection from the destructive effects of environmental factors. Plaster will adequately cope with this task, the application of which will ensure a long service life of the insulation and improve the thermal insulation of the structure.
The need for plastering foam plastic
Polymer materials have a long service life. Foam plastic is no exception. Experts conducted tests and subjected the foam to conditions simulating 80 cycles of temperature changes. The results met the expectations of the technologists - the foam did not lose its technical characteristics.
Conclusion
Having understood the types and types of mesh for plaster, as well as their purpose, it will not be difficult to choose the right material. However, to achieve a positive effect from its use, it is necessary to follow the finishing technology described above.
For more information on this topic, watch the video in this article.
The mesh for plaster is the key to the durability of the work performed. Plastering walls is a traditional leveling and finishing technology. And not only - plaster is also performed for the purposes of fire protection and sound insulation, during repairs, as a decorative finishing layer or as preparation for finishing... but most often gypsum, cement-sand and lime plaster is needed, just as finishing. The use of mesh for plaster is an important condition.
Reinforcement of products made from cement-sand mortars is a condition for their long service life, and the plaster layer is no exception. In order for the plaster layer to be durable and serve for a long time, it is reinforced by placing inside a mesh made of plastic, fiberglass, steel; there are a lot of types and materials of mesh. And you need to choose a grid based on certain conditions.
Plastering the facade using a polymer mesh
Polymer reinforcement has a very valuable quality: it successfully resists deformation of the plaster layer.
Due to its chemical properties, it cannot react with oxygen, and therefore rust does not form.
The plastering work procedure is similar to the previous version. But there are also some features:
- Fastening is often carried out by pressing staples or nails into the plaster layer. For fixation, you can use a construction stapler if the wall material allows.
- The plastering process should begin not from the bottom, but from the middle of the polymer mesh. Then the plaster layer is distributed in each direction, gradually approaching the edges. The movements are performed in the same way as when gluing wallpaper, when the air is expelled from under it.
- It is necessary to carefully ensure that the mesh does not stretch during the finishing work. The polymer material is elastic, so you need to be careful when working so that it does not form bubbles.
What happens: varieties
The construction market is full of a variety of cellular materials for plastering surfaces. They are mainly produced from:
Each grid is designed to perform a specific job. A brief description is presented in the table:
| Grid type | Cell size, mm | Short description |
| Painting | 5x5 | Made of plastic. Used for work inside buildings. Use gypsum-based mixtures |
| Universal |
Large
Painting plaster
The final stage – painting – also has its own nuances. So, when using adhesive-based compounds, the wall must be treated with a water-based primer. If the paints are soluble organic, the primer should be synthetic. In addition, solvent-based paints should not be applied to fresh plaster, as this will lead to an undesirable reaction with an alkaline environment.
- DIY battery screen ← Published: June 26, 2017
- DIY bath screen ← Published: June 26, 2017
- Bathroom screen ← Published: June 26, 2017
- How to make an electric heated floor in an apartment with your own hands ← Published: June 26, 2017
- Cordless screwdriver for home ← Published: June 26, 2017
Published: June 26, 2022 in the category: Construction industry
Fixing frame protection to corner stops
A peculiarity of fastening mosquito frames in corner stops (pockets) is that the lower transverse bar fits tightly into the lower corners, while the upper corners of the frame are held only in the horizontal direction.
The installation principle is similar to installing the mesh on Z-brackets. The only difference is that the corners do not allow the frame to move sideways, which helps to secure the mesh more firmly.
Attaching the mesh to the corners
Carefully . Despite the manufacturers' assurances that the corners are made of ultraviolet-resistant plastic, after two to three years the plastic limiters may collapse. In this case, the owners risk losing their mosquito nets.
Types of suspended ceilings by type of construction
Another criterion for classifying suspended ceilings is the complexity of the design. It is divided into two types:
- single-level design;
- multi-level.
The type of construction should be selected based on the individual characteristics of the room in which the renovation was undertaken.
Single-level suspended ceilings
A single-level suspended ceiling is a structure without niches, protrusions, steps and other volumetric parts. It can be mounted from slabs or sheets of plasterboard. This option looks simple, without unnecessary details that could hurt the eye.
Installation of the structure is carried out in three stages:
- make markings;
- attach the frame to the main surface;
- install the slabs.
As a rule, in rooms with single-level ceilings, a lamp (chandelier) is used as the main light source. Sometimes 1 - 2 lamps are added.
Multi-level suspended ceilings
Multi-level ceilings require a more complex design. This type of suspended structure allows you to hide unsightly corners, protrusions, and veil communications and wiring.
Multi-level ceilings may contain one or more figured elements: islands, steps. In addition to hiding the shortcomings of the room, such details perform the function of zoning the space.
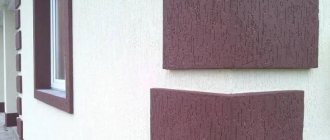
Plastering the facade of a house using insulation – prices
Making the house so warm that in winter frosts the temperature in the rooms is comfortable, and heating costs do not go beyond reasonable limits is a natural desire of the homeowner. One of the most widespread methods of insulating a private house is to cover the outer walls with insulation, followed by plastering the surface over a plastic mesh. Since plaster mortar is used for exterior finishing, this method is also called “Wet Facade” technology.
Despite the apparent simplicity of the method, plastering the facade of a house using insulation requires professional skill, great care and responsibility from the performers. Considering the upcoming amount of work associated with preparing a large amount of solution and staying at altitude, the optimal solution is to involve qualified specialists with the proper experience and the necessary equipment. The Cottage-Expert company offers its services - insulation of private houses, cottages in Moscow and the region using the “Wet facades” method.
| Name of works | Cost of work |
| Finishing | |
| Surveyor's visit, consultations, estimate preparation - free of charge The company has a staff of highly qualified workers, professional tools, scaffolding and equipment for preparing plaster mortar in any required quantities. Our craftsmen are fluent in the technology of building insulation, work quickly and efficiently, ensuring not only high thermal insulation properties of the walls, but also the ideal geometry of the facades, as one of the main factors of high aesthetics and respectability of the building. | |
Recommendations from experts
It is possible to obtain a high-quality and reliable wall only if you follow advice from experts:
- Alignment. The walls should be carefully leveled. The level is checked using a plumb line or laser. The better the work is done, the better the finishing is.
- Taking into account the characteristics of materials. Compatible materials should be selected. Aggressive solutions are capable of dissolving the reinforcing structure.
- Taking into account the maximum load and possible shrinkage of the building. In the case of new buildings and facades that are severely deformed, it is recommended to use metal reinforcement.
- Final revision. Plaster is not a finishing coat. To give it decorative properties and prepare it for subsequent finishing, it requires sanding and sanding.
Experts recommend that you always sand the walls after applying plaster.
Reinforcing mesh is a necessary element for rough finishing of house facades and walls in new buildings. Its correct fastening and adherence to the technology of applying plaster allows you to create a reliable and strong coating that will last a long time.
Sources
- https://mirbetona.info/finishing/setka-pod-shtukaturku
- https://1beton.info/shtukaturka/setka-shtukaturnaya
- https://PoShtukaturke.ru/steny-vnutri/shtukaturka-vyravnivanie/oshtukaturivanie-sten-po-setke.html
- https://1pofasady.ru/shtukaturka/setka-dlya-shtukaturki-sten
- https://DekorShtukaturka.ru/instrumenty/setka-dlya-shtukaturki-sten
- https://oshtukaturke.ru/raznovidnosti/armiruyushhaya-setka
- https://arbolit.org/sovety/tehnologiya-vypolneniya-shtukaturki-po-setke.html
- https://1pofasady.ru/shtukaturka/tehnologiya-shtukaturki-fasada-po-setke
Choosing the type of insulation for plaster
The entire list of finishing works is usually planned in advance, so even at the stage of choosing insulation it is worth understanding the properties of different types of material in order to plaster them using the correct technology. The most commonly used materials for insulating facades are polystyrene foam (foam plastic) and mineral wool.
Quite easy to install and inexpensive material with excellent resistance to moisture. Expanded polystyrene insulates the facade well, but is less durable than mineral wool. In addition, polystyrene foam is not fireproof.
It is most reasonable to choose expanded polystyrene for thermal insulation of brick facades, concrete, expanded clay concrete and slag concrete walls.
- Mineral wool;
Non-flammable and breathable material with excellent vapor-permeable properties. When planning to install such insulation, you should understand that its weight is greater than that of foam plastic, so to attach it to the facade you will need a stronger sheathing.
It is also recommended not to skimp on the quality of mineral wool and choose two-layer materials in the form of diabase or basalt slabs. They are quite dense and have a hard outer surface.
Mineral wool is used to insulate houses made of timber, expanded clay concrete, as well as walls made of gas silicate and aerated concrete.
When choosing plaster, it is necessary to take into account the type of insulation that will be installed on the facade. If you choose expanded polystyrene, the reinforcing mesh should also be special - resistant to alkalis.
Technology
This technology itself is not very new: in old houses, especially wooden ones, you can often find walls covered with a lattice of thin wooden planks, on top of which plaster has already been applied. Now the choice of materials is much richer; it is not limited solely to wood.
Problems solved by reinforcement:
- The adhesion of the plaster solution increases.
- The coating becomes stronger. Having hardened in a single layer, the plaster turns into a monolithic layer.
- This method helps to some extent correct the master’s flaws. Even with an ineptly applied mortar, the reinforcing mesh will hold the plaster, preventing it from crumbling (read what to do if the plaster begins to crack and crumble here).
What thermal insulation materials are used for the facade?
If you are interested in facade plasters for insulation , the choice of materials that will be used for thermal insulation of the building is important. They can be different, both in composition and in the method of installation. Preference should be given to the option that suits you in terms of the combination of price and technical characteristics.
Mineral wool is one of the most common materials used for thermal insulation of walls using the wet facade method. This is an environmentally friendly material, safe in case of fire, environmentally friendly and vapor permeable. Among the disadvantages of mineral wool, one can note its heavy weight and inconvenience to use. Fragile fibers of mineral wool can get into the skin and cause considerable discomfort. In the case of insulation before plastering, the wool should be basalt or stone.
In popularity, mineral wool is surpassed only by polystyrene foam. This is an inexpensive material, lightweight and easy to use. It does not cause irritation and has excellent thermal insulation properties. However, the vapor permeability of this insulation is almost zero. After treatment with such material, walls stop breathing and need high-quality ventilation to avoid dampness. In addition, polystyrene foam is susceptible to fire and releases toxic substances when burned.
Not the most popular, but solely because of its cost, and not because of its performance, is polystyrene foam. It is much stronger than foam plastic, so it can be used to insulate the basement. Lowly susceptible to fire due to the presence of special fire retardants. The thermal conductivity of this material is extremely low, less than that of mineral wool or polystyrene foam. Among the disadvantages are not the highest vapor permeability and a fairly high price.
How to attach the plaster mesh
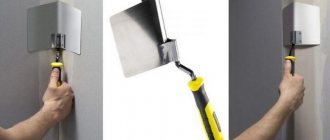
To understand how to properly attach the mesh to the wall, it is worth considering the two most popular types of mesh - fiberglass and metal. It is much easier to secure the first named type of product, since for this you only need to screw in several screws at an equal distance from each other. Such fastenings are sufficient to securely hold the mesh.
To keep the mesh more securely, you should roll it out across its entire width in one piece, without dividing the product into several. Vertical beacons are installed at a distance of about two meters from each other during installation. After the mesh is hung on the screws, the plaster applied seals it to the wall, so additional fastening elements are not needed.
The installation process for metal mesh is slightly different. This is due to the fact that under its own weight such a product is not able to be securely held on the mounts. Also, the cells of metal mesh are large and require additional fastening with mounting tape.
To secure it, you only need to cut off part of the mounting tape so that it can completely cover one cell. After cutting the mounting tape, it is fixed to the wall with self-tapping screws. You need to calculate the distance between the fasteners in such a way that the mesh does not sag on any section of the wall.
Article on the topic: Installation of wooden countertops. How to make a table from boards with your own hands - drawings and photos How to make a tabletop from wood
Latest reviews
Feedback quality control at the proper level
My wife and I bought an apartment in a new building, heard about the organization on the radio, signed up for a measurement and they calculated an estimate for us, we approved it, signed all the necessary documents, and sent an advance payment. The work went on without our presence and participation. The company works smoothly from the supply of materials to the stable availability of employees, quality control on.
Review without dust, they cleaned up after themselves
I was doing renovations in the kitchen, my friends advised me to contact “Comfort in Your Home” and I was very pleased with the result. They did it on time, worked with a vacuum cleaner around the house, there was no dust, they cleaned up after themselves. I recommended it to friends. Thank you.
The whole family was very pleased with the review
I’m very pleased with the renovation of the children’s room, well done guys. The repairs were done quickly, efficiently, and the affordable prices made us very happy. The whole family was very pleased! We will definitely contact you again and recommend you if necessary! Thank you very much!
Review: Thank you for the great New Year gift
In December 2013, my husband and I decided to renovate our kitchen and bathroom. After surfing the Internet and reading various reviews about different companies, we decided on Comfort in your home. We called and agreed to meet, and on the same day. The master arrived, we discussed all the details. Repairs began on the 1st. I really wanted it to be done in time.