Developers often have a question about how to plaster aerated concrete on the outside. Before starting work, it is recommended to determine the important characteristics and, based on this, select the optimal finishing option.
Aerated concrete plaster must meet the basic requirements - the mixture adheres tightly to the surface and has good adhesion. The finishing layer is durable, frost-resistant and has the required level of vapor permeability and water repellency.
When to do plastering work
External plastering is recommended after completion of finishing work in the building. It is generally accepted that if the surface of aerated concrete blocks is not protected from the street, it will absorb moisture. This is not true; primed walls can stand without a protective layer for a whole winter; when the climate changes in the spring, the moisture from the surface will evaporate. In the opposite case, when the house is treated from the facade, evaporation vapor will be directed into the room, which will lead to the appearance of dampness.
Note! An exception is the option of building a house on the seashore or pond. When it is necessary to protect external walls from the influence of humid climates and winds.
Before plastering, the walls made of aerated blocks must dry thoroughly. If during the construction process a cement mortar was used, which has the ability to absorb moisture. For this reason, exterior decoration will not be effective during the rainy season. But especially dangerous for walls is cold water, which then turns into ice. During the melting process, the structure of aerated concrete begins to collapse.
Methods for plastering walls made of aerated concrete
The ability of aerated concrete to absorb water puts forward special requirements for wall decoration. It is necessary to protect them both from external influences (rain, heavy fog, melt water, etc.) and from steam contained in the indoor air of residential premises. In this regard, plaster as a finishing method is one of the most controversial, and at the same time, reliable options. The problem is that it is impossible to use ordinary sand-cement plaster in this case, since the water from it will be intensely absorbed into the gas blocks, which will disrupt the crystallization regime of the cement. Special compositions are required for working with cellular concrete.
There are two main ways to finish aerated concrete with plaster:
- manual, when the composition is thrown onto the wall and leveled using ordinary tools;
- mechanical, in which the plaster is supplied under pressure using special equipment.
Manual application is used more often, since not every finisher has special equipment for mechanical application. In addition, the mechanical method does not give the final result - the composition is only thrown onto the wall, and leveling and making it flat is done with hand tools.
Requirements for finishing walls made of aerated blocks
Aerated concrete is a hygroscopic material with high vapor permeability. Such qualities create special requirements for finishing. First of all, the basic rule must be strictly observed - the vapor permeability of the wall pie materials should increase in the direction from the inside to the outside. This means that the permeability of the first finishing layer should be lower than the second, etc. The outer layer should have the highest permeability. This rule must be strictly observed, otherwise water vapor, absorbed into the wall, will be trapped at the border of the two layers. The wall will gradually begin to get wet, the materials will become saturated with moisture. Dampness and mold will appear in the house. The outside walls will begin to freeze, and expanding ice crystals will tear apart the aerated concrete blocks.
It follows from this rule that plaster mixtures for interior and exterior decoration cannot be the same. When finishing aerated concrete blocks indoors, it is necessary to apply compounds with relatively low permeability, and outside - the most permeable types of plaster. Otherwise, you can either lock the moisture inside the aerated concrete block or leave it in the first layer of interior finishing. This will cause the walls to get wet, the appearance of fungus and mold, and the indoor microclimate will become uncomfortable and even harmful to people. At the same time, there are specialized compositions that can be used to increase the vapor permeability of the mixture. The use of such additives simplifies the solution of the problem - before plastering the gas silicate blocks, it is necessary to bring the mixture to the required state. Typically, compositions with minimal vapor permeability are selected (aerated concrete mixtures for interior work), and then their permeability is increased with the help of additives that allow plaster to be applied externally.
Therefore, when planning to do the finishing yourself, you must first select suitable compositions and take into account the specifics of aerated concrete walls. This is quite a difficult task, because of which most owners prefer to plaster only the internal walls and install sheathing (siding) on the outside. This solution is quite reasonable, since when installing the sheathing, it is possible to create a ventilation gap that ensures the removal of water vapor from the aerated concrete and from the external insulation. However, the appearance of a plastered house is significantly more attractive and solid. In addition, it is possible to perform plastering on the external insulation, which will improve the heat-saving qualities of wall materials and protect them from contact with water.
Facade insulation
If the building is properly insulated, you can heat the room faster and save money on heating costs. It is recommended to insulate the outside with mineral wool, polystyrene foam, polystyrene foam or other options. For example, the insulation and plaster of the facade of a house can be replaced by building an additional brick wall or treated with liquid polyurethane foam.
Types of plasters
There are several types of plaster that are suitable for treating aerated concrete walls. There are certain requirements for mixture compositions for outdoor work.
- The material must be permeable and its coefficient must be higher than that of the surface being treated - aerated concrete or sealant.
- The plaster must be resistant to frost and temperature changes.
- To prevent cracks, the applied layer must be elastic.
- The plaster must have strong adhesion properties to aerated concrete.
Is it possible and necessary to plaster aerated concrete blocks?
Few people want to increase the cost of a house by finishing it, even if its owner is not limited in budget. Therefore, most often the choice is made of plaster, as the most economical material, but this is far from its only advantage.
To make it clear why plaster is so good, let us explain the physical side of the work of cellular concrete enclosing structures.
Aerated concrete is characterized by a high coefficient of vapor permeability, and with a decrease in the density of products it only increases. Today, when they learned how to make blocks with a density of 300 kg/m³ and strength class B2, which allows them to be classified as a thermal insulation and structural material, the walls of houses built from them have become even more permeable to vapors. In this case, the coefficient is 0.26 mg/m*h*Pa, which is even more than that of wood.
Since the material allows steam to pass freely, it means:
- It must be protected from the inside with vapor-proof materials.
- Since no vapor barrier provides 100% protection, conditions must be created outside for vapors to escape. To do this, the finishing material, which is installed adhesively, must have an even higher coefficient of vapor permeability, or a hanging material installed with a ventilated gap must be used.
Plaster is an adhesive material, and it is the only one that can meet the requirements for vapor permeability. However, on plaster facades special ones should be used for porous substrates.
The second, irreplaceable advantage of plasters is that they protect walls from air permeability better than other materials. After all, few people manage to achieve perfect execution of masonry - there are still gaps (especially when working with tongue-and-groove blocks), leaks in the junction of windows and other structures.
Expert opinion Vitaly Kudryashov builder, aspiring author
Ask a Question
Important: Plastering aerated concrete masonry is not only possible, but also necessary - at least on one side. In rooms there is no need to choose a special plaster for cellular concrete - any will do, because the degree of vapor permeability is important only for the facade. True, if the conditions for the escape of vapors from the outside are not created, every effort must be made from the inside to ensure that they initially cannot enter the thickness of the walls and condense there.
Specialized plasters designed for porous substrates are usually thin-layer. The advantage is that they can be applied not only directly to aerated concrete, but also over insulation, which not only compensates for the missing thickness of the masonry, but will also be an excellent barrier to air convection and eliminate thermal inhomogeneity of the walls.
In general, plaster, even applied over insulation, creates virtually no additional load on the walls - and this is another advantage. By the way, cement-based aerated concrete adhesives can be used as plaster.
Is a mesh needed when plastering aerated concrete?
Due to its low density and strength, and for a number of other reasons, aerated concrete is susceptible to cracking. And if the structural material cracks, then naturally this can also happen to the finishing layer. Manufacturers recommend that in certain cases, reinforcing plaster layers with fiberglass mesh, which not only prevents the formation of cracks, but also prevents their opening.
However, it does not always make sense to reinforce the entire area. Basically, reinforcement is required where stresses and uneven deformations occur (in areas of variable loads, humidity and temperatures). The following places experience similar instability:
- external and internal corners of walls;
- external corners of openings;
- jumper support zones;
- window sill area;
- joints of different materials (aerated concrete masonry and reinforced concrete monolith).
The reinforcing layer in these places allows stress to be distributed over a larger area, concentrating at one point. As for continuous reinforcement, it only makes sense to carry it out when the walls are finished immediately after construction, when the aerated concrete masonry has not reached equilibrium moisture content.
To obtain a high-quality plaster coating, it is necessary to select the material taking into account the quality of the masonry surface. In multi-storey construction, several formulations are used that make it possible to produce a solution with the required characteristics on site, but when finishing a private house, it is easier, of course, to use factory-made compositions.
When can I plaster after masonry?
When finishing cellular concrete walls of buildings with adhesive materials, it is very important to follow the following order: first, plastering is done in the premises (as well as all other work associated with wet processes), and then you can decorate the facade. If plaster is also used for exterior finishing, then the timing of this work will depend on its characteristics and the humidity of the base.
When using factory mixtures for cellular concrete, which have a higher vapor permeability coefficient than aerated concrete, plastering can be done immediately. Only, as already mentioned, in this case the coating must be reinforced with mesh over the entire area. If you decide, for example, to throw a cheaper cement-sand coat over the facade, then you need to wait at least six months until the aerated concrete naturally gets rid of excess moisture.
Mineral
How to plaster aerated concrete walls? Professionals and private builders recommend using mineral-based plaster compositions. They are among the thin-layer compositions specially created for finishing aerated concrete. Such solutions are made with your own hands; they are affordable, have good vapor permeability and are light in weight.
Ready-made formulations include the following components:
- lime;
- white cement;
- marble chips and other fillers.
The color palette of such plaster mixtures is limited. They can be easily painted; the only caveat is the use of vapor-permeable coloring compounds. Painting can protect the coating from moisture, because a damp environment can destroy mineral plasters.
Which plaster is better to choose for aerated concrete?
The type of plaster is selected depending on which side it will be applied from: indoors or from the facade. Let's consider which options can be used, and what nuances should be taken into account.
Plaster
Due to the natural properties of gypsum, which is very sensitive to moisture, plasters based on it are used exclusively for interior work and in rooms with normal humidity. Although here, too, the gypsum-based coating requires protection. These are impregnations based on water-soluble synthetic resins, which, penetrating into the pores and hardening, form a film that prevents the penetration of moisture. All hydrophobic impregnations work on this principle.
- Gypsum screed has the same vapor permeability coefficient as aerated concrete. Is it good or bad? If conditions are created outside for the unhindered escape of vapors, then good. If a material that does not allow steam to pass through well is installed on the façade (foam insulation, brick cladding without a ventilation gap, ceramic or concrete tiles, thermal panels with glue), then gypsum plaster is not the best choice. It is better then to take gypsum cement, or lime-cement, which has less vapor permeability.
- Gypsum plasters are valued mainly for their whiteness, which facilitates the process of preparing for finishing. After all, the gray cement base is quite difficult to paint over; it shows through even through some wallpaper. Working with gypsum plaster is also easier - it is lighter in weight and more elastic.
- In addition to gypsum, factory mixtures contain a fine filler (quartz or perlite sand) and a composition of polymer additives that gives the plaster the desired properties. This type of plasters is universal and can be applied to any surface. That is, there is not much difference: it is brickwork or aerated concrete - the main thing is how many and what kind of defects there are in it.
- The plaster option is also selected based on the quality of the base. If there are a lot of potholes, chips, or waste areas on it, you need to purchase two types of mixtures: base (starting) and finishing. The whole difference is in the size of the filler.
- In starting mixtures, the sand fraction is coarser, which makes it possible to compensate for unevenness of 5 mm or more. In the finishing mixtures, sand is ground into flour, which allows you to eliminate the graininess of the starting layer, and after a little grinding, achieve an almost ideal smoothness of the screed.
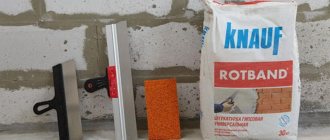
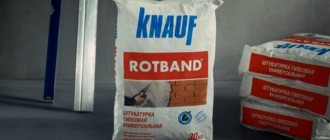
But if we take into account that aerated concrete masonry is always smoother than brick, one type of universal mixture is most often used for plastering it. An excellent choice would be: Founded by Gipswell; Rotband Knauf; Litox Platinum; Perfecta Smartgypsum.
Cement-sand
In general, plaster made from a mixture of cement and sand is not a very good choice for the exterior finishing of aerated concrete masonry. Its vapor permeability coefficient is only 0.09 mg/m*h*Pa (if you remember, aerated concrete has 0.26, three times higher). Accordingly, on the outside, such plaster will not allow steam to freely leave the walls, and will force it to condense, causing secondary moisture in the aerated concrete. If you use such plaster, then: firstly, it can only be applied after a few months, and secondly, it is also advisable to provide the same coating on the inside.
There’s no need to come up with anything special here, since you can use the same solution on which the gas blocks were mounted. But if you want to get the effect of a fur coat, take a composition with a larger filler fraction. For the façade you need M300 solution. It is mixed from M400 or M500 cement, in a ratio of 1:3 or 1:4 with sand (the higher the grade of cement, the more sand is added). The sand fraction is 1.5-2 mm; it must be sieved first through a coarse sieve, then through a fine mesh.
For smooth plastering, two types of mixtures with different filler fractions are also required. For plasticity, lime paste is often added to such plasters at the rate of 0.3-0.5 parts per 1 part cement for the starting layer, and 1:1 for the finishing layer. By the way, with the addition of lime, the vapor permeability of the cement screed improves. If you do without lime, you can make the solution more plastic by adding a mixture of liquid soap and CMC glue to it.
Facade mixtures
It is almost impossible to make vapor-permeable plaster at home. To do this, you need to replace the sand with aerated concrete grit, or porous the solution by adding fire extinguishing foam. And if you consider how much you will have to search for all this, and what price you will pay, it is unlikely that any savings will result. It is much easier to take advantage of manufacturers’ offers and choose one of the factory options presented below.
| Type of plaster | Features of the material |
| Mineral based | Mineral filler (sand, stone flour or chips) is found in all plasters. But the binder can also be polymer. Therefore, mineral compounds are those compositions whose binder base is cement (as well as lime and other natural substances). Plasters for cellular surfaces are called warm, since they use perlite granules, balls of foamed ceramics and glass as coarse aggregates. Such coatings have a low thermal conductivity coefficient (some have 0.086 W/m*C, like thermal insulating aerated concrete), and the same vapor permeability as masonry. Such plasters are used as a covering layer; the leveling layer can be made with the same adhesive mixture. Most mineral plasters for cellular concrete contain a filler of a certain size, which makes it possible to obtain a coating with one or another decorative effect. Usually these are dry mixtures, packaged in bags of 20, 25 or 30 kg, which only need to be mixed with water. Application can usually be done either manually or by machine. |
| On liquid glass (silicate) | Ideal for aerated concrete masonry are silicate plasters, the binder in which is an aqueous solution of potassium liquid glass together with mineral fillers, pigments and additives. Such plasters are ready for use and are packaged in plastic buckets of 10, 12 or 25 kg. The biggest advantage of such compositions is their very high vapor permeability - at least 0.37 mg/m*h*Pa. And this is half as high as that of aerated concrete. There is no need to worry about the release of vapors when plastering the walls in this way. Silicate plasters are very plastic and can be easily spread over the surface with a trowel. What layer thickness should be depends on the size of the filler. Using a tool, the coating is structured, after which it can be coated with silicate paint. |
| Polymer based | This category includes all plasters made on the basis of water-soluble resins: latex, silicone, acrylic and their compositions. From this list, only acrylic has poor vapor permeability, so for aerated concrete it is better to use such plasters in interiors. For facades, compositions based on silicone are better suited, which, by the way, is often combined with liquid glass. So, many facade plasters are called silicate-silicone. The advantage of silicone is its water resistance - and this despite the fact that such plaster retains high vapor permeability. Due to its excellent elasticity, most textured plasters are made with silicone. So, if desired, the facade of the house can be decorated not only with traditional bark beetle or lamb effects, but also using the sgraffito technique. Mostly putties are made of latex. They are also highly plastic, so they are used when it is necessary to obtain a surface with mirror smoothness. Accordingly, they are used more often in interiors, since the grainy texture looks more harmonious on facades. |
Silicate
This type of building plaster is based on potassium liquid glass, which is a binding component.
Advantages of silicate mixture:
- Easy to apply;
- Resistance to moisture;
- Vapor permeability;
- If necessary, it can be painted in any color;
- Acceptable price;
- Long service life (up to 25 years);
- Decorative qualities.
Silicone
It is better to plaster aerated concrete blocks with façade silicone plaster. It has high technical and performance characteristics and is superior to other plaster mixtures.
The advantages of silicone plasters include:
- properties to repel water;
- the building material is easy to apply with your own hands, without the involvement of specialists;
- plaster has a high degree of resistance to atmospheric phenomena and vapor permeability;
- Long service life;
- Fillers have different textures;
- The material is elastic.
Preparation of the solution
Typically, clay plaster is made by hand. The clay should be soaked in water for 24 hours, after which it is mixed and excess liquid is removed. Sawdust and fibers are passed through a sieve. The same needs to be done with sand. After this work is completed, all ingredients are combined with clay and water, and then mixed well. The correct mixture should have a sticky, thick consistency. If the composition turns out to be too sticky, you should add a little sand.
The mixture is tested for plasticity. First of all, this needs to be done visually. The plaster should resemble thick sour cream. The second method is to make a ball that is pressed against the surface. If the ingredients were mixed correctly, then the edges of the crushed ball, whose thickness has become 1 cm, should not crack.
Acrylic
The material has high decorative qualities and durability. The big disadvantage of acrylic plaster for processing aerated concrete and other cellular textures is the low level of vapor permeability. For this reason, condensation forms in the inner layer of the plastered surface. As a result, such exposure causes surface deformation - peeling and cracking.
Price comparison
Very often, the choice of building materials has to be made based not only on their technical characteristics and appearance, but also on cost. In this table we have collected the most popular plaster mixtures for aerated concrete with an indication of their cost.
Keep in mind that prices may vary not only in different regions, but also in neighboring stores.
Therefore, they are given approximately so that you can compare and roughly estimate the budget.
| Plaster brand | Price, rub | Packaging, kg |
| Cement | ||
| Aegis XI-S-42 will win | 240 | 25 |
| Bolars | 205 | 25 |
| HandPutz Baumit | 260 | 25 |
| Plaster | ||
| Aegis TM-35 will win | 270 | 30 |
| Knauf Rotband | 400 | 30 |
| Acrylic | ||
| Ceresit ST 60 | 1850 | 25 |
| Baumit Nanopor Top | 4300 | 25 |
| Silicate | ||
| Baumit Silikat Top | 4100 | 25 |
| Knauf Kati | 3500 | 25 |
| Silicone | ||
| Ceresit ST 75 | 5200 | 25 |
| Terracoat Silicone | 4050 | 25 |
| Kreisel SilikonPutz | 1950 | 15 |
To compare prices, it is not enough to calculate the cost of plaster per kilogram. You need to know its consumption and layer thickness, which is necessary to level the surface.
Cement-sand
Cement plaster is not suitable for treating external aerated concrete surfaces. For what reasons is this popular building material not suitable:
- The solution does not adhere to the smooth surface of aerated concrete due to insufficient adhesion properties. The mixture has high density and high weight;
- When applying cement mortar to the surface, aerated concrete absorbs moisture and the adhesion of the materials weakens. As a result of such rapid drying, the integrity of the layer is destroyed;
- Low vapor permeability of cement mixtures means non-compliance with building codes and violation of optimal microclimatic parameters in residential premises.
If cement plaster is used for interior work, it will protect aerated concrete walls from steam penetration into them.
Important! Expanded polystyrene and polystyrene are not recommended for use on aerated concrete surfaces.
Features of aerated concrete
Aerated concrete is a building material from the family of porous or cellular concrete. There are many varieties within the family:
- aerated concrete;
- foam concrete;
- gas silicate;
- fiber foam concrete, etc.
The basis for the manufacture of these materials can be cement, lime, and, somewhat less commonly, gypsum or ash. The physical and technical properties of all varieties are approximately the same, but in terms of the combination of cost and performance qualities, aerated concrete is the leader. In second place is foam concrete, which is cheaper to produce, but lags behind in strength and ability to bear loads. It is necessary to take into account that aerated concrete has a lot of varieties, differing both in the method of production (natural hardening and autoclave material) and in the degree of strength (depending on the number and size of gas bubbles in the mass).
The main feature of aerated concrete (like all cellular concrete) is the combination of working qualities:
- light weight;
- high heat saving ability;
- a smooth and geometrically accurate surface, ensuring high quality masonry even when work is performed by unqualified builders.
Low weight allows you to save on the construction of foundations, which ultimately reduces the total cost of construction by 30-40%. The ability to retain thermal energy (or low thermal conductivity of masonry) allows you to save on heating, which is an important and attractive quality for most regions of our country. However, these advantages come at the price of low strength (aerated concrete is not able to withstand high pressure and multidirectional loads), as well as increased hygroscopicity.
As a rule, each block has special grooves and projections. During laying, they fit into each other, ensuring the exact position of each block in the masonry. The result is a high-quality and even wall plane, which allows you to reduce the thickness of the finishing layer. When choosing the best way to plaster aerated concrete, you can consider finely dispersed compositions with a smooth surface. If you plaster the walls with a sufficiently high quality, you can obtain a surface suitable for applying a topcoat without preliminary preparation (sanding and putty).
Buildings made of aerated concrete cannot be left unfinished, since autumn rains will wet the walls, and night frosts will create conditions for their destruction due to frosty expansion of ice. Many builders perceive this feature of the material as a critical drawback that does not allow the material to be used for residential or critical buildings. However, if the masonry is protected in a timely manner, the useful qualities of aerated blocks will be preserved, and the danger of destruction will be eliminated. According to new GOSTs, aerated concrete and gas silicate materials are combined into one group. Their working qualities are very similar, therefore, when deciding how to plaster aerated silicate blocks, you can consider the relevant information on aerated concrete.
Plaster
The plaster base, which includes gypsum, has the following positive qualities:
- dries quickly;
- the solution does not shrink;
- the mixture goes on smoothly;
- no finishing coat required.
Disadvantages of plastering walls with gypsum:
- average level of vapor permeability;
- a larger amount of water is required compared to special mixtures, approximately 10-15 liters per 1 bag of 25 kg;
- the surface will quickly get wet after rain and snow;
- spots appear on the surface that need to be painted over.
Calculation of material consumption
When starting work on applying a plaster layer, it is important not to make a mistake with the amount of material purchased. Let us immediately note that it is impossible to calculate absolutely exactly how much of something will be needed - it is impossible to take into account all the differences in height of the wall surface, as well as the presence of a vertical wall. But, with a slight error in any direction, calculations can be made.
You should start by determining the area that needs to be plastered. To do this, multiply the length of each wall by its height and add the results together. From the resulting number, subtract the area of doors and windows. We multiply the final result by the average thickness of the plaster, resulting in the amount of mortar in m3.
For reference: the last multiplier is the average result of adding the thickest and smallest layers of plaster, which is determined during the installation of the beacons.
Calculating the number of components of the mixture, given the total volume of the solution, is not difficult.
Facade
The mixture is most effective for treating both external walls and indoors; the material is easy to apply with your own hands. Plaster has a number of positive qualities - good adhesion to the base, attractive appearance. Including the material has vapor permeability indicators identical to those of aerated blocks. When choosing plaster for building aerated concrete, it is better to choose a high-quality special mixture, this will simplify the process of finishing the house.
If you have to choose plaster or drywall, which is better for aerated concrete inside the house. The following facts should be taken into account: walls made of aerated blocks are smooth, and they do not require leveling. Accordingly, plaster will cost less, and the solution will form an even and beautiful layer.
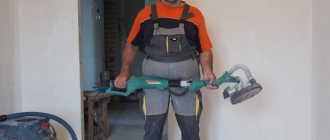
Tools for getting the job done
To follow the technology of plastering aerated concrete walls indoors, you will need:
- a stable stepladder or mobile scaffolding;
- bath for pouring soil;
- roller and paint brush;
- plumb line and building level;
- measuring tape 3 or 5 meters;
- two rules 1.5 and 2.5 meters long;
- hammer and chisel;
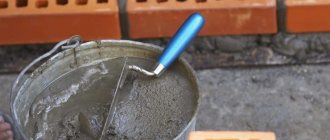
- a spacious container for preparing plaster mortar;
- trowel or trowel;
- wide and medium spatula;
- grater, smoother and malka;
- falcon;
- screwdrivers;
- metal scissors.
Prepare a small shovel and buckets for water and solution supply.
Self finishing
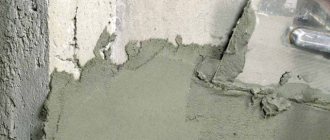
We plaster the aerated concrete on the outside with plaster intended for exterior use. There are two options for applying the mixture - a thick layer or several thin layers, which are applied in no more than 3 layers and no more than 1 cm each.
Work order:
- the surface is prepared for plastering - contamination is removed;
- Next, you should hang the surface with your own hands using beacons;
- spray is applied - the first layer of plaster coating;
- the primer is applied and leveled;
- cutting corners;
- finishing of slopes;
- a covering layer is applied;
- the surface is rubbed.
Preparing walls for plaster
After purchasing the materials and preparing the tools, you can proceed to pre-processing the surface and preparing it for plastering indoors.
By this time, general construction work must be completed, screed work must be completed, window and door units installed, electrical wiring done and hidden pipes laid. The surface of the walls to be plastered must be cleaned of all types of contaminants. Existing defects must be repaired or chipped.
Sealing cracks.
At the next stage, the walls are covered with soil directly along the grid in two times. This will ensure better adhesion (adhesion) of the plaster mixture to aerated concrete. To apply the first layer of primer, the existing composition is diluted with water 1:1. After it has dried, a second layer is applied at a calculated consumption of 160-180 g/m2.
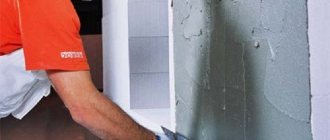
Next, a polymer plaster mesh is fixed to the wall plane. This can be done with tile adhesive, type CM11, or with special dowel clamps with a length of at least 15 mm. Fixing with adhesive is done by spreading diluted adhesive on top of the tile.
Plaster mesh.
The leveling of this layer is carried out with a notched trowel, which will create in-depth stripes for good adhesion of the plaster mortar to the reinforced adhesive layer. The presence of such a layer allows you to use a solution of any composition used in construction for finishing, but it will cost more.
If necessary, profile metal beacons are installed on the primed or glue-coated surface, indicating the exact position of a flat vertical plane. If the wall is already smooth, then you can immediately begin applying the first layer of plaster.
External work technology
- If necessary, insulation is installed for the blocks under the plaster.
- Preparing walls - leveling the surface to reduce material consumption and application thickness.
- Before you start plastering the walls, aerated concrete must be treated with a primer. For this purpose, compositions designed for the fine-cell structure of materials are used.
- Applying a thin layer of plaster mixture for aerated concrete surfaces - up to 5 mm. This base will serve to attach the mesh.
- Reinforcement of plaster with mesh.
Vapor permeability and humidity balance
If plastering of aerated concrete walls was carried out using heavy cement mixtures, it is important to ensure proper ventilation. The best solution would be forced exhaust systems. They allow you to remove excess moisture.
If the aerated concrete surface is protected from the outside by a ventilated façade system, a gap is provided to allow vapors from the room to freely escape outside. This allows you to use different types of plaster for aerated concrete without fear of disturbing the vapor permeability parameters. Do not use foam for protection. It has almost zero vapor permeability. Mineral wool will do.
If you want to balance the humidity, then when finishing the interior, use materials with a vapor permeability lower than that of the blocks. These can be special hydrophobic impregnations, paints, compositions with a dense consistency or moisture-resistant wallpaper. However, in this case, the importance of arranging high-quality ventilation increases. Otherwise, a greenhouse effect will occur.
Adviсe
It should be noted right away that plastering aerated concrete blocks from the outside with adhesive solutions is unacceptable. Because glue won't do the job. In order to protect and level surfaces, it is recommended to use specially designed mixtures that meet all operational requirements.
When plastering aerated concrete facade work is carried out, it is recommended to follow some rules, which are described below.
- after the building is erected, a certain period of time must be maintained so that the internal moisture evaporates naturally;
- the brand of plaster must be suitable for outdoor use;
- sequence of repair work - first inside the house, then outside;
- the temperature regime must correspond to +8 to +30 C0 - for exterior finishing;
- Building regulations that must be observed in relation to increasing thermal conductivity coefficients. Each material installed or applied to the gas block should be taken into account.
When can plastering begin after masonry?
When building a house from aerated concrete, you should not rush to finish the walls both inside and outside the building. Even when placed on glue, the blocks will still shrink - this is their property. There is no need to explain what will happen to the plaster on the wall that has shrunk - continuous cracks and a complete replacement of the plaster layer.
Experts say that after the construction of the wall, you must wait 7 months, and only after that begin plastering work. However, we cannot agree with this recommendation. Simply erecting walls does not lead to their shrinkage - there is no pressure on the blocks. Only after the roof is erected does the full shrinkage process begin. Therefore, the countdown should be carried out from the moment the roofing work is completed.
Reinforcement
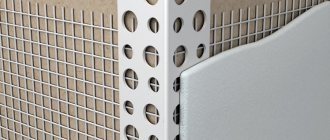
To the question whether it is necessary to reinforce the plaster, and whether a mesh is needed. The answer is simple, since the plaster layer of aerated concrete can vary from 5 to 15 mm. If the layer exceeds 10 mm, a metal mesh with a fine cell texture is used as a reinforcing layer. For example, a mesh with a wire diameter of 0.1 mm and a cell size of 0.16 x 0.16 mm, or fiberglass mesh with cells of 5x5 cm, is suitable.
The mesh must be installed with an overlap of 5 cm; for the corners of the house, perforated corners with mesh are used. This method will help prevent the formation of cracks in the plaster after the building shrinks. It is better to install the mesh into the applied solution using a spatula. A particularly important point is the installation of the mesh in places with a high level of stress - the area of windows and doors.
Advice! If you attach the mesh to a dry surface, the result will be zero. Because the mesh needs to be fixed to the wall using self-tapping screws, and then a layer of mortar must be applied. Otherwise, the unfixed mesh will move along with the putty.
Work order:
- Level the plaster layer over the mesh using vapor-permeable plaster.
- It is necessary to wait until the first layer is completely dry. Otherwise, it will fall off under the weight of the next layer. This technique involves thin-layer application of the mixture. You will have to wait three to four days for complete drying. Accordingly, the thicker the layer, the longer it takes to dry. Checking whether the surface is dry is done using water. Having splashed the liquid onto the surface, it was quickly absorbed - this means that it is time to begin further work.
- A second layer of plaster is applied, which is considered leveling. Therefore, the layer should be even and smooth;
- A third finishing coat of plaster is applied and will require further grouting if necessary.
- Painting the surface with materials for exterior work or applying putty.
- Treatment with a water repellent. Experts recommend applying this solution 12 months after painting and completion of all facade cladding work. A water repellent gives any coating additional water-repellent properties.
Note! When the plaster layer dries, it must be protected from the influence of such undesirable environmental factors as moisture, snow, rain.
Work order
Experts recommend exterior finishing of aerated concrete in the following order:
- it is necessary to apply a primer specifically designed for cellular concrete to the surface of the gas silicate;
- fix the already primed surface with a reinforcing mesh using special screws;
- apply a ready-made mixture that has vapor-proof properties;
- then the surface is leveled and rubbed.
The exterior finishing of the facade is carried out only after the interior decoration of the premises is completed. Otherwise, moisture will evaporate and transfer to the outer surface of the gas silicate block. Experts recommend exterior finishing in the warm season. Negative temperatures lead to freezing of fresh plaster, which will provoke further destruction and deterioration of the quality of the coating.
When performing plastering work on aerated concrete inside a building, you must adhere to the following sequence of work:
- It is recommended to remove dust and dirt from the walls;
- eliminate irregularities on the surface of the gas silicate, as well as fill the voids between the blocks;
- cover the surface of the gas silicate with putty;
- apply a layer of soil;
- after complete drying, begin plastering the walls;
- moisten and level the surface, grout.
putty
When deciding whether to putty aerated concrete, it is recommended to learn about the types of building mixtures. There are 3 types of product varieties on the market that are intended for finishing. By and large, this is a facade plaster intended for thin-layer finishing of an already plastered surface, differing only in composition. Ready-made mixtures are sold in buckets and come in silicate, silicone and acrylic.
Important! When plastering the outside of a house, it is recommended to use only vapor-permeable building materials. This will provide not only a reliable finish, but will serve as a decoration for the building.
Advantages and disadvantages of clay compositions
Before making your choice towards one or another finishing material, you should consider its features. Plastering with clay allows you to achieve soundproofing of walls, and such work can be done on a limited budget. The material is cheap, elastic, and therefore easy to apply.
Clay plaster for walls also has its disadvantages. Among others, the ability to absorb and release moisture well should be highlighted. This quality can cause the wall to become covered with cracks over time. Despite the fact that the composition lends itself well to application, finishing work requires the specialist to have relevant experience. Clay is a finicky material. Therefore, it must be used in conjunction with special additives to achieve a good aesthetic result.