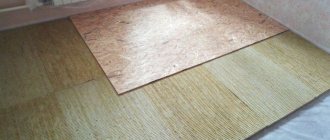
Houses are built mainly using the monolithic method, that is, the installed frame and formwork are filled with concrete mortar. This significantly reduces costs and construction time. A concrete wall is quite practical and durable, but it has one significant drawback: the walls turn out crooked. That is why the walls are leveled using high-quality plaster.
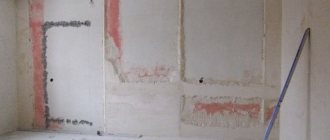
Plastering a concrete wall is a necessary measure
In this case, plaster is necessary not only for leveling, but also to cover the seams, increase sound insulation and prevent moisture from entering the wall. But not everyone knows how to plaster a concrete wall.
Available plaster options
The interior walls of houses can be finished in different ways. For example, using sheets of dry plaster, the wet method, or processing with synthetic materials manufactured in factories, as well as ready-made mixtures.
Laying dry sheets is quite simple, but wet mortar is considered one of the most labor-intensive, although the quality of such plaster is considered ideal. Synthetics are more flexible and easier to install, but there are certain nuances that you will learn about later.
Blend selection
For plastering concrete walls indoors, you can use cement-sand or gypsum mixtures, which you can buy in ready-made dry form or make yourself
Cement-sand mortar
The main advantages of cement-sand mortar:
- high strength;
- after mixing the solution, it can be used for a long period of time;
- low cost;
General benefits
The main advantages of plaster:
- Moisture protection.
- The ability of the wall to allow air to pass through.
- The texture may vary.
- Radiation protection.
- Protection from extraneous noise.
- Thermal insulation properties.
Plaster has many useful qualities
In addition to the above, unlike drywall, plaster can withstand large mechanical loads and temperature changes.
What is waterproofing
Problem areas need to be waterproofed. These include:
- bathrooms;
- kitchens;
- basements;
- ground floors;
- roof;
- weak walls in terms of insulation.
Special materials and technologies are used for implementation. First, let's figure out what waterproofing is.
Waterproofing is the protection of any structures and structures from moisture penetration. This means that applying a protective layer prevents the appearance of mold and unexpected influx of water, which protects against unplanned repairs and saves money.
Preparatory work
This is probably not the first time you have heard about the need to properly prepare the surface before plastering a concrete wall. And this is not in vain, because the evenness, quality, durability and strength of the floor depend on it. Of course, you should thoroughly clean the wall of dirt, dust, etc., and also ensure that it is rough.
Cleaning new buildings and previously finished walls
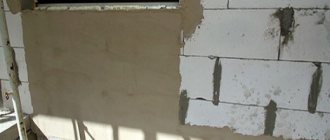
If you are cleaning the walls of a newly rebuilt building, you need to remove all remnants of the formwork compound, and all kinds of sagging, protruding fragments, and the like must be cut down. It is also important to get rid of any greasy stains, dust and resin. This can be done either using a handy tool (broom, brush, rag or scraper) or by blowing it with compressed air. Another option is to rinse with plenty of water.
Before applying plaster, the walls must be cleaned and moistened
Walls that have remnants of old coating (paint, wallpaper, etc.) must be thoroughly cleaned. If there are loose layers of putty, get rid of them. Cover cracks, potholes, etc. with a thick layer and sand with sandpaper.
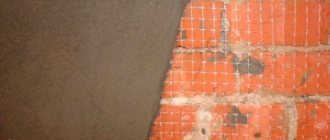
Concrete surfaces must be scored to ensure stronger adhesion to the plaster. This can be done with a hammer, hatchet, chisel and similar tools. Use plastic plugs or foam to protect electrical installations. And in order not to contaminate the system pipes, cover them with film first. Next, check the stability of the surface base by tapping on the wall. If the sound turns out to be muffled, everything is fine, otherwise you need to knock down the fragile layer and make a new one.
Primer
The primer itself increases the strength and durability of the wall by improving the quality of adhesion. Also worth noting is the prevention of mold, corrosion, rot and other unfavorable factors. The primer perfectly accelerates the drying process, develops resistance to moisture and, for denser surfaces, improves the absorption of solutions.
Primer concrete-contact
In the modern world, a unique type of primer is produced - contact concrete, which perfectly stabilizes the surface and increases the quality of plaster application. It is a durable material, but you will need to thoroughly clean the wall before applying it.
Net
At the junctions of concrete with other materials used, which are usually heterogeneous in structure, the plaster usually cracks. This happens due to the fact that the coefficient of thermal expansion is completely different, “due to” which drying on them occurs unevenly.
In order for you to avoid such problems, we will tell you how to plaster a concrete wall correctly. To do this, you will need a special fiberglass mesh (size 5x5 mm), which you need to attach to the middle of the joint and secure the edges.
Using fiberglass mesh
It also happens that the layer thickness is more than 20 mm, then it is necessary to level the walls using a stretched plaster mesh. The cross section may be different. By the way, such a mesh provides further strong protection against cracking due to impacts, elevated temperatures and humidity. In order for the plaster mesh to meet all requirements, the tension must be maximum, and if the mesh is metal, it should be painted to avoid corrosion.
Final preparation
The last thing you need to do is properly check for evenness. Using a level, plumb line and laser level, you need to weigh the surface to determine the horizontal and vertical accuracy of the plane. Having installed the beacons and marks, they are leveled.
Be sure to make sure the surface is level
Re-inspect the surface for dust, dirt, stains and protrusions. Because during the preparation process unnecessary little things may arise. Then you can start plastering.
Concrete texture
During the course of the article, we looked at the thickness of a load-bearing reinforced concrete wall, how to cut it and how to drill it. Now all that remains is to figure out how to decorate it in an interesting way.
Of course, such walls, like any other, can be covered with panels or covered with wallpaper. But today the texture of cement stone is in great fashion, therefore, having concrete walls, you can use their surface in the design of premises.
We won’t say unnecessary words, but simply demonstrate by presenting several extraordinary solutions:
As you can see, a concrete wall fits perfectly into modern interiors, and it can be finished in an unconventional way. It is enough to thoroughly clean and strengthen the surface with a primer, and then paint it with decorative paint, close in color to the natural color of the cement stone.Plastering process
The process of this work includes not only applying the solution to the surface, but also preparing the mixture.
Solution
You can prepare the appropriate solution for plastering a concrete wall in various ways. Basically, lime or sand-cement mortar is used for these purposes. You can make it yourself or buy a ready-made dry mixture in a specialized store. The mixture is easier to prepare, since it just needs to be mixed with a certain amount of water indicated on the specific package.
Unfortunately, the price for such a mixture is high, so it is not available to everyone. A solution made independently is much cheaper. Cement-lime mortar is made from cement, lime mortar and river sand in a ratio of 1:2:7. First you need to dilute the lime with water to a dough-like state, mix sand and cement separately and add this to the lime solution. If the mixture is too thin or, conversely, thick, you can dilute it with sand or water.
Cement mortar consists of one part cement and two parts sand. Due to the fact that sand reduces the plasticity of the mixture, it is not recommended to add more than three parts of it. Pour the ingredients into the prepared container one by one, then mix and add water. This solution hardens quickly, so do not prepare it in advance.
Some people also use a lime-clay mixture to plaster the concrete surface. To begin, dilute the clay with water and the lime with the liquid separately until it reaches the consistency of dough, then combine the clay mixture (1 part) with the lime mixture (0.4 parts) and sand (3-4 parts).
You can also make a mixture of lime, clay and gypsum. First make a lime-clay solution, and in another container dilute the gypsum with water. Mix these mixtures in proportions 1:3. But for a concrete surface it is better not to use clay admixture.
Tools
Before you get started, purchase the tools you'll need. To do this you need: steel brushes of different sizes, all sorts of scrapers, teeth, a falcon, a swing brush, a plumb line, a grater, plaster trowels, a special ladle, a trowel, and teeth. And also a level and a rule, screws and wooden slats, a trowel and a 1.5 m wedge.
Plastering tools
Of course, the dry mixture or the components of the solution. If you prefer ready-made mixtures, then you should consider that they may contain synthetic substances and plasticizers that have the ability to slow down or speed up the hardening process. Pay attention to this.
First step
After carrying out the preparatory work, you need to mark the places for installing the prepared wooden slats. The height of all planks must correspond to the height of the wall, and the thickness cannot exceed 10 mm. With these slats you need to divide the area into certain sections up to about a meter. You can attach them to the wall with screws intended for stone, then check the vertical evenness with a level. All this must be done so that later it will be easier for you to remove the slats.
Be sure to moisten the surface with water and immediately plaster the walls. You should start from the corner of the room. When the time comes to level the solution, use force, but keep in mind that this must be done within two beacons, the role of which is played by slats. After complete hardening, carefully remove the boards and seal the resulting grooves.
Plastering should begin from the corner of the room
The first layer when applying plaster
Since you need to plaster a concrete wall strictly in three layers, we suggest you familiarize yourself with each one separately. The very first layer is called “spray”, the solution of which has a creamy consistency. This is the most liquid layer. Considering that concrete is puttied, the thickness of the “spray” should be a maximum of 5 mm.
Application of the solution
With a trowel you need to pick up part of the solution into the falcon, then use a spatula to throw it onto the wall in random order. You need to know that this movement is made only with the hand, and not with a full swing. This is done to ensure that all the voids existing in the wall are filled.
In principle, you can spread the plaster solution, but almost no one uses this method. Try to wash the tool after each successive area that you plastered.
Second layer
After the first layer has completely dried, mix the soil solution, which should have a dough-like structure. When laying down the “soil” layer, use the same throwing method. Having filled the entire area, level the surface of the wall with the rule and remove the excess.
Pay attention to any voids that arise that should be filled with the mixture. After all this, level the wall with a tool such as a trowel in two main directions: horizontally and vertically. Do not forget to always check the evenness of the wall using a level. Layer thickness – up to 10 mm.
Third layer
This is the final layer, which is why it is called “covering”; the consistency of this solution should correspond to the previous one, and the application thickness should not exceed 2 mm. This layer is considered a finishing layer, so it must be done very carefully, without any errors. It should hide all the flaws of the ground.
Before mixing the solution, be sure to sift the ingredients and mix thoroughly so that there are no lumps or large particles. Next, you need to moisten the second layer of plaster and, using a trowel, apply a small layer of mortar, then level it with a trowel, doing this in a circular motion or in a wave-like manner.
Video on how to plaster concrete walls:
Applying panels
They allow you to transform the interior without much effort, especially since the panel is sometimes simply hung on the wall, like a large picture. You can make a large panel from boards, treat them with oil or stain, and fix them on the wall. It is advisable to choose wood for such an art object with obvious defects, ideally used boards. Similar panels can be made from plywood or cork and decorated, for example, with photographs. It is not forbidden to use panels upholstered with fabric, but dust must be removed from them frequently.
Panel covering part of the wall
Panels can fill part of the wall, zoning the space, or play the role of a headboard or an artistic accent.
It may seem to you that not all finishing materials proposed in the article belong to the budget category. But if you calculate how much time and money will be spent on high-quality leveling of the walls and their finishing, the benefits will become obvious. In addition, unusual finishing methods will help you create a modern, fashionable, individual interior.
Source
Plastering on beacons
In addition to the main method described above, you can do plastering using various types of beacons. This is necessary when the walls are very uneven and convex. Basically, in order to perfectly level the wall, strict control of the horizontal and vertical lines is carried out. This is a very complex process that is best left to an experienced professional.
To make it clearer for you, we will briefly look at how to plaster a concrete wall using beacons. For this type of work, you need to make markings at the top and bottom at the same level and screw screws into them, hang a weight that will act as a plumb line. Apply a little solution between two nails. In the same way, you need to hang beacons around the entire perimeter of the room. The beacon is installed on piles of applied mortar and pressed into it. This must be done so that the beacons rest against the screws.
Video on how to perform plastering on beacons:
Then you check the evenness of the surface using the beacons, relative to each other and in the plane. After this, they are covered with solution and dried. Next, plaster layers are applied according to the generally accepted method.
How to plaster concrete walls
The general word “plaster” hides a great variety of different materials. To make it easier to navigate this diversity, it is customary to classify plaster compositions by type of base, place of application, additional functions, etc.
By purpose (in relation to a concrete base):
- conventional (used for rough leveling of concrete walls, sealing holes, cracks, joints, cracks);
- decorative;
- special (X-ray protective, noise-reducing, sanitizing, etc.).
By place of application: façade, universal and interior.
Since concrete can be different, for example, gas and foam concrete structures are often found in private homes, not all plaster mixtures are suitable for plastering. To solve the question of how to plaster concrete structures, you need to get acquainted with the main types of compositions.
Cement-sand mixture
More often than others, cement-sand mixture (CSM) is chosen as plaster on concrete for exterior work. Cement is a binder that, when the solution hardens, forms a high-strength artificial stone that is resistant to frost. Sand filler does not reduce the strength of this stone, but it can significantly reduce the amount of cement used. The size of sand grains affects the workability of the mixture and the texture of the cement coating.
In addition to these two components, the cement mixture contains additives that give the solution the necessary qualities. They are used to increase the plasticity of the solution, increase frost resistance, water resistance, as well as other parameters of the working mixture and finishing coating. For some coatings, white cement is used.
Main advantages:
- strength (depends on the brand of cement used, the ratio of components);
- durability;
- frost resistance;
- waterproof;
- versatility (used outdoors and in various types of premises);
- ease of preparation and application of the solution;
- maintainability;
- availability, low price of components;
- manual or mechanical application possible;
- fire resistance;
- good adhesion.
The cement composition is not suitable for use in areas with seismic activity, as well as for houses located close to railway lines. Mineral plasters do not withstand vibration loads and building shrinkage. Therefore, for new buildings it is more rational to choose mixtures based on polymer bases.
Grout
After plastering the concrete wall with the last layer, immediately proceed to grouting without waiting for it to dry. Grouting must be done in two stages. First, in a circular manner, that is, you need to press the blade of a wooden trowel to the surface and make circular movements strictly counterclockwise. In this case, the sharp edge of the blade will cut off all protrusions, irregularities and unnecessary plaster.
Grouting walls
The next stage involves grouting in acceleration. To do this, press the grater against the wall and make straight strokes with sharp movements. In this way, traces of grout made in a circle are removed. And in order to improve the grout, put a soft cloth (for example, felt or felt) on a grater and rub the surface.
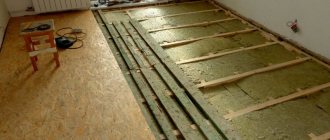
Recycled wood or used boards
In addition to laminate, you can use old boards for the same purposes. Beaten by time, covered with several layers of paint, with traces of rusty nails - a material with history! But they need to be brought into appropriate form. To prevent porous wood from collecting dust, cover the boards with a matte varnish.
The board perfectly masks uneven walls and complements the interior with natural materials.
Both laminate and boards need to be used in very measured doses, not on all 4 walls. The interior looks most harmonious when only one or two sides are decorated in this way.
Old boards have an interesting decorative effect
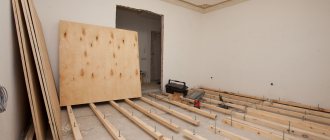
Frame cladding allows you not only to hide uneven walls, but also to save on electrical wiring. To replace wires in apartments, you need to trench the walls. This work is dirty and expensive, and when covering the frame, you can run wires in the cable channel between the wall and the finishing coating.
Finally
In principle, you already understand how to plaster a concrete wall, so all that remains is to add and summarize. In order to do it efficiently and get an impeccable result, spare no expense and buy all the necessary equipment, because it makes the work easier and helps in the work.
Remember that each layer of solution is applied only after the previous one has completely dried. A lime-based solution is considered dry when the wall turns white, on a cement wall - within 2-6 hours, on a lime-gypsum wall - within 10-15 minutes. Do not experiment with different solutions - this is unacceptable. Use the same solution for each layer. And do not forget the main condition for high-quality plaster: both the last and every other layer must be done neatly, evenly and cleanly. The quality of further decorative finishing depends on this.
- Author: Julia
Rate this article:
- 5
- 4
- 3
- 2
- 1
(5 votes, average: 5 out of 5)
Share with your friends!
What tools will you need?
You can use different tools for plastering. If the amount of work is small, you can get by with the minimum set:
- Hammer or drill with mixing attachment. It is impossible to make a high-quality mixture by hand, so you need to use additional tools or buy ready-made decorative plaster.
- Devices for throwing mortar. When plastering walls manually, one of the main working operations is throwing on the mixture. Professional finishers use a trowel for this, but beginners often find it more convenient to use a spatula. To apply the mixture to different areas, you will need at least two spatulas - a wide one and a narrow one.
- The rule is a bar for leveling the mixture along the beacons and cutting off excess. It is best to use the h-profile rule for leveling, the trapezoidal profile for trimming.
- Graters and graters for grating and smoothing the solution.
- Beacons, screws, fishing line or twine for installing them, pliers for removing profiles.
To dilute the composition you will also need a container. Before you learn how to properly plaster walls and apply the mixture quickly, it is better to prepare the solution in small portions, so you don’t need too large a container. To work with gypsum and cement compositions, you can take a regular 20-liter bucket.
Wooden paneling again
"I'm tired of it!" - you say. “You just haven’t revealed its potential,” the designers will object. Today, lining in the interior is not yellow varnished faceless walls. There are many colored compounds on the market that can be used to paint wood. Which color should I choose? Let's remember the trends.
- The pastel range remains relevant, especially shades from light sand to cream.
- Combinations of gray, graphite and white are in fashion. Against this background, splashes of bright colors look good.
- Deep shades of green, burgundy and blue are becoming more and more popular.
Depending on the purpose of the room, you can choose one color or a combination of several. This visually maintains a connection with natural materials and creates an atmosphere of country life.
Lining can look very interesting, harmonious and modern
Features of the method
Construction waterproofing mixtures differ in their use and composition. At the same time, they are divided into several types according to the following criteria:
- By type of material: roll (film, roofing felt), powder (construction dry mixes), liquid.
- By chemical composition: polyethylene, cement, bitumen, rubber, acrylic, PVC materials, silicone (silicon).
- By method of implementation: sealing, penetrating, coating, membrane.
As you can see, there are many types of waterproofing, each of which has its own characteristics of operation outside and inside the premises.
Outside buildings
When applying waterproofing, it is very important to take into account the air temperature and the amount of sunlight on the base. The mixtures are used at temperatures from +50C to 350C. Excessive sunlight negatively affects the applied powder or liquid waterproofing, as it causes water from the solution to evaporate very quickly. As a result of the hydration reaction, the composition will not achieve the declared characteristics and will not be able to perform its functions. Therefore, the workplace must be protected from solar radiation.
The main distinctive feature of facade waterproofing materials is the presence of such characteristics as frost resistance. This indicator is measured in freeze and thaw cycles. The material is considered frozen when the negative temperature is below the operating temperature indicated in the labeling.
Indoors
The main indicator for internal use is environmental cleanliness and fire safety.
Therefore, materials made of PVC, bitumen, and rubber are not recommended for interior work. Sometimes they cause allergic reactions. There is also one important feature of using waterproofing in rooms, which our builders forget about. Any powder and liquid compositions perfectly protect against moisture penetration on planes, but do not work well in corners. Therefore, at the junction of vertical and horizontal surfaces treated with insulation, a special membrane tape with an elastic non-penetrating gasket in the middle should be used.