A window sill is often perceived not only as an element of the overall window design, but as an independent multifunctional piece of furniture. It can be used as a table, shelf, step or seating area. Increased use of the window slab, especially for other purposes, leads to loss of aesthetic appearance and mechanical damage.
Over time, the desire to update the appearance of the window sill may be associated not only with the need for restoration, but also with decorative elements. You can not only strengthen the window sill slab and renew the surface with wear defects, but also choose a more suitable color, texture, and shape. The new technology for replacing an old window sill involves selecting and installing a special lining.
Restoration using an overlay allows you to restore the freshness and attractiveness of a window at minimal cost and adjust its shape taking into account its functional features.
The installation will not take much time, will not affect the walls, wallpaper, or the main structure of the window, and will allow you to do without inviting installation specialists to do everything yourself. It should be noted that such a restoration is possible provided the window sill thickness is no more than 6 cm.
Benefits of cladding
Most contractors who finish window sills with tiles highlight the following advantages:
- Visual. The apartment owner can choose tiles that suit the interior design of the room. The uniqueness of the work depends only on the imagination of the customer.
- Physical characteristics. By decorating the area near the window with ceramics, the apartment owner can avoid frequent cleaning. The tile is not so susceptible to dirt and dust and is easy to clean. In addition, it is able to withstand greater physical stress than conventional plastic.
- Duration of operation. Ceramic tiles benefit significantly when it comes to durability. In addition to the service life, the strength of the entire structure increases several times.
In short, in almost every component, ceramic or tile will be better for the home. If renovations in the house are being done “for yourself,” then it is recommended to opt for higher quality materials.
Causes of cold despite insulation
In some cases, the window sill may be cold even with insulation. Most often this happens due to incorrect installation.
The stove may also be cold due to:
- blowing through the installation seam, which could have worn out over time or due to improper installation of the window;
- insufficient heating, for example, due to improper operation of radiators or low power;
- incorrectly selected material for the window sill. Most often, such a stove will be cold if it is made of metal or stone.
Other reasons for cold window sills are discussed here.
Advice from experienced masons
The cladding process will not be difficult if you pay attention to the following factors:
- Surface condition. The base must be complete. If during preparation you find cracks, large scratches, chips, empty spaces, etc., then the problem should be corrected. If you ignore these nuances, the finish will not be of high quality. The tile can simply crack.
- Choosing a base. A concrete base will ensure the durability of the structure and high quality of finishing in general. It will lie on any surface (wooden or plastic) without any problems.
- Surface condition. After checking the area of work, you need to make sure that it is firmly fixed in the opening and will not “ride” during installation.
- Choosing the tile itself. The most important aspect. The type of masonry and the complexity of the work depend on the size of the tile. The diagonal of the tile is selected based on the size of the base. If it is not large, then it is recommended to go with 10x10 or 15x15 tiles. This will eliminate the need for cutting and will give the surface a more attractive appearance. If the dimensions of the base allow you to choose a larger tile, then you can think between 30x30 or 40x20 centimeters. Any store has a wide range of products, so choosing a model is not difficult.
Installation begins only after a new double-glazed window has been installed and the external type of drip has been correctly installed.
Advantages and disadvantages
Advantages of plastic finishing:
- environmental friendliness;
- durability;
- giving a neat appearance;
- variety of choice;
- reliable adhesion to the window frame;
- perfectly flat surface;
- heat and sound insulating properties;
- reasonable price;
- high installation speed;
- possibility of self-installation;
- no additional steps are required to level the surface of the opening after dismantling the old windows;
- moisture resistance;
- ease of use;
- Possibility of use on arched structures;
- preventing fogging and freezing of windows;
- a small amount of dust, dirt after installation.
Among the shortcomings are noted:
- tendency to mechanical damage;
- poor quality of additional elements;
- inability to replace part of the panel if damaged.
Required Tools
A universal list of tools that will be required during the work process:
- Universal type soil mixture.
- Adhesive solution.
- Tile.
- Marker for marking.
- Rubbing material for seams.
- Pliers.
- Glass cutting tool.
- Hacksaw.
- Level.
- Hammer (it is better to choose a rubber one so as not to damage the materials).
- Spatula (regular one is enough).
In order not to waste a lot of time, such materials for work can be found in the same store where you will buy the tiles.
In what cases are they necessary?
Whatever the reason, the new surface will add freshness and attractiveness to such an interior element as the window sill.
There can be many reasons for installation:
- Concrete or granite window slabs sometimes crack or chip at the corners.
- Plastic window sills, especially white ones, fade and turn yellow over time.
- Often, damage occurs from hot objects that accidentally fall on the surface, including unextinguished cigarettes.
- Traces from flower pots and water dried on the surface.
- Stains from aggressive cleaning products.
- Accidental mechanical damage.
- Scratches and marks of claws and teeth of pets.
- The desire to simply update the surface by changing the shape or color shade.
Selecting masonry type
In most cases, the master has to choose from two options:
- Along the area around the window.
- Perpendicular to it.
The dimensions of the base should be taken as the basis for choosing the type. It is necessary to minimize unnecessary trimming of materials. To adjust the die to the dimensions, use a regular type of glass cutter.
After determining the location of the incision, the area is marked with markers. Cladding should only be carried out on a smooth surface that is firmly fixed. Otherwise, you will not be able to trim the marked marks.
You should not be afraid to press hard on the laid material. If you press weakly, then there is a chance that the tile will not press through.
To do the job carefully, a rubber hammer will help, which should be used to slowly tap ceramic products in places where there is a potential cut. As an alternative to a hammer, you can use the handle of a spatula. But you should wrap it in something soft (for example, a towel) in advance, otherwise there is a risk of damaging the product.
The selected part must be broken off with a sharp and forceful movement. If you are not sure that the process will be like this, it is recommended to use an angle grinder. It will save time and physical effort.
Step-by-step installation of slopes and window sills using plaster
Not in all cases they are installed from scratch. Often people use the service of replacing these two elements of the window space. For example, if the windows in the apartment are in good condition, but the window sills and slopes are in a sad state and restoration will not save them, then you can replace these elements with new ones and install identical or more modern material.
At the final stage of wall finishing, plastic window sills are installed, then the slopes are finished. This sequence is determined by the task of securely fixing the slab under the window and preventing it from moving. When decorating an opening, it is necessary, in accordance with the rules, to attach a board under the opening inside.
The desired effect can be achieved using load-bearing pads, polyurethane foam and adhesives. During the installation process, the window sill must be brought “under zero”, and the opening itself must be equipped with insulating materials. In the case when the slopes are finished first, and not the window sills, the latter have an unacceptable property in this matter - displacement.
Window sill finishing options
In addition to the standard option for finishing the area near the window, there are several popular options.
Mosaic cladding
Ceramic material can neatly fill a small space near the window. Moreover, outwardly it will look stylish.
If a white mosaic matches the interior, then only white glue should be chosen. Otherwise, the color at the end of the procedure will not be in harmony.
The installation process will be much simpler than with standard tiles and much faster. The finishing material is perfect for any interior design, from classic style to postmodern.
The only significant drawback is the presence of many seams that divide the overall picture. After a certain period of time, without proper care, mold may begin to form in them. Dirt and dust also accumulate in the seams. It is enough to use a high-quality cleaning product at regular intervals.
You can use not just the classic method of laying mosaics; to achieve symmetry, it is recommended to mount the mosaic on a pre-installed grid.
Based on your needs, the dimensions of the entire structure are easily adjustable. Before installation begins, the working surface is checked for cracks and chips. If they are not there, then the tiling process will not differ from working with tiles.
Upon completion of installation, the work area is cleaned. The procedure for insulating the window sill is carried out before installation.
Working with plastic and wood bases
Cladding a wooden window sill is practically no different from working with a concrete surface. It is enough just to properly flash the tree and the entire structure as a whole with a sheet of drywall; after flashing, the procedure can begin.
There is a method in which you do not need to cover it with plasterboard. You will need to treat the wooden surface with an acrylic type primer. Next, epoxy type glue with the same grout is used.
Working with a plastic base is easier. It is recommended to replace the glue with liquid nails. The more textured the plastic, the higher the quality of grip.
When purchasing, it is better to select a composition that is originally designed to work with plastic or wood.
Afterwards the design will be ready for use.
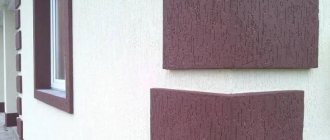
Kinds
Decorative overlays are available in two types: made of polyvinyl chloride (PVC) or MDF panels (from the German name Mittel Dichte Fazerplatte - fiberboard).
Plastic
Available in different color shades: white, imitation marble or wood pattern.
Designed for installation on window slabs made of different building materials:
- wooden;
- concrete;
- tiled;
- made of stone, natural or artificial;
The lining is selected to be 2 cm wider than the window sill in order to prevent the appearance of a gap with a gap on the old base. In the kit with the overlay, you need to select end caps made of the same material, suitable in width and shape for finishing the sidewalls.
Manufacturers offer standard sizes of PVC overlays: width – 15–52 cm, thickness – 3.5 mm, maximum length – 3 m.
MDF linings with drip edge
It is possible to restore the same window sills as those made from polyvinyl chloride. The difference between MDF overlays is the limited range of colors and the absence of corresponding end caps. In construction markets they are less common than plastic ones.
The MDV panel overlay should be wider than the board being closed by at least 6–8 cm, and the drip edge itself will serve not only for its main purpose, but also to cover the old window sill.
The usual dimensions of MDF overlays are: width - 35-70 cm, thickness - 15-18 mm, length - up to 4 m.
Before purchasing a pad, you need to make a balanced choice.
It is recommended to take into account the following criteria:
- The color shade must match the entire window system or be in harmony with wallpaper, curtains, and interior details.
- Quality characteristics should reflect resistance to moisture, temperature changes and sunlight.
- Possibility of using common detergents.
- The size is as close as possible to the dimensions of the window sill, taking into account the necessary “margin”.
- Availability of plugs suitable for the size and shape of the slab.
DIY porcelain stoneware window sill
When covering a window sill in the kitchen, porcelain stoneware is suitable. Experienced builders highlight its strength, which is considered the highest among alternative materials. If the technological part of the work is done correctly, the porcelain stoneware will be wear-resistant and resistant to high temperatures.
The advantages include:
- life time;
- ease of cleaning;
- the ability to place hot dishes;
- integrity.
Cladding a porcelain stoneware window sill begins with preparing an adhesive solution. It is important to pay sufficient attention to this point, otherwise the glue will not perform its direct function and will not hold the tile.
The prepared solution is gently and without strong accumulation added to the work surface where the back side will be. It is recommended to apply the glue with a spatula in order to do it evenly.
When applying the solution to the work surface, make sure that the pattern and elements completely match.
The main thing is to maintain the gap between the dies. This will allow you to maintain symmetry in the installation of materials at the same distance from the previous one. Plastic crosses are suitable for this. They also differ in size. A sales assistant in a store can help you with a more detailed selection of crosses.
You will need to allocate space for an inclination for the base of the structure; the angle is kept small. The slope comes from the side of the glass unit and towards the street. This action allows you to avoid the accumulation of concentrate on the structure area. The created slope directs the resulting concentrate from the base of the frame to the edge so that it flows out.
Upon completion of the laying of horizontal dies, the laying of the end elements begins. After laying the tiles on the surface, they proceed to preparing and applying sealing materials.
Putties in dark colors are popular. Dark tile options will look good. Running options:
- Blue color (preferably dark shades).
- Beige.
- Brown.
- Burgundy.
When choosing an option, you should base your choice on the color of the selected tile.
It is better to give the solution as much time as possible to harden. Afterwards the work area is cleaned and washed.
When facing work, make sure that horizontal and vertical elements are joined in the right places. Otherwise it will ruin the whole design picture.
After cleaning the window sill, the surface is renewed and ready for use.
When is repair needed?
Most often, repairs are needed when there is a significant change in color, traces of paint and tape, scratches, holes or cracks. Most of these defects can be corrected using:
polishing;- chemicals, for example, Domestos or regular bleach;
- You can erase traces of tape with an eraser or sunflower oil, and paint with solvent;
- cracks can be sealed with putty, sealant or liquid plastic;
- in some cases, the surface of the window sill simply needs to be sealed with laminated film.
More information about window sill repairs can be found here.
Puttying
To make the window finish look neat, use putty in the next step. If you don’t have store-bought putty, you can make it yourself. Take wood glue and wood chips left over from cutting the boards. Take only very small sawdust. Mix glue and sawdust in a 1x1 ratio.
Trust your intuition: one of the four Tarot cards will lift the veil of the future
The Moscow homeless service number has been integrated with “112”
Citizens of the Russian Federation will have the opportunity to return part of their travel expenses
Now seal the holes in the wood and the nail heads. Also repair defects on the boards themselves (cracks, chips), if any. Wait for the putty to dry. Remove any excess with fine sandpaper. Make the surface of the boards absolutely smooth.
What you will need
To decorate windows in your house with your own hands, you will need:
- wide board for window sill;
- narrow boards for framing windows (if desired, you can also make wooden slopes);
- ordinary wooden slats;
- putty;
- primer;
- paint or stain, brushes and roller;
- nails 5 cm long;
- hammer, electric saw, pry bar;
- sandpaper and sanding machine;
- chisel, tape measure, ruler, pencil.
You can use any wood for window cladding. These can be expensive types of wood with a beautiful texture or cheap ones, for example, ordinary pine boards. Choose putty to match the color of the wood.
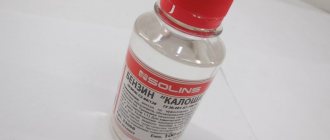
Using liquid acrylic
Liquid acrylic perfectly hides all defects of a plastic window sill. It is difficult to carry out restoration using this method on your own. Installation requires skill in working with the material, but the effect is excellent. The window sill looks like new. For restoration, you can use bulk acrylic (price is per liter):
- Art-eco – 2400 rub.;
- Art-Array - from 3900 rubles;
- Plastol – from 800 rub.
Rice. 5. Liquid acrylic on a plastic window sill
The material additionally strengthens the surface of the window sill. Acrylic can be used to change the color and texture of the window sill. Perfectly hides cracks, scratches and chips.
Article rating:
Window sill finishing with plastic Link to main publication
Related publications
- What are window sills for plastic windows made of?
Dismantling the old structure
If you need to replace the window sill, you will need to remove the existing tab. At the first stage, the slopes are dismantled.
Further actions are carried out taking into account the method of installing the old window sill:
- When disassembling a PVC panel, first remove the side plugs. Next, we open the decorative strip and embroider the joint filled with sealant. Remove foam from the support strips, clean the places where the edges are attached. After this, you can remove the window sill block.
- When the structure is fixed with foam plastic, it is not easy to disassemble. The board is cut with a jigsaw or angle grinder. After this, the parts are removed from their fastening points.
- If a special profile was used during installation, the road lining is removed and the screws are unscrewed from the mounting bracket.
Constructions
For non-standard windows and walls, in addition to classic rectangular window sills, you can purchase or manufacture products of unusual shapes:
- arched;
bay windows;
hedgehog - almost all complex shapes;
Bar counters are appropriate under a kitchen or dining room window; they are usually a continuation of the window sill and are made of the same material as the kitchen countertop.
Wooden window sills made from massive rough boards (with uneven edges) look original.
Materials required for work
Installation of overlays on window sills can be done by yourself, without contacting a specialist, since special construction skills are not required. The tool is also a common one, available to every handy owner:
- roulette;
- fine-tooth saw;
- jigsaw;
- assembly adhesive;
- putty or its equivalent;
- silicone
You may need special compounds to bring the surface of the old window sill into proper shape (degreasing, wiping).
The gloss also fades
In addition to its direct purpose, the window sill is used by households for many other purposes:
- as a desk or kitchen table;
- bench;
- additional shelf;
- greenhouse.
The white decorative surface attracts children as an object for creativity.
There are often cases of a window sill being close to a central heating radiator, as a result of which the plastic can become deformed or even catch fire. It does not tolerate too aggressive household chemicals and turns yellow if the window faces the sunny side. All this turns a beautiful piece of furniture into something that causes pity and irritation.
There are two ways to solve the problem: complete replacement and update.