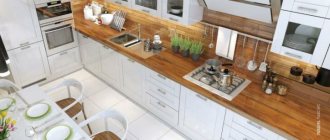
Choosing a countertop is one of the most important issues when arranging a kitchen, which must be resolved first of all. After all, this is a work area. It is noteworthy that every day she is subjected to many tests of strength. For example, hot dishes, cutting food, splashes of boiling water, fat, spilled liquids... That is, the main part of the load falls on the work surface.
And in this article we will tell you in detail how to cover a wooden tabletop so that it retains its original appearance and performance characteristics for as long as possible.
Wood is the material preferred by most. Why? Because this option is the most environmentally friendly and aesthetically pleasing of all available on the market.
Don't plan to spend money on a kitchen top made of natural wood, but want a high-quality and environmentally friendly product? Pay attention to the product line from the Kedr brand.
A catalog of more than 180 decors will allow you to choose the appropriate option for any interior concept. It contains products that are indistinguishable in appearance from real wood. And the E1 emission class guarantees the environmental safety of the material under any operating conditions.
Tabletop Cedar 7053/FL* Taxus
Advantages of wooden work surfaces
The countertop is something that is always visible in the kitchen. Of course, the beauty, durability and service life of the entire headset depend on its quality. It’s easy to guess that this is why customers of luxury kitchens, first of all, pay attention to wooden countertops.
Photo from source: ivd.ru
Table top Cedar 2075/FL Oak Kera
Wood is nobility, sophistication and environmental friendliness. Therefore, it has always been in great demand despite the impressive price tag.
Also, the advantages of solid surfaces include:
· safety both during operation and during disposal;
· amazing appearance of natural wood texture;
· pleasant and warm to the touch;
· the ability to give various shapes, that is, there are no restrictions in design;
· always remain in trend;
· possibility of use in any interior concept, that is, in all styles from classic to high-tech.
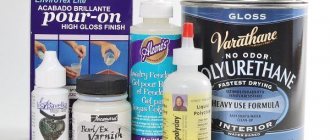
Main types of wood varnish
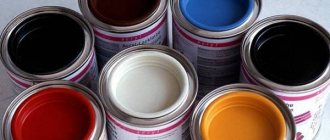
First, a few words about the functions of furniture paints and varnishes. It is advisable to choose a composition that simultaneously:
- will protect the wooden base of furniture, which is often washed, food is spilled on it, scratched with household items, and heated with hot dishes;
- will improve the appearance of surfaces that are always in sight, maintaining a festive look, shine or velvety matte for a long time;
- will not spoil food, contact of the table surface with food is inevitable, varnish for a wooden tabletop should not contain toxins or other components hazardous to health.
For reference! Paints and varnishes are produced for external and internal work, this is worth taking into account.
Types of varnish coatings used in the production and restoration of wood furniture:
Alcohol based. When dried, the alcohol evaporates from the composition, the dissolved resin hardens, forms a transparent or translucent layer with a glossy sheen. The varnish reliably protects the table base from moisture and mechanical damage. Pleasantly emphasizes the wood texture, slightly thickens the natural shade
When purchasing paints and varnishes, pay attention to the concentration of the base; the recommended alcohol strength is 90%; if lower, the protective layer will not be as strong. It is better to cover the countertop with a concentrated mixture. Oily. Thick varnish is a mixture of resin, pigment and mineral oil (petroleum product)
It is better to work with such paintwork materials outdoors. When dry, the varnish forms a durable film that is resistant to precipitation, ultraviolet radiation, and “kitchen risk factors.” The downside of the composition is its persistent yellowness, which makes the furniture look old. Nitrovarnishes. The basis of the mixture is organic solvents, the film-forming component is cellulose. There are no complaints about the strength or appearance of such coatings, but they are not safe. Organic solvents are too toxic. Harmful components of the mixture will pollute the atmosphere of the room even after the surface layer has completely dried. Due to the persistent odor and toxicity, manufacturers are gradually reducing production volumes of nitro varnish, and demand for it is falling. You should not cover a wooden countertop in the kitchen with this varnish; it is better to choose a safe composition. Water-based paints and varnishes. Water-based varnishes are safe and absorb well into wood. Due to acrylic dissolved in water, after drying the varnishes form a durable polymer film that hardens more and more over time, is heat-resistant, and not prone to abrasion. Water-based acrylic varnish is not afraid of water, it is transparent, and does not change color from ultraviolet radiation. Preserves the original wood grain and emphasizes the texture of the countertop. Polyurethane mixtures. They are elastic, resistant to cracking, and easy to use - no need to prime the wood. The varnish layer is not afraid of accidental impacts, static and dynamic loads. The paintwork dries quickly and does not emit harmful substances. The coating is safe, retains transparency, does not turn yellow, and looks great. But there are also disadvantages: it is better not to purchase polyurethane varnish for a wooden table; the moisture resistance of the coating is quite low.
Types of wooden countertops
The durability of products made from solid wood directly depends on the production method and the type of wood.
The hardest, and therefore most expensive, species are beech and oak.
Photo from source: fotostrana.ru
Table top Cedar 3829/Nw Bunratti Oak
Products made from birch, ash, walnut, and pine will be cheaper.
Table top Cedar 8215/12D Pine bourbon
Larch is especially preferred by manufacturers due to its durability. It is very resistant to stress and damage, has a dense structure, and contains gum - a natural antiseptic that will prevent, for example, wood from rotting, as well as the formation of fungus and mold.
Remember that products made from solid wood may warp over time. Glued laminated wood is assembled from several plates. It is extremely elastic, flexible, and resistant to moisture and sudden temperature changes.
Tabletop requirements
When thinking about how to cover a wooden kitchen countertop, keep two things in mind.
Firstly, it's durability.
Secondly, practicality.
These are the two main requirements for a kitchen top.
ALSO GOOD WOODEN TABLETOPS SHOULD:
· do not react to aggressive household chemicals;
· do not fade in the sun, do not change its color;
· have water-repellent properties;
· blend harmoniously with the overall design style;
· be heat-resistant so that hot dishes do not leave marks or damage;
· have a coating that is easy to clean - due to the fact that bacteria and microbes accumulate in the recesses of loose surfaces.
Is primer required?
Prime the table using roll/brush primer. Roll-on/brush-on formulas are best for high-traffic surfaces as they tend to be thicker and more durable than spray-on formulas. Apply 1 coat of primer using a mini foam roller or medium brush. Allow this coat to dry before applying a second coat.
Primer helps the paint adhere to the wood and hides any stains or discoloration. Between layers, wrap the roller or brush in a plastic bag and place it in the refrigerator. This will keep the paint wet and save cleaning time between coats.
Be sure to fill any cracks or holes in the table with good wood filler. Be sure to follow the instructions and let the filler dry to the point where you can sand it well.
Oil
Photo from source: master-kraski.ru
Oil impregnation is the optimal method for protecting solid wood products.
First of all, it helps the wood begin to repel water due to the formation of a barrier film that prevents the structure from getting wet.
Please note that such coverage will require periodic updating.
The compositions are available in different colors. Therefore, your decorative possibilities are almost limitless.
The base can be mineral, vegetable, synthetic. But, of course, industrial tung, citrus and linseed oils will provide the most reliable protection.
Divided into drying:
· partially - the wood is impregnated to deep layers. To remove the top layer, use a mechanical method;
· completely – does not wash off with water, forms a solid top layer.
It is better to apply oil compositions in at least two layers. Before applying a new one, the previous one must dry well.
Dyeing technology
Before you paint a wooden table, you need to arm yourself with:
- with a brush, roller and container (if paint is used) or spray (aerosol);
- goggles, mask, gloves, respirator (to avoid toxic substances getting into and on the body);
- antiseptic (necessary for protection against insects) and wood primer (reduces paint consumption).
If you choose the color yourself, apply the mixed paint to the surface and let it dry to understand what the final color will be. Painting the table is done on a hard surface, previously covered with newspapers or plastic wrap to avoid paint getting on the floor.
For those who decide to cover the table with varnish or non-water-based paint, it is better to carry out the restoration outdoors due to the strong toxic odor. If the piece of furniture is large enough, it is better to disassemble it into its component parts using a screwdriver, hammer drill, etc. Many experts argue that it is not worth violating the integrity of a wooden object, since in the future it may lose its shape. However, this statement is controversial. If you assemble all the parts together correctly and efficiently, this will not affect the life of the product, and it will be easier to paint. Before repainting a varnished table, you must remove the old coating. To do this, you can use a chemical solvent, a spatula, or a metal sponge. At the initial stage, sandpaper should be selected coarse-grained, which does not abrade the surface so much. Next, you should sand the surface with fine-grained sandpaper, cover it with an antiseptic and primer and leave to dry. An antiseptic is needed so that pests cannot subsequently reach the wood. After the primer has dried, the surface must be sanded again and wiped with a dry cloth or vacuum cleaner.
Sanding the table surface
The paint is applied in at least two layers
Masking tape is useful if the wooden product has glass or plastic inserts that do not need updating. It is enough to seal unnecessary places and you can proceed directly to painting. If you use aerosol paint, be sure to wear a respirator, goggles and gloves. These methods of protection allow you to paint a wooden tabletop without harm. The substance should be sprayed at a distance of 30 cm from the wooden table. Next, you need to leave the product to dry, and then cover the wooden table with another 2-3 layers of paint. The same sequence is maintained when using conventional liquid paint, which should be applied with a roller or brush with soft bristles. To make sure that the furniture is ready for the next treatment, it is recommended to lightly touch the edge of the surface with your finger. If the paint does not stick, then you can proceed to the next step.
How to paint a tabletop, how to choose a varnish for a table? What varnish to cover the table with depends on the further purpose of the product, but the most universal coating option is acrylic varnish, which will protect the wooden surface from mechanical damage. After painting, you need to remove the masking tape and leave the product to dry for 8 hours (or better yet, a day). Only after this is it ready for use.
Before applying the varnish layer, the table can be decorated with decorative fragments
How to oil a wooden tabletop?
To ensure that your wooden work surface lasts as long as possible, treat it properly. Everything is important here - the product, the thoroughness of surface preparation, application, drying.
Photo from source: instagram.com
STEP 1: Primary surface treatment
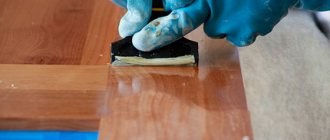
The first stage is cleaning from traces of grease and various contaminants. After this, the wood is dried. To better absorb the oil, the material is sanded. Coarse abrasives are used first and then fine abrasives.
After each abrasive treatment, the wood is cleaned. If deep scratches appear on the kitchen top, they are repaired with putty. Wax-based restoration kits are best suited for this.
STEP 2: Prepare the product for application
Everything is simple here. To prepare the oil for use, stir it for five minutes immediately before applying.
Attention! Quality is the most important thing when choosing oil. Don't skimp on it. A good surface protectant will help avoid damage from moisture and mechanical stress, make the countertop shiny and refresh its appearance.
STEP 3: Apply
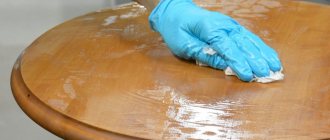
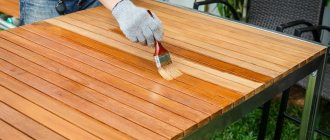
Apply the oil composition to the work surface with a cloth or brush.
Attention! Choose a fabric that does not leave lint.
Leave the first layer to dry for at least 12 hours. After this, it will be possible to apply the next one, and proceed similarly to the same principle.
The number of layers you will need is directly dependent on what you are using to apply the oil. For example, if you use a cloth, you will need to apply up to four layers, but if you use a brush, then only two.
Step 4: Dry
It may take from several hours to several days for complete drying, but nothing can be said for sure. However, information regarding the timing must be indicated on the packaging.
Oils with a natural base, as well as mixtures containing acrylic, take the longest to dry. After drying, it is important to wait and not use immediately.
The best water-based furniture varnishes
V33 matte polyacrylic white
This product from a French manufacturer is suitable for updating the surface of furniture, wooden walls or doors. If the surface has been previously treated, it will not require preliminary priming. After the layer has completely dried, a film will form that will not be afraid of water, mechanical stress or dirt. This makes caring for the product easier. In addition, such a varnish coating will not deteriorate from temperature changes and can withstand exposure to temperatures up to 90 degrees.
This model will give the wood a white color that will not turn yellow after a few years. “V33 matte polyacrylic” is easy to use and there will be no smudges during application. One liter of this product is enough to cover 12 sq.m. In this case, the first layer dries within three hours, and it will take a day to dry completely.
The average cost of a 0.5 liter metal can of varnish is 750 rubles.
VARNISH V33 matte polyacrylic white
Advantages:
- Uniform coverage;
- Almost odorless;
- Quick drying;
- Thermal and moisture resistance.
Flaws:
- Not detected.
Chief technologist acrylate semi-matte
This semi-matte transparent product has almost no odor, so work can be done even indoors. Due to the fact that the product is safe, it can be used to cover furniture or parquet in medical, preschool, food institutions, as well as to be used in everyday life. After complete drying, a film will form that is resistant to mechanical stress and will not deteriorate from moisture. With its help, you can not only transform a wooden surface, but also protect it from the aging process. In addition, this varnish can also be used for decorative purposes.
Work with this product should be carried out at a temperature not lower than +15 degrees. “Chief Technologist Acrylate Semi-matte” can be applied with a brush, roller or spray. It will take about 30-60 minutes for one layer to dry. Complete drying time is 24 hours. For 1 sq. m. it takes about 100 grams of product.
The average cost is 500 rubles.
VARNISH Chief technologist acrylate semi-matte
Advantages:
- Economical consumption;
- Easy to apply;
- Odorless;
- Can be used for decorative and protective purposes;
- Affordable price.
Flaws:
- Not suitable for garden furniture.
Tikkurila Kiva 70 polyacrylic colorless
This product is suitable for covering furniture, walls, ceilings and children's toys made of wood. It has no shade, but it can be created using a special color. It is also worth noting that the coating after such varnish will not become yellow over time, and when the product thickens, it can be diluted with water.
Tikkurila Kiva 70 polyacrylic can be applied using a sprayer, sponge or brush. After drying, a durable layer is formed on the product, which will protect the piece of furniture from mechanical stress and prevent it from aging. But to achieve this within two weeks after dyeing, the product will require careful care. So, it will take a day for Tikkurila Kiva 70 polyacrylic to dry completely. Product consumption is 8-14 l/sq.m.
The average cost of a 0.23 liter can is 500 rubles.
VARNISH Tikkurila Kiva 70 polyacrylic colorless
Advantages:
- Convenient to use;
- Applies evenly;
- Durable coating;
- Quick drying;
- European manufacturer.
Flaws:
- High price.
Neomid Interior polyacrylic colorless
Using this product, you can create a protective coating on wooden products, and it can also be used for decorative finishing. "Neomid Interior" is suitable not only for covering furniture; it can also be used to paint walls or ceilings. After drying, the film will highlight the natural structure of the wood. It is also worth noting that the varnish layer will have a semi-matte effect and high elasticity. In addition, the product contains bioprotective additives; with their help, the coated product will have reliable protection against mold and will not be subject to rotting.
"Neomid Interior" can be used for both home and garden furniture. The manufacturer also provided the possibility of using a color scheme. It will take 60 minutes for one layer of Neomid Interior to dry. One liter of product is enough to cover 5-10 sq.m.
The average cost is 350 rubles.
VARNISH Neomid Interior polyacrylic colorless
Advantages:
- No smell;
- Suitable for outdoor use;
- Quick drying;
- Low consumption;
- Affordable price.
Flaws:
- Not detected.
Wax
Wax is a natural, environmentally friendly material. But in addition to the water-repellent coating, it also creates protection against scratches and abrasions. Able to withstand common kitchen cleaning products.
Photo from source: ufa-les.ru
Attention! Wax thins out quite quickly, so you will have to polish and renew the coating more often than with oil. Before each update, the old layer will have to be cleared.
Varnish
Photo from source: kitchen-eco.ru
The varnish allows you to leave a beautiful natural wood pattern and gives a more saturated color. If you apply it in several layers, the varnish will prevent the kitchen top from deteriorating over time, will make its service life longer, protect it from the negative effects of moisture, and will prevent fungus, mold, and cracking due to sudden changes in temperature.
Interesting to know!
Dipped furniture is a popular home design trend that works well with kitchen tables and chairs. To try it out, paint the bottom half of your table legs. Or try the opposite: paint most of the table, but let the wood show through on the bottom half of the legs. A dipped look is a great way to introduce strong color. If you want to get really creative, consider using chalk paint on the top of your table. Children, for example, will draw while you prepare their breakfast, and adults will also have the pleasure of writing messages or reminders.
What varnish should I use on a wooden tabletop?
Photo from source: tiu.ru
It is recommended to use acrylic or polyurethane varnish. The area treated with them will withstand cold and hot dishes without any problems. It also creates reliable protection against contamination.
To remove the varnish coating, the surface will need to be scraped.
Technology of varnishing a wooden table
Before starting work, you should figure out how to varnish a wooden table. First you should worry about how to protect your respiratory system. To do this, you need a dust respirator or mask. Also, work is carried out only in rooms that are well ventilated. To varnish a table correctly, we present some algorithm for performing restoration work.
Preparing the surface
Surface preparation plays a very significant role in the quality of varnishing a wooden table. First, you should stock up on tools for sanding a wooden surface:
- sandpaper of varying degrees of grain;
- a piece of wooden block;
- a piece of rubber;
- long stick.
Varnishing process
It takes place in several stages:
REMOVAL OF OLD COATING
Clean the surface to “clean” wood. This can be done in three ways:
· chemical - a remover is used, which is applied with a roller or brush for ten minutes. The old layer of varnish is removed with a rag;
· mechanical – carried out using different-grained sandpapers or grinding machines;
· thermal cleaning - a hair dryer is used for this. After the top layer heats up and softens, it is removed with a rag.
REMOVING DUST FROM THE SURFACE
It is better to use a vacuum cleaner for this. At the same time, pay special attention to the corners of the table and other places where dirt could accumulate during the grinding process.
FILLING SCRATCHES
If there are scratches, fill them with putty. The best option is the one based on wax.
STAINING
Apply a small amount of stain. Do not allow streaks, drips, or unevenness to occur during work.
Staining is a wood processing process. It prevents mold and rotting of wood.
DRYING
Dry after application. Please note that the drying time of the varnish depends on its type, that is, it can range from 18 to 36 hours.
GRINDING
Do an intermediate sanding using sandpaper to remove any minor unevenness, if any.
Features of table decoration
When the paint is completely dry and hardened, it's time to start decorating. There are several techniques you can use at home. They are good because they do not require expensive investments and are easy to create at home. This is a great option for updating a child's room.
- Decoupage. For this technique you will need napkins with a beautiful pattern, brushes and PVA glue. Select the topmost layer of paper with a decorative element, attach it to the tabletop and apply glue on top with a brush. Make sure that the napkin does not tear, form air bubbles, or move from its original position. After the glue has completely dried, the decorative element is coated with transparent varnish.
- Tulle. Find a piece of tulle with a beautiful pattern. Wet the material, apply it to the table surface and fix it. Using spray paint or a brush, paint the tulle fabric evenly. After drying, remove the improvised stencil. It will look especially impressive if you use contrasting colors of the paint composition.
- Artificial aging of wood looks stylish in a home interior. To do this, sand the surface of the table with sandpaper and wipe certain areas with ammonia. When they darken, go through sandpaper again and varnish.
- Patination. This method produces beautiful, dark, vintage stains on a wooden surface. Apply the patina using stain or other suitable means, wait until it dries and remove unnecessary layers with a foam sponge.
Liquid glass
Photo from source: derevoblog.ru
This is epoxy resin - a transparent polymer that contains sodium and potassium silicates.
Soda glass is the best choice for decorating a wooden tabletop.
ADVANTAGES OF COATING
· retains the original shade;
· will not peel off;
· will not crack, is resistant to wear;
· will not be damaged by spilling hot coffee;
· easy and simple care
Liquid glass is diluted with ordinary tap water. To make the coating look like real glass, the wood is cleaned and well sanded.
Liquid glass is diluted with ordinary tap water. To make the coating look like real glass, the wood is cleaned and well sanded.
The composition is applied in a spiral, leveled with a spatula towards the edges from the center. It is important to have time to give the desired shape before the liquid glass hardens.
Dye is added to create a colored coating.
Self-adhesive film
Of course, this is the easiest way to cover. Allows you to renew a kitchen top that has become old.
Photo from source: mebpilot.ru
Before you begin finishing, thoroughly clean the area to be treated with sandpaper. Achieve a perfectly smooth surface.
Attention! Clean thoroughly. Do not allow air bubbles to form under the film!
In stores you can find a huge assortment of self-adhesive films with a variety of designs - imitation stones, solid wood of any species, plain, with a pattern.
The surface with such a film is easy to clean from dirt and can serve for a long time without wear or fading.
Kitchen table refurbishment ideas
Artistic painting
Many home craftsmen are afraid of this method of restoration. Indeed, real artistic painting requires serious professional skills and talent. But no one is asking you to transfer the scenes of great artists onto furniture, and drawing a few flowers is not so difficult.
In addition, the category of artistic painting includes working with stencils and some types of appliqué. Agree, painting a cabinet or tabletop using ready-made stencils will not be difficult. You can find the stencil you need at any book market, and sometimes even from hawkers in the underground passage.
Working with stencils does not require any special professional skills.
Adhesive tape
The self-adhesive film can be installed on the tabletop in a maximum of an hour. Now in this market there are countless options for decorating film, starting with a single-color coating and ending with imitation wood, stone, and even reproductions of paintings by famous artists. Plus, the ornament can be ordered for reasonable money.
Self-adhesive film allows you to radically change the appearance of the table.
The installation technique itself is not complicated, but the main requirement is a perfectly smooth, polished base. I will tell you how to polish the tabletop later, and the film is glued in 3 stages:
- After you have polished the tabletop, the dust is wiped off and a couple of layers of acrylic primer are applied to the surface, each layer being applied after the previous one has dried.
- Now we need a soap solution; you can dissolve a bar of soap in water or use dishwashing detergent. The solution is applied to the countertop with a sponge.
- The film is glued from the edge of the tabletop. The protective paper is removed gradually as the strip is glued. From under that part of the film that lay on the countertop, air is immediately expelled along with the soap solution. It is convenient to expel the air with a plastic wallpaper spatula or rag.
Step-by-step technique for arranging self-adhesive film.
Ceramic tile
At the end of the renovation, there are often excess tiles left in the kitchen or bathroom, which can be safely used to decorate the table. In this way you can beautifully decorate an old dining table in the kitchen or on the open terrace.
Patchwork tiles in the patchwork style look great, as well as decorative tile panels and borders with patterns. No less impressive will be a tabletop made of tiles that imitate stone or expensive wood.
Decoupage
For this decor you will need a brush, paper napkins with a pattern, PVA glue and transparent furniture varnish.
The pictures are carefully torn off or cut out with scissors, the bottom layers of paper are removed, then the resulting thin appliqués are placed in the designated place and coated with glue on top, trying to avoid folds and tears.
If any element cannot be attached the first time, you must immediately wipe it with a sponge moistened with warm water and try again with a similar fragment.
Dried decoupage is coated with transparent furniture varnish in several layers, otherwise the paper decor will quickly be erased.
Craquelure
Craquelure is a cracking varnish that is used to deliberately give a product a look that imitates the texture of antique paintings. It can be one-step (the composition is applied in one layer and cracks as it dries) and two-step (two mixtures are used - one based on epoxy resins, the second is water-based, they interact and a characteristic texture is obtained).
The color of the veins is determined by the bottom layer of acrylic paint, as well as the shade of the grout. Most often, powdered golden pigment or pastel is used for this purpose.
Two-step craquelure is usually used to complement decoupage or hand painting to achieve the effect of an aged painting. One-step is more suitable for products without patterns.
stain
A wooden table can be successfully decorated using stain. Using this tinting liquid, you can give the wood a new rich shade. It is noteworthy that after processing the wood texture is perfectly preserved. In addition, the tabletop will be protected from moisture and ultraviolet radiation.
The stain should be applied parallel to the grain. At the final stage, the surface must be covered with several layers of varnish.
Epoxy resin
Epoxy resin is a two-component compound that, when liquid components are combined, turns into a hard plastic. For decorative purposes, transparent epoxy is used. You've probably seen transparent keychains with small objects inside, and this is epoxy resin.
Using epoxy, you can quickly restore a dried out and cracked countertop. You just need to connect the components according to the instructions on the package and pour the composition into the cracks and potholes.
In addition, the decorative effect will increase significantly if, for example, silver oxide with a phosphor (a composition that causes a glow in the dark) is added to the transparent epoxy. True, after the composition has completely cured, the tabletop needs to be sanded and polished.
Transparent epoxy resin can be decorated according to the artist's design idea
Decorative tape
Stationery stores sell tape of different colors and shades; you need to buy an assortment of it and stick it like wallpaper on the tabletop. Although, to be honest, colored tape is more of a children's option. The child will be interested in the process.
- First, the countertop is polished and degreased with any alcohol-containing solution, for example, cologne.
- If the plane is pasted over completely, then the first strip is glued along a pre-drawn straight line; it is better to start from the edge of the tabletop.
- Subsequent strips are glued end to end and immediately rolled with a wallpaper rubber roller for seams. It is a rubber wheel with a handle, 25 - 30 mm wide.
Colored tape on the tabletop looks original, but this decor is not practical.
Decorative tape is inconvenient to use. This covering will look good only if you do not use the table at all. If, for example, you arrange a teenager’s desk in this way, the ribbons will begin to fly off within a couple of weeks, and there is simply no point in strengthening the colored tape with varnish.
Painting through tulle
In many rustic styles, a patterned tablecloth on the table is considered a must-have attribute. Using white and some contrasting paint, you can decorate a tulle tablecloth with your own hands in a couple of hours. This is one of the options for stencil painting.
- You need to find a piece of old tulle, preferably without holes.
- Now you need to paint the countertop white.
- When the paint has dried, lay out the tulle on it and make sure that the pattern looks adequate. To prevent the fabric from accidentally moving, it is advisable to secure it with pushpins under the tabletop.
- Next, take a can of nitro enamel with contrasting paint and evenly apply the composition over the tulle. After 15 minutes the tulle can be removed, and after half an hour the table is ready for use.
Decor using a piece of tulle is considered one of the simplest and fastest.
Potal (gilding)
Gold monograms are a wonderful decoration for a table in a classic style. They can be stenciled with shiny acrylic paint, but a more realistic effect can be achieved using gold leaf. In essence, this is the thinnest foil that imitates precious metals, which is used for artistic purposes.
To prevent the gilding from crumbling, it is coated with a transparent varnish on top.
Mosaic
To revive an old table, you can assemble a mosaic composition on it. The material used for the work is tiled or glass mosaic, available for sale in hardware stores. For finishing, you can use fragments of tiles, for example, used to decorate a bathroom, or elements of old CDs.
To assemble the composition, remove the old layer of paint from the tabletop, then level it with sandpaper and cover it with acrylic primer. When the surface is prepared, a mosaic is made on it. The plot and composition of the future film are limited only by the author’s flight of fancy. The elements are attached with liquid nails or superglue.
For those who do not have time to create their own compositions, mosaic canvases are on sale. These are small tiles that form a pattern and are attached to fiberglass. The buyer just needs to attach it to the tabletop using tile adhesive, and then fill the gaps. This is a quick and inexpensive way to revive your kitchen table.
Soft glass
Photo from source: spkubani.club
You can cover it with oilcloth or a tablecloth, but they wear out very quickly.
An adequate alternative is transparent PVC film. It is also called soft glass. Withstands household chemicals, relatively high temperatures, is not saturated with water, and is not subject to deformation. No scratches left.
Excellent for surfaces made of wood, chipboard, MDF, glass, metal, artificial stone, agglomerate.
Which paint to choose?
- Enamel based paints are known for being hard, durable, corrosion resistant and easy to clean.
- Latex-based paints are also easy to clean and look nice, but they don't hide damage and aren't durable.
- The oil paints we discussed above have a strong, unpleasant odor and are absorbed into the wood as they cure, making them extremely durable and easy to clean.
What is the best way to cover a wooden tabletop?
When choosing a covering, you need to rely on your desires, as well as the design of the room as a whole.
Photo from source: reciclaredecorar.com
Tabletop Cedar 3198/Mw Rhodes Wood
Do you work with wood yourself? Do you want to remodel an old countertop or create one yourself from scratch? Then choose formulations made from oil and wax. They will protect the array from moisture, scratches, and the negative effects of high temperatures. Varnishes are less popular at the moment.
Need a quick restoration of your work surface? An excellent option would be to use self-adhesive film, the color and design of which can be chosen so that the surface is in perfect harmony with the set and the interior as a whole.
If you want to experiment and create a masterpiece with your own hands, try liquid glass. It can be used not only to fill a tree, but also to add a herbarium, shells, sea pebbles, and branches to the composition.
Photo from source: art-build-msk.ru
Painting a table with your own hands - where to start?
If you're not sure what color to paint your table, we'll tell you. White tables with bright chairs look good in kitchens, while brighter colors can really make a delightful accent. Think about what kind of atmosphere you want to create and then choose a color that will help you achieve that look. Some shades include yellow, red, turquoise and navy blue.
Can chipboard replace natural wood?
Chipboard (chipboard) is a composite material that contains chips mixed with resin. By far, this is the most popular material for making countertops.
If you don’t see the point of spending money on a kitchen top made of natural wood, but want an aesthetic product with good performance characteristics, pay attention to the following options:
Veneered chipboards
Photo from source: zakazat-mebel.ru
The surface is covered with veneer - a thin layer made from natural wood. A protective layer of varnish is applied on top.
Visually they do not differ from solid wood countertops. Disadvantages include an average level of resistance to chemicals and scratches.
Melamine cladding
Photo from source: sdelai-lestnicu.ru
In this case, the chipboard is finished with kraft paper, which is impregnated and coated with melamine resin. Resistant to solvents and moisture.
They can have any pattern, including the texture of natural wood.
Lamination with plastic
Covered with HPL plastic. It is resistant to UV rays, mechanical stress, moisture, food acids and any household chemicals. They are durable and easy to maintain. These are beautiful, varied products.
They give the greatest scope in terms of design. On the market you can find decors with very high-quality imitation wood or stone.
If you are looking for a high-quality countertop with an affordable price tag, then pay attention to chipboard with HPL lamination.
A photorealistic imitation of an array will please the eye, reliability and ease of maintenance will eliminate additional expenses and worries, and a high level of environmental friendliness will allow you not to worry about the health of your family.
It is these advantages that we have embodied in the “Cedar” line of countertops. Our task is to provide the client with a high-quality, aesthetic and durable product at an affordable price. Get more information on the official product resource.
Table top Cedar 690/P Indian wood
Causes of breakdowns and repair of an old table
If you discover a breakdown of old furniture, you should immediately take care of repairing the table. Of course, you can repair a piece of furniture in a special workshop, but this pleasure is not the cheapest. All repair work can be easily done independently.
If there is a breakdown, it must be repaired.
The causes of breakdowns can be very diverse, ranging from careless use, deformation of mechanisms, ending with old material, environmental influences, termites, etc.
The causes and nature of breakdowns may be different.
The fallen parts are pushed into place and fixed with special furniture glue. In case of breakage and loss of thread elements, small similar wooden blanks are created.
If any parts have fallen off, they are reattached.
If the tabletop has become completely unusable, it should be replaced immediately. This is true in case of a large amount of rot. The new surface is securely fixed with a press. If deformation due to dampness is observed, the product is thoroughly dried. Its elements are set in the desired position and straightened under the press.
In some cases, a complete countertop replacement may be necessary.
