The modern market of construction and finishing materials offers a huge range of floor coverings with a wide variety of properties and characteristics. Both modest budget options and expensive luxury finishes are available for sale.
Types of floor coverings
After reviewing the information presented below, you will get a complete understanding of the main types of floor coverings and will be able to make the most correct choice.
Linoleum
Linoleum
Modern linoleum consists of six layers
One of the most common types of flooring. Materials for household, semi-commercial, and commercial purposes are available for sale. Classification is carried out in accordance with the strength indicators of linoleum. The best option for the home is semi-commercial rather than household linoleum - it is slightly more expensive, but lasts much longer.
What is the difference between commercial linoleum and semi-commercial
Advantages
- Resistant to moisture.
- Unpretentiousness and ease of care.
- No noise when walking.
- Impervious to rotting.
- Long service life.
Table of class and marking of household linoleum
linoleum
Flaws
- Demanding requirements for the foundation. The subfloor must be level - only in this case can you count on a long service life of the coating.
- Relatively low environmental friendliness. In this regard, linoleum, as an artificial material, is noticeably inferior to natural finishes.
- Low resistance to mechanical loads. The weight of a person and small interior items is supported by linoleum, but under the pressure of heavy furniture and large equipment, the material is pressed through.
- Weak resistance to temperature changes. Relevant for cheap and low-quality linoleum. This finish quickly becomes deformed and becomes cracked.
Table of characteristics of Tarkett linoleum (Tarkett)
Types of flooring bases
The floor in an apartment, unlike in an individual house, is installed on the existing floor “from the builders” in a new house, or on a beam floor in an old one. For this reason, before laying the floor, it is necessary to carefully examine the ceiling. In old houses, it is necessary to raise the old floor and carry out an examination of the floor beams. Replace or strengthen damaged beams or replace them with new ones. The best solution would be to replace the beam covering with reinforced concrete.
Floors in new houses, depending on the construction technology, can be made of reinforced concrete panel floors, or in monolithic frame houses - solid expanded clay concrete.
The following can be used as beams:
- wooden beam;
- reinforced concrete beam;
- metal profile (T-beam or I-beam or rail).
Beams are mounted during construction directly into the wall, or on concrete crossbars built into the wall.
Beams can be wooden or concrete. , hollow-core panels were most often used as which served as the basis for the floor on one side and the ceiling on the other.
Floors from builders, in addition to surface defects, may have a slope. Therefore, the surface of the ceiling is covered with a screed, which solves two issues:
- makes the surface smooth enough for the position of the floor covering;
- makes the surface horizontal.
Cement strainer
The simplest type of screed is a cement screed. The filling solution is prepared from grade 400 cement and washed and sifted river sand. Currently, ready-mixed dry mixtures are available for sale. But you can cook it yourself. Mixture composition:
- Sand - 3-4 parts.
- Cement - 1 part.
- Water - so much so that the solution resembles sour cream.
Sequence of actions when installing cement screed:
- clean the floor surface from destroyed, cracked concrete;
- thoroughly clean from debris and dust;
- measure the slope and calculate the required amount of solution;
- decide on the composition of the mixture for the solution, prepare it or use a ready-made one;
- add water and mix the solution in a concrete mixer or in a container using an electric drill with a mixing attachment;
- level the beacons and guides;
- pour the solution, distributing it evenly over the floor area, while simultaneously smoothing it along the guides to the desired level.
After completion of all work, during the entire curing time, it is necessary to moisten the pouring surface by spraying it with water. To maintain moisture, you can cover the pouring surface with polyethylene.
The final setting and drying time of the screed is 28-29 days.
Semi-dry cement screed
Recently, the semi-dry screed method has become widespread. Its main advantages are:
- short curing time of the mixture, sufficient for laying the floor covering;
- no risk of leaks to the lower floor;
- the plasticity of the screed and, as a result, the absence of cracks and cavities after hardening;
- additional heat and sound insulating properties.
The composition of the mixture for laying semi-dry screed differs from wet screed by a significantly lower water content. In addition, a significant amount of plasticizer is added to the solution - fiber fiber, which keeps the screed from cracking.
The composition of the mixture is as follows:
- Pure construction sand, fineness modulus = 2.0; fraction up to 5 mm - 2 parts.
- Cement grade 400D20 - 7 parts.
- Water - 1 part.
- Fiber - 700 gr. per 1 cu. m of solution.
The installation procedure is the same as in the case of a cement screed with the difference that:
- the prepared solution should have the consistency of wet sand;
- level the beacons and guides;
- install thermal insulation along the wall in the form of tape, mineral wool or expanded polystyrene;
- pour the solution, spreading it evenly over the floor area;
- as a rule, smooth the solution into a horizontal surface in accordance with the beacons;
- when the solution begins to stick, wipe the surface clean.
The main advantage of semi-dry screed is that after 12 hours hardens enough to be walked on. After 42 hours, porcelain stoneware and tiles can be laid on it, and after 7 days - laminate, PVC tiles or linoleum. The fact is that although a semi-dry screed gains strength very quickly, the moisture evaporates from it little by little over the course of a month. Therefore, it is better to install a parquet floor over a fresh screed after a month of aging, since even minor fumes can ruin dry parquet.
Dry screed
The main advantage of a dry screed is that it can be covered with flooring immediately after installation. The intermediate layer of dry screed is formed as follows. Waterproofing in the form of a polyethylene sheet 0.2 mm thick is laid on the surface of the ceiling. From above it is filled with expanded clay or sand, which is carefully leveled and compacted with a flat vibrator or roller.
metal profile is laid on the layer thus formed which is covered on top with gypsum fiber boards arranged in a checkerboard pattern, which are attached with mounting screws . If the backfill is more than 7 cm thick, the top layer is reinforced with another layer of gypsum fiber boards. The floor covering is immediately laid over the finished screed.
Self-leveling floors
In the case where it is necessary to obtain perfectly smooth horizontal surface, ready for laying linoleum, PVC tiles or laminate, the best intermediate layer can be obtained by pouring a liquid solution of a certain composition onto a well-waterproofed base. Such a solution is formed by diluting with water, in accordance with the instructions attached to each package of the ready-made mixture, a wide variety of which are currently available on the building materials market.
The mixture consists of cement, gypsum, fillers such as fine sand and contains various chemical components that promote rapid and uniform spreading, plasticization and stabilization of the resulting coating. An ideal horizontal surface is formed by itself under the influence of gravity. That is why these mixtures are called self-leveling. Different compositions are associated with different conditions and different thicknesses of the coating formed.
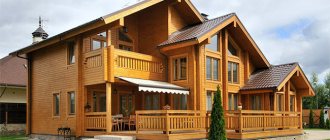
Wooden floor
Before installing the floor, heat and sound insulation should be placed between the beams. It can be mineral wool, expanded clay or slag. Porous insulating material loses much of its insulating properties when it absorbs moisture or steam. Therefore, it must be carefully insulated with a moisture-proof film, for example polyethylene or roofing felt. If the size of the film is insufficient, its sheets should be overlapped, sealing the edges with tape.
- If the distance between the beams does not exceed 60 cm, then the floor can be laid directly on the beams. If not, then logs are laid on the beams, perpendicular to their direction at a distance of 50–60 cm.
- The logs are also placed directly on the reinforced concrete floor or screed.
- Logs are wooden beams with a cross section of 50×100 made of softwood. When laying, it is necessary to use a level to set the top edge strictly horizontally. The distance between the logs should not exceed 60 cm.
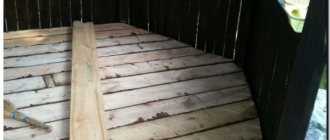
pre- floorboard is placed on the joists It is necessary to install ventilation ducts in the walls, coming out of the walls at a distance of several centimeters from the baseboard, closed with openwork hatches. These moves are necessary to ventilate the space between the joists and the underside of the board. For greater strength, the boards are attached to the joists with self-tapping screws inserted at an angle at the level of the cotter pin in order to hide their heads and make it possible to process a single floor surface with a polishing machine.
The best flooring boards are mahogany and oak, but they are most often made from softwood. Boards made from Siberian larch have an optimal price-quality
After polishing, the floor can be varnished or painted. In both cases, it is necessary to follow the painting instructions and, if necessary, pre-prime with special primers. This will significantly extend the life of the paint layer.
A subfloor can also be laid on the logs, on which PVC tiles, linoleum, or laminate can be laid as a floor covering. To do this, the subfloor is covered with additional leveling sheet material, such as fiberboard. Coating of tiles or porcelain stoneware over a wooden surface is only possible if a reinforcing reinforced screed is applied on top.
The subfloor can be made from floorboards, chipboards, or OSB. In this case, an additional leveling layer is not needed. Parquet is laid on the subfloor.
Polyvinyl chloride coatings
Polyvinyl chloride coatings
Polyvinyl chloride coatings have a service life of up to 30 years
Available in the form of tiles and panels with an adhesive base and a locking joint. Also on sale are tiles mounted using third-party adhesive mixtures. Modern vinyl floors look more aesthetically pleasing and are characterized by significantly improved performance characteristics compared to their old Soviet-made counterparts.
Advantages
- Resistance to various types of loads.
- Easy to install.
- Resistant to moisture.
- Good sound insulation properties.
- Nice external texture.
- Large selection of colors and textures.
- Long service life.
PVC tiles. Specifications
Flaws
- Demanding requirements for the foundation. The subfloor must be level, otherwise over time all defects will appear on the vinyl. The humidity of the base should not exceed 5%.
- Demanding requirements for storage and storage conditions. Before use, vinyl must be given time to adapt to environmental conditions. In addition, the temperature intervals recommended by the manufacturer must be maintained during the finishing process and after its completion.
- Weak resistance to ultraviolet exposure. Relevant for cheap vinyl. Direct sunlight causes the color to fade and yellow spots to appear on the surface of the coating.
- Unnatural composition. Vinyl is a man-made material. When burned, it releases substances that are toxic to humans. At the same time, a cheap and low-quality coating makes them stand out even in a “state of rest.” When purchasing, be sure to ask the seller to present quality certificates.
PVC floor tiles
Construction of a foundation on the ground
Installation of a concrete floor on the ground with waterproofing
A subfloor on the ground is a concrete foundation of the basement or first floor of a building, which lies directly on the soil. Such a floor is made with a strip foundation, when there is no layer between the soil and building materials. Such designs are most often found in private houses and cottages. And since the base directly “interacts” with the soil, many nuances must be taken into account during its installation.
The arrangement of a rough covering on a strip foundation begins with the laying of waterproofing materials, which, if necessary, can perform a drainage function. In what order are the layers of the “pie” stacked?
- Sand is poured along the entire perimeter of the soil located inside the building;
- The thickness of the sand layer should range from 6 to 12 cm;
- To protect the layers of the “pie” from the influence of moisture, a plastic film is laid on the sand;
- After this, a mound of crushed stone is made, the layer thickness of which should be approximately 15 cm;
- Then the installation of reinforcing mesh with a cell size of up to 20 cm is carried out;
- Next, the concrete screed is poured;
- As soon as the concrete dries, it is additionally treated with bitumen mastic to eliminate the possibility of moisture seeping through the concrete;
- Before laying the finishing coating, a layer of vapor and thermal insulation can be laid, which will prevent the accumulation of condensation under the finishing coating and heat loss in the room.
The stages of work on arranging a rough foundation on a strip foundation can be seen in the photo below.
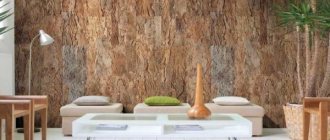
Cork coverings
Cork floor
How to lay cork flooring
Natural coating with high heat and sound insulation properties. The finishing is based on cork tree bark. Produced in roll and slab formats. Perfect for finishing floors in rooms that require environmental friendliness, silence and comfort.
Interlocking cork floor
Advantages
- High thermal insulation performance.
- Good sound insulation.
- Resistance to deformation influences. Even heavy furniture and equipment leave no traces on the cork floor.
- High shock-absorbing properties.
- No slipping.
- Normal tolerance to a variety of chemical influences, with the exception of aggressive alkalis.
- Resistance to various pests.
Types of cork coverings
Flaws
- High price. As a result, taking into account the costs of various additional materials and the work itself, the price of a cork floor is comparable to the costs of purchasing and laying good parquet.
- Low tensile strength. Sharp furniture legs, pet claws, heels and other similar things negatively affect the condition of the traffic jam.
- Low thermal conductivity. It will not work to use cork flooring in combination with a floor heating system, because... the “cork” simply will not allow heat to pass through.
- Tendency to swell when in contact with water. This point eliminates the possibility of installing cork floors in bathrooms and other rooms with high humidity levels.
cork floor
Which floor is better to make in an apartment: analysis of various options
Categories: Articles
Have you started a major renovation? In this case, you will certainly be faced with the question of what flooring is best for the apartment? There are quite a lot of types of foundations, ranging from a banal floor screed to high-tech floors on adjustable joists, and choosing between them is by no means an easy task. Rely on builders for this? As they say, it will be more expensive for itself. All that remains is to figure it out on your own, which is what we will do in this article, in which we will look for the answer to the question, which floor is best to make in an apartment or private house? We will study all existing options, get acquainted with their features, based on which you can draw your own conclusions.
What floor to make in the apartment photo
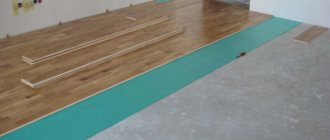
Laminate
Laminate in the interior
A panel made from fiberboard and supplemented with several layers of thick paper. A texture is applied on top of the paper (the most popular option is imitation parquet), and protective materials are applied on top of it. The production technology ensures that the panels are resistant to abrasion, sunlight, various types of damage, deformation and contamination.
Laminate classes
Laminate is relatively easy to install and has a long service life. The only limitation is that the panels cannot be installed in bathrooms and other rooms with high humidity levels. The installation technology requires preliminary laying of a special substrate.
Which laminate to choose
Laminate classification
Advantages
- Resistance to external influences.
- Good tolerance to elevated temperatures.
- Relatively easy to care for.
- Environmental Safety. The panels contain no substances that can cause harm to human health. The material does not accumulate bacteria, it does not cause allergies and is perfect for finishing the floor even in a children's room.
- Easy to install.
- Can be combined with underfloor heating systems.
- Long service life.
- Relatively affordable price.
Laminate in the interior
Flaws
- Poor resistance to moisture. The material is not recommended for use even in kitchens. If you decide to decorate your kitchen floor with this material, give preference to its adhesive variety.
- Risk of bubbles and other swellings if installation technology is violated.
- Creaking when walking when laid on an insufficiently leveled subfloor.
- Low quality cheap varieties.
laminate
What tools and materials are needed?
If you decide to make a wooden floor in your apartment yourself, you need to purchase materials and tools, and you must also be able to use them.
To work you will need the following tools:
- hacksaw;
- hammer and axe;
- electric drill and screwdriver;
- perforator;
- building level
In addition, you need to purchase the following materials:
- batten;
- logs with a section of 50x50mm and a length of 3 m;
- insulation and substrate;
- nails and screws;
- anchor bolts.
Once you have acquired all the tools and materials, you can begin installing the floorboards.
Ceramic coating
Ceramic coating
Ceramic floor tiles
Ceramic floor tiles can be used in various types of living spaces
One of the most popular materials for flooring. The tiles are especially suitable for tiling floors in rooms with heavy traffic and high humidity. A huge range of tiles are available for sale, differing in size, design, strength and a number of additional characteristics.
In private house construction, ceramic coatings are most often used in bathrooms, as well as hallways, toilets and kitchens. In general, you can choose tiles that will fit perfectly into the interior of any room, but in bedrooms, living rooms and other similar rooms, it is better to combine ceramics with floor heating systems, otherwise it will be cold.
Advantages
- The widest selection of design solutions.
- Almost limitless scope for the implementation of a wide variety of ideas. Using tiles, you can create unique compositions and visually change the proportions of the room.
- Strength.
- Easy to care for.
Flaws
- Labor intensive installation.
- Presence of seams. It will not be possible to completely remove them. The width of the seams directly depends on the skill of the installer.
- Cold. Walking on such material with bare feet is not an acquired taste. To be comfortable, ceramics must be combined with a heated floor system, which leads to additional costs.
KERAMA MARAZZI catalogues. Download in PDF format
2015 Ceramic granite
2015 English collection
Hotels
KERAMA MARAZZI
ceramic floor tiles
Floor color and interior
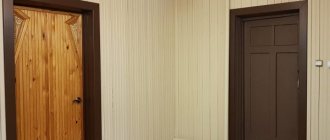
Floor design begins with color selection. To begin with, not so much color as tone: whether the floor will be light or dark in the room. There are many selection criteria. This is the style of the room, its dimensions, your desires.
In recent decades, light-colored floors have become a clear favorite. It is typical for most fashionable styles of decorating apartments and houses. Light flooring should be of Scandinavian design, minimalism, modern style, pop art, and even popular Provence and loft. They make light, and sometimes even shiny, floors in exotic high-tech and in some no less exotic directions.
Light floor in loft style - carefully aged wood
Dark floors are appropriate in a classic interior and other “historical” trends - baroque, gothic, rococo, etc., they are also characteristic of oriental ethnic trends - rooms decorated in Japanese and Chinese styles. If you know exactly what kind of setting you want, it's easier for you. If you haven’t fully decided yet, you’ll have to figure it out further.
Dark floors are more classic
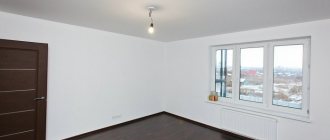
Style isn't all there is to it. Different floor colors create different sensations. A light floor covering makes the interior light and airy and optically expands the boundaries of the room. That is, this is an option for small rooms.
But at the same time, the atmosphere is “cold”. The room is light and light, but “comfort” in the classical sense will not work. But you can place dark or bright furniture, some outlandish accessories. Against a light background, all this does not hurt the eyes and brings a touch of coziness. After a busy day, this environment might be better.
The interior is light but cold
The dark floor, on the contrary, is heavier and more down-to-earth. It gives a feeling of comfort and stability, but in a small room, and even with low ceilings, a “box” effect appears. Comfort becomes oppressive and heavy. You can compensate for this effect with very light walls and ceilings and an abundance of light. If you want a dark floor in a small room, the furniture and doors should be light.
Gloomy...
Large areas with high ceilings and dark floors may look good with dark furniture and doors, but with bright multi-zone lighting and very light floors and ceilings. For standard apartments this is not an option.
And finally, let's move on to the practical component. Everyone has long known that dirt is more visible on a light surface. This is also true for the floor and you will have to clean it more often. But you will be able to save on electricity and lighting: with the same amount of light, the illumination in a room with a light floor is better. And this, by the way, is also one of the selection criteria. If the room is directed to the south, you can “shade” it with a dark floor, and vice versa - in the north, lighten it with a white or light gray floor.
Warmer shades on the floor do not make the interior look as gloomy as black or dark brown.
Everything is bright except the floor
One of the intermediate options - neither dark nor light
Carpets
Carpets
Variety of carpets
This popular type of flooring is characterized by a relatively affordable cost, ease of installation and an almost limitless range of design solutions. Modern carpets are not of interest to rodents, insects and other pests; they are easy to care for and durable.
Natural carpet
Carpets made from acrylic, wool, polypropylene, nylon, silk and many other materials are available for sale.
Carpets, made in Türkiye
Advantages
Among the advantages of modern carpeting, the following characteristics should be noted:
- resistance to various adverse effects, including abrasion;
- wide selection of colors and designs;
- low creasing;
- decent sound insulation when using carpets with soft and elastic pile.
Flaws
If carpets have disadvantages, namely:
- poor resistance to direct sunlight. This is especially true for cheap models. Carpets lose color and generally presentable appearance;
- poor tolerance to exposure to water and use in conditions of high humidity;
- tendency to accumulate dust between the villi. If you prefer carpet flooring, be prepared to use a broom and vacuum cleaner often.
carpet
How to lay joists on a concrete floor correctly
The base must be strong, so if the screed is old and crumbling, it must be replaced. Work on laying logs on a concrete base is carried out in the following order:
- Be sure to purchase quality materials . The humidity of the logs is no more than 18%, they must lie indoors for several days and if you see that some logs are bent, they cannot be used. All wooden elements must be treated with antiseptics and fire retardants.
- All debris is removed from the floor and a layer of waterproofing ; these can be special materials, regular film or hydrophobic mastics.
- to lay the logs perpendicular to the light coming from the window. In the hallway, logs are laid transverse to the direction of the main movement along the floor.
- The distance between the lags for a tongue and groove board depends on the thickness of the boards; the thinner it is, the smaller the step between the lags. The outer bars are installed 2-3 cm from the wall, and the rest are usually in increments of 40-50 cm.
- The logs allow you to level the base; for this purpose, substrates are used, which allow all the beams to be set at the same level. In addition to helping to level the joists, the underlays act as additional waterproofing. You cannot use soft materials, as over time they will sag and the floor will begin to creak. The substrates for leveling the joists must be durable and not sag over time; there are plastic substrates in stores.
To check the moisture content of a concrete base, glue a piece of polyethylene to it and remove it after a day. If there is a wet spot underneath, it means the screed has not dried yet.
There are several ways to attach joists to the floor, each of which has its own characteristics and advantages:
- The simplest and cheapest is fastening using self-tapping screws . To do this, the logs are drilled through, holes are made in the base, into which dowels are inserted and screws are tightened; they should be 5-6 cm longer than the thickness of the beam.
- Anchors provide more reliable fastening, but their cost is much higher. They are more powerful than self-tapping screws, so they fix the joists more reliably. The fastening sequence is the same as in the previous version, but in order to hide the bolt head, it is necessary to countersink the logs. For one log, 3-4 anchors with a diameter of 10 mm will be enough; their length should be 5-6 cm greater than the thickness of the beam.
- Fastening with corners . In this case, one part of the corner is attached to the joists using self-tapping screws, and the other to the concrete base; the self-tapping screw should go into the wood by 3-4 cm, and into the base by 5-6 cm.
- You can purchase adjustable logs; they are easier to set up, as there are plastic stands that allow you to adjust the height. After the timber is exposed, the protruding part of the bolts is cut off.
Parquet coverings
Parquet coverings
A classic version of expensive and high-quality flooring. The performance characteristics and appearance of the material directly depend on what kind of wood was used for its manufacture. Homes with wooden floors are always warm, comfortable and cozy.
Parquet
Advantages
- Excellent appearance.
- Long service life.
- Complete environmental safety.
- Low thermal conductivity.
Flaws
- Tendency to deformation. In summer, wood expands; in winter, on the contrary, it shrinks. In view of this, when laying the panels it is necessary to leave technological gaps.
- High price. High-quality parquet is noticeably more expensive compared to other types of coatings. However, it has to be changed much less frequently, which fully compensates for the high cost.
parquet
Features of the use of expanded clay concrete
An example of expanded clay concrete screed
When is a expanded clay concrete screed made? This type of material is relevant in the process of laying the “pie” on the ground, which is possible in the case of arranging the floor on a strip foundation. Using expanded clay concrete, you can make a warm, moisture-resistant monolithic base with very low thermal conductivity. A mixture of expanded clay and cement simultaneously performs a heat-insulating and drainage function, which is especially important in the case of shallow groundwater.
How is expanded clay concrete laid?
- The soil is compacted and covered with sand;
- For additional waterproofing, roll out roofing felt;
- Then the reinforcement frame is assembled;
- Then a primary screed is made from a cement-sand composition;
- After the cement has hardened, a screed is made from expanded clay concrete with a layer thickness of at least 6 cm.
Polymer coatings
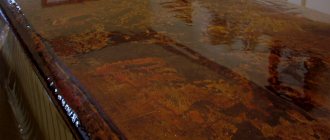
Self-leveling floor
Decorative floor 3D. Volumetric image on your floor
This category includes self-leveling floors, loved by many. The coating can be made on a cement-acrylic, epoxy, as well as polyurethane and methyl methacrylate base. Suitable for use in a wide variety of spaces. In residential buildings and apartments, 3D floors based on polyurethane are most often used. The compositions fit perfectly into the interiors of bathrooms and kitchens. They are characterized by aesthetics and exclusivity of appearance, high durability and long service life.
Materials for the installation of polymer floors
Advantages
The main advantages of self-leveling floors include the following characteristics:
- resistance to high humidity;
- attractive design;
- long service life;
- good tolerance to chemical influences;
- high adhesion properties;
- resistance to fire, temperature changes;
- excellent hygiene;
- ease and unpretentiousness in care.
Self-leveling floors 3d photo
Flaws
The material also has its weaknesses, namely:
- high price;
- comparative difficulty of dismantling. Over time, even the most beautiful 3D floor can get boring for the owner, and considerable efforts will have to be made to remove the coating;
- demands on the subfloor;
- complexity of arrangement.
self-leveling 3d floor
Categories of rough foundations
Installing a floor in an apartment on a dry screed
You can make a subfloor in various ways, and the choice of each of them is determined by the characteristics of the foundation itself, the presence of an underground and the microclimate in the room. What types of foundation are there?
- Wet:
- liquid;
- with screed (single- and multi-layer).
- Dry:
- along logs (on reinforced concrete foundations, beams);
- adjustable (on chipboard, plywood, joists);
- dry screed (expanded clay, granulated concrete).
Each of the listed types of structures can be used in specific conditions. To understand which subfloor is appropriate where, let’s consider the design features of the main types of foundations.
Cost of different coatings
For many buyers choosing the appropriate finishing option, the deciding factor is the cost of the material. Of course, this point also needs to be taken into account, which is what you are asked to do using the following table.
Table. Average prices for flooring
| Flooring | Prices, rub/m2 |
| Linoleum | 100-700 |
| Polyvinyl chloride coatings | On average from 1000 |
| Cork covering | On average from 1600 |
| Laminate | 170-1250 |
| Tile | 300-1500 |
| Carpets | 70-2000 |
| Parquet | 1000-2600 |
| Self-leveling floors | On average from 800-1000 |
Now you are aware of the key characteristics, advantages, weak qualities and average prices of the most popular types of floor finishes. The information received will help you think carefully and make the best choice.
When choosing a floor covering, it is important to balance environmental characteristics, health concerns and the cost of the covering
Good luck!
New trends in flooring
This year, laconic style and natural floor coverings will take a strong position. In floor design, gray and beige shades are relevant, which harmonize with different interior styles and create a successful background for furniture and decorative elements. Polished surfaces are being replaced by a rustic style.
The emphasis is on:
- natural stone texture;
- geometric prints on tiles;
- earthy tones;
- pronounced texture of untreated wood;
- matte surfaces.
The floor covering should look as natural as possible, creating the feeling that it has been inherited by more than one generation. The trend is for flooring materials with 3-D effects in the form of scuffs, uneven textures, deep cracks, and half-erased paint. Scratches and unevenness in the grain give the appearance of noble aging. The style of the 60s returns with herringbone parquet, checkerboard tiles in a black and white palette. The restrained color scheme can be diluted with blue, green, brick-red carpet colors. Preference is given to parquet and solid boards, stone. The use of jute and sisal carpet is allowed. With a small investment, you can create a linoleum and laminate floor with an imitation of aged wood that is in line with the latest trends. Tiles with watercolor imitation of natural materials are suitable for wet rooms.
How to choose material
The floorboard in the apartment serves for a long time and decorates the home.
But this is only if the material has been processed correctly. Doing this on your own is inconvenient and difficult, so when purchasing, you need to pay attention exclusively to boards that have been treated with antiseptics, fire retardants, and also dried, cut, polished and profiled. In other words, they must be fully prepared for installation.
You need to pay attention to the price - once upon a time, wood was cheap, and wooden floors were found everywhere. Currently, wood has become more expensive, but nevertheless remains a fairly popular finishing material. High-quality wood cannot be cheap, so you should not save.
If at least one of these points is not met, it is strongly recommended to refuse the purchase. Replacing plank floors in an apartment is time-consuming and expensive, so small savings will ultimately only lead to greater expenses.
Solid board, selected taking into account the above points. Timber for logs, treated with antiseptic, antifungal agents and fire retardants. Plywood sheets (preferably impregnated).
They are also cut independently and then treated with stain, copper sulfate, and used machine oil. Plywood is required to create linings when installing level logs
If you plan to create heated floors, then you also need an unedged board of the third grade for arranging the rough covering, as well as materials for heat and vapor barrier. A roll of roofing felt to isolate the joists from the concrete. Strips of material are placed between the concrete base and the bars.
Removing outdated wood flooring
This process is the most labor-intensive and unpleasant, but it is impossible to do without it.
When the old floor covering is wooden, you will need to prepare the following tools for dismantling:
Dismantling begins with removing the baseboards along the perimeter of the room.
If you plan to re-lay floorboards or old boards will be used for the construction of joists, then they should be dismantled very carefully, trying to minimize damage. Use a nail puller to remove previously driven nails, and use a screwdriver to remove self-tapping screws.
When the removed wooden elements are no longer needed, they should be removed from the apartment.
After freeing up the space, they begin to dismantle the logs. Very often they are securely attached to the rough base, so they must be removed carefully so as not to damage the base. Otherwise, you will have to waste time sealing the resulting holes.
When the old covering is removed from the room, it needs to be thoroughly cleaned. Upon completion of this procedure, you can begin preparing the floor for installation.
Creating a new screed
There are several ways to make a new screed. When there are slight differences in height on the rough base and it is planned to lay a wooden floor on it, then its surface can be made ideal using a self-leveling coating such as in the photo. It is able to level out minor defects and flaws existing on the base.
All materials have their own maturation period, which depends on the components included in the dry building mixture.
Floor care
Maintenance depends on the type of coating. Smooth surfaces must be washed - moisten a small fragment with water and immediately wipe dry.
Wooden floors are wiped with warm water and a neutral product. Vinegar removes stains. Carpets need to be vacuumed at least 2 times a week and washed 2 times a year.
Natural surfaces are treated with dry powder.
The floor is an important component of an apartment and a private house; it must be reliable and comfortable. The optimal flooring and its design are selected depending on the room.
It is necessary to take into account the advantages and disadvantages of all types of surfaces and properly care for them.