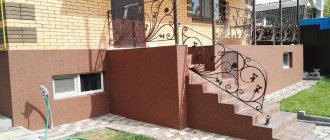
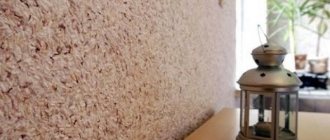
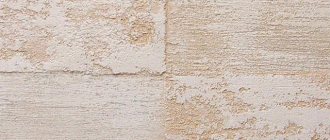
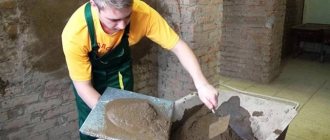
Decorative plaster is a rather diverse and interesting material, despite the fact that it is used everywhere. A wall finished with plaster, depending on the type of material, can have a different texture, color, look modest and discreet, or, on the contrary, very expensive. Marble decorative plaster is one of the types of decorative surface finishing. It is used for various purposes, including finishing facades.
Marble decorative plaster
Marble chips
Features of marble coating
Marbled plaster has been used by humans since the times of Ancient Egypt and Rome. It was made from durable, reliable materials, so the created coating had unique properties and aesthetic characteristics. Now the basis of plaster is acrylic or mineral polymers, which are supplemented with stone chips.
Bayramix marble plaster
Depending on your specific need, you can choose a material with the following properties:
- moisture resistance;
- antibacterial effect;
- plastic;
- increased resistance to mechanical damage.
The most popular decorative marble plaster is produced. It was this manufacturer who first introduced the material to the modern market, and therefore is considered the founder of the “stone fashion” in the interior. You can also find products on sale that produce only environmentally friendly, high-strength, elastic, breathable coatings for interior work and facades.
Required Tools
Marble plaster in the interior
To apply the marble mixture you do not need special knowledge. This type of material is easy to work with. The following tools will be needed:
- Container for diluting the mixture.
- Trowel and float for plastering.
- The brush is flat.
- Construction electrical equipment (drill, mixer).
- Roller for applying primer.
How to properly apply marble plaster (video)
Composition and characteristics
Products based on acrylic resins are transparent or translucent in appearance. Plaster, which is made on a mineral basis, has a matte appearance - white or colored. Most often, the filler for it is ground marble or granite of different grain sizes and rounded shapes.
Since the granules themselves are painted in a variety of shades, the finished plaster has a rich color palette. However, to increase the decorative effect, the products are tinted with pigments, glitter, mother-of-pearl and other impurities are introduced into them. The plaster may also contain:
- antiseptics and fungicides;
- water-repellent additives;
- plasticizers;
- modifiers;
- adhesion enhancers;
- substances for increasing color fastness;
- solvents;
- varnishes;
- waxes;
- preservatives.
It is thanks to the presence of stone chips in the plaster that the marble effect and a certain roughness are achieved. To reduce costs, part of the marble component is replaced with granite, while the quality of the plaster is practically not reduced. Moreover, it is possible to enhance the strength properties of the coating, because granite is stronger and more wear-resistant than marble.
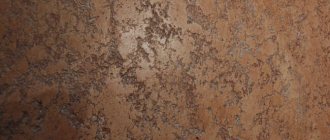
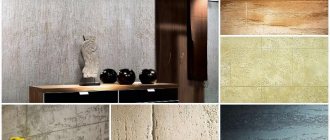
Photos of modern versions of Venetian plaster in the interior
Using Venetian plaster you can create an amazing variety of beautiful interiors. See samples in the photo. For any interior, you can choose the right color scheme and marble pattern. In an accessible and relatively inexpensive way, you can decorate your room, giving it a rich, respectable look.
Tyutyunnikov Dmitry
Article verified by a decorative finishing specialist
Scope of application
Marble plaster is perfect for covering bases that need increased protection from water - plinths, facades, foundations. It is also used to decorate bathrooms, swimming pools, saunas, and baths. The material is plastic and is easily applied to products and surfaces with curves, therefore it is suitable for niches, columns, bay windows, ledges, as well as arches, openings, and any architectural forms.
Plaster with stone chips is widely used indoors. This type of coating is especially popular in cottages and houses with a classic, antique style. However, marble plasters also fit into modern style trends, allowing you to create fashionable details, patterns, and highlight walls or individual stripes or areas. As for base materials, plaster with marble chips ideally fits on surfaces that are not prone to shrinkage:
- brickwork;
- concrete, cement;
- foam blocks;
- cinder blocks;
- OSB, chipboard;
- drywall;
- plastered walls.
Types of material
Marble plaster is conventionally divided into two large groups:
- Marble. Includes natural stone chips.
- Venetian. Its basis is marble or granite flour with the addition of special pigments that imitate crumbs.
Most often, the plaster filler has a spherical shape, less often - faceted. Depending on the base, the material can be lime, acrylic or sand-cement. Based on the size of the granules, marble plaster is classified as follows:
- Fine-grained. The grain size is 0.5 mm or less.
- Medium grain. The grain diameter is 1–3 mm.
- Coarse grain. Includes fractions up to 3–5 mm.
Typically, marble material with fine and medium grains is purchased for interior work, and coarse grains for facades.
Adviсe
In order for marble plaster to adhere well and the finish to be durable and beautiful, you should follow several rules during the work.
- All work must be carried out in dry, but not hot weather. It is undesirable for the sun's rays to fall on a freshly treated surface.
- Lamps, if there are any on the walls, should not be turned on until the plaster is completely dry.
- The thickness of the plaster layer should not be more than twice the size of one filler crumb.
- Plaster should be applied to one wall continuously to avoid the appearance of unevenness.
- If it is cool outside, then the plaster should be given at least two days to dry completely.
- The drawing is best applied using patterns.
- If coarse marble plaster is used, it can also be applied to rough plaster. But the fine-grained one should be applied to clean putty or a sanded smooth surface.
Marble plaster is a universal method that allows you to hide imperfections in the walls of a building and give them a presentable look.
Color range of marble mixture
There is a wide range of marble plaster on the market. Until recently, its colors were limited to the natural color of the stone, but now they are determined by a variety of synthetic pigments. So, the catalog contains 48 basic shades that can be mixed with each other and get new tones. High-quality plaster retains 100% natural paint for 15 years on facades and about 25 years when used internally.
Advantages and disadvantages
Marble plaster has many advantages:
- withstands even severe mechanical stress, is not damaged, and is considered very wear-resistant;
- has a long service life due to excellent strength characteristics;
- resistant to ultraviolet radiation, atmospheric factors, temperature changes;
- does not disturb the microclimate in the house due to vapor permeability;
- does not allow moisture to accumulate on the walls;
- environmentally friendly, does not contain toxic components, has no odor, does not emit harmful substances even at elevated temperatures;
- easy to mount on surfaces, including complex ones;
- universal: can be used indoors and outdoors;
- has increased moisture resistance;
- differs in fire safety, does not support combustion or smoke;
- after drying, it is easy to care for, it can be washed with any household products;
- does not allow mold and fungi to multiply.
The disadvantages include the high cost of the material, so not everyone can afford to decorate a facade or room with marble plaster. Over time (after 15–25 years), the finish will lose its brightness, although it can be painted in any suitable color. Plaster is vulnerable to aggressive chemicals (for example, hydrochloric acid), although such contact in everyday life is difficult to imagine.
Conclusion
To summarize, we can say that decorative plaster can be freely applied to plaster. The disadvantages include the need for additional treatment of the walls, preparing the surface for applying a new layer of plaster, as well as testing the strength of the old layer of plaster.
The advantages include saving time on removing the old layer of plaster and financial costs for additional work.
Decorative plaster, like textured plaster, with proper preparation of the walls and skill in its application, is easy to apply and becomes a beautiful part of your interior. At the same time, it will be very durable and practical, but provided that it is applied in compliance with all the described conditions.
Technology of applying marble plaster
In order not to be distracted while searching for the necessary tools while working, it is better to prepare in advance what you may need:
- two stainless steel spatulas - narrow and wide;
- trowel - a steel spatula for masonry and grinding;
- a grater for leveling the solution, a grater for mashing;
- containers for mixing or applying plaster;
- a drill with a mixer attachment (needed only for preparing the dry mixture, but not needed for ready-made plaster);
- level - will help determine the evenness of the applied layer.
Preparatory stage
The base that will be plastered must be carefully prepared. It is cleaned of dirt, dust, and carefully inspected. All swelling, peeling, and crumbling areas are cleaned to a hard surface using a spatula. In difficult cases, a grinder, a metal brush, or a grinding machine may be required.
If areas affected by mold are identified, moisten them well with antiseptic compounds 2-3 times. Efflorescence from the wall is removed with special cleaners, which are sold in hardware stores.
All cracks, chips, and holes are sealed with a standard solution of 1 part cement and 3 parts sand. Before covering them, they are slightly embroidered and cleaned of dust. Large holes are filled with preliminary laying of reinforcing fiberglass mesh. After this, check the condition of the surface with a level and, if necessary, plaster the entire base, leveling it.
Useful tips for the master at the preparation stage:
- It is better to apply coarse-grained mixtures to the rough leveling layer, and fine-grained mixtures only to the finishing layer after preliminary sanding.
- As the walls are leveled, be sure to prime them with covering primers, tinted, if necessary, to match the color of the marble plaster.
- You need to let the primer dry for 12 hours or more.
It is necessary to purchase marble material with a reserve of 7–10%, since some of it crumbles during application and remains on the tools. It is important that all the plaster is from the same batch, since even from the same manufacturer, different deliveries may differ in color.
Manual plastering
First, dilute the dry mixture according to the instructions or mix the finished composition well. If it is too viscous or thick, add a little water, 50–100 ml each (too much liquid can ruin the material).
Then they work like this:
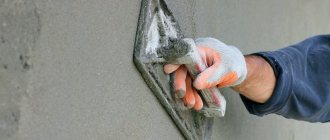
- Take a small amount of product onto a small spatula and apply it to a large spatula or trowel.
- Apply the solution to the surface, holding the tool at an angle of 60 degrees.
- Distribute the mass in an even layer, moving in one direction and applying a certain force (you can use a grater).
- If you have to interrupt work, stick a strip of masking tape along the border of the future joint, and after the start of a new stage, the tape is removed.
After 30 minutes, when the marble plaster has already begun to set, begin rubbing. Take a stainless steel grater, lean it firmly against the wall, and smooth the coating with circular movements. There is no need to press hard or treat the same area for a long time. After complete drying (after 24 hours), the wall is irrigated with a water repellent or acrylic varnish from a spray bottle and left to dry for another 12 hours.
Applying plaster using a mechanized method
To complete all the work faster, use a different method of applying plaster. It is used by professionals, especially when it comes to processing a large area. You need to buy or rent a pneumatic crumb thrower - a container with a nozzle (hole diameter 4–6 mm) connected to a compressor.
After preparing the base, pour the solution into the crumb thrower, turn on the compressor with a pressure of 6–7 atmospheres, and pump in air. When applying the composition, the nozzle is kept at a distance of 50 cm from the base, moving it from top to bottom. Make sure that the product evenly covers the wall without the appearance of bare areas. After 30 minutes, the plaster is rubbed down in the same way, and a day later it is treated with a protective compound.
Creating a drawing
To make the wall or facade more decorative, you can use marble plaster in several tones to create designs, patterns, and ornaments. First, draw a sketch on paper, then make markings on the wall. Masking tape is glued along the perimeter of individual areas, then plaster of the selected color is applied. After rubbing, the tape is removed and new stripes are glued on the following areas. This way you can make any drawings, inserts of the desired size and shade.
Application to the façade
Street decoration is regularly exposed to unfavorable factors: temperature changes, precipitation, sunlight. For cladding facades, special plaster with increased strength characteristics and coarse grain is used. Work with it only in dry, warm weather, taking into account the following recommendations:
- The brickwork is pre-prepared: the mortar protruding from the joints is cleaned off, the wall is plastered, and dried well.
- Apply penetrating acrylic primer in 2-3 layers, waiting for each of them to dry, using a roller or brush.
- If possible, two people work together to apply the plaster to the entire wall at once and rub it in in one pass.
- For wall cladding, you can use a pneumatic crumb thrower, holding the nozzle tip at a distance of 50 cm from the surface.
- After the plaster has dried, it is rubbed clean with a steel float and a protective varnish coating is applied.
Application of decorative material indoors
In a house or apartment, you should use a fine-grained or medium-grained mixture. The decorative layer should be thin - no more than 1–1.5 times the diameter of the stone chips. Provide normal humidity in the room (up to 65%). All electrical appliances built into the walls are turned off in advance. After rubbing, not varnish is used, but wax, which is more suitable for interior decoration due to its environmental friendliness.
How to properly prepare the surface
To apply a layer of Venetian, a perfectly flat surface is required.
Therefore, it is necessary to carefully prepare it first - level it using ordinary plaster and putty, sand it, and prime it.
Despite the high strength of the finished layer of Venetian plaster, if the base is of poor quality, cracks may appear after a few years.
To avoid this, it is necessary to ensure the stability of the surface in advance and, if necessary, use reinforcing materials.
Before applying decorative plaster, make sure the wall is perfectly flat
The best base is considered to be finishing the walls with plasterboard. They have perfectly flat surfaces, are fixed to frames and are relatively resistant to deformations that may occur in load-bearing structures. Walls of panel houses and monolithic partitions are suitable.
But stone and brickwork are most susceptible to deformation during the operation of the building, so they must be strengthened with reinforcing materials.
It is important to apply a layer of Venetian putty very thin, about 1 mm. Therefore, all the smallest irregularities must be corrected in advance. For this, after reinforcing and plastering the walls, gypsum putty is additionally used.
When preparing the base, you must also take into account its ability to absorb moisture. This applies to cement and lime plaster. In these cases, it is necessary to use primers that penetrate deeply into the plaster layer.
Calculation of material quantity
On each package of plaster, the manufacturer indicates the consumption per square meter. This indicator is approximate and in practice may vary depending on the quality of preparation of the base, the skill of the performer, etc. Mixtures with round grains have a slightly lower consumption than those containing grains with edges.
Also, consumption varies depending on the grain size itself:
- large fractions - up to 8 kg/sq.m. m;
- medium fractions - 4–5 kg/sq. m;
- small fractions - 2–3 kg/sq. m.
On average, the thickness of the plaster layer is 5–30 mm (for street work it needs to be thicker). Using the specified data, you can calculate the material consumption and purchase the required quantity with a small margin.
Preparing the walls
Before directly applying the finishing material to the walls, we must prepare the surface.
- First, we remove the old coating (paint, plaster, wallpaper, etc.) and each fastener element.
- We level the walls with starting and finishing putties, controlling the result using a building level and a plumb line. In cases where the unevenness is very large, I advise you to cover the room with plasterboard slabs and seal the joints using a putty mixture.
- We treat the surface with a double layer of primer with a break of at least 3 hours between applications of the primer. In this way, we clog all small pores and cracks, remove settled dust, increasing the adhesion strength of the plaster to the wall surface.
DIY marble plaster
To save on finishing costs, you can make marble plaster yourself. To do this, you need to get a binding component, filler (marble or granite chips), as well as pigments. White cement M500 and acrylic putty can be used as a binder. Using a mixer, combine 1 part binder, 3 parts filler and add dye, as well as 1 part water. The finished plaster should have the texture of very thick sour cream.
For another recipe for preparing plaster you need to combine:
- 1100 ml slaked lime;
- 1100 ml marble chips;
- 30 g liquid soap;
- 360 ml linseed oil;
- 180 ml water;
- pigment.
After mixing the components, the resulting plaster is almost no different in quality from store-bought. Depending on the grain size, it can be used for external or internal work. Marble plaster is a beautiful and elegant material, durable and practical. It is not difficult to apply it yourself using the tips above.
