If you decide to change the wallpaper in your apartment, then in any specialty store you will find a large selection of wall coverings. But finding “your” option is not an easy task. It so happens that consumers are not aware of certain features of a particular type. In this article we will take a closer look at what vinyl wallpaper represents. Why are they better or worse than other varieties? What are their pros and are there any cons?
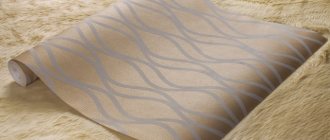
Vinyl wallpaper is wall coverings, the base of which can be non-woven or paper, and the top layer consists of processed polyvinyl chloride.
Today, vinyl wallpaper has gained the greatest popularity. They existed before, but were not very suitable for residential premises, due to the composition being different from the current one. However, now such finishing material is perfect for any room, and new technologies allow you to choose from a variety of shades and materials.
Properties of vinyl sheets
Vinyl coating is a polymer layer that is applied to a base made of paper or non-woven fabric.
The main advantage of this material is its long service life. In addition, vinyl does not fade under the influence of ultraviolet rays, as happens with other wallpapers, so you can safely choose canvases with bright patterns. In addition, the coating does not deform under the influence of moisture, so the linens are even used for toilets and bathrooms. However, the polymer coating does not withstand temperature fluctuations the best, so it is not recommended to glue the sheets near the stove or other heat sources.
This material does not allow oxygen to pass through. This problem can be corrected by purchasing special cloths with microscopic holes. Only in this case will the wallpaper be breathable, but at the same time maintain protection from moisture.
Vinyl coating is wear-resistant
Some people are inclined to believe that polymer coating can harm the well-being of residents. This belief arose for a reason, but only low-quality materials have such properties, so it is recommended to avoid products from dubious manufacturers. While high-quality vinyl sheets do not pose harm to households, because they are produced in accordance with safety standards.
The positive aspects of vinyl covering include the following:
- Possibility to apply wallpaper to any type of surface (wood, plaster, concrete).
- The canvases have a significant thickness, due to which they hide damage to floors and sagging plaster (to hide defects, you need to use canvases with maximum density).
- A choice of colors allows you to find the best option for each design.
- If necessary, you can choose both standard rolls and those with a width of 100 centimeters.
Vinyl sheets are designed for surfaces of any type
Pros and cons of PVC-coated wallpaper based on non-woven fabric and paper
As we have already said, PVC coating is applied to a non-woven or paper base. All these materials have certain properties that should be familiarized with before gluing.
Advantages of non-woven fabrics:
- the glue is applied directly to the ceiling, so there is no need to soak the wallpaper with it;
- non-woven fabric is a durable material, so the wallpaper will last for a long period;
- It is precisely these canvases that make it possible to hide noticeable wall defects in the best way.
Disadvantages of non-woven wallpaper:
- the material does not have good ductility, so it will be difficult to paste over various arches and rounded protrusions with canvases;
- walls and various stains from previous materials can be visible through the canvas.
There is no need to apply glue to wallpaper with a non-woven base, which reduces work time
Find out how to glue non-woven wallpaper, and also read the tips for simple gluing, in a special article on our portal.
The main advantages of wallpaper with a paper base:
- the paper stretches better, which means that it will be easy to cover a raised, rounded surface with such canvases;
- the material tightly covers the surface of the wall, which means that various spots will not show through.
Among the disadvantages of paper base, the following should be highlighted:
- you will have to coat not only the surface with glue, but also the dense surface;
- paper quickly absorbs glue, which means more of it will be needed;
- the paper surface can be damaged by negligence;
- the canvas does not immediately adhere to the wall, so you will have to hold it for some time.
When gluing wallpaper with a paper base, you will have to apply glue to the canvas as well.
Regardless of the type of base, everyone can cope with the process of gluing dense sheets. But first you should understand their varieties.
The process of making paper-based vinyl wallpaper
In order to understand in more detail the properties and composition of such wallpaper, let's look at the process of their manufacture. Vinyl is applied to paper prepared in a special way. It is usually applied several times , since a large number of vinyl layers provides the wallpaper with increased strength .
Vinyl is applied using special printers that immediately create original patterned compositions on the surface. In some cases, to add originality, gold or silver shades , then such wallpaper is covered with a protective layer of varnish.
After completing these procedures, the process of treating the wallpaper with special substances begins, thanks to which they can be wiped and cleaned .
What types of vinyl wallpaper are there?
Wallpaper of this type differs in various characteristics: with relief or smooth, profile or embossed. An important selection criterion is the method of applying the polymer coating.
Table 1. Types of vinyl wallpaper according to the method of applying the top layer.
| View, illustration | Description |
| This is the most primitive way of applying a coating to the base. So, the top layer is the thinnest PVC, on which various textures are located. In appearance, this coating resembles silk. You can find a large number of colors of such wallpaper on sale. |
| This is a more complex version of the coating, which is a relief. It is made in the form of stone, wood and other materials. |
| These are thick wallpaper sheets that are styled to look like leather, brick and other surfaces. Such wallpaper is suitable for deformed floors with noticeable cracks, which allows you to hide imperfections. |
| They differ from other varieties in having a uniform surface, so it is easy to remove dirt from them with a rag. This type of vinyl wallpaper is considered to be resistant to moisture and chemicals. |
There is another popular variety - canvases for painting. They have a uniform light color, so you can paint the wallpaper with any paint. The main advantage is the possibility of repeated painting. This means that the canvases do not have to be constantly re-glued; it is enough to periodically refresh the paint layer.
Heavy vinyl wallpaper differs from other varieties in thickness
Prices for various types of vinyl wallpaper
Vinyl wallpapers
Manufacturers
Among the most popular manufacturers of this type of wallpaper are brands such as “Rasch” (Germany), “Zambaiti” (Italy), “Grandeco” (Belgium), “Caselio” (France), “Eden” (Ukraine), such wallpaper very high quality and meet all necessary standards. You can also purchase domestic wallpapers, “Art” , “Erismann” and many others.
Regardless of which country produces the paper-based vinyl wallpaper you choose, you will see that they have a fairly attractive price.
Below are examples of prices for such wallpaper from various brands:
- Palette - about 450 rubles per roll;
- Rasch - about 600 rubles per roll;
- Caselio - about 650 rubles per roll, etc.
As you can see, all of them practically do not differ in price: this is due to the low cost of such wallpaper , since paper is a fairly inexpensive material, and minor differences are due to the fact that wallpaper from foreign manufacturers includes transportation costs in their price.
How to choose glue?
Only if you choose the right glue will you be able to carefully glue cellulose-based vinyl wallpapers, because such wallpapers themselves are heavy, so not every glue allows you to glue them reliably. If you skimp on adhesive material, the canvas will lag behind the ceiling, move to the side, and sometimes noticeable bubbles will form.
Experienced craftsmen recommend purchasing imported glue. Despite the fact that it costs more than the Russian one, it is of high quality. A suitable glue should set quickly, but not in a few seconds - the master should be able to distribute the strips in accordance with the pattern. In addition, the adhesive composition must include components that prevent the formation of mold on the floors. This feature is important in the case of vinyl, because some types of wallpaper are characterized by a lack of breathability.
Note! The packaging with glue usually indicates the consumption, so you should not assume that the more it is, the better the canvas will stick. Excess composition may ooze out from the seams, thereby staining the outside of the wallpaper.
It is necessary to choose an adhesive that is suitable for a specific type of wallpaper.
You should not purchase universal type glue for gluing vinyl sheets - you need specially selected compositions for premises for various purposes. If you doubt that a certain adhesive is suitable for the type of wallpaper, it is better to consult with specialists. As a rule, consultants at a hardware store help solve this problem.
However, it must be taken into account that vinyl wallpaper adhesive must have the following characteristics:
- when mixed with water, lumps should not form, because they cause unsightly bumps to appear on the surface;
- the composition must contain any antiseptic component to prevent the development of fungus.
- high-quality glue should be stored for several days after preparation;
- the shelf life of the glue in the package lasts several years;
- the composition should not contain toxic substances that pose a danger to human health;
- the composition should have simple instructions for preparation so that a beginner can cope with this process.
Some types of glue have a pinkish or light blue tint that disappears after drying
Table 2. Popular glue manufacturers.
| View, illustration | Description |
| "Methylane" | Contains an antifungal substance that protects the surface from mold. It has a pinkish color, so you definitely won’t leave a “bare” gap. One package is usually enough for four rolls. |
| "Cleo" | Suitable for gluing heavy wallpaper with polymer coating. The composition contains an antiseptic. The main advantage of the composition is cost-effectiveness. So, one pack is enough for seven to eight rolls, so the glue has occupied a leading position for many years in a row. |
| "Kelid" | One of the popular brands. The adhesive contains special components that allow you to glue wallpaper in rooms with high humidity. One pack of glue is enough for 5-6 rolls. |
| "Moment Vinyl" | It is suitable specifically for gluing wallpaper with a paper base, as it contains cellulose, which provides reliable adhesion. In addition, it also has an antifungal effect. The pack is enough for six rolls. |
| "Pufas" | The composition is environmentally friendly and provides good adhesion due to the content of cellulose particles in the composition. This is an economical product that is enough for even nine rolls. |
Prices for glue for vinyl wallpaper
Vinyl wallpaper adhesive
Video - Which glue to choose for vinyl wallpaper
How to properly dilute the adhesive
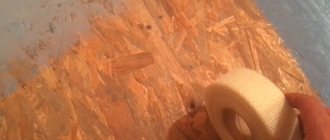
Kirill and I stood and argued whether the surface for gluing was already dry or whether it still needed to dry. Kirill needed an object lesson on the characteristics of materials. Then I took a piece of wide tape and stuck it in the middle of the wall. In the morning we came and tore off the adhesive tape. She took with her small pieces of putty and moisture. This means that the drying of the finishing materials has not completed and it is impossible to continue working.
The disadvantage of paper base is its high sensitivity to moisture. If there is a lot of it, the wallpaper will not stay on the wall for more than a month and will easily fall off. You need to take your time, wait a few days, give the putty and primer a chance to dry completely, and only then glue the vinyl wallpaper.
We chose a universal glue for heavy wallpaper. You can buy inexpensive PVA, dilute it with water and glue it on. The difference is small, just don’t expect to easily remove the residue during your next repair. Paper and glue will create a strong union, strong as cement, and will not want to leave the wall. It will be especially difficult to tear them off from drywall and various types of particle boards. Any master knows how much material he will need. But I had a student, and he should be able to do calculations. The packaging always indicates the meter consumption, per square meter with an average layer thickness. There is also a breakdown of the ratio of water and dry mixture.
Vinyl wallpaper on paper basis
To dilute the glue, the nephew measured out water at room temperature and poured it into a bucket. Then he began to pour out the dry mixture. I told my mind to hold the bag just above the surface and began to help and mix. Properly diluted glue:
- has no lumps;
- lie flat, without sliding, on the wall;
- Can be stored for up to 8 days in a diluted state.
Having mixed everything until a homogeneous consistency, we let the adhesive mixture stand for 10 minutes - the amount indicated on the pack, and mixed well again. We did not use a drill with an attachment; at high speeds, the mixture becomes saturated with air and a large number of bubbles form, which are difficult to remove. I advised Kirill to add weak coloring powder when mixing. This will allow him to see the uniformity of application of the composition while he gains experience.
What equipment will be needed during the work process?
When wallpapering, a standard set of equipment is required:
- Building level. It will be required in order to leave appropriate marks for the canvases on the ceilings.
- A simple pencil.
- Brushes of various widths for applying glue to walls and wallpaper. If desired, they can be replaced with a roller with shortened bristles.
- Large rubberized roller. Needed for smoothing canvases on the wall.
- Stationery knife and scissors. They are needed to cut sheets of a certain length and prepare openings for sockets, switches, and pipes.
- Measuring tape.
- Cotton material. It will be needed to remove excess traces of glue on the seams.
- Ladder.
Note! It is not always easy to glue wallpaper in the corners of a room, so it is better to involve an assistant in this process, who will spread the glue on the canvas and support the stepladder.
Before starting the wallpapering process, you need to stock up on the necessary materials.
How to remove old wallpaper from walls?
Removing old wallpaper from walls is easy, but you will need to use some tricks. So, you should prepare spatulas, one wide and the other narrow, a solution for removing the coating, a perforating tool, oilcloth or film (required in order to cover all objects located in the room).
First of all, water with the addition of liquid soap is applied to the walls to soften the coating. The wall should be left in this form for about 25 minutes. When the wallpaper becomes soft, it will be easy to remove it from the walls using a spatula.
If you used strong glue that is not softened by soapy water to paste the previous wallpaper, you will need to use a sanding machine with an emery cloth attachment. Of course, this method requires more free time and effort, but it allows you to remove the previous coating to the ground.
Most old coatings can be easily removed with a spatula
We will look in detail at how to remove wallpaper from walls, step by step, with instructions and tips, in our special article.
Preparing floors before gluing
In order for the walls to look neat after wallpapering, it is recommended to level them first. This problem is often encountered by residents of apartments built in older years, where the floors are not uniform. The alignment method must be chosen depending on the complexity of the problem. If the deviation from the norm is no more than 8 millimeters, then you will have to use only putty.
Table 3. Methods for leveling walls.
| Method, illustration | Description |
| Rough putty is usually laid in two layers, between which a grating is located - this is necessary in order to prevent cracking of the surface. In this case, the wall must be leveled on all sides. The finishing putty is also applied in two layers, after which the surface is treated with fine sandpaper. |
| It is necessary to plaster the walls if they are so crooked that the defect is noticeable to others. For such purposes, a ready-made composition of cement and polymers is used, which makes it possible to abandon the use of a reinforcing mesh. Before you start plastering, you need to prepare the walls, clean them of dirt and apply a primer. Otherwise, leveling involves the following steps: 1. Treatment with a liquid solution of 4 millimeters. This is necessary for better adhesion to subsequent layers. 2. Primer 6 millimeters. 3. Finish coating. |
| An effective way to level floors is to use plasterboard panels. If the curvature is less than 8 millimeters, then they can be secured with a special solution. In other cases, you will need to install a metal frame, which complicates the task. Upon completion of the work, it will be necessary to putty the plasterboard panels in accordance with the rules. The advantage of the method is not only smooth walls, but also sound and heat insulation. |
Find out how to putty walls under wallpaper with your own hands, and also read the step-by-step instructions in a special article on our portal.
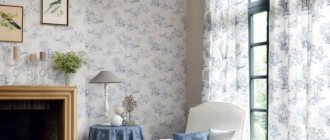
Main varieties
Depending on the room in which you plan to hang it, and what style idea you have chosen, you need to choose one of four options for this type of wallpaper .
These options include the following:
- foam vinyl wallpaper;
- hard vinyl wallpaper;
- smooth vinyl wallpaper;
- vinyl wallpaper with silk-screen printing.
Vinyl wallpaper of the first type has a paper base and is covered with structural vinyl . A special feature of such wallpapers is their texture . Due to the fact that foam vinyl wallpapers are quite textured, they visually mask unevenness and defects in the wall surface, and they also have increased density .
The peculiarity of wallpaper made of hard vinyl on a paper base is that the outer layer is quite thin, but due to its hardness it is very dense, which ensures the resistance of this type of wallpaper to various types of damage .
Thanks to the special texture, such wallpaper can be used to imitate various materials: tiles, stones, etc.
As for wallpaper made from smooth vinyl, such vinyl is less dense, but this type of wallpaper is the easiest to glue due to the increased lightness of the material.
A special type of wallpaper made from vinyl on a paper basis is wallpaper with silk-screen printing. Their bottom layer consists of paper, while the top one includes silk threads , which is why its texture resembles silk fabric .
In addition to the main advantages, such as high durability and strength , such wallpapers have many colors , and due to their texture they create an original and elegant style for the room.
Attention! Vinyl wallpaper with silk-screen printing should be glued to a carefully prepared surface. Any irregularities due to the smooth texture of such wallpaper will be noticeable, and in addition, this will cause you additional inconvenience when gluing.
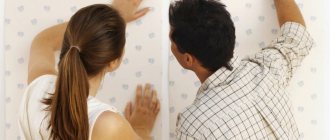
Wallpapering process: step-by-step instructions
Step one: First you need to prepare the walls. If they have fresh plaster, the surface should dry out.
It is necessary to press a piece of film against the wall, and if drops appear on it within a few hours, then you need to wait before gluing it
Step two: primer must be applied to dry floors. This can be either a special composition or wallpaper glue.
The primer allows you to hide cracks and scratches on the surface
Step three: dilute the glue in the container according to the instructions on the package.
The glue should be mixed for at least ten minutes, otherwise lumps will form.
Step four: now, using a building level and a pencil, you need to make marks on the wall where the first canvas will be located.
Markings will allow you to quickly navigate during the gluing process
Step five: the room should be de-energized.
It is necessary to unscrew all sockets and switches so that openings can be made for them
Step six: now you need to cut the rolls into strips of the required length.
It is recommended to leave an allowance of 8 centimeters
Step seven: the adhesive composition must be applied to the prepared canvas in any way.
Each area must be thoroughly soaked
Step eight: next, glue is applied to the wall (if you are using rolls 100 centimeters wide, you should skip this step), and then the canvas is applied to it.
Gluing the canvases to the wall must be butt to the previous ones.
Step nine: after gluing, you need to cut off the remaining pieces.
This can be done with a stationery knife.
Note! During the work process and until the wallpaper has completely dried, it is necessary to leave the windows in the room closed, otherwise the stripes will begin to move away from the ceilings.
Video - Gluing vinyl wallpaper
Subtleties of wallpapering the ceiling
It is necessary to glue wallpaper on the ceiling before you move on to the ceilings. In this case, it is recommended to opt for lightweight vinyl options, because the heavy material may not be available.
Otherwise, the process is no different. It will be more difficult to fit the strips end-to-end and smooth out unevenness, so it is better to involve an assistant in the work. In addition, when pasting the ceiling, it is better to take the furniture out of the room, otherwise the surface will become dirty with drops of glue.
Wallpapering the ceiling
Rules for gluing canvases in corners
It doesn’t matter from which corner you start gluing the wallpaper, the main thing is that the corners are even. If there are defects, it is better to pre-align them using the methods discussed above.
In this case, the strip is cut through at the joints. This means that if there is less space left to the corner than the width of the canvas, then you need to measure this distance and make a cut with an allowance of 3.5 centimeters. After which another strip is glued overlapping. Then both strips are cut at the junction. In this way you can get an even joint.
The easiest way to paste over smooth, geometric corners
Preparatory work
Any type of wall decoration begins with preparatory work. Gluing vinyl trellises is no exception. Preparations consist of preparing:
- wall surfaces;
- trellis;
- paste.
Preparing the walls
The quality of wall decoration with vinyl wallpaper and its service life directly depend on the efforts made to prepare the surface for gluing. It should be smooth, dry and free of dirt. The work must be carried out, but without fanaticism - most types of trellises mask minor defects well. The preparation technology is described in detail in the material “How to prepare walls for wallpapering.” Let us briefly recall what it says:
- sconces, fasteners, sockets, switches are removed from the surface of the walls;
- The floor and ceiling plinths are removed. It is advisable to remove the trim from the interior doors. This will somewhat lengthen the process of finishing the walls, but will eliminate the difficulties of passing the doorway;
- old finishing is removed: wallpaper is torn off, paint is peeled off, decorative plaster is knocked off;
- The walls are carefully examined and tapped. If “swelling” areas are detected, the plaster is removed;
- chips and cracks are repaired with repair mortar;
- dirt, soot and grease are removed;
- the cleaned wall is treated with a primer;
- if necessary, plastering work is carried out, after which the surface is primed again;
- a layer of putty is applied. If the operation is not necessary for plaster and concrete, then for gypsum plasterboard it must be carried out. Otherwise, when removing the annoying wallpaper, you will have to regret it - along with the wallpaper, the paper layer will be torn off from the drywall;
- the wall is primed again (preferably, especially under heavy wallpaper) with glue. For these purposes, you can use a universal primer or highly diluted glue;
- All windows close tightly, regardless of the time of year (summer or winter). The slightest draft leads to the wallpaper coming off the wall.
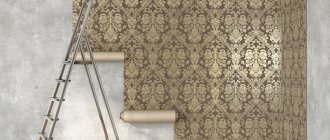
Preparing wallpaper
Professional finishers try to avoid combining dry and wet processes when gluing wallpaper. Therefore, first, wallpaper is cut to size for the entire room. You can organize your work correctly using the following algorithm:
- a diagram of the placement of each sheet of wallpaper is drawn up (see figure);
Scheme for decorating a room.
- The height of the surface to be pasted is measured. If there is a plinth, small tolerances are made, 2-3 cm near the floor and ceiling - then you will have to trim both at the top and bottom. If the baseboard is removed everywhere, the work becomes easier. You can measure accurately, and millimeter differences will be hidden by the baseboard;
- trellises are rolled out on any flat surface. Basically it's the floor;
- the length of the first sheet is measured;
- the wallpaper is bent. The bend is smoothed by hand to make cutting easier;
You can cut it like that.
So. But this method is more convenient.
- if there is no print on the wallpaper, there is no need to adjust it according to the pattern - the roll is rolled back and forth until it runs out;
- folds are rolled with a roller or smoothed by hand;
- the canvas is cut into sheets.
If it is necessary to adjust the drawing, the work is carried out in a different sequence:
- the first sheet is cut off and turned over with the pattern facing up;
- the tube rolls out again;
- the pattern is adjusted;
- the second sheet is cut along the lower edge of the first. The top should be trimmed on the wall, because It's easy to make a mistake on the floor;
Combining the drawing.
- the cut sheets are numbered - they must match the positions on the diagram.
The work is completed after sheets have been cut for the entire room.
Glue preparation
Paste for vinyl wallpaper is prepared in the same way as for paper, according to the instructions printed on the packaging. Given the heavy weight of the canvases, it is necessary to strictly follow the manufacturers' recommendations. Otherwise, you may end up with peeling wallpaper, if not immediately, then after 3-4 years. All the features of preparing the paste are given here.
Drying time for vinyl wallpaper
The drying time of the wallpaper depends on the circumstances, but first of all on the preparation of the walls - as we have already said, the floors must be thoroughly dried. In addition, the room temperature should be within 20 degrees, and the air humidity should not be more than 74%, otherwise the wallpaper will take too long to dry on the walls.
Do not forget that other work should be carried out in this room only when the wallpaper is thoroughly dry.
The drying time of the wallpaper will also differ from the amount of glue applied, so you should not violate the rules of the instructions
Note! As a rule, wallpaper on non-woven fabric takes 24 hours to dry, and on paper – 10-12 hours.